As if in sympathy with the sicknesses, both physical and political, which have dominated the world since the beginning of the year, the kitchen garden got off to a half-hearted start this spring. The broad beans and peas were ravaged by mice, chard and brassicas were mildewed and slug-devoured and far too many of my first sowings germinated badly. The most concerning of these was the celeriac, which is a staple for us in the winter. We habitually plant 20 plants and eat them all.
Celeriac seed is small and notoriously erratic as it needs light and early warmth to germinate. It also has a long growing season and so needs to be started off in early spring indoors, under glass or in a heated propagator. We waited more than three weeks for ours to appear on a bright windowsill, before finally admitting that they probably weren’t going to. And so, in the knowledge that we simply couldn’t survive a winter without, I resorted to ordering some young plants from an online supplier. We hardly ever do this, but I am always grateful that they exist as you are effectively able to buy time and plug any gaps in the garden that might have appeared through misfortune or mismanagement.
However, what you do not have from mail order suppliers is control over the varieties, and I was obliged to buy ‘Giant Prague’, when our proven variety of choice for many years now has been ‘Prinz’. We have never had a problem with ‘Prinz’, which has been easy to grow and a reliably heavy cropper, with roots of a kilo or more being standard. So I have been keeping an eye on the newcomers this summer to see how they compared. I quickly noticed their different growth habit, as they are much taller, more upright and leafier and so have shaded the plants behind more than the lower growing ‘Prinz’. In late summer I also became aware that the roots were not bulking up as noticeably, despite the heavy watering that they like and regular feeding.
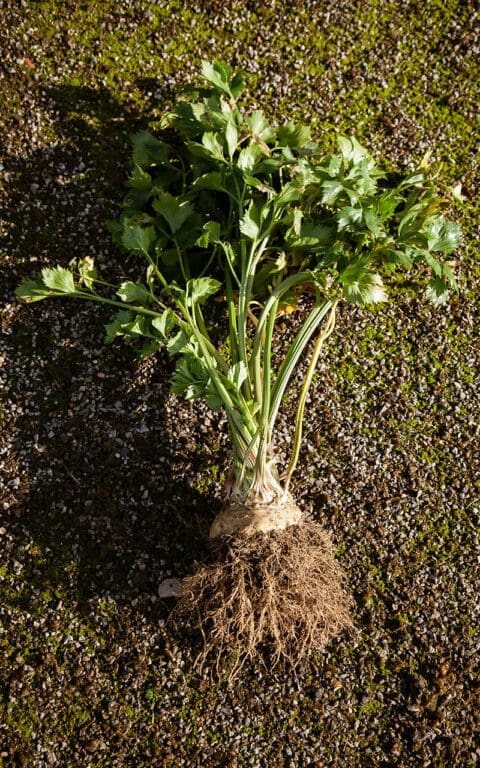
When I went to dig the first of the celeriac for this recipe this morning I was not impressed to find that several of the plants are bolting, and so have useless withered roots, and that the plants in the back row, in the deepest shade, have also failed to swell. Immediately the number of meals we have counted on them to provide is probably halved. Somewhat disheartening after all the effort and the ground given up for a disappointing crop of something we have taken for granted. At least it was good to know that I would be making the roots go further with the addition of chestnuts and windfall apples.
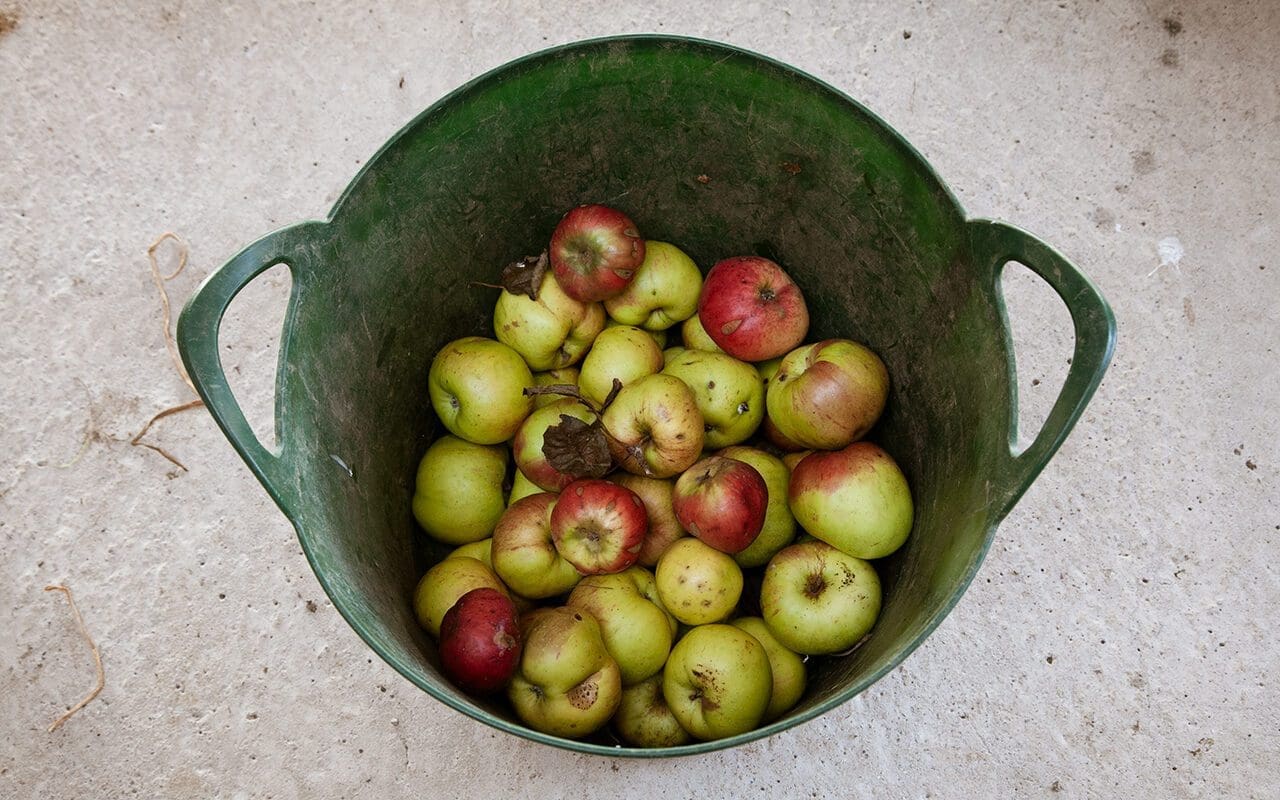
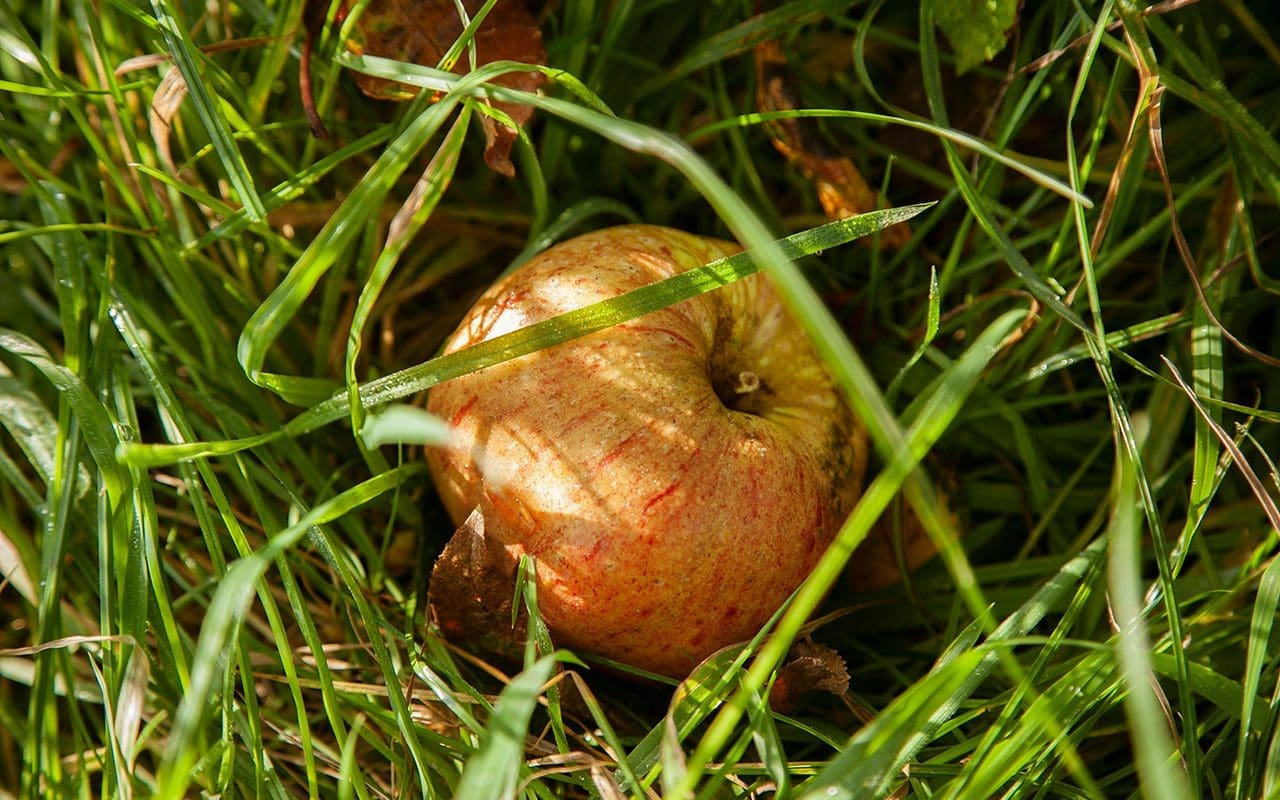
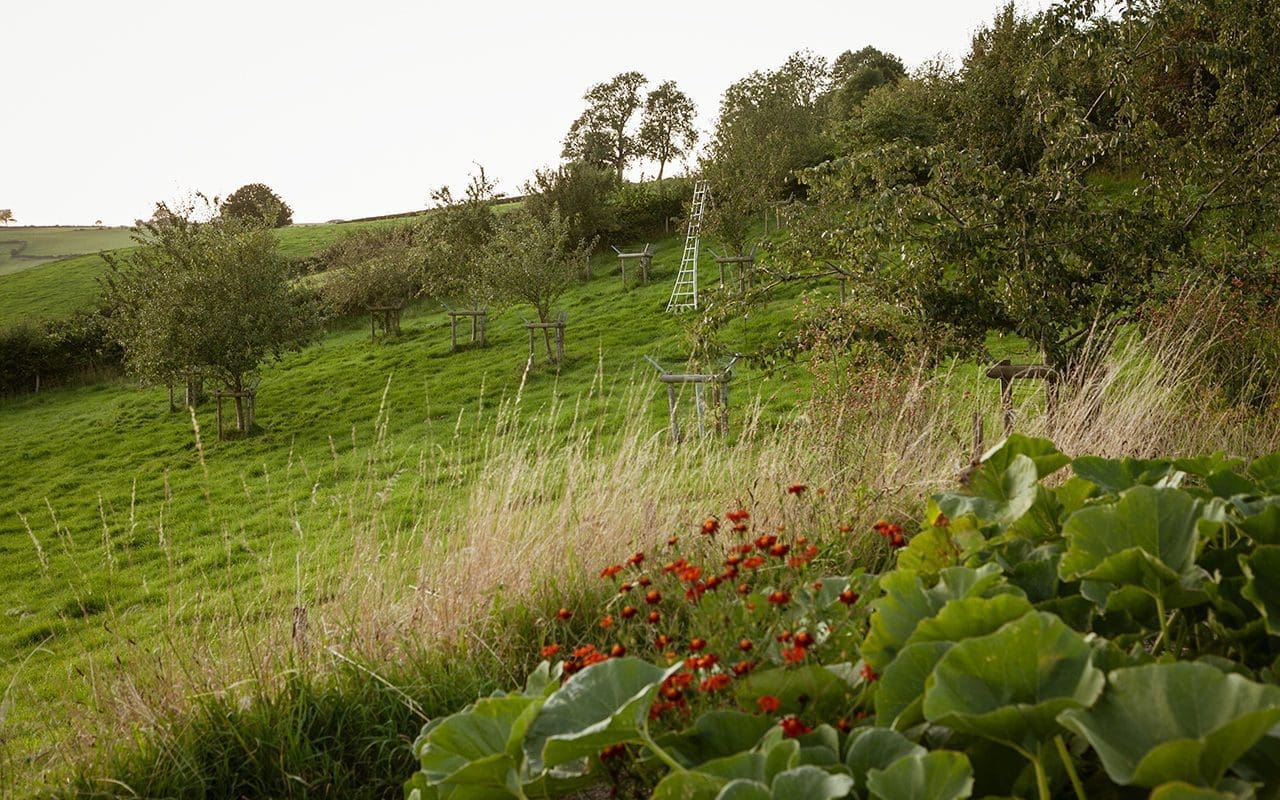
In the orchard the apple ‘Peter Lock’ has held onto its fruits the longest of all. This West Country variety has a long season of ripening, and so there are still apples on the branches that won’t fall no matter how vigorously you shake. The ripe windfalls are cushioned by the long grass of the pasture in which they grow and so, if you can get them before the mice, jackdaws and wasps do, they are seldom badly bruised or damaged. ‘Peter Lock’ is a dual-purpose eating and cooking apple with creamy white flesh. It is tart, yet sweet, and makes the most delicious golden apple puree which we always have a container of in the fridge, both for breakfast or evening dessert with yogurt or cream respectively. The large fruits also store well into the new year.

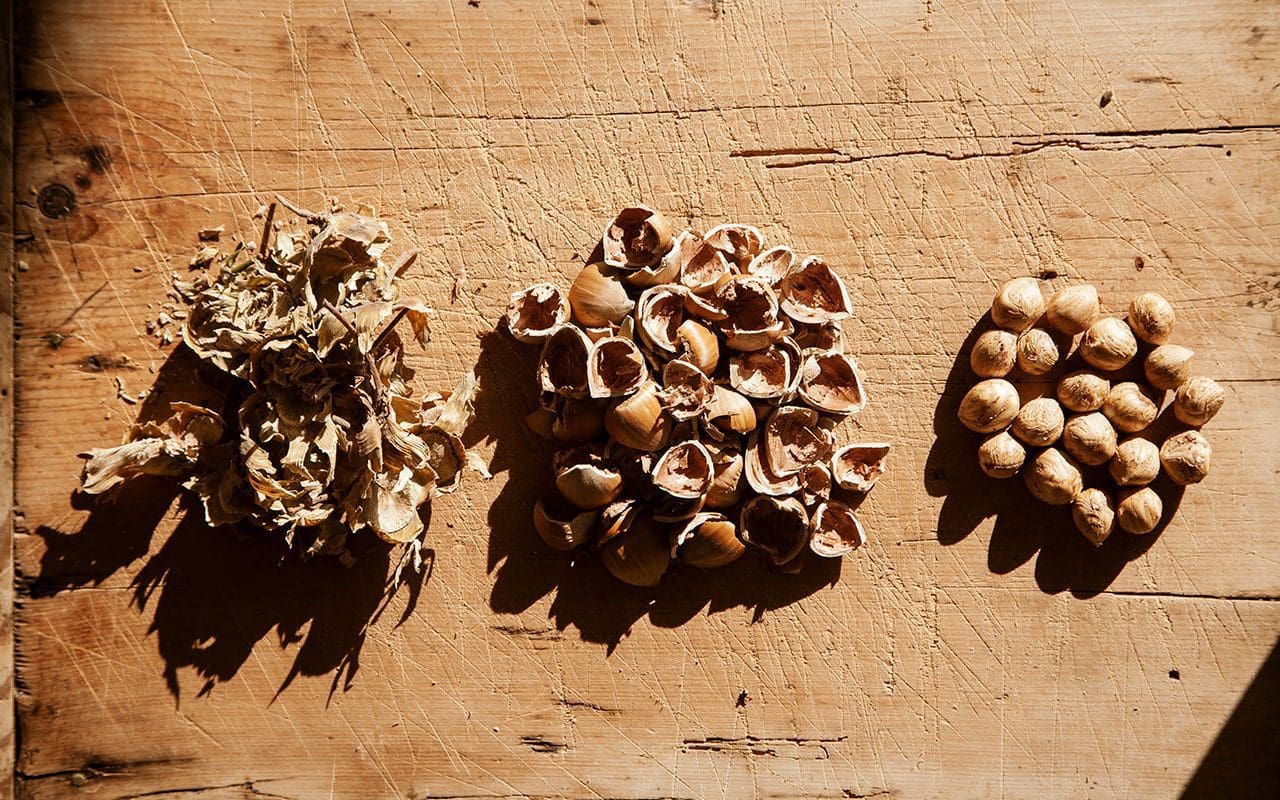
Our late spring frost on May 12th means we are without chestnuts this year, but the tree that Dan planted in memory of his dad has thrown out some good growth without the energy going into fruit so we hope, frost permitting, for a crop next year. Celeriac has an affinity with many nuts, particularly walnuts, hazelnuts and pecans. Here seasonal chestnuts enrich and thicken the soup. Wild mushrooms would be an appropriate addition. Rustic shards of bread fried in olive oil would provide textural contrast. The addition of cooked pearl barley would make it more substantial and go further. It would take well to the addition or substitution of other warming herbs and spices including rosemary, thyme, sage, winter savory, nutmeg and mace.
750g celeriac, after peeling, coarsely cubed
1 medium onion, peeled and coarsely chopped, about 200g
350g cooking or eating apple, peeled and cored and coarsely chopped
300g cooked chestnuts
2 bay leaves
8 juniper berries, crushed
2 cloves garlic, finely chopped
A 2cm length of fresh ginger, peeled and finely grated
50g butter
1 litre hot vegetable or chicken stock
Heat the butter in a large, heavy-bottomed saucepan until foaming. Add the onion and stir to coat thoroughly. Put on the lid and leave on a low heat to sweat. Stir from time to time and cook until translucent and golden.
Add the celeriac, garlic, juniper, ginger and bay leaves to the pan, stir everything together, and return to a low heat with the lid on. Stir from time to time and cook for around 15 minutes, when all should smell fragrant and the celeriac is starting to become translucent at the edges.
Add the hot stock and chestnuts, stir and return the lidded pan to the heat. Cook very gently for about 40 minutes until the celeriac is soft.
Add the apple and cook for another 10 to 15 minutes until it starts to break down.
Remove from the heat and use a potato masher to roughly smash the mixture into a course soup. Season generously with salt and black pepper.
Recipe & photographs: Huw Morgan
Published 7 November 2020
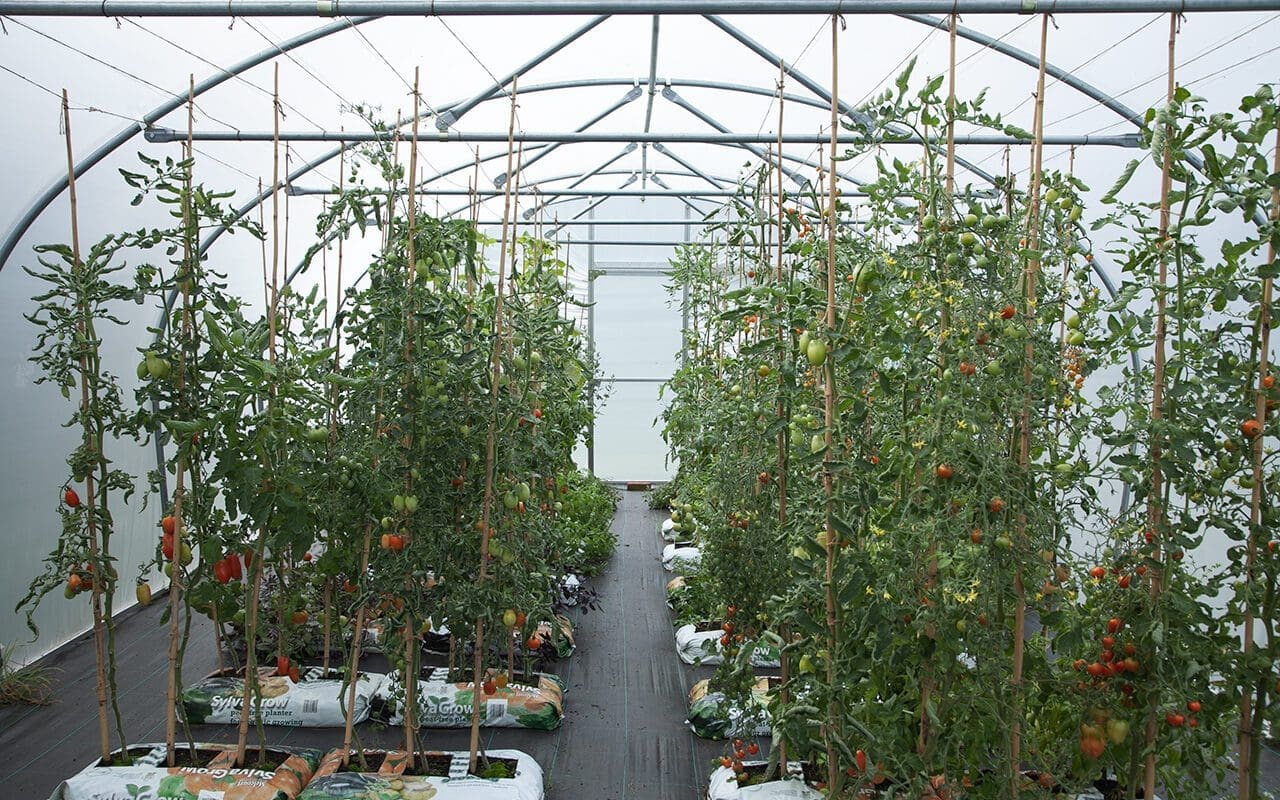
As I mentioned recently, one of our greatest challenges in the garden this year has been the new polytunnel. Having long discussed getting one, the prospect of being locked down in Somerset for the best part of the growing season meant that we were finally able to commit to the daily tending and watering requirements that weekending here meant we could never manage. Although the idea of this additional responsibility caused Dan’s mum, who was staying with us, some sleepless nights, the reality has been, in most ways, much easier than anticipated.
Our motivation for getting one was primarily to realise the unfulfilled desire to be more self-sufficient. We grow almost all of our own hardy fruit and vegetables, resorting to the greengrocers only for those things either grown under glass or imported. Although the novelty of being able to grow a whole range of tender fruit and vegetables was exciting, at the time we decided to go ahead there was a lockdown run on vegetable seeds, which meant that we weren’t able to source the everything we wanted to try. So we settled for what effectively became a trial of tomatoes. Having only grown very reliable outdoor varieties of tomato here previously, there has been much to learn and Dig Delve provides us with a means to record that learning for our future reference, as much as to share it with you.
Our first lesson was to discover that late March was very late to be sowing tomatoes under cover. We started the pots of seeds off on the airing rack above the range in the kitchen, where they were quick to germinate, before being moved to the cold frames.We were then lucky to have such good, warm weather in April, that the seedlings grew away strongly. However, because steel supplies were being diverted to make emergency hospital beds, every week the delivery date for the polytunnel would get pushed back by another fortnight. Very quickly the plants went from being just perfect to plant out to needing to be slowed down by moving them out of the frames.
Eventually, the polytunnel went up over a couple of days at the end of May and the tomatoes immediately went straight into grow bags. Having realised that there was not time to prepare and cultivate the section of pasture where the polytunnel was to be sited, we settled for organic grow bags and put down a membrane to suppress grass and weed growth. Next month we will take up the membrane and install a board edging to make two, low raised beds for cultivation over the winter and for the future. We have seen the effects of the late sowing and delayed planting out all through the growing season, with some varieties being slow to get going, and some just not cropping as heavily as we feel they ought to have done.

The next challenge, and one related directly to growing the plants in bags, was getting the watering regime right. When the plants are small their uptake of water is less predictable than when they are more mature and daily watering (twice daily in hot weather) is needed. This difficulty in judging when and how much to water in the early stages led to a combination of both under and over watering, which stressed the plants when they were around 90cm tall and just as they were starting to set their second trusses, which almost all aborted. None of them suffered from blossom end rot, though, which is also caused by erratic watering and so, with the benefit of hindsight, it became clear that things had also been exacerbated by the fact that I didn’t start with the potassium seaweed feed nearly soon enough. I now know that feeding should start as soon as the first truss has set and continue weekly through the whole growing season. The lateness in feeding also affected the ripening of some varieties, most notably the larger plum and beef tomatoes, which developed ‘greenback’, where the shoulders of the fruit fail to ripen, which is also caused by a lack of potash. Not all tomatoes are prone to this, however.
Although we had a heavy harvest of the first trusses in late July and early August, this meant that there was a significant gap in production during August, aggravated by the cold and cloudy weather that typified that month. It has only been since temperatures started to rise in early September that the ripening has started again. With some continued sun and the doors to the polytunnel kept closed night and day now, I am pretty confident that we will still have a good amount of ripe tomatoes to freeze and preserve for the winter.
Apart from those hurdles, the general maintenance of the plants has been very straightforward. The only puzzle was how to manage the plum tomato ‘Roma’, which I treated like all the other varieties, which indeterminate type. These are the cordon varieties that keep growing upwards and require pinching out and tying onto a support. Noting that it wasn’t responding as the others I did some Googling and discovered that it is a determinate or bush-forming variety, which should be allowed to grow freely. This may be what has been responsible for the very light crops with this variety.
We have had no pests to speak of and, when it did look as though there may be a risk of aphid proliferation, I quickly saw a polytunnel ecosystem establish itself with the arrival of ladybirds and hoverflies and, when the slugs arrived, I soon found that I was disturbing a frog and a toad while watering, as they sheltered in the damp protection of the grow bags.
Apart from the watering and feeding, all that has been required is a weekly session pinching out side shoots, tying the vines onto their canes, removing any yellowing foliage and giving the floor a sweep. In fact the thing that has taken the most time has been the harvesting, preparing and preserving of the fruits when the gluts, few as they have been so far, have come. As the autumn weather starts to turn from Indian summer heat to chill, I forsee only one more busy weekend of peeling, chopping and bottling ahead of me. That has been another learning experience which I will write more about another time.
Due to the seed shortage the varieties we were able to get hold of in March were limited to the most widely grown and popular, some of which, like ‘Gardener’s Delight’ I remember my grandfather growing, and which, with ‘Sungold’, Dan and I have been growing since our days in Peckham. They are popular because they are easy, hardy and productive, and also delicious. Others, such as the beef tomato, ‘Marmande’, Dan has grown for clients, while others were new to us and were chosen to have a range of colours and sizes to choose from. On our list for next year are ‘Costoluto Fiorentino’, ‘Purple Ukraine’ and hardy Russian variety ‘Moskvich’.
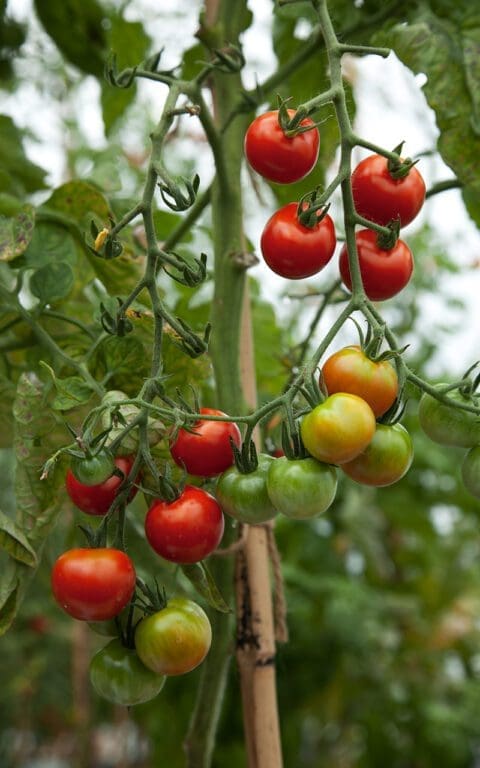
Gardener’s Delight
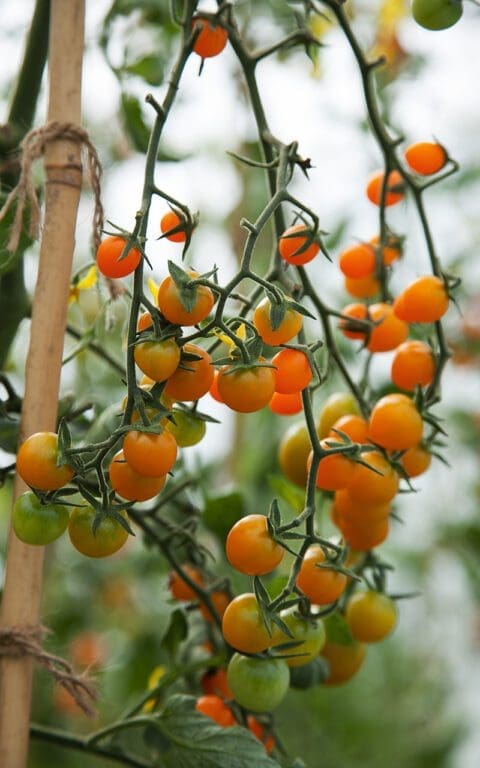
Sungold
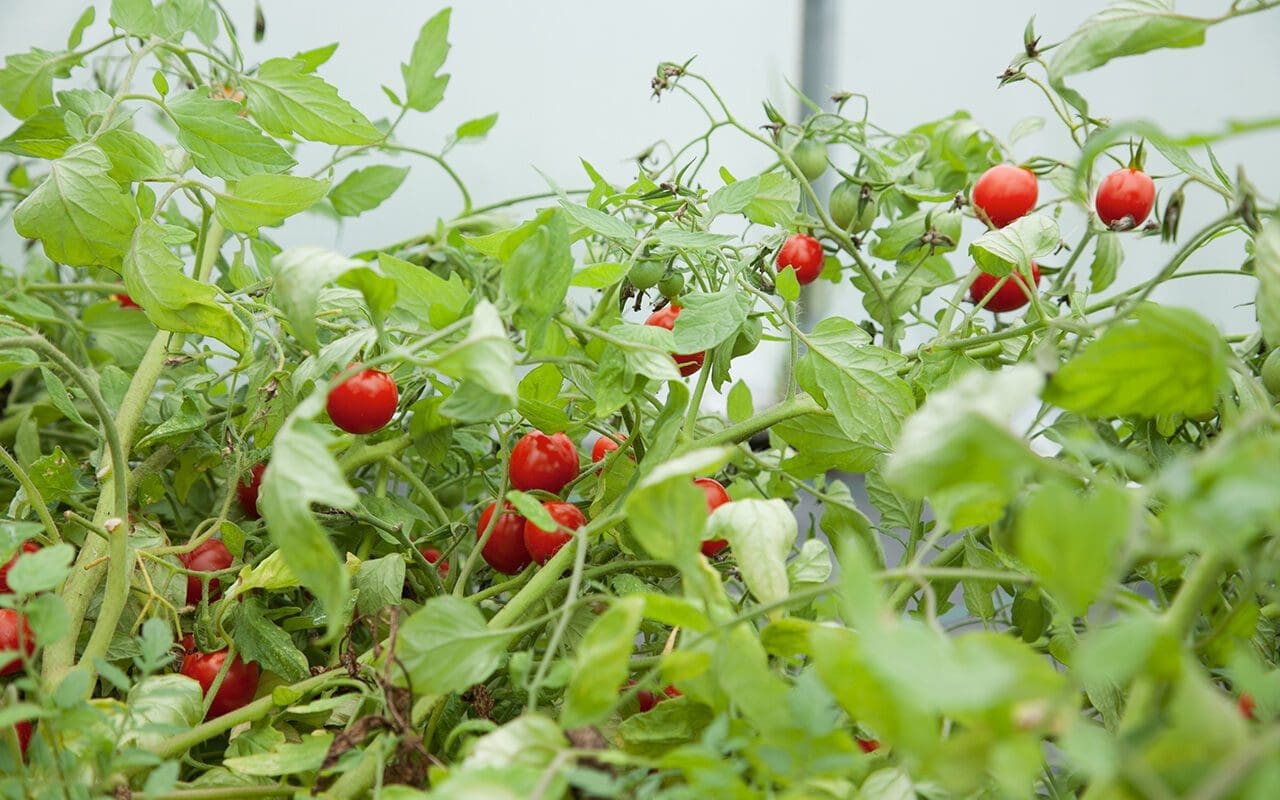
Tumbling Tom Red
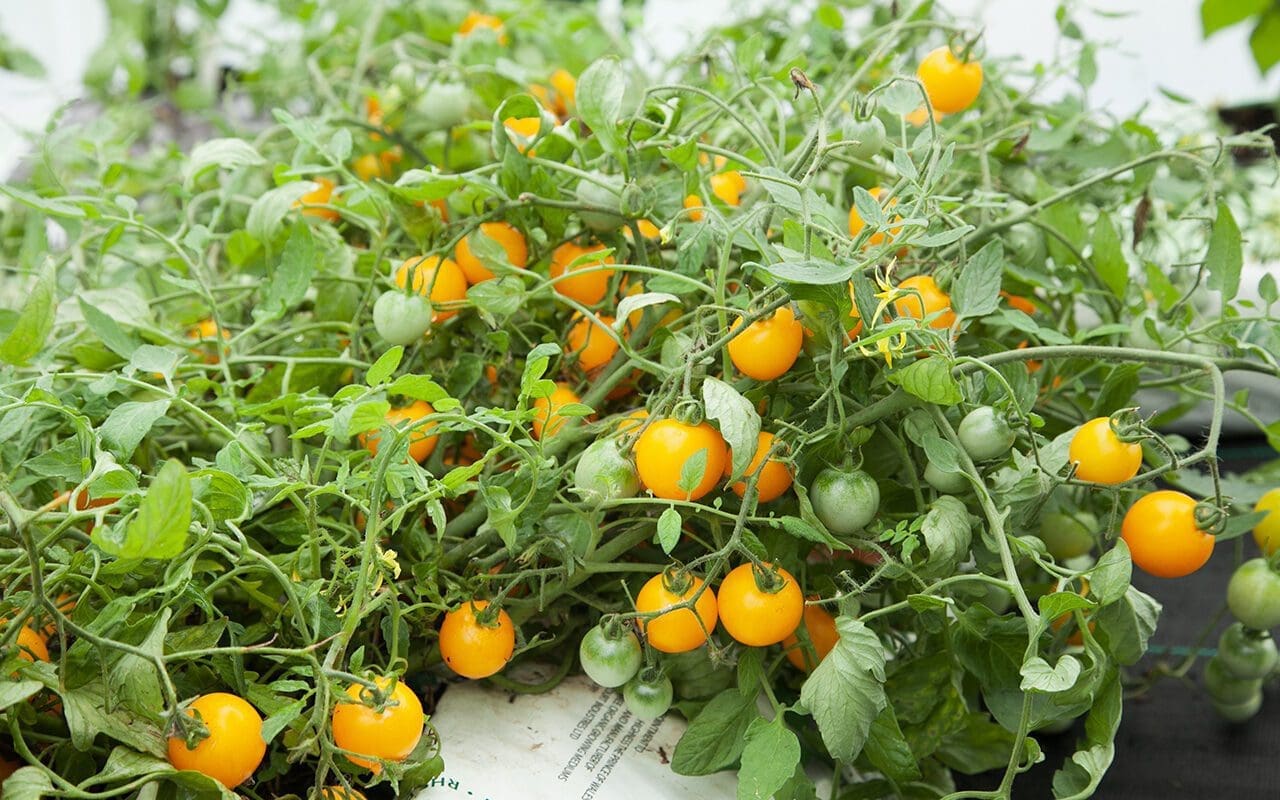
Tumbling Tom Yellow
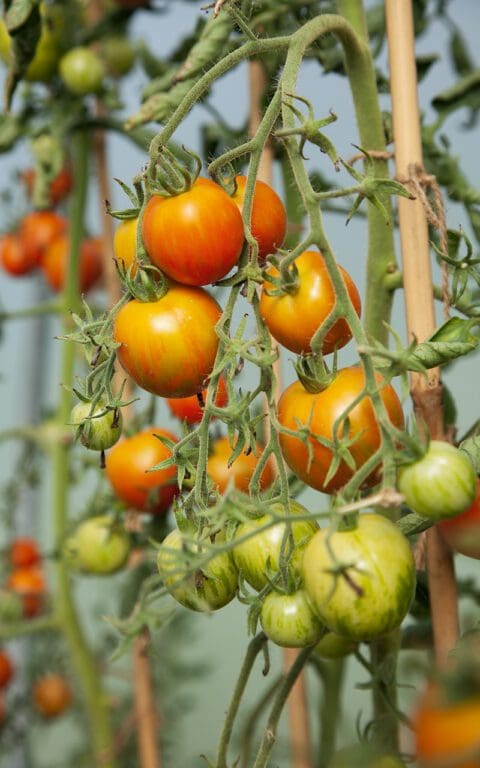
Tigerella
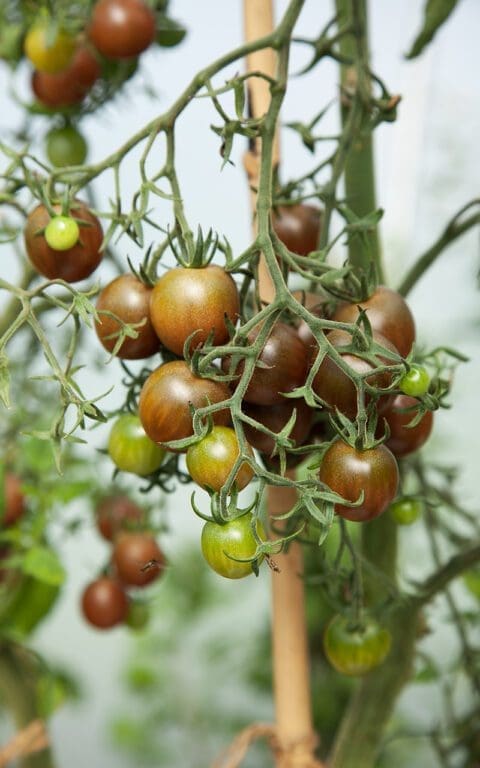
Black Opal
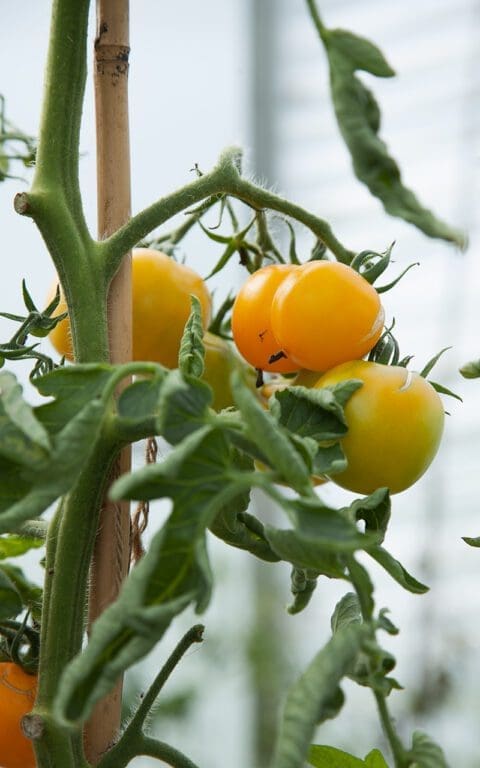
Golden Sunrise
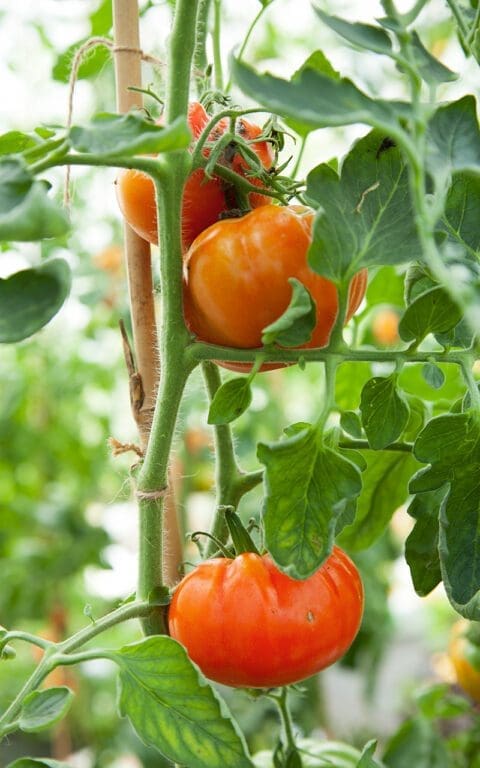
Marmande
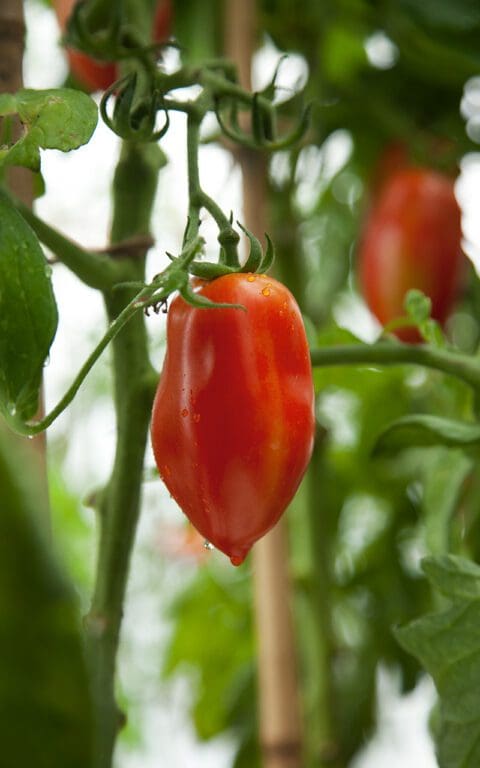
San Marzano
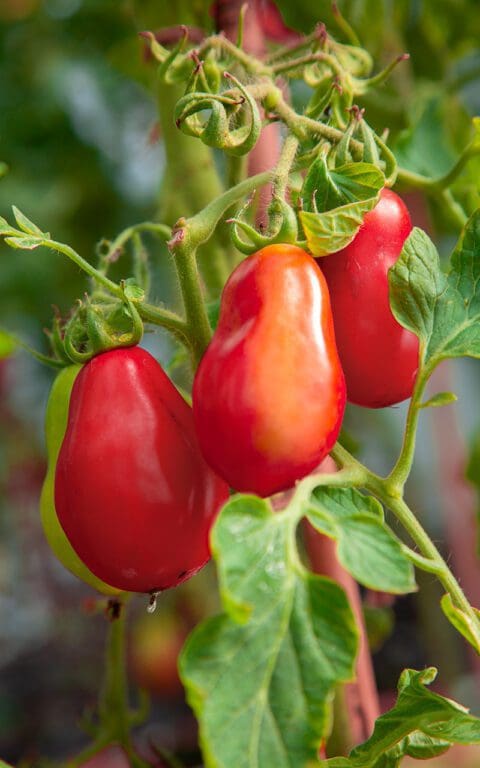
Roma
Words and photographs: Huw Morgan
Published 26 September 2020
So this is my lunch. No, really, it is. Or I should say, was. Yesterday’s to be exact. Dan has been away for the past three days, his first trip of any length away from here since lockdown was eased, and suddenly I have found how much there is to do here when you are here alone. So time has been at a premium and yesterday the solution to not giving myself more to do than was manageable was to make my real life lunch the subject of today’s recipe.
The Kitchen Garden provides one of the main focusses of attention right now, with a tidal wave of produce rapidly gathering momentum, which needs harvesting, preparing and preserving. Every day there is a new round of beans, courgettes and tomatoes to harvest and these ingredients have featured in some way or another in most of our meals for the last couple of weeks.

The bush beans, ‘Cupidon’ and ‘Aquilon’ (the first of which we grew for the first time last year, the latter of which was new to us this year) have been providing a steady stream of fine green beans for around a month now. Although you do have to crouch to pick them it is very easy to de-top them while picking by pinching the stalk end of the bean, and it is possible to amass quite enough for dinner for two in a matter of seconds. We have probably blanched and frozen around 5kg over the past couple of weeks, and probably eaten the same amount. Although they are now on the wane and showing signs of exhaustion the first of the climbing beans are just forming, so we should have a perfect handover.
The bean recipe features the first of our polytunnel tomatoes, of which we are inordinately proud. We are still at the point where we are just keeping on top of the harvest and managing to eat them all, but plans are afoot to dry, bottle and puree the tomato deluge when it arrives. The simple tomato ‘sauce’ here can be made in bulk, flavoured with any herbs you like such as thyme or fennel, and kept in a container in the fridge or frozen to add to any number of simply cooked vegetables when you like.
The Italian way of serving summer vegetables in a sweet and sour agrodolce dressing or sauce is a favourite summer way with anything from cauliflower to mushrooms to fennel and courgette. The sharp, salty flavours are good on a hot day, but work equally well warm from the pan or at room temperature if the weather takes a colder turn.
The vinegar and honey dressing can be flavoured with anything you feel like. I might use fennel seed, bay leaf, marjoram, cumin or pink peppercorns depending on what is available. Some sliced anchovy, finely grated lemon zest and toasted pine nuts would work well too.
When time is of the essence it is best to keep things simple in the kitchen. No more ingredients or food preparation than is absolutely necessary. I use whole herbs and spices and keep cooking methods the same for multiple dishes so that things can be cooked together. This has the added benefit of reducing washing up. The method below is written to make both dishes at the same time, as I did today, so that they arrive at the table together.
You will need a large saucepan, a small saucepan, a colander, a small bowl and two medium mixing/serving bowls.
These dishes are perfectly filling alone, but can easily be augmented with a tin of sardines, a boiled egg, a slab of feta cheese or a piece of grilled halloumi.
Serves 2

Green beans & tomatoes
200g fine green beans
200g cherry tomatoes, mixed colours are good
1 large clove garlic
A small handful of small fresh basil leaves
2 tbsp olive oil
Salt
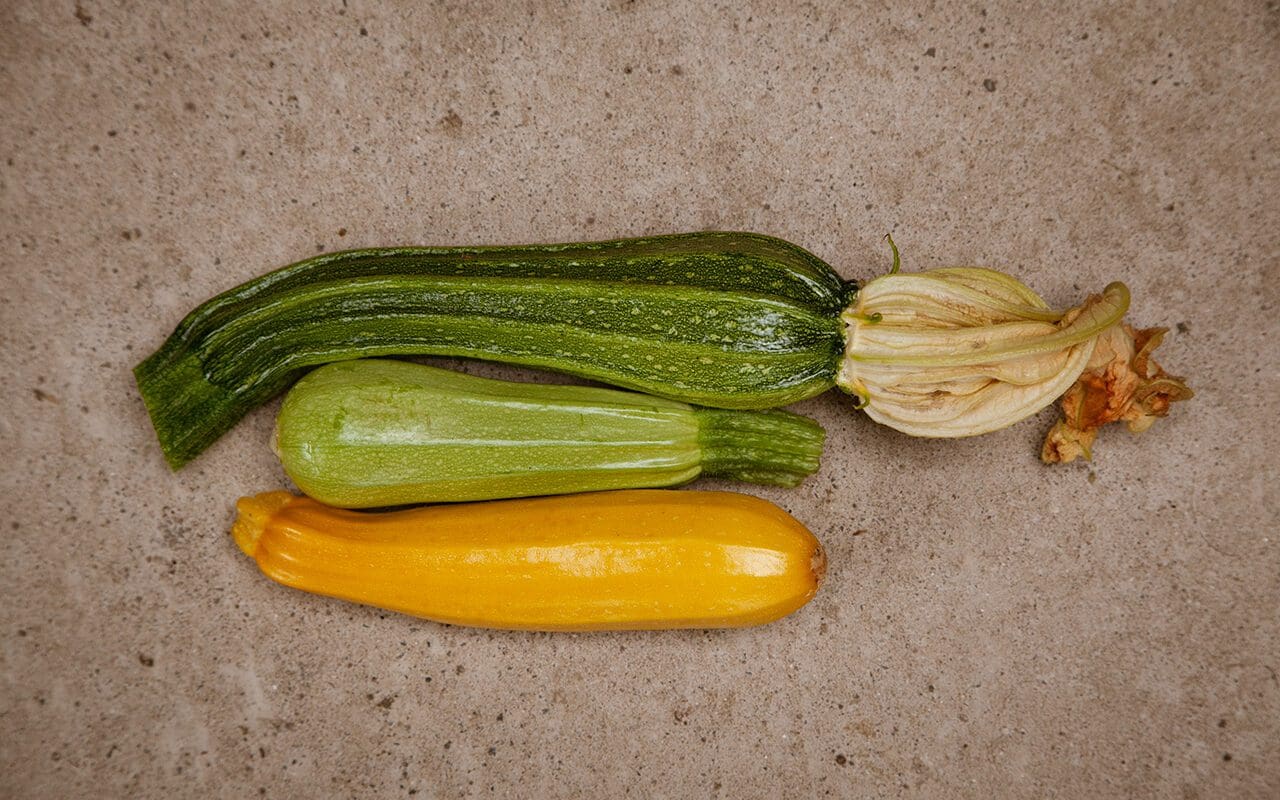
Zucchini in agrodolce
1 medium or 2 small courgettes, around 350g
5 tbsp white wine or cider vinegar
3 tbsp honey
1 fat clove of garlic
1 tbsp currants
2 tbsp extrafine capers
¼ tsp dried chili flakes
½ tsp whole coriander seed
12 black olives, stoned
A couple of stalks of flat leaved parsley, leaves removed
A small handful of small, whole mint leaves
Salt
Fill the large saucepan with water and bring to the boil.
Make the agrodolce. Put the vinegar and honey into the small saucepan with the coriander seed, chili flakes and clove of garlic which you have crushed under the blade of a knife. Put over a low heat until the honey has melted and the mixture is hot. Take off the heat and pour over the currants in a small bowl. Leave to soak.
Put the courgettes and beans into the pan of boiling water. Bring back to a simmer and cook with the lid on. Remove the beans after 10 minutes, refresh under cold water and drain. After a further 5 minutes cooking carefully remove the courgettes from the pan and leave to drain on a plate until warm enough to handle.
While the courgettes are cooling put the olive oil into the cleaned small pan and put it back on the heat. Roughly crush the second clove of garlic and fry in the hot oil until lightly browned. Tip in all of the tomatoes, put the lid on the pan and turn the heat up high. Cook hard for 2 to 3 minutes, shaking the pan frequently, until the tomatoes are breaking down, but still retain some shape. Take off the heat. Season with salt. Scatter over the mint and parsley.
While the tomatoes are cooking cut the courgettes into chunky pieces and put into one of the mixing/serving bowls. Pour over the agrodolce mixture while the courgettes are still hot, add the capers and olives and mix gently so that all the pieces are coated. Leave to stand while you finish the beans.
Put the green beans into the other serving bowl and pour the still warm tomato sauce over them. Mix gently to combine. Pour over a little more olive oil if you like. Scatter over the basil leaves.

Recipes, words and photographs: Huw Morgan
Published 8 August 2020
After endless days of low cloud cover, chill winds and drizzle, suddenly the sun blazed yesterday and again today. Last night I dreamt of Greece.
Our planned Easter break had to be cancelled, of course, and neither of us have the stomach yet for travelling that far. Like many our relationship to international travel has changed over the past months, due both to quarantine requirements and the clear proof, as if any were needed, of the contribution flying makes to climate change when emissions plummeted after lockdown. Travelling overland and by sea have become our preferred means of getting away, but it will be some time before we feel confident enough to make the 4 day journey by train and ferry to our beloved island.
When I dream of our holidays in Greece food figures strongly in my memories and there is one dish in particular that I miss more than any other. Pythia is the local name given to the chick pea fritters that are more commonly known across Greece as revithokeftedes. They are doubtless related to falafel, but are lighter and fresher tasting, although recipes vary from region to region, village to village and family to family. In fact, one of our holiday pastimes is to judge who, this year, is making the best pythia. There are a couple of regulars who mantain total consistency from meal to meal and year to year, but every year there may be a surprise newcomer.
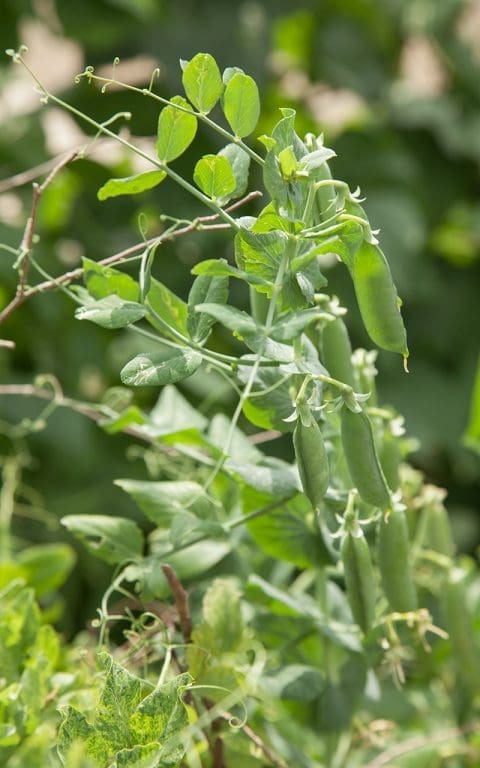
We have never tried to grow chick peas here, since they need a long season of heat for the peas to ripen. However, I was heartened to read this growing information recently, which suggests that with a sunny, sheltered position it is possible to get a substantial crop of green peas that are good to eat fresh. We learned a lesson this year, after planting our peas on the ‘frontline’ of the kitchen garden. After a slightly false start due to mice eating some of the first sowing, they were then slow to get going and, once they did, hated the hot winds of May and the cold winds of June equally, never really hitting their stride. The short-growing petit pois ‘Charmette’ fared the better of the two we grew, but only provided for around four meals, as the pods wizened on the plants before maturing. Early this morning, whilst picking the last of the very disappointing and elderly crop of Glory of Devon peas, I was wondering what to do with them, as they were too old to simply eat boiled. With visions of Greece still floating in my head I thought that they would make a good substitute for chick peas in a fresh, green version of pythia.
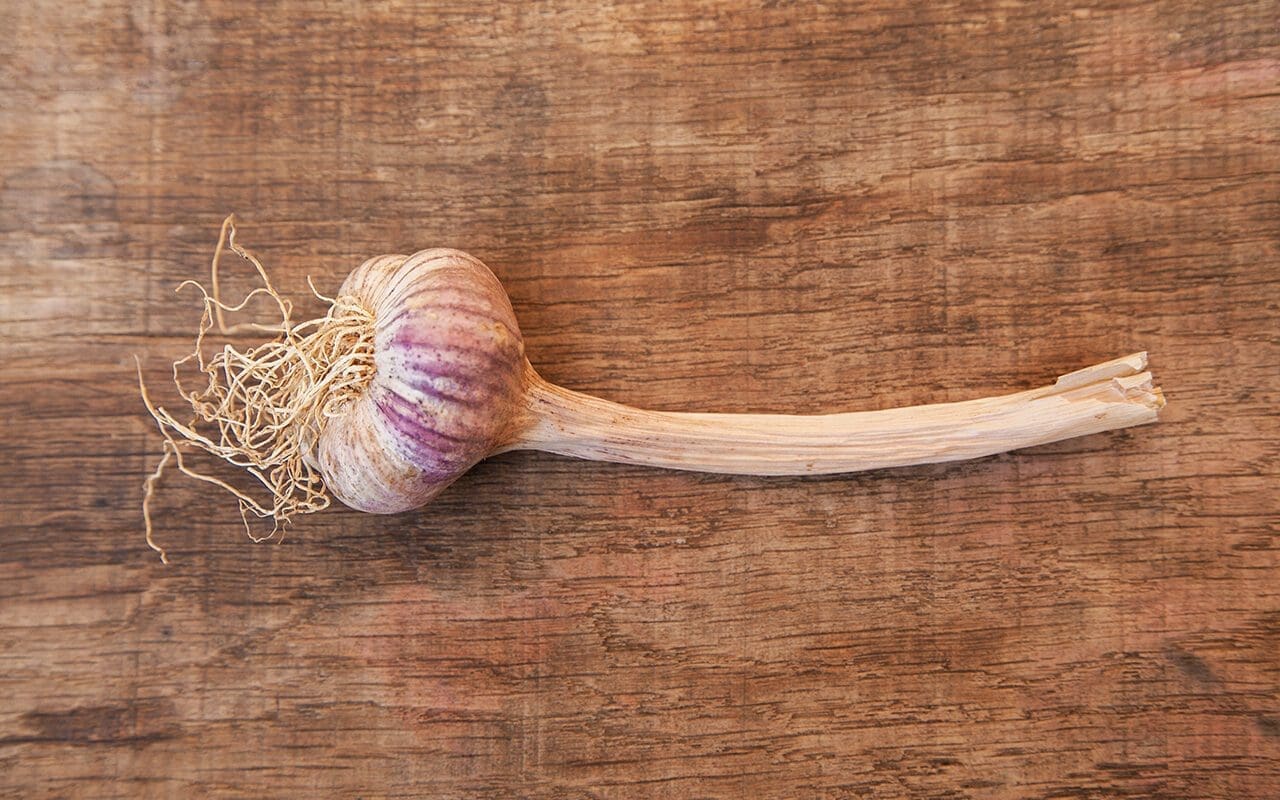
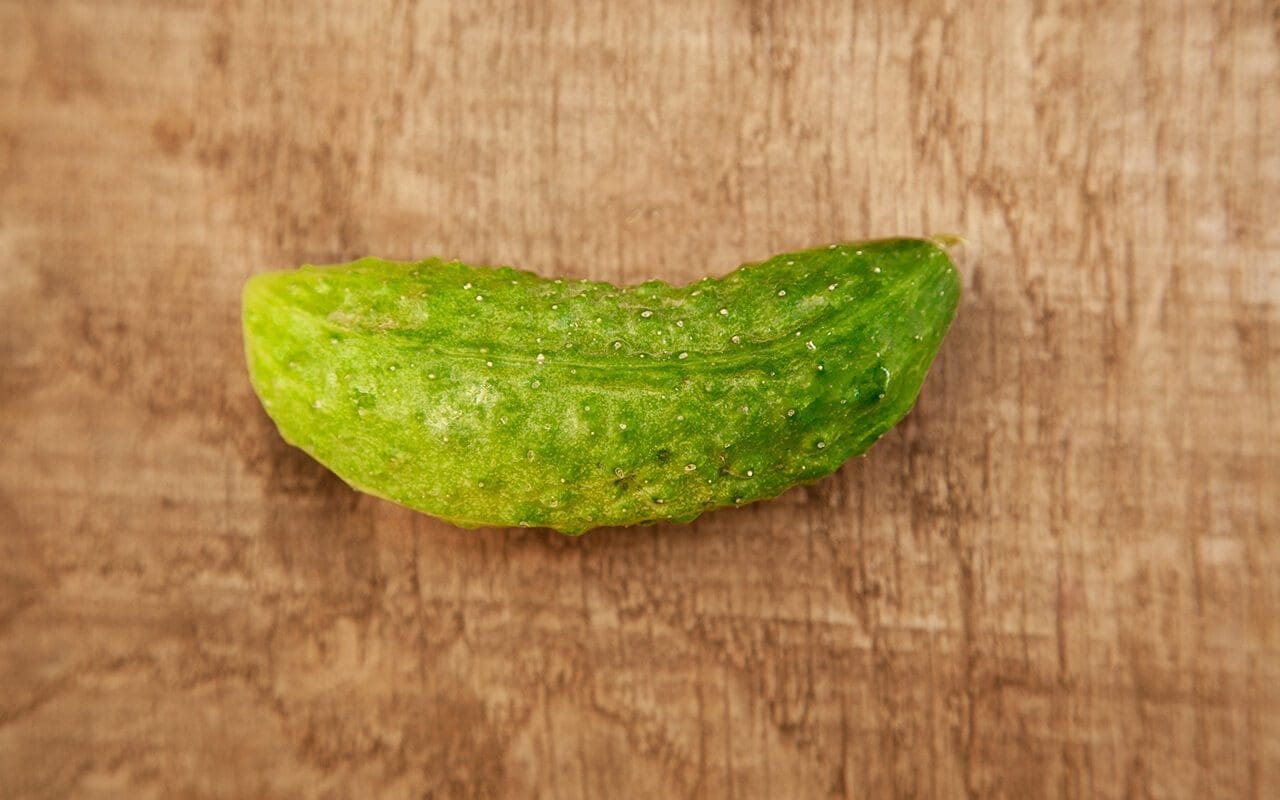
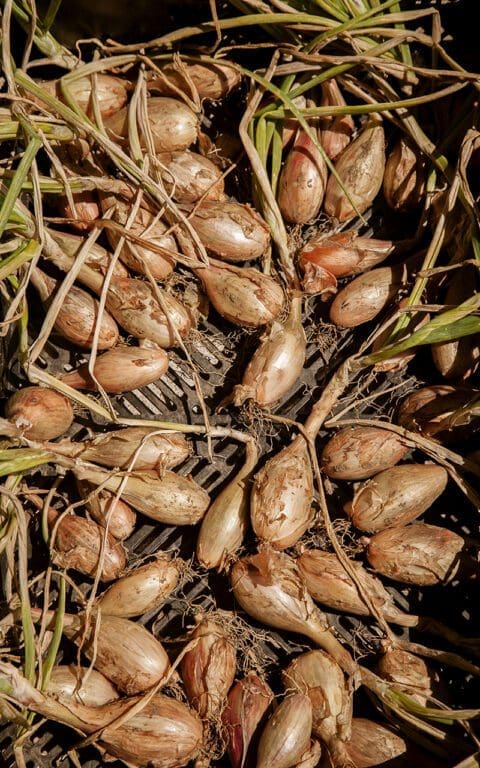
Last weekend I dug up the shallots and three weeks before that the first of the summer garlic, both of which feature in this recipe, as well as the cucumber and herbs which are all from the garden.
If you can’t find chick pea flour and have a Nutribullet type blender you can make your own from dried chick peas. It can also be found at suppliers of Indian foods as gram flour. You can, of course, use frozen peas in place of fresh, or broad beans or the traditional chick peas.
Makes 12, enough for 4 as a starter
250g shelled peas
1 shallot, finely chopped, about 40g
2 fat cloves of fresh garlic
A small handful of flat-leafed parsley, stalks removed
The leaves from two stems of fresh oregano, about 2 tablespoons
1 teaspoon ground coriander
1 long green chilli
The zest and juice of one lemon
8 tablespoons of chick pea flour
1 teaspoon of baking powder
Ice cold fizzy water
Salt and finely ground black pepper
1 small cucumber
100ml strained Greek yogurt
1 tablespoon mint, very finely chopped
1 tablespoon dill fronds, very finely chopped
1 clove of garlic
Salt
Flavourless oil for frying such as rapeseed or rice bran
Firstly grate the cucumber finely into a sieve. Sprinkle with some salt and leave to drain over a bowl while you make the pythia mixture.
Blanch the peas in boiling water for two minutes. Drain them well in a colander then put them with the shallot, garlic, herbs, coriander, chilli, lemon zest and juice into a food processor fitted with a blade. Pulse process until the mixture resembles coarse breadcrumbs. Tip the mixture into a bowl and season with salt and pepper.
Add the chick pea flour and baking powder and stir well to combine. Then add the fizzy water a little at a time until you have a mixture that is soft, but that still holds its shape on a spoon. If it looks too wet add more chick pea flour a little at a time. Leave to stand.
Put the oil into a high sided frying pan to a depth of about 2cm and heat to smoking point.
Using your hands squeeze as much liquid as possible from the cucumber. Put into a bowl with the yogurt and herbs. Grate the clove of garlic into the mixture, season with salt and stir.
When the oil is smoking test fry a small amount of the fritter mixture by gently lowering half a teaspoonful into the oil. It should sizzle and float and brown rapidly. Turn it over to brown the other side, then remove from the oil with a slotted spoon and drain on kitchen towel. Allow to cool a little before tasting, then adjust the seasoning if necessary.
Bring the oil back up to temperature, then take dessertspoonfuls of the mixture and gently lower them into the oil. Do not overcrowd them or they won’t develop a crisp exterior. I use a 22cm diameter, high sided skillet and cook three at a time. Fry for approximately a minute and a half each side until a deep, golden brown, turning them gently once. Remove from the oil with a slotted spoon allowing excess oil to drain back into the pan before moving them onto a small baking tray lined with absorbent kitchen paper. Put them into a warm oven while you cook the rest of the mixture.
Put three pythia on a plate for each guest, with a spoonful of tzatziki and a slice of lemon. Eat piping hot with a glass of something cold.
Recipe & photographs: Huw Morgan
Published 18 July 2020
We have just returned from the Climate Strike march in Bath City centre.
Like many of us this year I have been inspired by the school children’s and young students’ worldwide strikes in the name of Fridays for Future, initiated by the example of Greta Thunberg.
Like many of us I have also felt guilt and shame at the fact that we, the older generation, have left it to the young to draw international attention to something that we have been aware of since before these young people were born.
Well, now there is no turning away. There can be no more heads buried in the sand.
During 7 minutes of seated silence this morning I looked around me at all of the people. I thought about how all these like minds and their kind around the globe will have all been trying to make small differences to counteract what we know are the causes of climate change, global pollution and environmental pillage.
I thought about the corporations, businesses and individuals that have benefitted from the destruction of our environment fully aware of the cost to the planet, and reflected on the kind of person who knowingly robs future generations of their future for short term financial profit.
I berated myself; for not engaging, for not doing enough, for consuming too much, for judging others for their apparent profligacy.
I considered how we can have an effect. What can we all do that will make the biggest change ?
The word that entered my head was simplicity. No more than you need.
I intend to make changes. I plan to be stricter with myself. I am sure I will lapse. I know there will be challenges.
It is also essential to enjoy what life offers. To know that it is not only our responsibility to effect change. We must force those that are able to create the biggest and most meaningful changes – governments, manufacturers, agriculture, industry – to face up to their responsibilities to ensure there is a future world that humans can inhabit.

The main ingredients in this dish are from the garden, prepared simply and just enough for one
100g fine green beans
1 pear, about 100g
10 cobnuts, about 20g
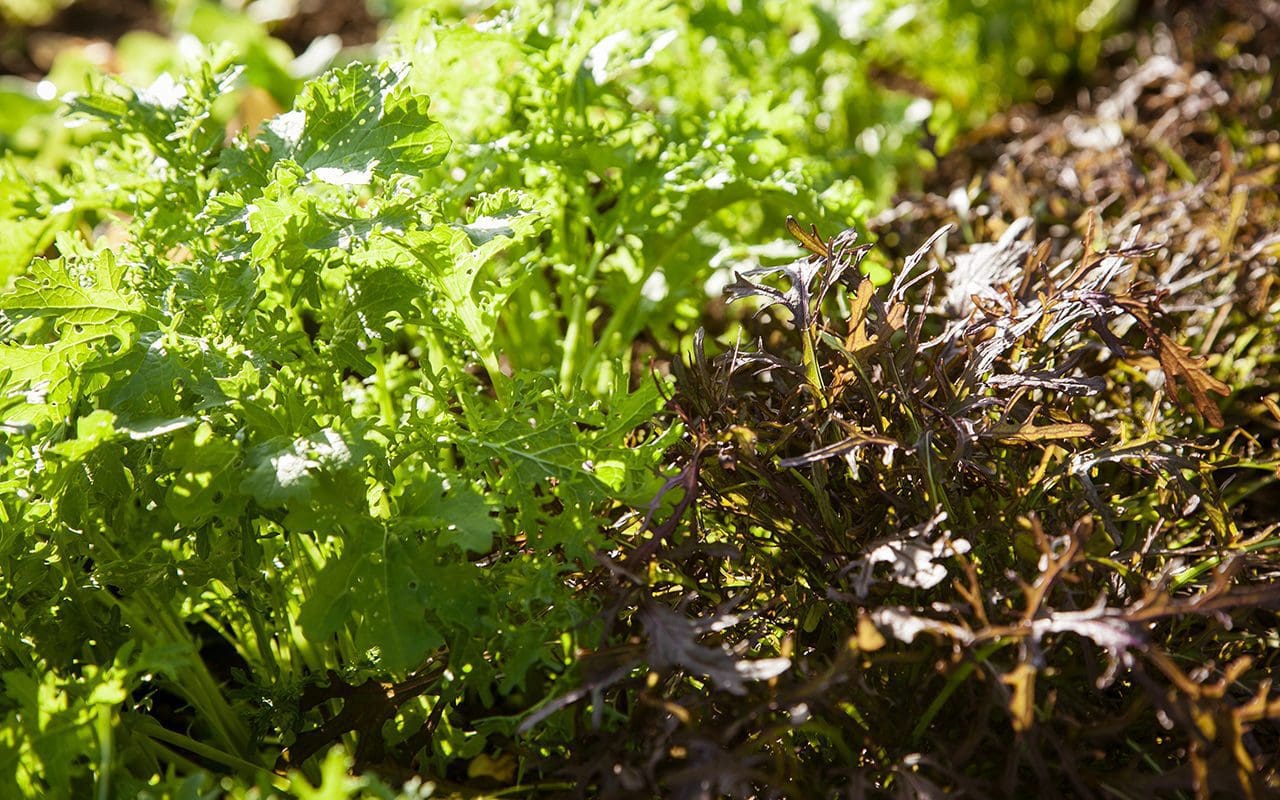
A small handful of young salad leaves – lettuce, mizuna, mustard greens, rocket, spinach
1 tablespoon lemon juice
1 tablespoon hazelnut oil
Salt
Put a saucepan of water on to boil.
Remove the tops from the beans and boil for 3 minutes. Drain and refresh in cold water.
Shell the cobnuts and slice coarsely.
Wash and dry the salad leaves.
Put the lemon juice into a large bowl.
Quarter the pear and core. Cut each quarter lengthways into 3 pieces. Put them immediately into the bowl with the lemon juice and toss to coat.
Add the beans, salad leaves and cobnuts.
Drizzle over hazelnut oil.
Season with salt and toss everything together.
Serve.
Recipe & photographs | Huw Morgan
Published 21 September 2019
We have been inundated. A vegetable garden with courgettes running to marrows and tripods of beans hanging heavy and outwitting our best made plans to stagger the crop with three weeks between sowings. The beetroots have ballooned to the size of cricket balls and the chard is straining over the path as if to say “eat me”. Wet weather and warmth in August has put a surge of aromatic growth on the basil and, now that September is cooling, there is pesto to be made if we are to reap the benefits.
Harvesting in August could easily take two days a week and the same again in preparing the pickings for pickling, jam, bottling and freezing. These are good times and in the past we would have pulled together and made an event of it to make light of the workload. Next year we plan to do exactly this at the time of critical mass and set up an industrious production line with friends who are good at picking and friends who are good at preserving. A weekend or two spread over the month will help to manage the glut and people will go home with something to mark their efforts and a memory of the times of plenty for the winter.

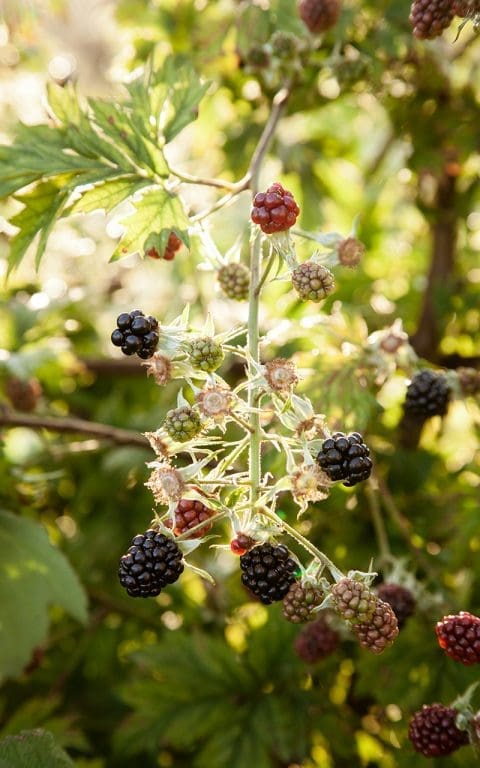
Beyond the kitchen garden (and the distraction of beckoning autumn raspberries) and through the gates to the slopes that lie beyond, is the orchard. Planting these trees was my first move after arriving here and they are now in their eighth summer and weighed down with fruit. The apples are yet to come, but the plums have been demanding to keep up with and we find it impossible not to be bothered by the inevitable waste. Yes, of course the excess never goes to waste, the evidence of rodent nibbling and flurries of birds that rise from the windfalls beneath the trees are proof. Working from the ladder up amongst the branches and you find the wasps also gorging and beating you to it if you are not fast enough. The plums ripen over the course of a week, each tree at a slightly different time and with some overlapping.
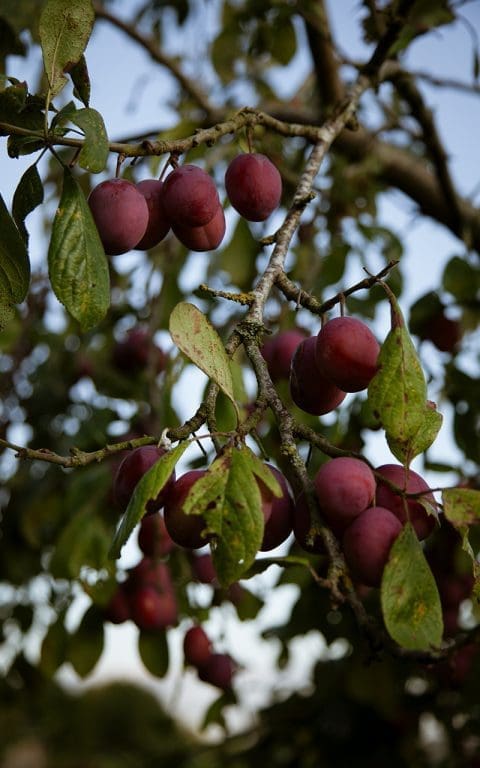
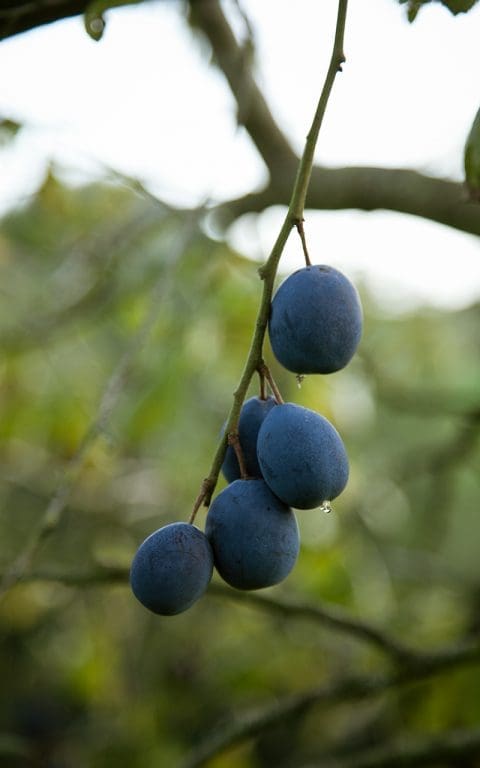
The gages came first this year and I can say now that I would be happy having nothing but gages. We have four in the plum orchard. This year ‘Bryanston Gage’, ‘Cambridge Gage’ and ‘Early Transparent’ were all productive. They are all superior to the other plums for being aromatic and naturally sweet but ‘Bryanston Gage’ is perhaps the most delicious. As good as apricots and, with the sun in the fruit, warm in your mouth. Morning and evening are the best times to pick. You will be ahead of the wasps when the fruit is still cool with dew, but just before sundown is also a good moment for the fruits are sun warmed and the wasps are early to bed.
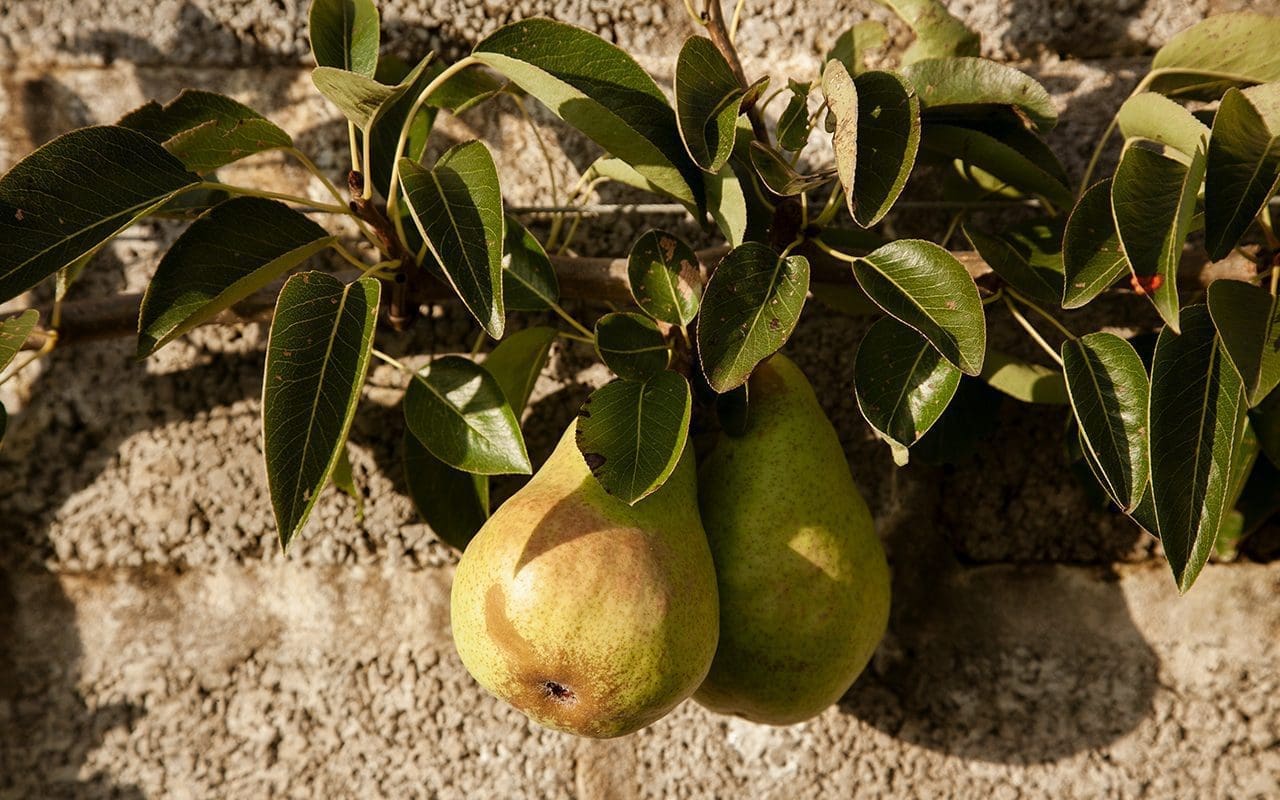
I am beginning to doubt whether it was a good idea to have planted pears in the orchard. There are five trees and I can see they will make a good-looking contribution, but the fruits of pears are notorious for dropping just before they ripen and then bruising by the time they are ready to eat. In the kitchen garden we have five cordons grown against the south-facing wall that backdrops the garden and, in terms of convenience, they have proven themselves. The espaliers make picking easy and, as the pears tend to come all at once or over the course of a week, the amount of fruit you have is manageable compared to the orchard trees.
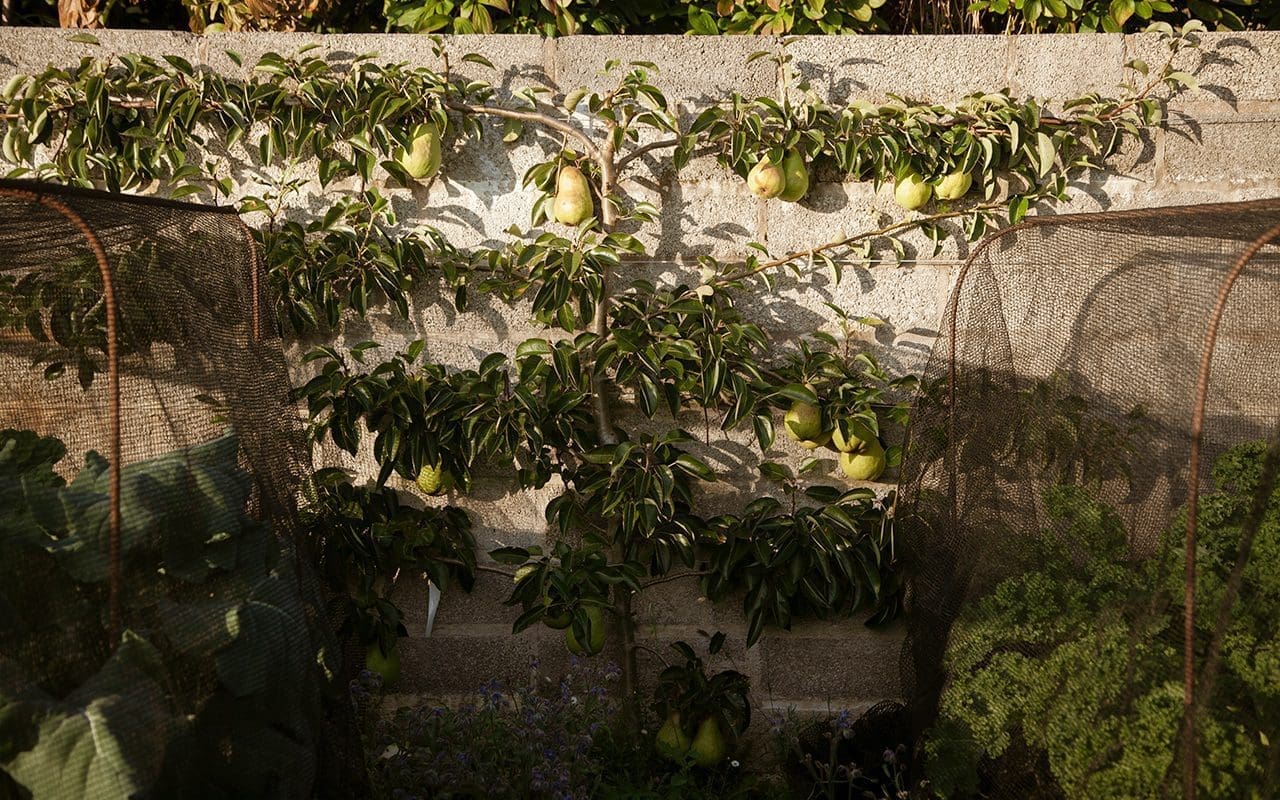
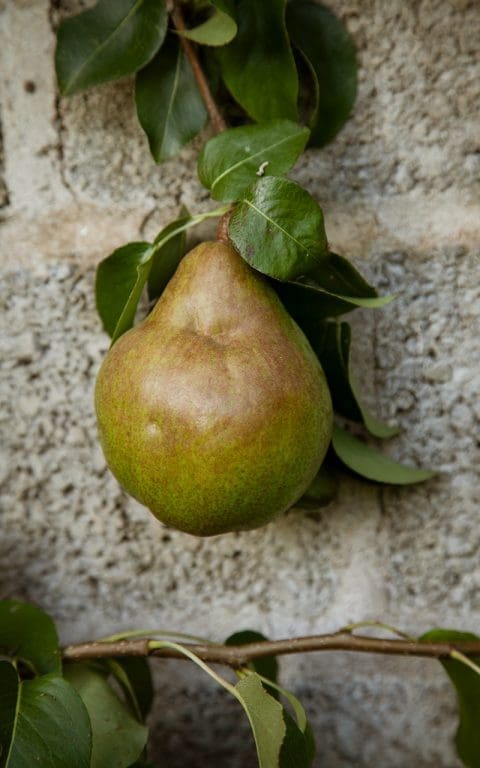
We have five varieties that stagger the cropping over the course of six weeks or so to keep us in pears for the autumn. ‘Beth’ is our first to drop, although we have just eaten the last. I now grow a soft bed of Erigeron under each cordon to act as a cushion for the fruit but, once they start to fall, you need to get out there daily if the mice – and possibly larger rodents – are not to get there first. Although I like the crunch of a nearly ripe pear, two to three days on a shelf sees ‘Beth’ colour to a soft yellow and the fruit ripen to sweet and melting perfection.

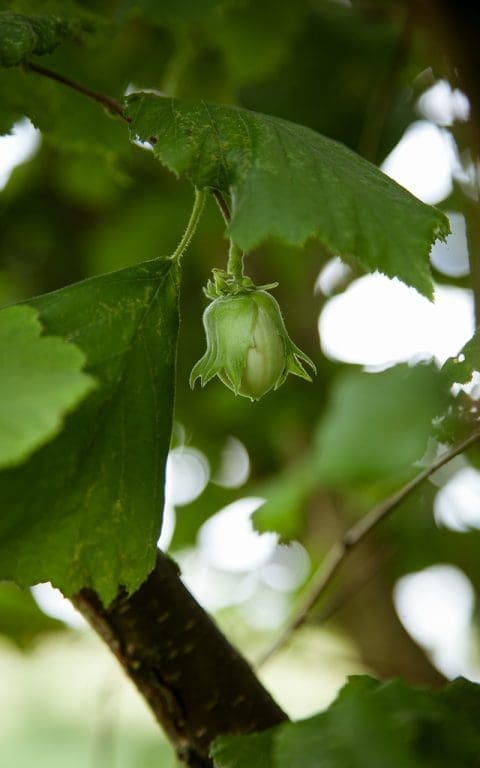
Down by the stream we have seven varieties of cobs and filberts; ‘Webb’s Prize’, ‘Gunslebert’, ‘Kentish Cob’, ‘Cosford Cob’, ‘White Filbert’, ‘Pearson’s Prolific’ and ‘Butler’. The trees are in their seventh year and cropping heavily now. This year we have beaten the squirrels who discovered them a couple of years after they started fruiting. St. Philibert of Jumièges, after whom filberts are named, has a feast day on August 20th and from about that time you have to be vigilant. We have learned to pick them early if we are not to lose the entire crop whilst we’re not looking. We put them in a single layer in perforated plant trays to allow plenty of air to circulate and ripen them up in the open barn out of reach of the mice. Sharing what you must leave behind due to the sheer volume of the harvest is one thing, but sharing your hard earned fruits is quite another.
Words: Dan Pearson | Photographs: Huw Morgan
Published 7 September 2019
It has been too hot to cook. Too hot to do much at all. And yet the Kitchen Garden has been demanding attention. If we take our eye off the ball right now we will find that currants and berries will rot on the bush, in late summer there will be no more salad and, come autumn, there will no turnips, swedes or winter lettuce. Harvesting has become a twice daily occurrence and beds must be cleared to make room for the last of the summer sown crops.
A couple of weekends ago, just as we were preparing to head off to Hokkaido, we spent two mornings picking gooseberries and blackcurrants for the freezer. If you have a hat and water bottle and keep in the shade of the bushes, this can be a very pleasant way to pass a hot, sunny morning with friends; picking, chatting, eating and laughing. The resulting Tupperwares full of berries are their own reward. Whenever I am squatting on my milking stool picking blackcurrants I remember – always too late – Sarah Raven’s method, which is to cut out the oldest canes when laden with fruit and then take these to a comfortable, shady spot to pick the berries off at leisure. Needless to say this is never the way it happens.
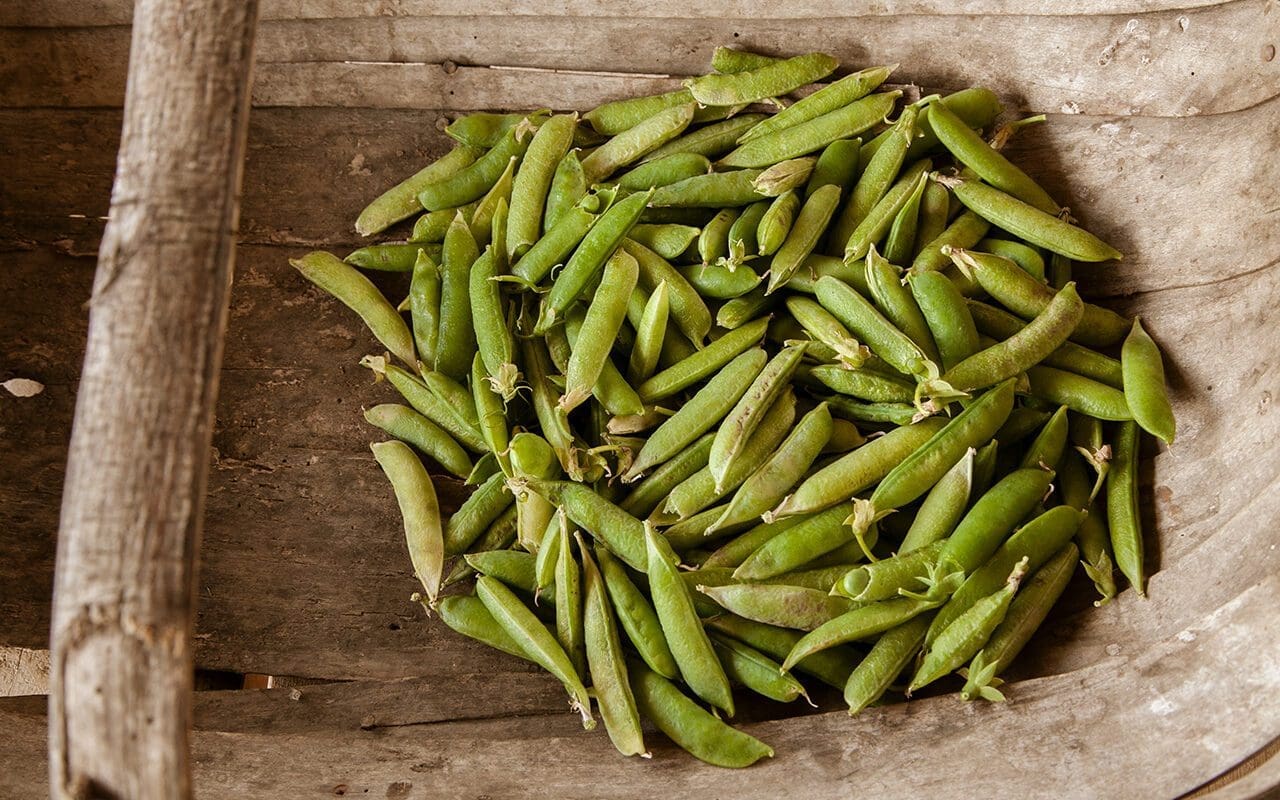
We returned from Japan to find that both sowings of peas – one late winter, another mid spring – had caught up with each other and we had a pea glut comparable with the currant glut. Here it was a much more straightforward decision to simply take out the plants – leaving their nitrogen-fixing roots in the soil – and pick off the pods in the shade of the open barn by the house. Nothing can compare to the satisfaction of podding peas into a bowl and I have a particular fondness for shelling them into a red enamel metal bowl, which reverberates like a gong as the peas hit the sides, its colour vibrating against the green of the peas.
The peas are no longer in their prime, but freshly picked and quickly cooked, they are still quite delicious. We most often eat peas cold in summer. Thrown into a pan of boiling water for a few minutes, drained and then refreshed in cold water I will throw a couple of handfuls into salads, or puree them with mint, stock and cream to make both a green hummus-like dip or a thinner, refreshing chilled soup. Peas and white cheeses of all sorts go together beautifully, both the salty – feta, halloumi, pecorino – and creamy – Vignotte, goat curd, ricotta – providing different types of contrast to peas’ natural sweetness.
Here burrata – a type of mozzarella filled with cheese ‘rags’ and cream – provides a decadent richness which, mixing with the basil oil dressing, creates a delicious sauce. It is customary to serve burrata at room temperature but, when it’s as hot as it has been, I prefer the cheese to be lightly chilled, and so take it out of the fridge around 20 minutes before it is needed. If you can’t get hold of burrata then substitute with a good quality, fresh buffalo mozzarella or a piece of ripe Vignotte.
Per person
100g shelled peas
A small handful of young leaves; lettuce, pea shoots, watercress, rocket
1 burrata or burratina, 100g weight
4 large Genovese basil leaves
3 tablespoons olive oil
½ small clove garlic
Zest and juice of ¼ lemon
¼ teaspoon salt
Small-leaved basil or torn Genovese basil to serve
Wash and dry the salad leaves.
Put a pan of water on to boil.
Put the salt, garlic and basil leaves into a mortar and crush into a coarse green paste. Add the olive oil, lemon zest and juice. Stir to combine.
Cook the peas in the boiling water for 2 to 3 minutes. Drain and quickly refresh under a cold running tap. Drain off excess water.
Arrange the salad leaves on a plate. Spoon the peas over the leaves. Place the burrata in the centre. Spoon the basil dressing over everything. Strew over some basil and serve immediately with some oiled and grilled sourdough bread.
Recipe & photographs: Huw Morgan
Published 27 July 2019
I have just returned from the South Tyrol where we are helping to heal the scars of construction and seat a new house back into a precipitous mountainside. This north-eastern province of Italy feels more Austrian than Italian and the two-hour drive from Verona plunges you deep into a valley as the Dolomites rise up around you. The spa town of Merano sits at the end of the valley and the slopes that come down to meet the town are farmed proudly and intensively by the locals. Though there was already snow on the peaks, every ledge and terrace up to the treeline was striped with fruit trees. Figs to the lower slopes and then apples, pears, apricots and cherries in immaculate cordons criss-crossing the contours. Beautifully constructed chestnut pergolas sailed over the terraces to make the fleets of vines easily pickable and, in the gulleys that became too steep, the yellowing of the chestnut trees marked their presence at the base of the oak woods above them. Our client helped to make our stay that much more memorable with a meal at a typical Tyrolean eatery on the last night. A winding, single-track road into the orchards threw us off course more than once, but we eventually found the farmhouse, sitting square and noble with the view of the town below. We were welcomed warmly by the family who have occupied this farm for more than seven hundred years and invited into a beautifully simple wood-panelled room. Shared farmhouse tables with chequered tablecloths and lace-covered pendant lights concentrated the experience and a tiled floor-to-ceiling stove sat in the corner of the room to enhance the autumnal feeling. Our host came to the table, offering speck and drawing up a chair beside us to cut and portion it carefully, as he explained the nature of the meal to come. The speck was his own and he told us how it was smoked daily over the course of three months with the prunings from his vines and apple trees. A perfectly portioned apple, rosy as in a fable, sat on the chopping board as a complement, together with schüttelbrot, a South Tyrolean crispbread flavoured with caraway seed. A jug of this year’s new wine, the first of several, helped to lubricate the feast that was to follow. Next came the knödel. Two portions, one red and made of beetroot, the other yellow which, on tasting, we discovered were made with swede, both drenched in a sauce of melted butter and grated parmesan. A meaty plate of home made blood sausage and belly pork on a bed of sauerkraut came next, with more knödel, this time flecked with chopped speck. Finally, a round of hot, charcoal-roasted chestnuts made it to the table. A large cube of butter and schnapps infused with grape skin served to counteract their mealiness and, as we peeled them together, our fingers blackened, I couldn’t help but feel that this same autumn meal must have been eaten in this room for generations.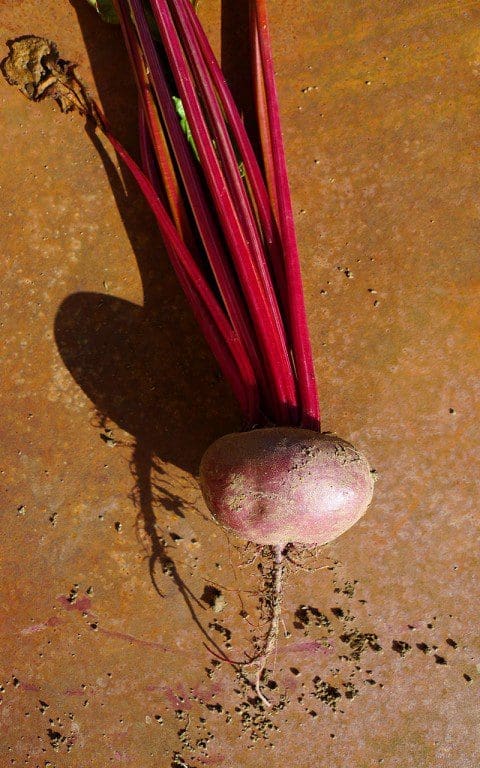 Beetroot ‘Egitto Migliorata’
INGREDIENTS
Knödel
250g beetroot
1 small onion, finely chopped, about 50g
1 clove garlic, finely chopped
1 tablespoon butter
70g coarse breadcrumbs
30g hard goat cheese or pecorino, finely grated
1 small egg
30-50g plain flour
Small bunch flat leaf parsley, about 1 tablespoon finely chopped
Small bunch dill fronds, about 1 tablespoon finely chopped
Salt and pepper
Sauce
8 tablespoons buttermilk
1 tablespoon soured cream
1 tablespoon freshly grated or creamed horseradish
1 tablespoon olive oil
1 tablespoon lemon juice
Salt
Finely grated hard goat cheese, finely chopped parsley and dill fronds to serve.Serves 2
METHOD It is worth saying that to get the best result you must use breadcrumbs made from the best bread you can get, preferably sourdough, and that the breadcrumbs should be quite coarse. It is also said that the staler the breadcrumbs, the better the knödel. If you can’t get hold of buttermilk use just soured cream or crème fraiche. Heat the oven to 180°C. Wrap the beetroot tightly in foil and bake for 30 minutes to an hour depending on size, until they are soft. Unwrap and leave to cool. Rub the skins off under cold running water. Grate coarsely and put into a mixing bowl. Melt the butter in a small lidded saucepan over a moderate heat. Put in the onion and garlic, stir to coat, then put the lid on the pan and reduce the heat to low. Sweat the onion for about five minutes until it is soft and translucent, but not coloured, stirring from time to time. Remove from the heat, allow to cool, and add to the beetroot. Add all of the remaining dumpling ingredients, apart from the flour, to the beetroot and onion. Stir until all is well combined. Season with salt and pepper. Add the flour, starting with 30g. The dough should remain soft, but start to come together in the bowl. If the mixture seems too wet add flour a little at a time until the right consistency is reached. Do not be tempted to add more flour or the dumplings will be gluey. Leave the mixture to sit for 15 to 20 minutes while you bring a deep pan of water to the boil and make the sauce, by putting all of the sauce ingredients into a bowl and whisking together until emulsified. When the water comes to the boil, turn down to a gentle simmer. Using a knife or spoon divide the dumpling mixture into quarters. Wet your hands with cold water and then take a quarter of the mixture and quickly shape it into a ball. Repeat with the remaining dumpling mixture. Gently lower the dumplings into the hot water, being careful not to burn your fingers. The dumplings will sink. Using a slotted or perforated spoon stir them very gently from time to time to stop them sticking to the bottom of the pan. Cook for 8 to 10 minutes until they float, when they are ready. Carefully remove the dumplings from the pan with a slotted spoon and allow as much water as possible to drain away. Spoon the sauce onto two plates and place two of the dumplings on each plate. Scatter the herbs and cheese over and serve immediately while still hot. Words: Dan Pearson / Recipe and photographs: Huw Morgan Published 3 November 2018Whether it’s fish and chips after a day on the beach, calamares fritos at a Spanish bar or Indian pakora with an ice-cold Tiger beer at a festival, deep fried food is something that always tastes better outdoors and when the weather is hot.
In Greece recently I was staying with friends who, in late June, were already struggling to keep up with their courgette glut, so for lunch one day we decided to make kolokithokeftedes, the traditional Greek courgette fritters. Courgettes are coarsely grated, salted and then squeezed to remove as much water as possible, before being mixed with onion, garlic, feta, egg, breadcrumbs, dill and mint. Traditionally shaped into patties and shallow fried, they can be a little heavy, so my host decided to put loose spoonfuls of the mixture into deep boiling oil so that the shards of onion and courgette that made their way free of the mass became crispy and a deep, caramelised brown. They came out looking like tiny deep-fried, soft-shelled crabs. Served with a bowl of cold, garlicky tzatziki, six of us devoured about forty of them in quick succession.
In Japan, of course, it is tempura that fulfils this role. It is no surprise to learn that the technique of deep frying batter-coated fish and vegetables was brought to Nagasaki by the Portugese in the 16th century. Peixinhos da horta is believed to be the original dish that inspired a way of cooking that we now primarily associate with Japanese cuisine. These ‘little garden fishes’ are green string beans, coated in batter and deep fried, and were eaten in Portugal during Lent, when meat was off the menu. The Japanese took this idea and ran with it, and now tempura describes the method of cooking any fish, meat or vegetable in this way.
One of our favourite places to eat when in London is Koya Bar, a tiny Japanese restaurant in Soho, where fast-cooked food is prepared in front of you behind a long seating counter. While the queue to get a table can sometimes seem intimidating, the turnaround is so fast that waiting in line for 30 minutes is a small price to pay for food this delicious. It is the most authentic Japanese eating experience we have had outside of Japan. Although they specialise in udon noodles, there is always a blackboard of seasonal specials on offer and, of these, it is the kakiage tempura that we order without fail whenever we go. Kakiage tempura differs from regular tempura in that it is a mixture of sliced vegetables (sometimes combined with fish) in batter rather than the individual pieces of fish, crustacean and vegetables that we are more familiar with. Seasonality is key and, at Koya, they can be made of anything from wild carrot with carrot tops to broad beans and peas or squid and chrysanthemum.
We are now in the midst of our courgette glut and looking for new ways to use them as often as possible, while our sweetcorn is challenging us to eat it quicker than it becomes starchy. I have grown ‘Double Red’ this year, a new variety with seed from The Real Seed Catalogue, who sell some of the most interesting vegetable varieties in the country. The plants are highly decorative with stems and husks stained a deep purple-red and cobs of dark burgundy, almost black, kernels, which are almost too beautiful to eat. They have made a good partner to our ornamental red and tan amaranth this year. We have also just lifted all of our onions and so the combination of vegetables here reflects what is best to eat at this very moment. I could also have used green beans, carrots and beetroot or, later in the season, pumpkin, sweet potato, mushrooms, celeriac, kale or salsify. You can also add any herbs that you like to the mix. Here I have used the traditional purple shiso (Perilla frutescens var. crispa), which is used to impart the pink colour to umeboshi plums. It has a flavour somewhere between aniseed and basil. Dipped into batter and fried at the end of cooking the leaves also make a beautiful garnish.
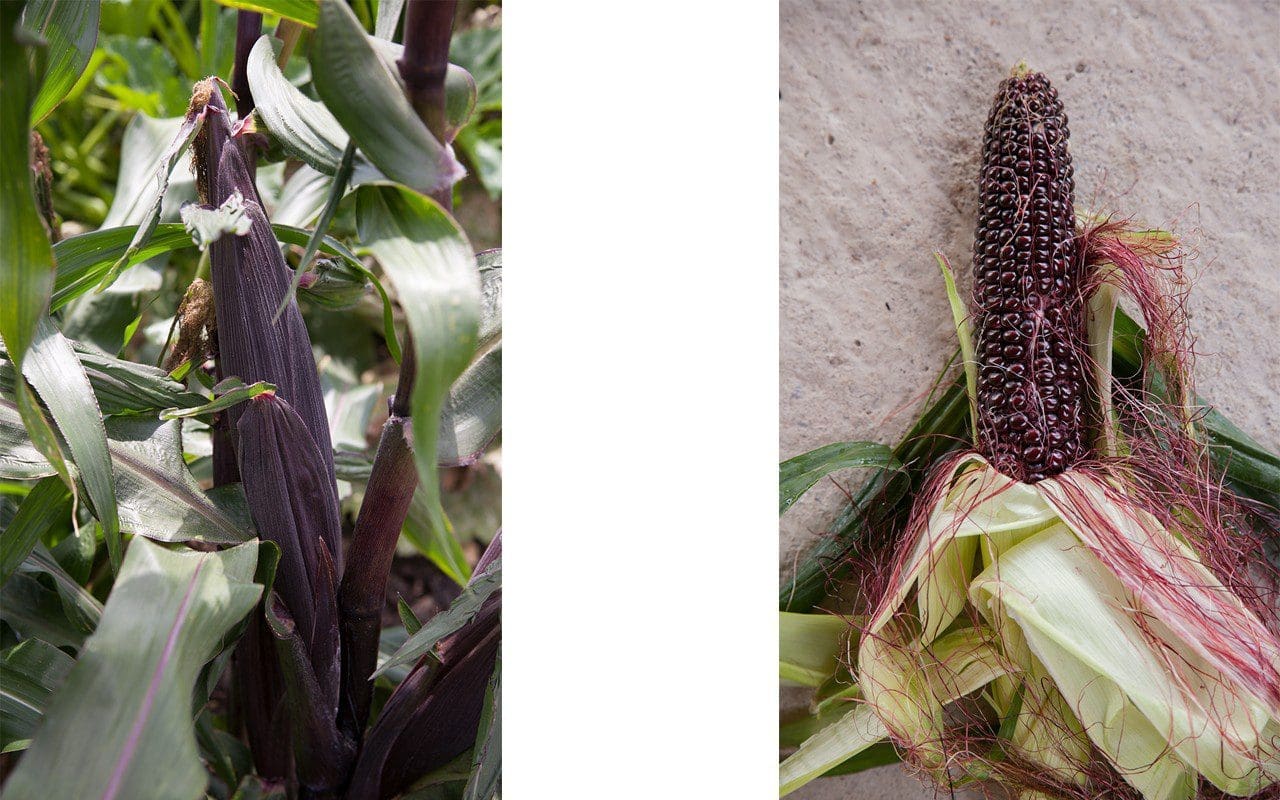
Sweetcorn ‘Double Red’
Although there is a plethora of recipes for tempura batter using either whole eggs or whisked egg whites, I have found that the simplest batter of just flour and water makes the crispest coating. However, there are a few golden rules to ensure that your tempura turns out as well as possible. Firstly, all of the vegetables must be cut to a size where they will cook in the same time. It is traditional for the vegetables to be coarsely julienned or grated. Secondly, get your oil hot enough to cook before you make the batter. It should be between 170°and 180°C. Thirdly, the batter should be as cold as possible, and must not be over-mixed or whisked which stretches the gluten and makes it tough and chewy. Chopsticks are used traditionally and it should have lumps of flour in it. Fourthly, before placing the batter-coated vegetables in the oil, allow as much batter to drain from them as possible. This ensures the lightest coating and avoids a doughy centre. Fifthly, only cook a couple of spoonfuls at a time, so as not to crowd the pan and lower the temperature of the oil. Sixthly, use a small wire strainer or slotted spoon to remove any overcooked bits of batter from the oil between batches to avoid them flavouring the oil and attaching to the next lot of fritters. And finally, do not be tempted to ‘worry’ the fritters in the oil, be patient and leave them be until they are ready to turn, or the batter will not have cooked and they will fall apart.
It is customary to serve tempura with a simple dipping sauce of dashi, soy sauce and mirin, but the lemon and miso sauce here, adapted from a recipe by Elizabeth Andoh from her excellent book of Japanese home cooking, Kansha, complements the richness of the fried fritters perfectly.
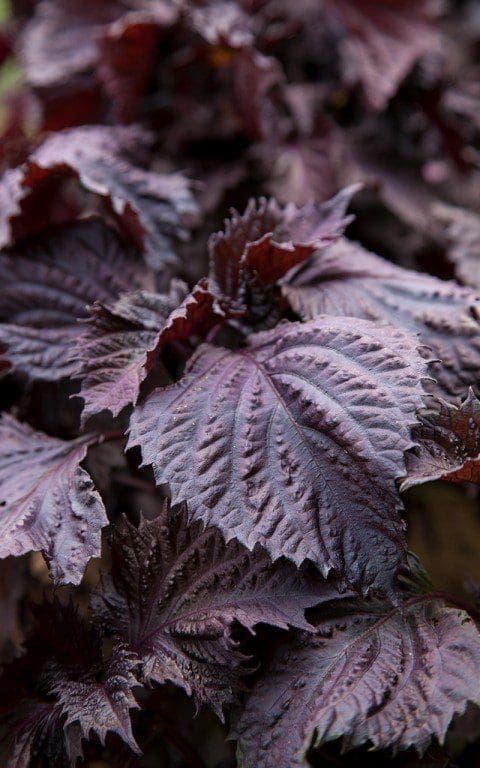 Purple shiso
INGREDIENTS
350g courgette, coarsely julienned or grated
2 large sweetcorn cobs, shucked
1 medium red onion, about 175g
8 large and 6 small shiso leaves
Sea salt
Sunflower or rapeseed oil
Batter
175ml iced sparkling water
65g self raising flour
65g cornflour, plus 1 tablespoon more
A few ice cubes, 4 to 6
Dipping Sauce
3 tablespoons white miso
3 tablespoons lemon juice
Finely grated zest of half a lemon
1 tablespoon maple syrup or lightly flavoured honey
1 tablespoon mirin or sake
Makes about 12, enough for 6 people
METHOD
Put the courgette into a sieve and sprinkle lightly with sea salt. Use your hands to mix the salt in well and then leave to drain over a bowl for 20 to 30 minutes.
To make the dipping sauce, put the miso and lemon juice in a small bowl and stir well. Add the maple syrup or honey and mirin and stir well again. Add the lemon zest and stir again. Transfer to a serving bowl.
Using a very sharp knife shave the corn kernels from the cobs over a bowl. Slice the onion in half down the centre and then cut each half across the grain into crescents the thickness of a coin. Separate the onion crescents and add to the bowl of corn.
Take small handfuls of the salted courgette and squeeze hard to remove as much water as possible. Add to the bowl of corn and onion. Cut the eight large perilla leaves into fine ribbons and add to the bowl. Using your hands, mix all of the vegetables and herbs together until the courgette strands are separated and all is well combined. Sprinkle over the one tablespoon of cornflour and toss with your hands again until everything is lightly coated. This helps the vegetables to stick together when fried.
Pour the oil into a medium-sized (25cm), deep-sided frying pan to a depth of about 2cm. Put over a medium heat until the surface begins to shimmer. Turn the heat down a little and make the batter. Put most of the iced water and some ice cubes into a bowl. Sift the two flours onto the water and then quickly mix together. The batter should be the consistency of single cream and just coat your finger. If it is too thick add more iced water. Turn the heat up under the oil and, when just smoking, test the temperature with a few drops of batter. It should sink and then immediately rise to the surface and puff up.
Pour two thirds of the batter over the vegetables and mix quickly until everything is lightly coated. Add a little more if you think it needs it. However, you may not need to use it all. The vegetables should not be swimming in batter. Using a tablespoon and a fork, take a scant tablespoonful of the vegetable mixture and hold it above the bowl, allowing most of the batter to run off. Then slowly place the vegetables into the hot oil, using the fork to quickly spread them out so that you have a thin fritter about 8cm in diameter. Now wait 30 seconds for the underside of the fritter to cook, before using two forks – or chopsticks – to carefully turn the fritter over. Cook for another 30 seconds until the other side is cooked and lightly coloured. In a medium-sized pan you should aim to cook no more than two fritters at a time, always allowing the oil to return to temperature before frying the next batch.
Remove the fritters from the oil with chopsticks or a slotted spoon, and hold them above the pan to allow as much oil to drain from them as possible, before transferring to a hot plate lined with absorbent paper. You can now either choose to serve them as they come from the pan or put the plate into an oven heated to 100°C to keep warm, while you cook the rest of the mixture.
When all of the mixture is cooked transfer the fritters to a clean plate. Quickly dip the remaining shiso leaves in the batter and fry until crisp. A matter of seconds. Remove and drain quickly on absorbent paper, then use to decorate the plate of fritters. Serve immediately with the dipping sauce.
Recipe & photographs: Huw Morgan
Published 11 August 2018
When I was a child we spent every summer holiday in Wales, staying with my maternal grandparents who lived near Gowerton, the gateway to the Gower peninsula. When the weather was good we would head straight to Horton beach after breakfast, with crab paste and ham sandwiches wrapped in foil, hard-boiled eggs, bags of crisps and a tin of Nana’s homemade Welsh Cakes and pre-buttered slices of Bara Brith to see us through the day.
My grandfather was a Baptist minister, so on Sundays the day started differently. Nana was up even earlier than usual, housecoat on and getting lunch (or dinner as we called it in those days) prepared before we all headed off to chapel. All of the vegetables came from the back garden, which was given over entirely to food; potatoes, runner beans, peas, broad beans, lettuces, onions, beetroot, carrots, parsnips, swedes, cabbages and, of course, leeks. A tiny greenhouse was full to bursting with tomatoes and cucumbers. At the front of the house, the long bed running down one side of the path was filled with Dadcu’s dahlias, tied to bamboo canes in regimented rows, a cacophony of colour in every shape available, like sweeties. On the other side of the path an assortment of exotics planted into the lawn, including a phormium, a bamboo and a pampas grass, provided me and my brother with a playtime jungle.
The chapel was just on the other side of the street so, as soon as the service was over, Nana would head back to the manse to get dinner on the table for Dadcu’s return. Although a full roast dinner was not unusual on these sweltering summer Sundays, the meal I remember most clearly, and which was my favourite, was cold boiled ham with minted new potatoes and broad beans in parsley sauce. I loved the combination of the cold, salty meat, buttery potatoes and creamy beans and would ensure I got a little of each on every forkful.
Thinking back to this garden now I realise that, although Dad also grew veg in our North London garden, it was Dadcu’s kitchen garden where I first really understood the connection between plant and plate. My brother and I would be sent out to help dig potatoes, getting a rush of excitement as the first pearly tubers were heaved from the rich, dark soil, scrabbling to grab them and put them in the bucket. Pulling carrots straight from the ground I would think of Peter Rabbit, although I was sure that, unlike Mr. McGregor, the Revd. Jones did not have a gun. And often I would sit on the back step with Nana and Mum easing broad beans from their pods, marvelling at their cushioned, fleecy protection and enjoying the plonking noise they made as they fell into a plastic bowl at our feet. I never questioned that what we ate at mealtimes had been grown just yards from the dining table, nor that there was work required to get it there. I think that even then those vegetables tasted better to me because they were so fresh and I had helped get them to table.
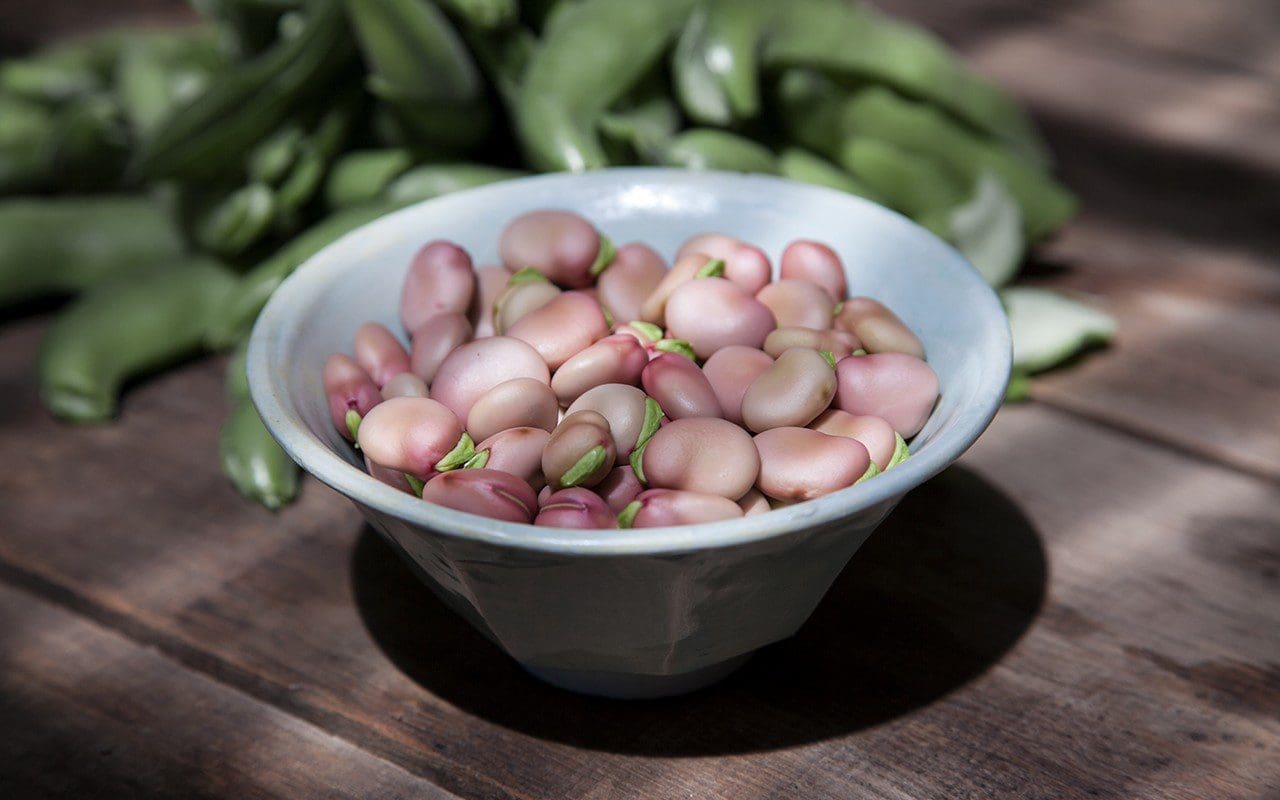 Broad Bean ‘Karmazyn’
Although I can’t profess to be as good a vegetable gardener as my grandfather, now that we have a kitchen garden of our own, I find it hard to buy anything other than lemons, melons or peaches from the local greengrocer in the summer. The feeling of being able to assemble a meal entirely from vegetables you have grown, harvested and prepared yourself has no equal. People say that vegetable gardening is hard work, and I agree, but I don’t understand why this is seen as a negative. The time, care and nurturing that goes into producing your own food gives you a connection to it that is as nourishing as the food itself. When you understand the hard work involved in growing, tending and harvesting you stop taking food for granted and get some perspective on how much food should really cost.
So, to get back to the broad beans. We have grown two varieties this year. An unnamed heritage variety with very decorative, dark pink flowers and green beans from a late autumn sowing, and a variety named ‘Karmazyn’, with white flowers and beautiful rose pink beans, which were sown in March. Surprisingly, the later sown ‘Karmazyn’ have been the quicker to mature. Earlier in the season, as it became apparent that the plants were starting to overtake their autumn-sown neighbours, I was concerned that we were going to have a major glut when both varieties came together, but it now appears we will have a good succession from pink to the green. Close by the artichokes are producing almost faster than we can eat them. ‘Bere’, the variety we grow, is spiny with little meat at the base of the leaves, but the hearts are a good size, sweet and strongly flavoured.
Due to their synchronised production in the garden it is no surprise that broad beans and artichokes are commonly cooked together, with a variety of recipes to be found in French, Italian, Greek, Turkish and other Middle Eastern cuisines. What is common to many of them is the generous use of lemon and fresh herbs. This recipe is very loosely based on an Elizabeth David recipe for Broad Beans with Egg & Lemon from Summer Cooking, which would appear to be of Greek origin. Here the boiled vegetables are dressed with a light, creamy, herb-flecked sauce. A more refined and delicate version of my dear Nana’s beans, although just as good with a couple of slices of cold, boiled ham.
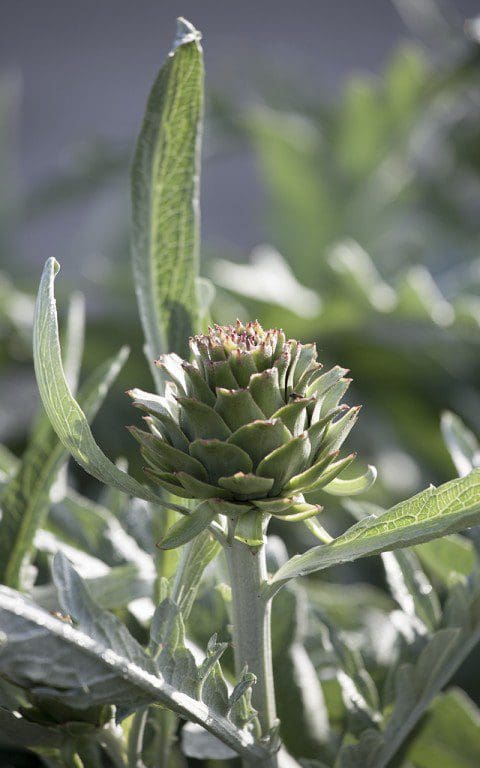 Artichoke ‘Bere’
INGREDIENTS
Artichokes, 4 small per person
Broad beans, I kg in their pods to yield about 250g
Zest and juice of 1 lemon (reserve 1 tablespoon of juice for the sauce)
Sauce
Butter, 25g
Garlic, a small clove, minced
Cornflour, 1 teaspoon
The yolk of a small egg, beaten
Single cream, 4 tablespoons
Tarragon or white wine vinegar, 1 teaspoon
Lemon juice, 1 tablespoon
Cooking water from the beans, about 200 ml
Fennel, 1 tablespoon finely chopped
Dill, 1 tablespoon finely chopped
Tarragon, 1 tablespoon finely chopped
Salt
Serves 4
METHOD
Bring a large pan of water to the boil. Cook the artichokes for 15-20 minutes until the point of a sharp knife can be easily inserted into the base. Drain the artichokes, run under a cold tap for a moment and then allow to drain and cool completely.
Put the lemon juice in a small bowl. Cut the stalks from the artichokes and gently remove and discard all of the leaves until you reach the choke. Carefully scrape out the choke with the edge of a teaspoon. Tidy the hearts with a sharp knife removing any tough green bits. Rinse in a bowl of water to remove any clinging choke hairs. Dip each heart into the lemon juice as you go and put to one side in a bowl.
Bring a fresh pan of water to the boil. Throw in the beans and cook until just done. Freshly picked ones take only 2 or 3 minutes, older beans will take a little longer and may need to be slipped from their tough outer skins after cooling. When cooked remove 200ml of the cooking water and keep to one side. Then drain the beans and immediately refresh in cold water. Drain and reserve.
To make the sauce, in a pan large enough to take the artichokes and beans, melt the knob of butter until foaming. Take off the heat, put in the garlic and swirl the pan around to cook it lightly and flavour the butter. Still off the heat put in the cornflour and stir well. Add the cream and stir again. Add the egg yolk and stir once more. Then add about 150ml of the reserved cooking water, the vinegar and lemon juice. Season with salt. Put the pan back on a low heat and stir continuously until the sauce starts to thicken. Taste to ensure the cornflour is well cooked and adjust the seasoning. The sauce should be glossy and the consistency of single cream. If it is too thick loosen with some of the reserved cooking water. Put in the chopped herbs and lemon zest and stir through. Put the artichokes and broad beans into the pan and stir gently but thoroughly to ensure that all of the vegetables are well coated with the sauce.
Transfer to a serving dish, and strew some more herbs and lemon zest over the top. Serve warm or at room temperature.
Good enough to eat simply on its own or on toast, this is also a perfect side dish for poached salmon or trout, and cold roast chicken.
You can use any combination of soft green herbs that you have available. Chervil is particularly good, as are parsley and mint. For a more substantial side dish a couple of handfuls of the tiniest, boiled new potatoes make a fine addition.
Recipe & photographs: Huw Morgan
Published 23 June 2018
