ALREADY REGISTERED OR A PAID SUBSCRIBER? SIGN IN
ALREADY A PAID SUBSCRIBER? SIGN IN
ALREADY A PAID SUBSCRIBER? SIGN IN
ALREADY A PAID SUBSCRIBER? SIGN IN
ALREADY A PAID SUBSCRIBER? SIGN IN
ALREADY A PAID SUBSCRIBER? SIGN IN
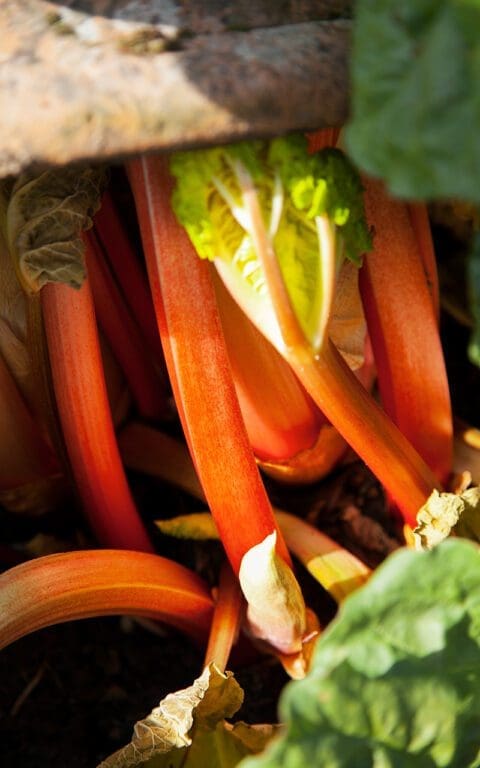
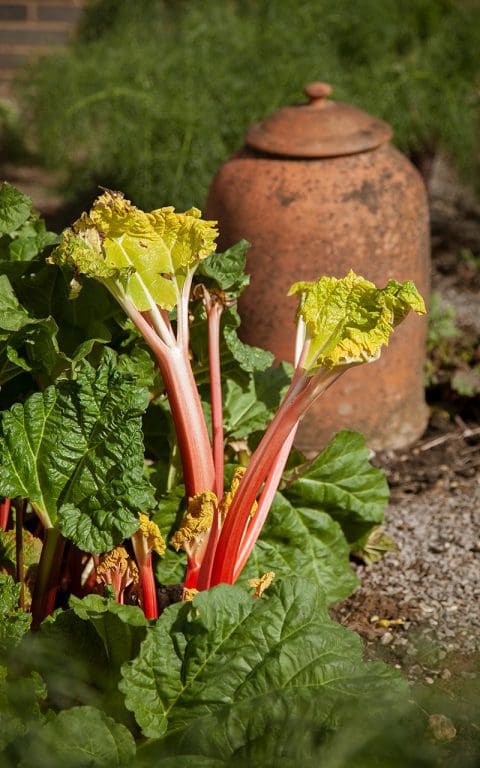
We put the terracotta forcers over the crowns of ‘Timperley Early’ at the end of January and over the variety named ‘Champagne’ at the end of March, although it probably should have been a little earlier. Despite the fact that the ‘Timperley Early’ would have been good weeks ago, there has a lot been going on in life and we just haven’t had time to pick it. The stems and emerging foliage of both have now pushed the lids off the forcers and exposure to light has been threatening to undo all of the good that forcing does for vibrancy of colour and flavour. Consequently, we have a rhubarb glut and, with plenty already cooked and in the freezer, part of my recipe challenge for this week was to answer the repeating question, ‘So, what else can you do with rhubarb?’.
When I scrolled past a mouthwatering image of Diana Henry’s Luscious Lemon Bars (thickened lemon curd on a shortcake base) on Instagram last week I thought they would adapt well to the sourness of rhubarb and so compared a number of different recipes to get a feel for proportions before alighting on one which sounded simple, foolproof and delicious. I made a couple of adjustments, substituting ground almonds for some flour in the shortbread base and replaced the flour in the custard topping with cornflour. All of the other ingredients, proportions and cooking method were as per the original recipe.

On Thursday, in between ferrying aubergines, peppers and chillis to the polytunnel, watering everything in pots, and doing anything requiring the pair of hands that we’ve been missing after Dan’s hand surgery last week, I managed to get a tray of these luscious rhubarb bars into the oven. Except that is not what came out. Through the mysterious alchemy and chemistry of cooking what emerged was something completely different. A layer of buttery, crumble topping above a firm custard with a thin layer of jammy rhubarb in the middle. Though delicious they were not what I had imagined and clearly needed more work to produce what I had in mind.
In the knowledge that cooking, photographing and writing a recipe in one day is already quite a tall order, I had to come up with another rhubarb recipe overnight. I thought, ‘Keep it simple.’ and stuck with rhubarb curd instead. No baking, just measuring and stirring.
After consulting books and websites I decided to adapt a familiar recipe I have cooked many times, substituting rhubarb juice for orange in Sam & Sam Clark’s curd recipe for Seville orange tart.
I finally settled down to cooking in the late morning and immediately the contemplative focus of cooking calmed my busy mind. The simplicity of just four ingredients and one pan. The repetition and order of cracking and separating eggs, cutting butter into cubes, weighing out sugar and measuring rhubarb juice. And then the close attention required to cook it carefully to ensure that the eggs don’t curdle.
It took over half an hour for the curd to start to thicken over the lowest heat possible and as, I stood there in the warmth of the range intently stirring, completely focussed on the activity before me, my mind went into the entranced meditative freefall that cooking shares with gardening.
Makes around 2 x 200ml jars
140g caster sugar
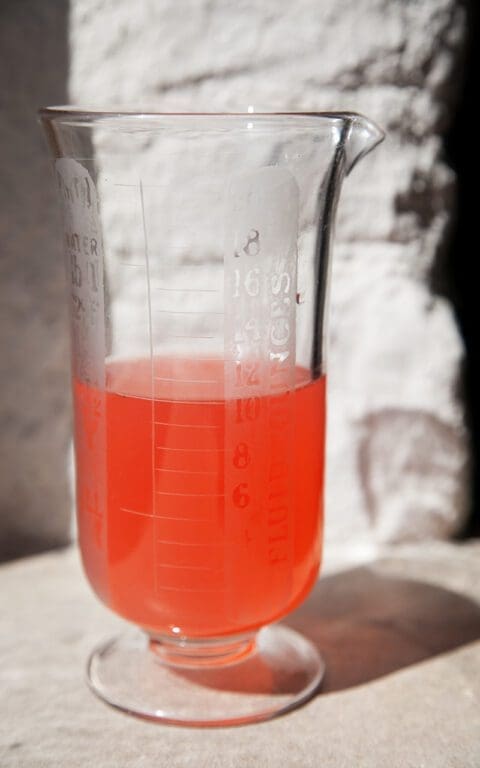
170ml rhubarb juice (see below)*
170g unsalted butter, cubed
4 large egg yolks
2 large eggs
*The rhubarb juice in this recipe is a by-product of rhubarb poached to go into the freezer. Around 500g of rhubarb should give you enough juice for this recipe. Cut the rhubarb into short lengths. Put them into a non-reactive pan with a tight-fitting lid and put in a medium oven (about 160°C) for around half an hour until soft. Strain off most of juice. Keep in the fridge and use in place of lemon juice or vinegar. It is particularly good in spring salad dressings.
Lightly beat the egg yolks, eggs and sugar together in a medium pan. Add the rhubarb juice and butter.
Put the pan over a very low heat and stir continuously until the butter melts and the mixture starts to emulsify and becomes glossy and thick. Do not be tempted to turn up the heat or it will curdle. Once it attains the consistency of custard pour into warm, dry, sterilised jars. Seal, leave to cool and then refrigerate. Keeps in the fridge for up to two weeks.
The flavour of rhubarb is delicate, so don’t be tempted to add other flavourings to this curd or they will overwhelm it.
Delicious on warm scones, mixed with poached rhubarb and whipped cream or as a filling for a tart base.
Recipe and photographs: Huw Morgan
Published 24 April 2021
Once upon a time I had a very sweet tooth. Each Christmas Eve, close to midnight, as my overexcited brother and I lay feigning sleep in our bunk beds, dad would come and lay something heavy at our feet. We knew exactly what it was, and it called on all our reserves of self-control and superstition to prevent ourselves from peeking until it started to get light. When we did – and my younger brother was always the first to crack – we would haul the stockings (actually dad’s nylon football socks) up the bed and start to unpack them. Always alongside this stocking was another made of net. A Cadbury’s Christmas selection pack containing the usual suspects – Mars Bars, Twix, Milky Way, Marathon. We would slowly eat our way through these on Christmas morning and still somehow have room for lunch.
As a child I was always more interested in what was for ‘afters’ than the main event and my favourites usually involved chocolate, whether it was Bird’s Angel Delight, mini rolls, steamed chocolate pudding, Viennetta ice cream or choc ices. At around the age of 9 I started baking my way through the Marguerite Patten recipe cards mum had collected and which sat in a specially made plastic box on top of the fridge freezer. Once I had become proficient with scones, jam tarts and sponges, I quickly moved on to Devil’s Food Cake, chocolate Swiss Roll, Black Forest Gateau and, eventually, eclairs and profiteroles. My pièce de résistance, however, was Marguerite’s Pots au Chocolat, which to me looked impossibly chic in the photo on the front of the card. The dark, velvet mousse in simple, white porcelain pots, decorated with elegant quills of dark chocolate. It made me feel very grown up the first time I served them. Looking back for that recipe now I find that they contained melted marshmallows. Certainly not the purist’s idea of this classic French dessert, but one that, as a child, I was more than happy to accommodate.
As the years passed my palate became more refined. I graduated from Cadbury’s Dairy Milk to Bournville, from milk to dark chocolate Bounty bars and got a taste for Fry’s Chocolate Creams from my dad. (Mint, since you ask.) At university, I discovered Swiss and Belgian chocolate before, in my mid ‘20’s, experiencing a revelation. I had moved into a house on Bonnington Square in Vauxhall and, unbeknownst to me, my new landlady was about to change my view of chocolate forever. She was Chantal Coady who, in 1983, had opened Rococo Chocolates on the King’s Road. There were four of us renting rooms there and every month Chantal would bring home a box of ‘bin ends’, broken bars and trial new products from the shop and invite us for a chocolate tasting.
This may conjure images of a craven orgy of chocolate bingeing, but quite the contrary. The room was candle lit, a fine cloth on the dining table and a small selection of wines and spirits were available to be sipped in recommended partnerships with some of the ‘sweets’. Chantal would break small pieces of chocolate onto plates and pass them round. We were instructed to place the chocolate on our tongues and to allow it to melt slowly – no chewing! – and to describe the flavours we were tasting. Chantal explained how fake vanilla, hydrogenated oils and sugar destroyed the true nature of chocolate and would get us to compare my childhood Dairy Milk to a high cocoa content milk chocolate to understand what she meant. She taught us to appreciate it like fine wine and I have never looked back.
Christmas always calls for chocolate, but as I have aged my taste for sweet things has tempered and I have decreased the amount of refined sugar I eat. I rarely order pudding in restaurants these days unless I am prepared both for the initial sugar rush and the almost immediate headachy comedown. At home, dessert usually takes the form of stewed fruit or a handful of figs or dates, rather than anything sweeter. But it’s Christmas and I want chocolate, so I worked on this dessert recipe without refined sugar.
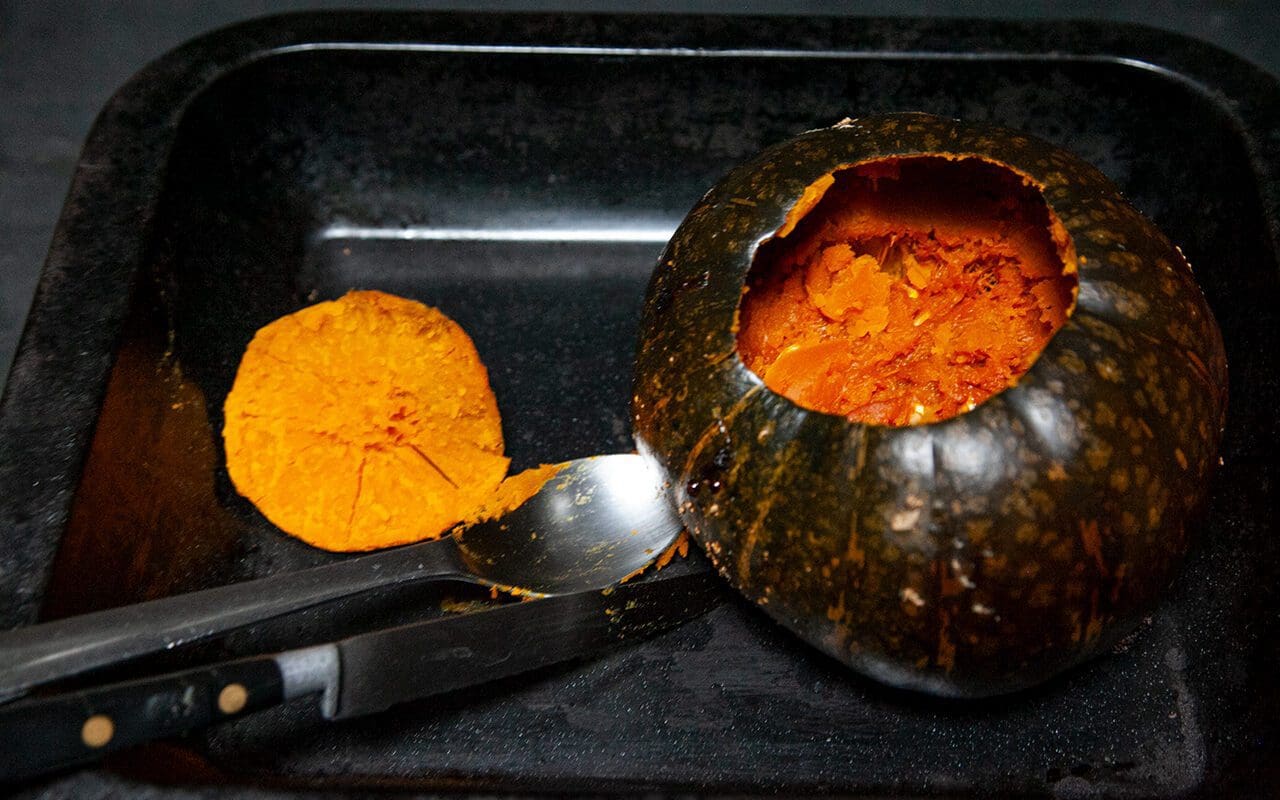
The combination of pumpkin and dates in the filling means that it needs no further sweetening, although if using chocolate with more than 82% cocoa solids you might want to and add honey or another sweetener to taste. If possible, use a drier-fleshed variety of pumpkin, otherwise you may need to drain the flesh before using as you don’t want the filling to be too wet. The Kabocha pumpkin I use has the texture and flavour of chestnuts, which makes it particularly truffle-like.
Chantal was also a pioneer in the use of unexpected flavourings and this tart is also the perfect foil for your favourites. To my knowledge, she was the first to make cardamom flavoured chocolate, to which she introduced me and which is my habitual choice. However, you can infuse the milk and cream with any winter spice or herb you like. Bay is very good (a couple of leaves), or try a sprig or two of rosemary or thyme, a spoonful of ground fennel seeds or even some crushed juniper berries. A teaspoon of finely ground espresso coffee heightens the bitterness. Half a teaspoon of chilli powder warms the mouth and accentuates the flavour of the chocolate, while a few drops of rose or rose geranium oil add a different level of perfumed refinement. The addition of a couple of tablespoons of alcohol – rum, for instance – makes it definitely adults only. Although we have been eating it plain this week, for a truly festive plate this would be particularly good with brandy-soaked prunes or figs or pears poached in white wine. Definitely a chocolate dessert for grown-ups, not children.
Serves 12
Pastry
75g hazelnuts
150g plain flour
1.5 tablespoons honey or maple syrup
75g cold butter
1 large egg, beaten
A pinch of salt
Filling
200g cooked pumpkin
100g dates, chopped
100ml milk
250ml double cream
3 large eggs
200g dark chocolate (minimum 70% cocoa solids)
Seeds from 3 cardamom pods, finely ground or other chosen flavouring
You will need a 23cm round, fluted tart tin with a removable base.
Set the oven to 180C.
Put the hazelnuts into a small baking pan and put into the oven for 10 minutes until lightly toasted and fragrant. Remove and allow to cool, then put into a food processor and process into a medium-fine flour. Do not over process or you will end up with nut butter.
Add the flour to the hazelnuts and pulse mix. Cut the cold butter into 1cm cubes and add to the flour and nuts. Pulse again until the mixture resembles breadcrumbs. With the motor running slowly add the beaten egg and honey until the dough comes together. Stop the machine immediately and quickly remove the dough. It will be very soft. Form into a ball, wrap and put into the fridge for 30 minutes.
When the pastry has chilled, roll it out carefully on a floured surface until large enough to line the tart tin. The pastry is very short, so work quickly and carefully. However, if it falls apart just fit the pieces to the tin and press together gently to join. Trim the excess pastry from the rim allowing a little extra for shrinkage, line with greaseproof paper and fill with baking beans. Bake blind for 20 minutes. Remove the baking beans and greaseproof paper and return to the oven for a further 5 minutes until it looks dry. Remove from the oven and allow to cool.
To make the filling heat the milk and cream in a small pan. Grind the cardamom seeds to a fine powder in a mortar and pestle and add to the milk. As soon as the milk comes to the boil remove from the heat, add the dates put a lid on the pan and leave to stand until cool.
Chop the chocolate coarsely and put into a heatproof bowl. Put into the oven for about 10 minutes until almost melted. Remove from the oven and then beat with a fork to ensure that all of the chocolate is melted.
Put the cooled dates and cream, eggs and pumpkin into the food processor and process until smooth. Add the chocolate and mix until fully combined. Pour the mixture into the prepared pastry case and bake for 30-40 minutes until the mixture just starts to crack at the edges, but still has a little wobble in the centre.
Leave to stand for 20 minutes before removing from the tin and transferring to a serving plate. Decorate with sieved icing sugar as you wish.
Serve warm.
This reheats and freezes well.
This can easily be made suitable for vegans, using coconut oil and sugar in the pastry. For the filling substitute the milk with vegetable milk, the cream with an equal weight of silken tofu (although do not heat this with the milk). Substitute the eggs in both pastry and filling with chia ‘eggs’ (1 tablespoon ground chia seed mixed with 3 tablespoons cold water for each egg).

Recipe & photographs: Huw Morgan
Published 19 December 2020
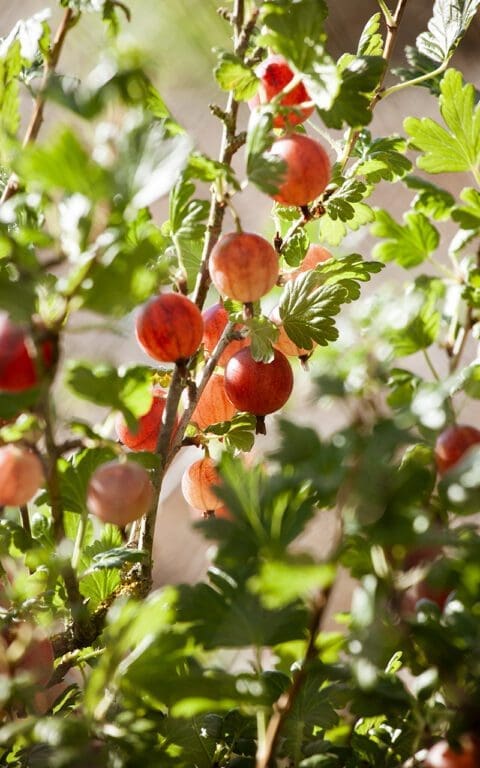
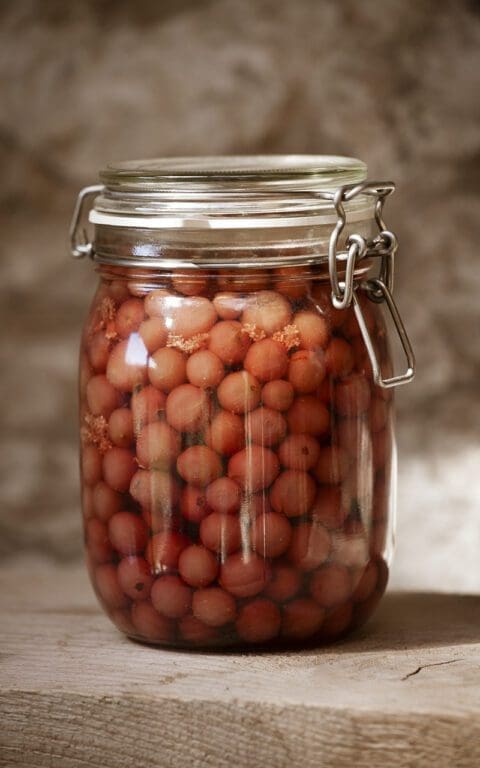
A tsunami of soft fruit is about to break. The gooseberries are first and so this weekend I’ll be crouched on a milking stool in the cool shade of the blackcurrant bushes picking ‘Hinnomaki Green’. As I pick, the blackcurrants brushing my shoulders will be a constant reminder that soon there will be consecutive weekends of picking. We have three varieties, each with different fruiting times to extend the season and the harvest. Last year around this time I found our dear friend Sophie (AKA Champion Picker) among the bushes at daybreak on a post heatwave misty morning, picking and breakfasting in tandem. A whole bush stripped before coffee time is par for the course for Sophie. This year it will be down to me, Dan and the lucky birds.
The gooseberry ‘Hinnomaki Red’ take a little longer to reach maturity than the green, which is a relief, since a Kilner jar full of the remainder of last year’s harvest has been judging me silently from a shelf in the pantry for a while now. We always reach this point in the year when the approaching harvest starts to throw a very different light on the frozen ends of last year’s crop in the freezer. A quick stock take this week revealed two half carrier bags full of gooseberries (green) and blackcurrants respectively, a huge Tupperware full of redcurrants and damsons. Just enough to stew for a week of breakfasts, unlike last year’s June’s freezer clearance which resulted in a memorably messy and sticky summer’s day making damson ketchup, damson chutney, damson shrub and damson fruit leather, again with Sophie, and other willing helpers.
Now that the kitchen garden is beginning to produce in earnest we are really missing our regular weekend housefuls to help harvest, prepare and cook food from the garden together, then share it at a large and usually raucous table late into the evening.
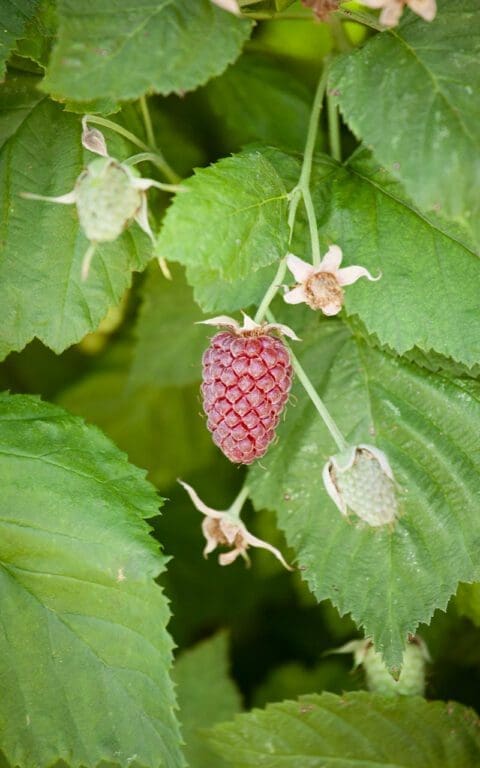
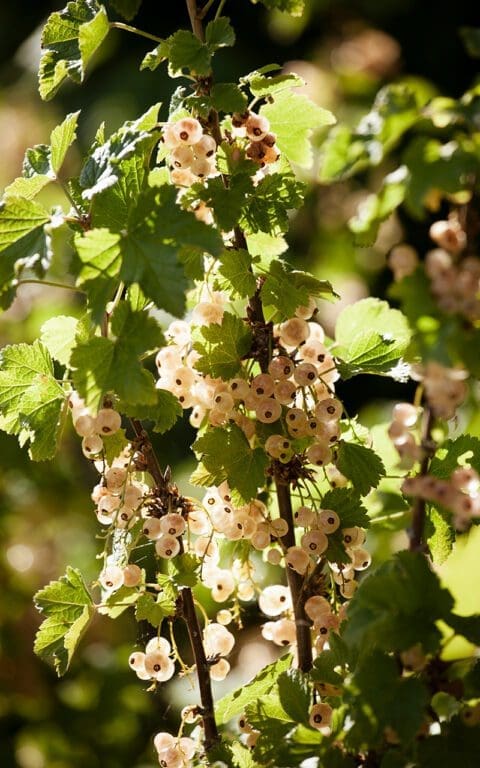
The absence of visitors in this unusual year has also meant that I have found far less reason to make puddings in recent months. When we do end a meal with something sweet it is invariably with some variety of stewed fruit and a spoonful of yogurt, sometimes cream. However, with that jar of red gooseberries on my conscience, a quick pass through the kitchen garden revealed that the whitecurrant and tayberry were dripping with jewel-like fruit, and a summer pudding of this and last summer’s fruits started to materialise. Sweetened with some elderflower cordial made last week and using up the end of a stale loaf of bread that was consigned to the freezer for breadcrumbs several weeks ago and is now taking up valuable space. Space that will very soon be filled by a new generation of soft fruit.
INGREDIENTS
750g mixed soft fruit – raspberry, blackcurrant, strawberry, gooseberry, bayberry, loganberry, redcurrant, whitecurrant
3 tablespoons elderflower cordial
3 tablespoons light honey or caster sugar
A couple of heads of elderflowers
7 slices 1cm thick of slightly stale good white bread
METHOD
Put any fruit that needs cooking (blackcurrants and gooseberries) into a lidded pan on a very low heat with two tablespoons of water and the honey or sugar. Cook until they start to burst and release their juices. Remove the pan from the heat and add the rest of the fruit. Remove the elderflowers from their umbels by dragging the tines of a fork through them over the pan of stewed fruit. Stir, return the lid and leave to stand until cool.
Cut a circle from one slice of bread to fit the bottom of a 1 litre pudding basin. Cut all but two of the remaining slices of bread into triangles of the same height as the pudding basin and use to line the inside of the basin. Fill any gaps with smaller pieces of torn bread. Once the basin is lined pour all of the stewed fruit (reserving three tablespoons) into the cavity. Press down with the back of a metal spoon and smooth level. Cut the remaining slices of bread into as few pieces as possible to make a lid that fits on top of the stewed fruit.
Take a side plate the same diameter as the top of the basin and put it on top of the pudding. Then secure the plate well. I use extra strong elastic bands or well-tied string to exert pressure on the pudding, but you can weight the plate down with a heavy jar. Stand the pudding basin in dish to catch any juice and put in the fridge overnight or for a minimum of 4 hours. Put the reserved stewed fruit into a small pan with a couple of tablespoons of water and one of honey or sugar and bring to a simmer. Press through a sieve and reserve.
When ready to turn out slide a blunt knife between the pudding and the basin until it is loosened. Take a deep serving dish and invert it over the pudding basin. Holding the basin and plate tightly together with both hands invert the whole lot and shake gently but firmly. You should hear the pudding slip out of the basin and onto the plate with a satisfying slurp. Carefully lift off the basin. Pour over the reserved fruit sauce. Decorate with more fruit if you like and serve with cold pouring cream.
Recipe and photographs: Huw Morgan
Published 27 June 2020
Raymond Lewis, the farmer who lived here before us, was born in this house shortly after his parents moved here in the early 1930’s. Although he raised cattle, his parents had been market gardeners and it is our nearest neighbour, Glad, who has been the fount of all knowledge regarding how the land here was used before we arrived. She too was born here, in the house just above ours on the other side of the lane, and went to school with Raymond. She has a prime view over our slopes.
It was she who told us that we were planting our new orchard on the site of the Lewis’ old orchard, that the hollies by the Milking Barn were harvested each year for wreaths destined for the Christmas Market in Bath and that the extra-scented, large violets we found growing everywhere were wrapped in leaves and tied with cotton for spring posies. When we expressed amazement at finding ‘wild’ gooseberries and redcurrants in our farthest hedgerow, Glad said that it bordered the field where the soft fruit had been grown and so we realised that they had arrived through the actions of thieving birds.
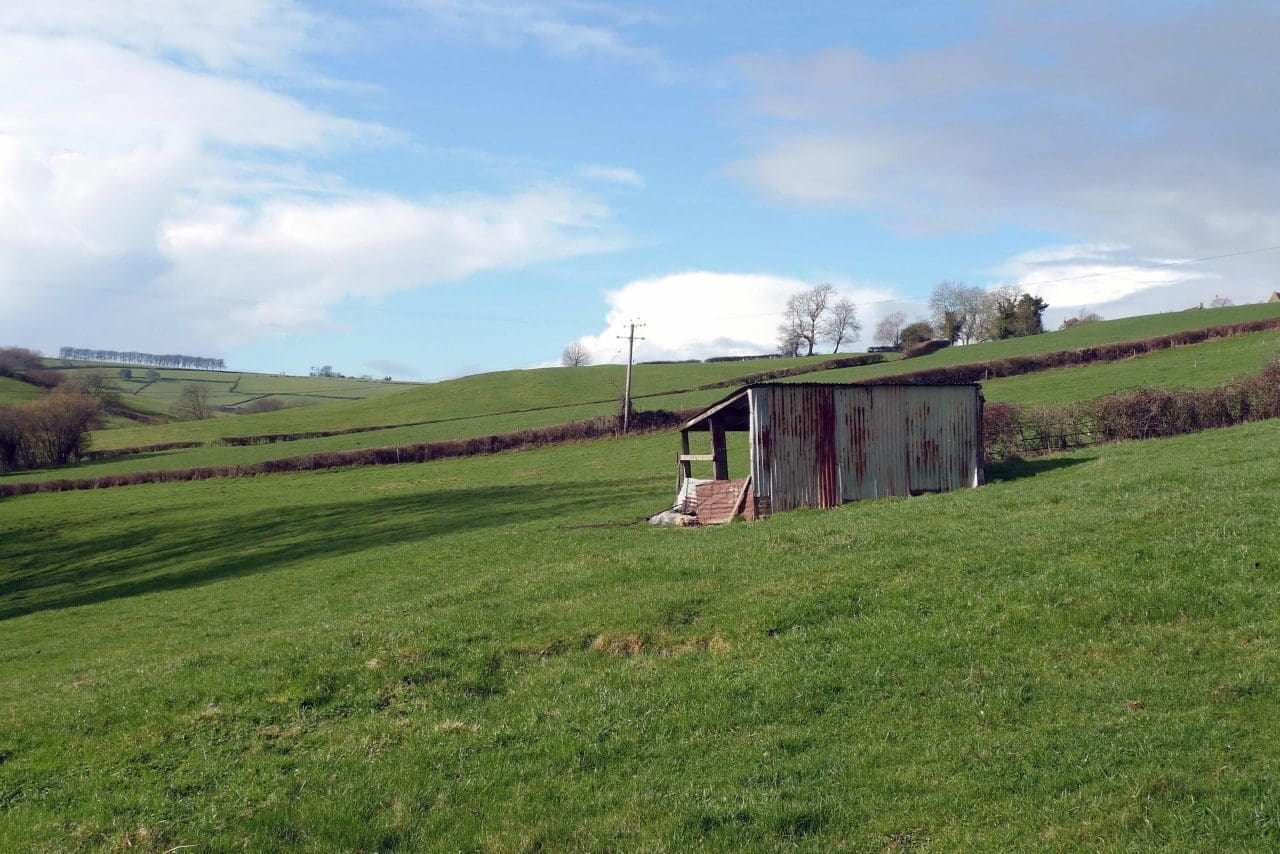
Another piece of growing history she imparted was to do with the ramshackle shed half way down the field in front of the house. We had been charmed by this little structure from the first time we saw it, but couldn’t work out what it had been used for. Made from a motley collection of wood and reclaimed corrugated tin sheeting and open on two sides it is barely high enough to stand up in. It evidently hadn’t been used by Raymond’s cattle, and it was too far from the house to have had any obvious purpose such as a vegetable or wood store. The clue to its use was revealed the winter after we arrived, when clearing the mess of bramble from the hedge that runs up behind it.
There in the undergrowth were a dozen or so terracotta rhubarb forcers. Unfortunately all but a couple were broken beyond use, but it was suddenly clear what the little shed had been used for. We asked Glad at the first opportunity and she confirmed that it had been ‘the rhubarb forcing hut’, which is how we have referred to it ever since. We have often imagined Mr. and Mrs. Lewis in there in deepest winter, inspecting the covered crowns by candlelight (as they still do in the Yorkshire rhubarb triangle to prevent the stalks colouring) and then carefully harvesting armfuls of the pale pink stems to take to market. Now it provides shelter for the sheep that graze our pastures and has sometimes protected us from sudden summer downpours when the water runs off the roof in sheets.

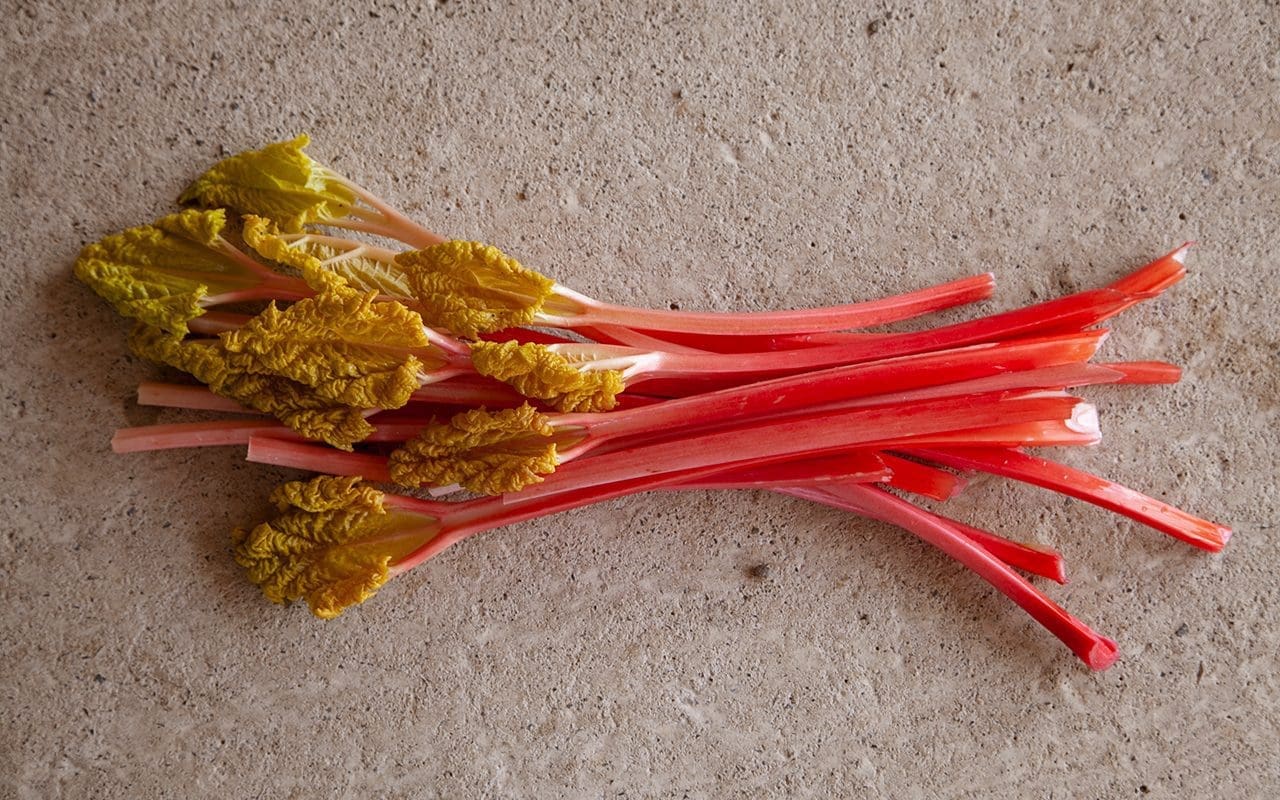
We have three varieties of rhubarb in the Kitchen Garden here which take us through spring and early summer; Timperley Early, Champagne and Victoria. The first is, not surprisingly, said to be the earliest, and has always been so for us. We have found it possible to force it for stems in February. The other two are later and tend to come together if left uncovered, but by forcing one of them and leaving the other – on a yearly rotation – we can have rhubarb until June. Beyond that and it can become a little long in the tooth and green to eat fresh, but is still perfectly serviceable for jam. When forcing rhubarb it is important to only cover part of the crown and, when ready to harvest, to take the slenderest stems and leave the strongest to feed that part of the plant for the future. To allow it to rebuild its reserves you should then choose a different part of the crown to force the following year.
The flavour of forced rhubarb is so subtle that it needs the simplest of treatments to show it off to its best advantage. Most often I just roast it and serve with a creamy accompaniment of buttermilk pudding, pannacotta or, simplest, a mixture of whipped double cream and creme fraiche. I find orange, the customary partner of rhubarb, overwhelms this early season delicacy. However, judicious use of thyme or rosemary adds an unexpected counterpoint that suits this fruit that is actually a vegetable. It also has an affinity with the aniseed used here, but it’s not essential, so leave it out if you prefer.
The pastry is based on a recipe by Alice Waters of Chez Panisse, and is a fast and easy way to achieve a deliciously flaky result. Its success relies on using the best quality butter and flour and the very lightest of touches to ensure the pastry stays as cold as possible. If you are using open grown rather than forced rhubarb you will need to increase the quantity of sugar in the filling by at least 25g, depending on how tart you like your rhubarb.
200g plain flour, Tipo 00 preferably
150g unsalted butter
1 teaspoon icing sugar
A large pinch of fine sea salt
8 tablespoons iced water plus a couple more
500g forced rhubarb, trimmed weight
75g caster sugar
1/2 teaspoon vanilla essence
3 tablespoons ground almonds
1 teaspoon aniseed
2 teaspoons icing sugar
1 teaspoon water
2 tablespoons melted butter
Stalk trimmings from the rhubarb
5 tablespoons water
3 tablespoons caster sugar
Take the butter, still in its wrapping paper, and put it in the freezer for 20 minutes to harden.
Sift the flour into a bowl with the icing sugar. Add the salt. Remove the butter from the freezer. Unwrap about 2/3 of the block and, holding the end of the block in the paper, coarsely grate it onto the flour. To avoid grating your fingertips you may need to cut the very last of it into small pieces.
Using a sharp knife and rapid slicing and lifting movements cut the flour and butter together until the mixture resembles coarse gravel. The butter should be visible in a variety of different sizes, but few should be bigger than a pea.
Continuing to work as quickly as possible, sprinkle the iced water over the mixture 2 tablespoons at a time. Each time use the knife to mix the water into the flour and butter. When you have added all of the water the mixture should just start coming together, but there will still be dry flour visible. Use your fingertips to see it it feels like it will come together. If it seems too dry add another tablespoon or two of water – but no more – and mix through again. Then very quickly, using your fingers and not the palms of your hands, bring the dough together into a ball. Do not knead it or overhandle it. The dough should feel cold.
Lightly dust a piece of greaseproof paper about 40cm square with flour and place the dough onto it. Gently and quickly flatten the dough with the palm of your hand into a rough circle. Take a floured rolling pin and, using light, rapid movements, roll the dough out into a circle about 35cm in diameter, rotating the greaseproof paper in quarter turns after each pass. Reflour the rolling pin if it starts to stick. The pastry will be very short, so don’t worry about the edges cracking. Lift the greaseproof paper and dough onto a heavy baking sheet and put in the fridge for 20 minutes to chill.
Set the oven to 200°C (400°F, gas mark 6).
Cut the rhubarb into pieces about 8cm long. Put into a non-reactive (glass or ceramic) bowl. Sprinkle over the caster sugar and vanilla essence and toss together briefly. Leave to stand while the dough is chilling.
Remove the baking sheet from the fridge. Working quickly again, sprinkle the ground almond evenly over the pastry leaving a 5cm border. Arrange the rhubarb on top of the almond. You should have enough rhubarb for two layers. The first can be arranged somewhat haphazardly, and should use up any larger pieces. You may need to cut these in half lengthways to ensure they cook evenly. Retain the smaller stems for the top layer and arrange them more pleasingly.
Then, working around the circle, gently lift the edge of the pastry up over the rhubarb, folding, pleating and gathering as you go. Pinch it together quickly if any tears appear, since you want to keep the juices in as far as possible. Don’t worry too much about appearances though. You want to ensure that the pastry holds the rhubarb in place, but it is more important to get the chilled pastry into the oven quickly than for it to look primped and perfect.
In a small bowl put the aniseed or caraway seed, icing sugar and water. Stir until the sugar has dissolved. Add the melted butter and stir to combine. Brush this mixture generously over the pastry.
Put the tart straight into the oven and cook for about 40 minutes until the pastry is golden brown and the rhubarb bubbling.
While the tart is cooking put the rhubarb trimmings, water and sugar into a small pan. Bring to the boil, then simmer until the rhubarb has disintegrated and the liquid is syrupy. Strain the liquid off and, when the tart is cooked, gently brush this syrup over the rhubarb.
Serve warm with single cream.
Serves 8
Recipe and photographs: Huw Morgan
Published 23 March 2019
We are sorry but the page you are looking for does not exist. You could return to the homepage