ALREADY REGISTERED OR A PAID SUBSCRIBER? SIGN IN
ALREADY A PAID SUBSCRIBER? SIGN IN
ALREADY A PAID SUBSCRIBER? SIGN IN
ALREADY A PAID SUBSCRIBER? SIGN IN
ALREADY A PAID SUBSCRIBER? SIGN IN
ALREADY A PAID SUBSCRIBER? SIGN IN
ALREADY A PAID SUBSCRIBER? SIGN IN
Eleven years ago in this last weekend of October we arrived here on the hillside. It was a different place then. The house was damp, with a pink 1980’s bathroom, vinyl floral wallpaper and swirly carpets that hid a whole ecology of rot. It was a farmer’s house, so there were enough practical comforts. An old oil range, so we were warm once it was up and running and uPVC windows which kept out the weather, so we were happy. The house would be fine for a while, the real reason we were here lay beyond its walls and the land beckoned.
Grazed to the buildings by beef cattle, the trees had been cut back hard and the broken hedges were neatly flailed so as not to shade the grass. There were no concessions to anything but utility, but the views rolled on splendidly and without interruption. With the prospect also came exposure and, though we have become used to it now, when the wind blew that first winter, we woke to the house shuddering as if we were on the prow of a ship.
I knew immediately it would be wrong to plant out the view to provide shelter, but alongside the dream of finding this place came the long-term ambition to plant my own orchard. By the time the leaves were off the trees in the hedgerows, it was clear where it might be. Hunkered into the hill beyond the barns and stepping down the slopes in three parts to frame the landscape. I planted that first winter; a plum orchard on the higher ground where the earliest flowering trees would be least likely to catch the frost, West Country apples further down the slope and a group of pears to the west of the barns, where they would bask in sunshine and be afforded shelter from the easterlies.

The old adage goes, “You plant a pear for your grandchildren” and I’m pleased we moved quickly to get the trees in. A decade on and it is interesting to see what we have not had to wait that long to have learned. The pears that have done well in their huddle of shelter have grown into fine young trees, but their fruit is erratic, one year off and maybe another year on. On the fruiting years their habit of dropping all in one go over the course of a week when they are ripe has also proved problematic. The windfalls bruise and ripening is inconsistent in the branches, though the fruit still drops.
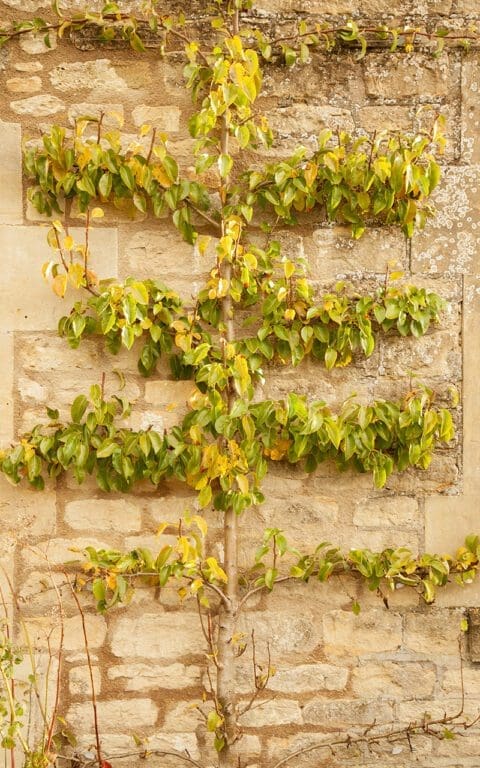
The pear trees we trained as espaliers on the south-facing walls of the kitchen garden have proven their worthiness in half the time. A half day applied training the limbs into position in combination with a late summer prune has given us reliable yields and an orderly backdrop. Pears that are ‘on display’ as it were and hanging neatly along branches to bask in sunshine also make better fruit. The fruit is restricted in number by the management of limbs where an unmanaged tree will, more often than not, be burdened with the flux of feast or famine. This year, we had a week of frost when the pears were flowering in April which saw all the blossom in the orchard trees lost, but we were able to fleece the trees on the protected walls.
We have four varieties, starting with ‘Beth’ in early August and they neatly hand over one to the other, ‘Beurré Hardy’, ‘Williams’ and the last and the best of them all, the delectable ‘Doyenné du Comice’. Doyenné (meaning ‘flavoured one’) was a mark of distinction when the first pear bearing the name, ‘Doyenné Blanc’ emerged in 1652. Several were to follow, but ‘Doyenné du Comice’ (1852) or the Comice Pear has been the most enduring. And with good reason, for the pear is of superlative flavour. In Joan Morgan’s excellent ‘The Book of Pears; The Definitive History and Guide to over 500 varieties’, she describes them thus: ‘Handsome, generous appearance with rich, luscious, very buttery, exquisitely textured, juicy pale cream flesh; sugary sweet yet intense lemony undertones, developing hints of vanilla and almonds’.
Of the four varieties on the kitchen garden wall ‘Doyenné du Comice’ is the lightest cropper, a four-tier cordon produces 15 to 20 fruit a year. You might think this would be enough, but they are so very good that, to mark our marriage five years ago, we planted two more cordons on the front of the house, where each new set of limbs marks time and increases our harvest.
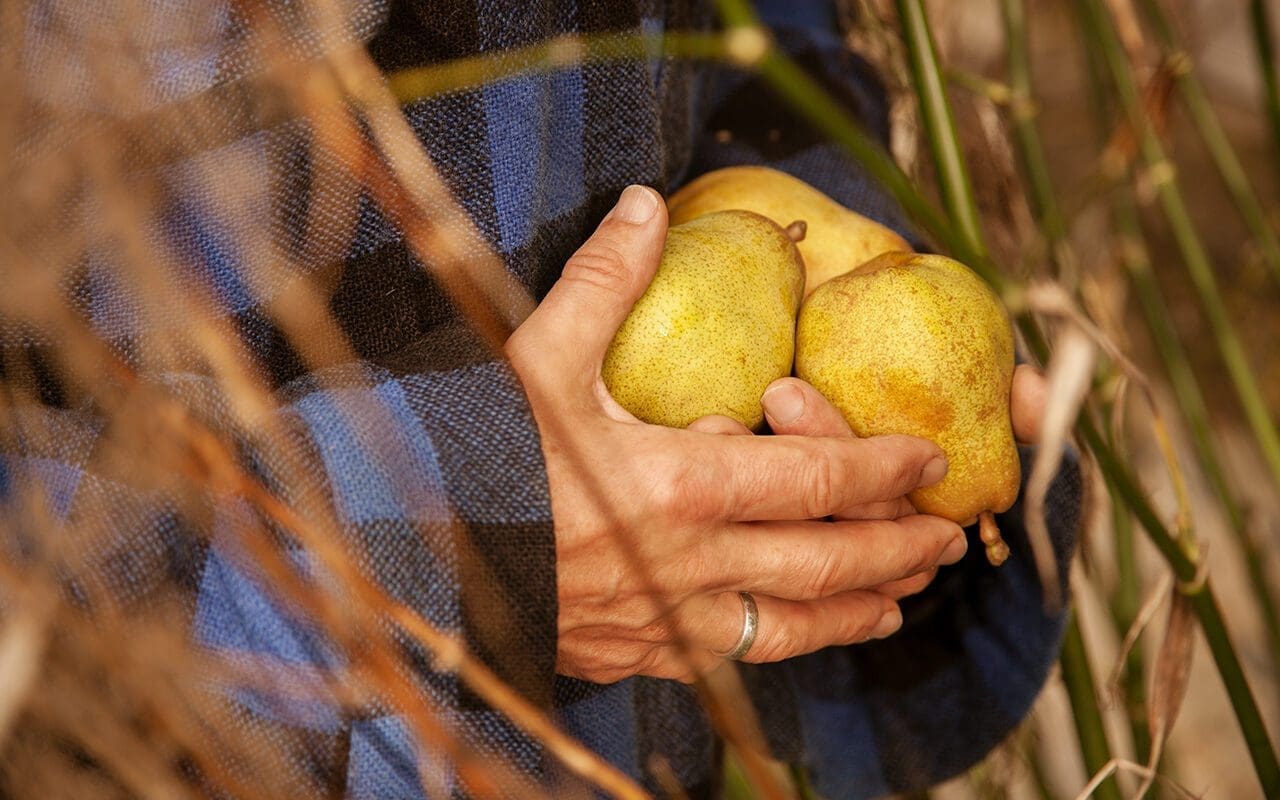
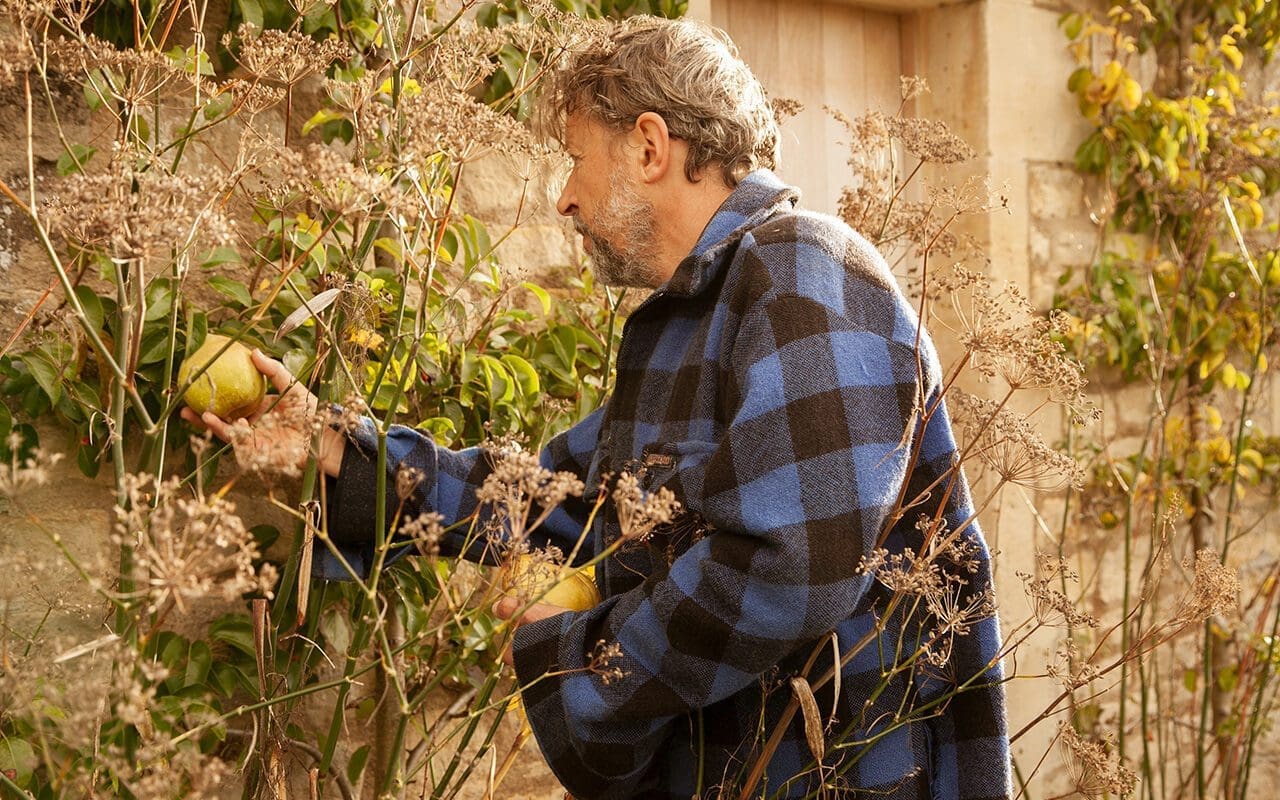
During the last couple of weeks we have been watching keenly, but the last week of October, our moving-in week, seems to be the perfect time to harvest. Pears should be picked and ripened inside on a cool shelf for the best results. Cup the fruit gently in your hand, lift and gently twist a quarter turn. The stalk yields to the turn when it is ready and the fruit can be left in-situ if not. Make sure to check daily, because a fallen fruit will be nibbled and ruined overnight by mice. They also know of their charms, but do not wait for the fruit to fully ripen.
Jane Grigson writes beautifully about pears and, most notably that ‘the old legend that towards the end it may be necessary to get up at 3 a.m. to find absolute perfection is not a great exaggeration.’ Test for ripeness by applying gentle pressure at the neck with your thumb. If it is hard still, be patient, but as soon as the flesh begins to give, the fruit should be eaten, preferably with the skin so that the melt has some structure as contrast. Either alone or with cheese, a fine combination. A perfect fruit will be as good as a warm fig picked fresh off the tree in Greece. A delectable reward with the sun and summer goodness melting in your mouth as we slide into the dark weeks ahead.
Words: Dan Pearson | Photographs: Huw Morgan
Published 30 October 2021
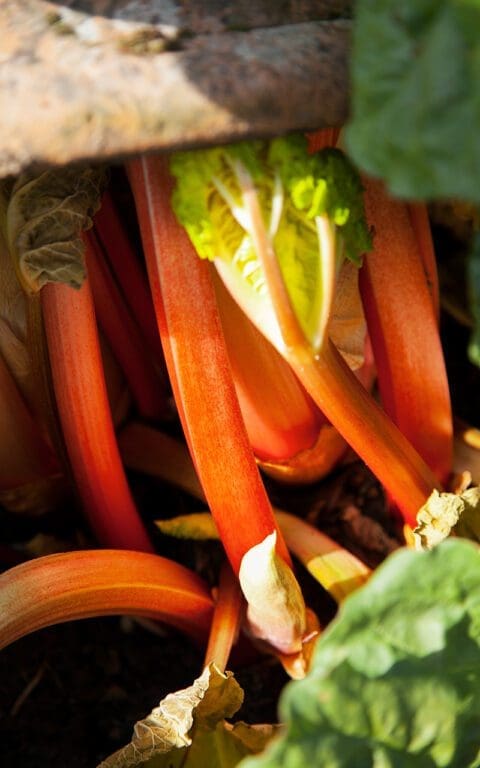
We put the terracotta forcers over the crowns of ‘Timperley Early’ at the end of January and over the variety named ‘Champagne’ at the end of March, although it probably should have been a little earlier. Despite the fact that the ‘Timperley Early’ would have been good weeks ago, there has a lot been going on in life and we just haven’t had time to pick it. The stems and emerging foliage of both have now pushed the lids off the forcers and exposure to light has been threatening to undo all of the good that forcing does for vibrancy of colour and flavour. Consequently, we have a rhubarb glut and, with plenty already cooked and in the freezer, part of my recipe challenge for this week was to answer the repeating question, ‘So, what else can you do with rhubarb?’.
When I scrolled past a mouthwatering image of Diana Henry’s Luscious Lemon Bars (thickened lemon curd on a shortcake base) on Instagram last week I thought they would adapt well to the sourness of rhubarb and so compared a number of different recipes to get a feel for proportions before alighting on one which sounded simple, foolproof and delicious. I made a couple of adjustments, substituting ground almonds for some flour in the shortbread base and replaced the flour in the custard topping with cornflour. All of the other ingredients, proportions and cooking method were as per the original recipe.

On Thursday, in between ferrying aubergines, peppers and chillis to the polytunnel, watering everything in pots, and doing anything requiring the pair of hands that we’ve been missing after Dan’s hand surgery last week, I managed to get a tray of these luscious rhubarb bars into the oven. Except that is not what came out. Through the mysterious alchemy and chemistry of cooking what emerged was something completely different. A layer of buttery, crumble topping above a firm custard with a thin layer of jammy rhubarb in the middle. Though delicious they were not what I had imagined and clearly needed more work to produce what I had in mind.
In the knowledge that cooking, photographing and writing a recipe in one day is already quite a tall order, I had to come up with another rhubarb recipe overnight. I thought, ‘Keep it simple.’ and stuck with rhubarb curd instead. No baking, just measuring and stirring.
After consulting books and websites I decided to adapt a familiar recipe I have cooked many times, substituting rhubarb juice for orange in Sam & Sam Clark’s curd recipe for Seville orange tart.
I finally settled down to cooking in the late morning and immediately the contemplative focus of cooking calmed my busy mind. The simplicity of just four ingredients and one pan. The repetition and order of cracking and separating eggs, cutting butter into cubes, weighing out sugar and measuring rhubarb juice. And then the close attention required to cook it carefully to ensure that the eggs don’t curdle.
It took over half an hour for the curd to start to thicken over the lowest heat possible and as, I stood there in the warmth of the range intently stirring, completely focussed on the activity before me, my mind went into the entranced meditative freefall that cooking shares with gardening.
Makes around 2 x 200ml jars
140g caster sugar
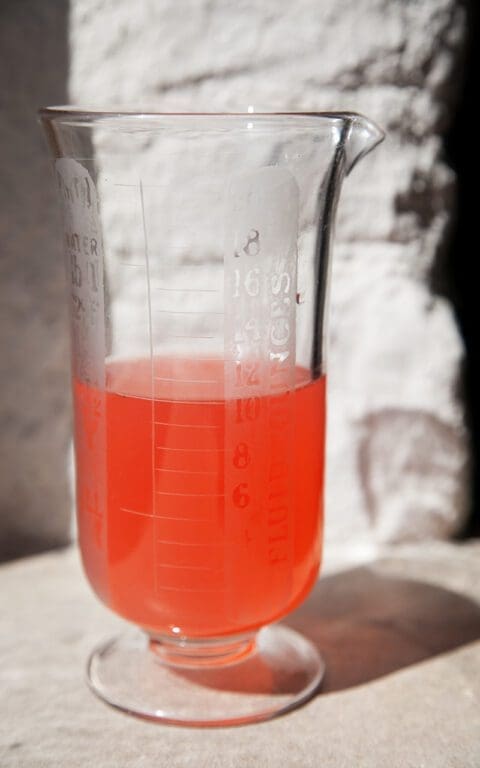
170ml rhubarb juice (see below)*
170g unsalted butter, cubed
4 large egg yolks
2 large eggs
*The rhubarb juice in this recipe is a by-product of rhubarb poached to go into the freezer. Around 500g of rhubarb should give you enough juice for this recipe. Cut the rhubarb into short lengths. Put them into a non-reactive pan with a tight-fitting lid and put in a medium oven (about 160°C) for around half an hour until soft. Strain off most of juice. Keep in the fridge and use in place of lemon juice or vinegar. It is particularly good in spring salad dressings.
Lightly beat the egg yolks, eggs and sugar together in a medium pan. Add the rhubarb juice and butter.
Put the pan over a very low heat and stir continuously until the butter melts and the mixture starts to emulsify and becomes glossy and thick. Do not be tempted to turn up the heat or it will curdle. Once it attains the consistency of custard pour into warm, dry, sterilised jars. Seal, leave to cool and then refrigerate. Keeps in the fridge for up to two weeks.
The flavour of rhubarb is delicate, so don’t be tempted to add other flavourings to this curd or they will overwhelm it.
Delicious on warm scones, mixed with poached rhubarb and whipped cream or as a filling for a tart base.
Recipe and photographs: Huw Morgan
Published 24 April 2021
Once upon a time I had a very sweet tooth. Each Christmas Eve, close to midnight, as my overexcited brother and I lay feigning sleep in our bunk beds, dad would come and lay something heavy at our feet. We knew exactly what it was, and it called on all our reserves of self-control and superstition to prevent ourselves from peeking until it started to get light. When we did – and my younger brother was always the first to crack – we would haul the stockings (actually dad’s nylon football socks) up the bed and start to unpack them. Always alongside this stocking was another made of net. A Cadbury’s Christmas selection pack containing the usual suspects – Mars Bars, Twix, Milky Way, Marathon. We would slowly eat our way through these on Christmas morning and still somehow have room for lunch.
As a child I was always more interested in what was for ‘afters’ than the main event and my favourites usually involved chocolate, whether it was Bird’s Angel Delight, mini rolls, steamed chocolate pudding, Viennetta ice cream or choc ices. At around the age of 9 I started baking my way through the Marguerite Patten recipe cards mum had collected and which sat in a specially made plastic box on top of the fridge freezer. Once I had become proficient with scones, jam tarts and sponges, I quickly moved on to Devil’s Food Cake, chocolate Swiss Roll, Black Forest Gateau and, eventually, eclairs and profiteroles. My pièce de résistance, however, was Marguerite’s Pots au Chocolat, which to me looked impossibly chic in the photo on the front of the card. The dark, velvet mousse in simple, white porcelain pots, decorated with elegant quills of dark chocolate. It made me feel very grown up the first time I served them. Looking back for that recipe now I find that they contained melted marshmallows. Certainly not the purist’s idea of this classic French dessert, but one that, as a child, I was more than happy to accommodate.
As the years passed my palate became more refined. I graduated from Cadbury’s Dairy Milk to Bournville, from milk to dark chocolate Bounty bars and got a taste for Fry’s Chocolate Creams from my dad. (Mint, since you ask.) At university, I discovered Swiss and Belgian chocolate before, in my mid ‘20’s, experiencing a revelation. I had moved into a house on Bonnington Square in Vauxhall and, unbeknownst to me, my new landlady was about to change my view of chocolate forever. She was Chantal Coady who, in 1983, had opened Rococo Chocolates on the King’s Road. There were four of us renting rooms there and every month Chantal would bring home a box of ‘bin ends’, broken bars and trial new products from the shop and invite us for a chocolate tasting.
This may conjure images of a craven orgy of chocolate bingeing, but quite the contrary. The room was candle lit, a fine cloth on the dining table and a small selection of wines and spirits were available to be sipped in recommended partnerships with some of the ‘sweets’. Chantal would break small pieces of chocolate onto plates and pass them round. We were instructed to place the chocolate on our tongues and to allow it to melt slowly – no chewing! – and to describe the flavours we were tasting. Chantal explained how fake vanilla, hydrogenated oils and sugar destroyed the true nature of chocolate and would get us to compare my childhood Dairy Milk to a high cocoa content milk chocolate to understand what she meant. She taught us to appreciate it like fine wine and I have never looked back.
Christmas always calls for chocolate, but as I have aged my taste for sweet things has tempered and I have decreased the amount of refined sugar I eat. I rarely order pudding in restaurants these days unless I am prepared both for the initial sugar rush and the almost immediate headachy comedown. At home, dessert usually takes the form of stewed fruit or a handful of figs or dates, rather than anything sweeter. But it’s Christmas and I want chocolate, so I worked on this dessert recipe without refined sugar.
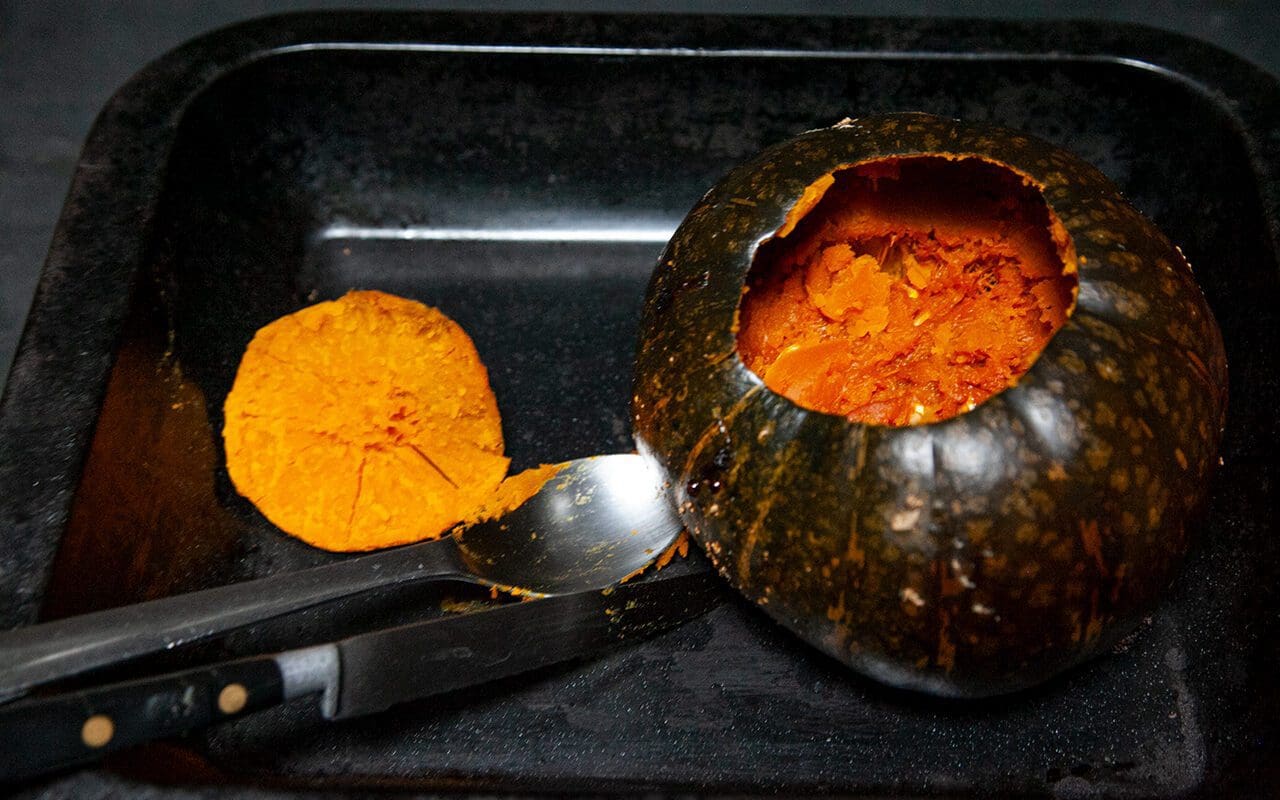
The combination of pumpkin and dates in the filling means that it needs no further sweetening, although if using chocolate with more than 82% cocoa solids you might want to and add honey or another sweetener to taste. If possible, use a drier-fleshed variety of pumpkin, otherwise you may need to drain the flesh before using as you don’t want the filling to be too wet. The Kabocha pumpkin I use has the texture and flavour of chestnuts, which makes it particularly truffle-like.
Chantal was also a pioneer in the use of unexpected flavourings and this tart is also the perfect foil for your favourites. To my knowledge, she was the first to make cardamom flavoured chocolate, to which she introduced me and which is my habitual choice. However, you can infuse the milk and cream with any winter spice or herb you like. Bay is very good (a couple of leaves), or try a sprig or two of rosemary or thyme, a spoonful of ground fennel seeds or even some crushed juniper berries. A teaspoon of finely ground espresso coffee heightens the bitterness. Half a teaspoon of chilli powder warms the mouth and accentuates the flavour of the chocolate, while a few drops of rose or rose geranium oil add a different level of perfumed refinement. The addition of a couple of tablespoons of alcohol – rum, for instance – makes it definitely adults only. Although we have been eating it plain this week, for a truly festive plate this would be particularly good with brandy-soaked prunes or figs or pears poached in white wine. Definitely a chocolate dessert for grown-ups, not children.
Serves 12
Pastry
75g hazelnuts
150g plain flour
1.5 tablespoons honey or maple syrup
75g cold butter
1 large egg, beaten
A pinch of salt
Filling
200g cooked pumpkin
100g dates, chopped
100ml milk
250ml double cream
3 large eggs
200g dark chocolate (minimum 70% cocoa solids)
Seeds from 3 cardamom pods, finely ground or other chosen flavouring
You will need a 23cm round, fluted tart tin with a removable base.
Set the oven to 180C.
Put the hazelnuts into a small baking pan and put into the oven for 10 minutes until lightly toasted and fragrant. Remove and allow to cool, then put into a food processor and process into a medium-fine flour. Do not over process or you will end up with nut butter.
Add the flour to the hazelnuts and pulse mix. Cut the cold butter into 1cm cubes and add to the flour and nuts. Pulse again until the mixture resembles breadcrumbs. With the motor running slowly add the beaten egg and honey until the dough comes together. Stop the machine immediately and quickly remove the dough. It will be very soft. Form into a ball, wrap and put into the fridge for 30 minutes.
When the pastry has chilled, roll it out carefully on a floured surface until large enough to line the tart tin. The pastry is very short, so work quickly and carefully. However, if it falls apart just fit the pieces to the tin and press together gently to join. Trim the excess pastry from the rim allowing a little extra for shrinkage, line with greaseproof paper and fill with baking beans. Bake blind for 20 minutes. Remove the baking beans and greaseproof paper and return to the oven for a further 5 minutes until it looks dry. Remove from the oven and allow to cool.
To make the filling heat the milk and cream in a small pan. Grind the cardamom seeds to a fine powder in a mortar and pestle and add to the milk. As soon as the milk comes to the boil remove from the heat, add the dates put a lid on the pan and leave to stand until cool.
Chop the chocolate coarsely and put into a heatproof bowl. Put into the oven for about 10 minutes until almost melted. Remove from the oven and then beat with a fork to ensure that all of the chocolate is melted.
Put the cooled dates and cream, eggs and pumpkin into the food processor and process until smooth. Add the chocolate and mix until fully combined. Pour the mixture into the prepared pastry case and bake for 30-40 minutes until the mixture just starts to crack at the edges, but still has a little wobble in the centre.
Leave to stand for 20 minutes before removing from the tin and transferring to a serving plate. Decorate with sieved icing sugar as you wish.
Serve warm.
This reheats and freezes well.
This can easily be made suitable for vegans, using coconut oil and sugar in the pastry. For the filling substitute the milk with vegetable milk, the cream with an equal weight of silken tofu (although do not heat this with the milk). Substitute the eggs in both pastry and filling with chia ‘eggs’ (1 tablespoon ground chia seed mixed with 3 tablespoons cold water for each egg).

Recipe & photographs: Huw Morgan
Published 19 December 2020
We are sorry but the page you are looking for does not exist. You could return to the homepage