ALREADY A PAID SUBSCRIBER? SIGN IN
This article is dedicated to Susan Sheehan, a longstanding American client of Dan’s, who writes the most wonderful emails that frequently have us doubled up in tears. One of these sent last year started (all Susan’s capitals), “I always read DIG DELVE…naturally, it is my absolute fantasy life blog. I imagine myself calm and RELAXED looking at the row of trees you have on the horizon, at your enchanting house and garden, and whipping up a batch of ELDERFLOWER AND ROSE cordial and a RHUBARB GALETTE…all sounds so romantic, and utterly doable. Then I just have to slap myself in the face and out of the TRANCE your blog, Instagram posts and new website induce…it is all just lovely. I want to be just like you when I grow up.”
So Susan, here is a picture of my RELAXED life this week. Dan has been away for 10 days. I am working on the picture edit of the book he has written about the Tokachi Millennium Forest. There have been, and I kid you not, around 40,000 images to go through, which has required an insane amount of focus, concentration and organisation. At around 4pm each day I Facetime Julie, our American friend who is designing the book. She lives in Portland, Oregon. It is usually around 8pm before we finish looking at layouts, discussing the design and swapping images around. Then a walk for the long-suffering dog, dinner (or more likely cheese and biscuits) and then bed. Then repeat. Yesterday, I had the florist Flora Starkey here, squeezing in a winter photoshoot en route to Bristol airport, while an old university friend also arrived to stay for the weekend. Fortunately Sophie is an excellent cook since, on Saturday, I have also invited good friends and godchildren for lunch.
Trying to shoehorn cooking, writing and photographing a recipe for Dig Delve into that schedule is, unfortunately Susan, the very opposite of RELAXING and, although not every week is this extreme, it is closer to the usual state of affairs than the idyll you describe. It doesn’t always feel very doable or very grown up. Sometimes we have to cut corners and speed things up to fit everything in, so this extremely easy recipe was directly inspired by a starter we were served at our Waterloo local, The Anchor & Hope, just last week.
I used to love the crispy ‘seaweed’ that my dad would order from our local Chinese restaurant when I was a kid. I thought I was eating something very exotic, of course, when the mundane truth was that it was just shredded, deep-fried cabbage. When this plate was brought to our table last week it took me straight back to those foil takeaway containers, with the same crisp texture and delicious savoury taste. The bright and smoky harissa was the perfect foil to the dark leaves, while the cool contrast of crème fraiche, made the whole plate sing. I immediately knew that I wanted to reproduce it at home.
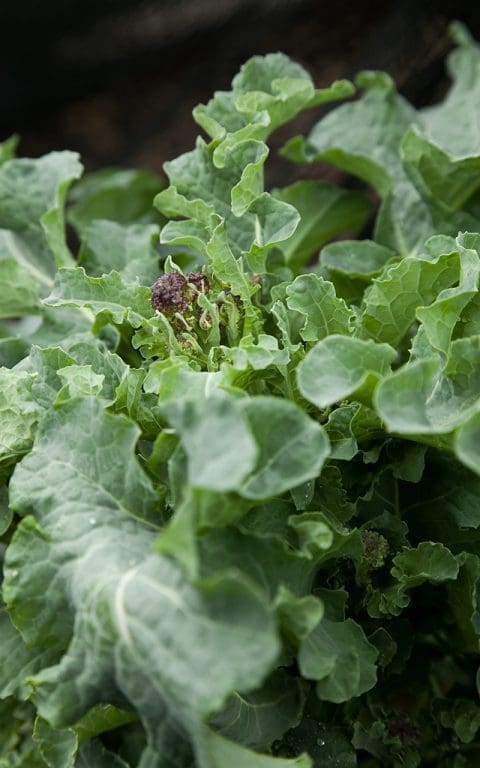
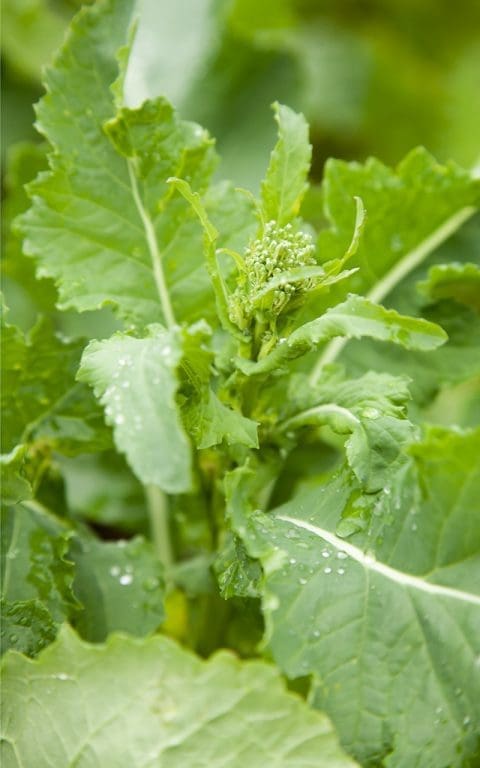
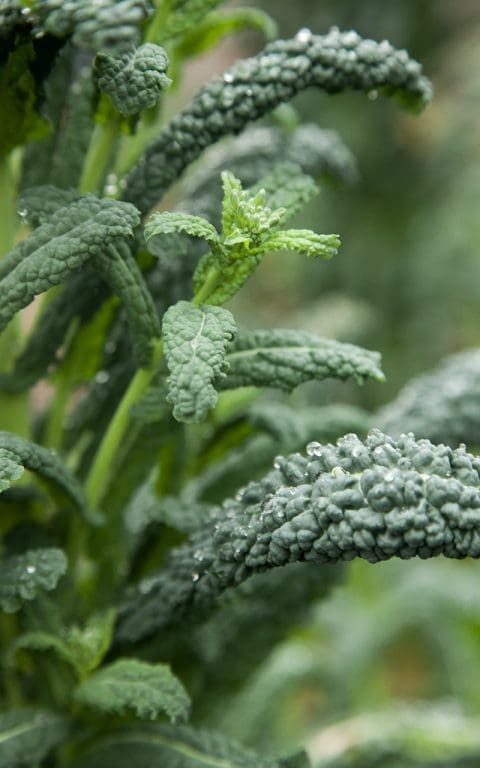
We have 5 beds of brassicas that keep us going through the winter, and are now close to having only two still producing. Many of the red cabbages, which were our most successful germinator last year, are still standing, as are the second sowing of curly kale. The Cavolo nero are producing less leaf, but have started to send out flower spikes in step with the Early Purple Sprouting broccoli. A new winter crop for us, which I will definitely be sowing a lot more of next September, is the turnip green Rapa Senza Testa from Real Seeds, which has stood fresh and green all winter. From one row we have only had a handful of servings of the delicious buttery greens, but they are still producing and now also going to flower.
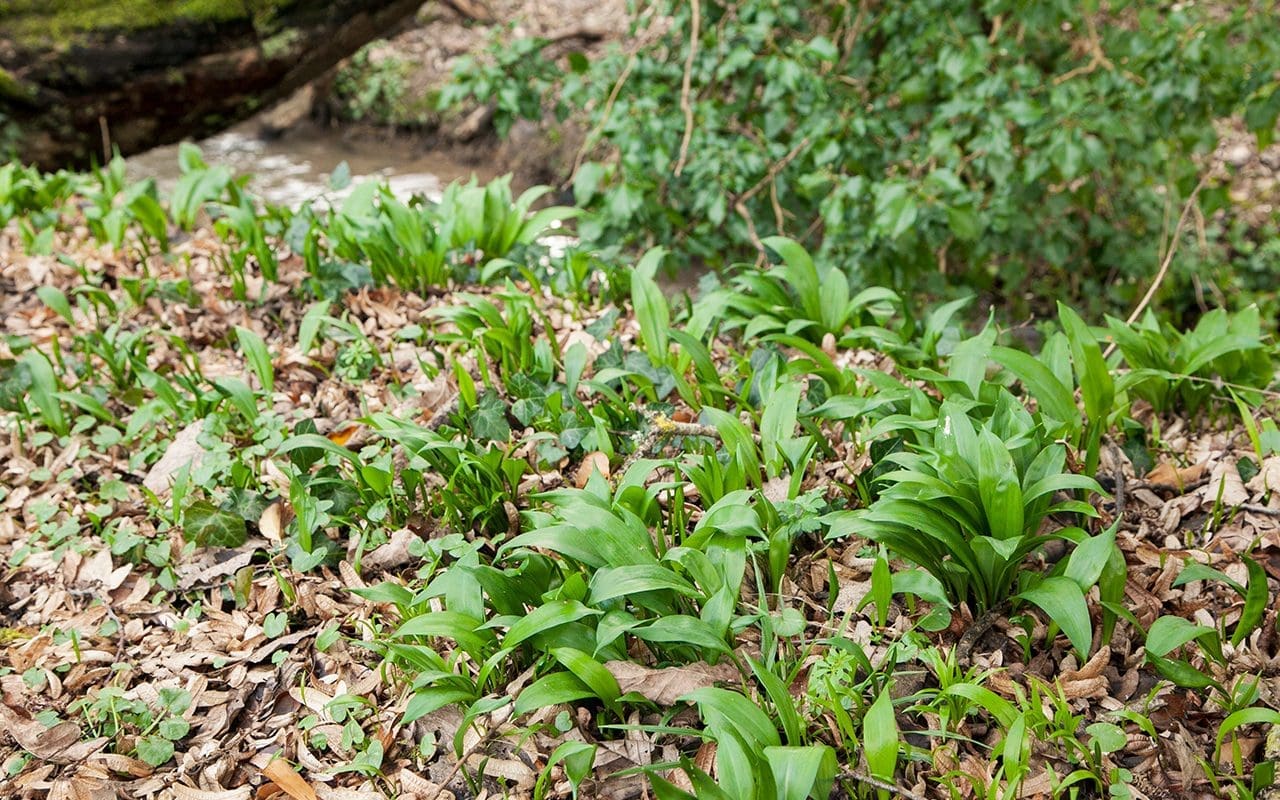
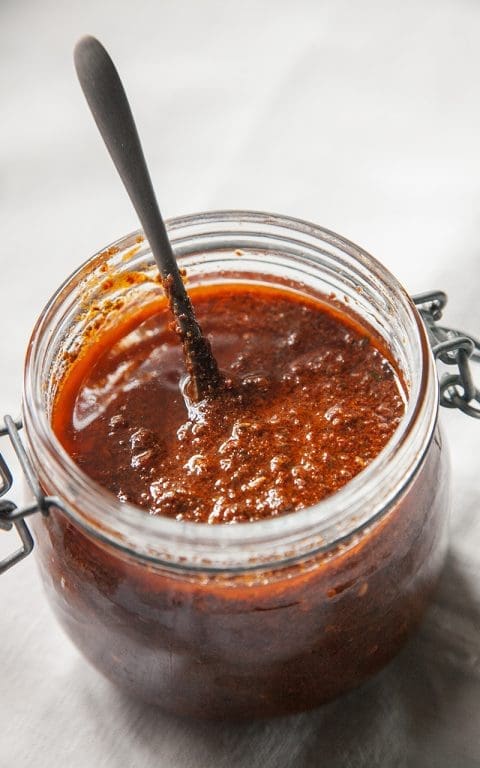
Two weekends ago in the woods I was a little perturbed to see the tiny emergent leaves of the wild garlic, which seemed far too early and too young and few to harvest. However, already they are here in number, and so yesterday I picked a handful to flavour the harissa. I made the harissa with a variety of smoky, medium and hot dried chilies from the pantry together with some fresh red chilies from the greengrocer. Unless you like it very hot avoid the bird’s eye and scotch bonnet types. The recipe below makes more than you require. It keeps well in the fridge covered with olive oil.
To make this into more of meal it is delicious topped with a poached or fried egg.
Serves 2
200g mixed brassica flower sprouts, tender stems only
2 litres rapeseed oil
HARISSA
25g mixed dried chilies
25g fresh red chilies
1 tablespoon cumin seeds
1 tablespoon coriander seed
1 tablespoon fennel seed
A small handful of young wild garlic leaves
1 teaspoon smoked paprika
1 tablespoon tomato puree
1 teaspoon sea salt
2 tablespoons lemon juice
1 tablespoon red wine vinegar
100ml olive oil
Crème fraiche, to serve
First make the harissa.
Put the dried chilies in a heatproof bowl and pour over enough freshly boiled water to cover. Leave to soak for 30 minutes.
Toast the seeds in a small dry frying pan over a high heat until they become fragrant. Tip into a mortar and grind to a fine powder.
Remove the seeds and stalks from the fresh chilies and do the same with the soaked dried chilies. Put them all into a small blender with the other ingredients. Blend until a fairly rough paste is achieved.
Transfer to a small Kilner type jar.
Heat the oil in a large deep pan until smoking. Fry the flower sprouts in batches for a minute or two at the most. Be very careful as you put them into the oil as they will splutter. Keep a close eye on them, as they can take differing lengths of time to cook. When done, lift them from the oil with a slotted spoon and put into an ovenproof dish lined with kitchen paper. Put the dish in a low oven while you cook the remaining flower sprouts, transferring them each time to the oven to keep warm.
When the sprouts are all done transfer them to a hot serving plate. Toss over a couple of pinches of sea salt. Spoon over some of the harissa. Put some crème fraiche on the side of the plate. Eat immediately.
Recipe & photographs: Huw Morgan
22 February 2020
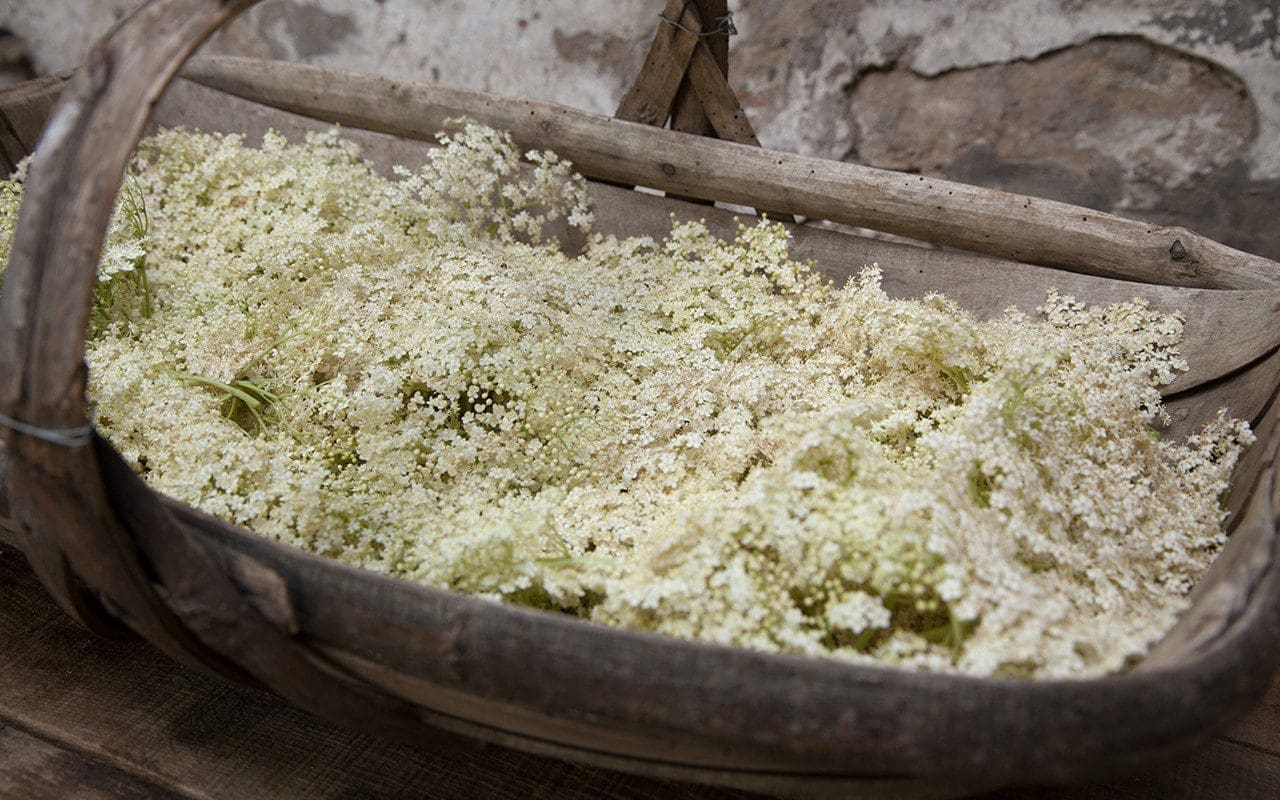
The elder is spilling from the hedgerows, creamy, heavy with flower and weighted by a deluge of June rain. This is their month and we can see them marching up the valley and foaming from the edges of the copses where they are happy to seed into shadow, but prefer to push out into the sun.
Elder is fast. Their shiny black berries, which are some of the first to be gorged on by birds in the autumn, are deposited wherever there has been a perch. I find them here under the woody shrubs in the garden and where there has been a perennial left standing that has provided a place for a pause. We even have a quite mature elder that has found its way into a humus laden crack high up in an old ash pollard to prove their ease in finding a niche.
They look innocent as seedlings and are easily weeded but if you miss one you will have a sturdy little plant that will jump up and out into the light in its second year and in the third already be demanding space that might have been promised to something else. They go on in life living fast and hungry and, if you have them in a hedge and leave it uncut, they will create a gap there by simply outcompeting their neighbours. They age quickly and fall apart with topweight, so opening up a wedge. It is into these gaps that you will find brambles seeding and then a whole new wave of succession.
I must admit to removing them where I have been repairing the hedges so that I can replace them with hedging plants that retain a more measured growth cycle. Hazel, hawthorn, dogwood, viburnum and eglantine rose. It is bad luck I know, but where I have done it I now have hedges that are opaque in winter and layered from the bottom up with three plants replacing the weight of the interloper. A cut piece of elder wood reveals why its old Anglo Saxon name aeld (meaning fire) was given, because the hollow stems were used to blow air directly into the heart of a fire. Although it is also unlucky to bring elder inside, I suppose there must be room for exceptions.
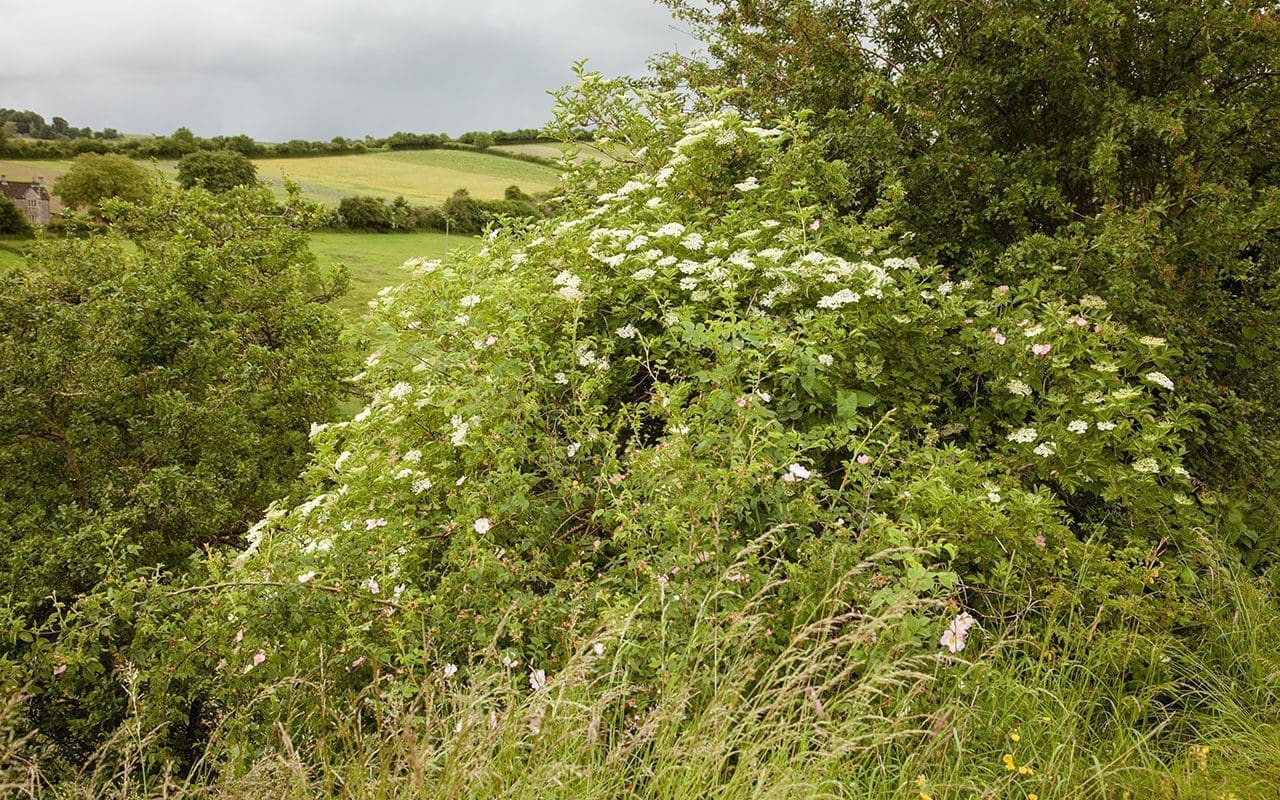
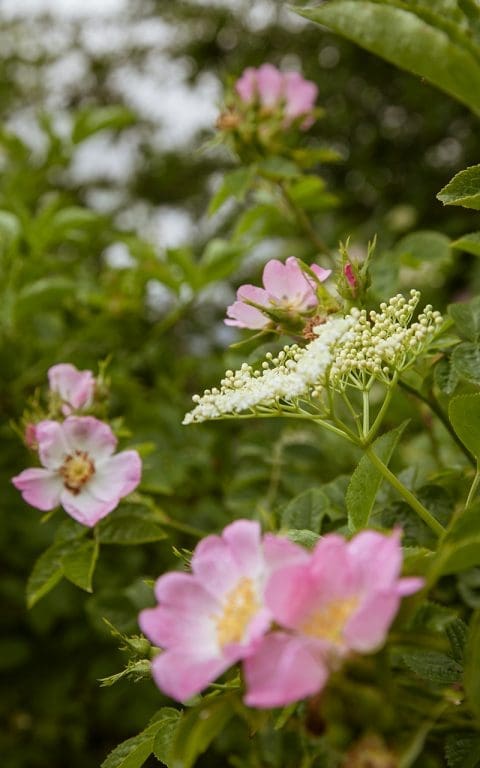
We are lucky enough to have room to let a number of elders have their head here and, only when June weather allows, we steep them and make cordial, since the flowers need to be dry when harvesting. Their heady, sweet perfume is completely distinctive and reminiscent of this time later in the year. A moment of fecund growth and dampness still in a young summer. Where we have let a hedge grow out to make a bat corridor on our high field, a plant that is easy to harvest is paired very beautifully with wild rose, the cream and pink heightened for their company. The coupling has been inspiration for a cordial that Huw is making this week with some of the first roses as a means of capturing this moment.
Where I want to make a quick impression in a garden that needs something evocative of a wilder place, or indeed to segue from garden to landscape, I will often use the cut-leaved Sambucus nigra f. laciniata. This is a lovely plant, strong but lighter on its feet than the straight species and already tall and making an impression in year two. More ornamental selections have given us good dark-leaved forms with cut foliage that are exquisite and easily used. The filigree of ‘Black Lace’ and ‘Eva’ are better I think than ‘Black Beauty’, which has a more simple leaf that can look heavy. The darkness in their genes spawns flowers that are as pink as the species is cream and are a strong influence in the June garden. I haven’t grown the yellow cut-leaved ‘Golden Tower’ which is said to be smaller in stature, but it could be nice in a little shadow to give the impression of artificial sunlight when June days are bringing us (welcome) rain and grey skies.

Words: Dan Pearson | Photos: Huw Morgan
Published 15 June 2019
Whether it’s fish and chips after a day on the beach, calamares fritos at a Spanish bar or Indian pakora with an ice-cold Tiger beer at a festival, deep fried food is something that always tastes better outdoors and when the weather is hot.
In Greece recently I was staying with friends who, in late June, were already struggling to keep up with their courgette glut, so for lunch one day we decided to make kolokithokeftedes, the traditional Greek courgette fritters. Courgettes are coarsely grated, salted and then squeezed to remove as much water as possible, before being mixed with onion, garlic, feta, egg, breadcrumbs, dill and mint. Traditionally shaped into patties and shallow fried, they can be a little heavy, so my host decided to put loose spoonfuls of the mixture into deep boiling oil so that the shards of onion and courgette that made their way free of the mass became crispy and a deep, caramelised brown. They came out looking like tiny deep-fried, soft-shelled crabs. Served with a bowl of cold, garlicky tzatziki, six of us devoured about forty of them in quick succession.
In Japan, of course, it is tempura that fulfils this role. It is no surprise to learn that the technique of deep frying batter-coated fish and vegetables was brought to Nagasaki by the Portugese in the 16th century. Peixinhos da horta is believed to be the original dish that inspired a way of cooking that we now primarily associate with Japanese cuisine. These ‘little garden fishes’ are green string beans, coated in batter and deep fried, and were eaten in Portugal during Lent, when meat was off the menu. The Japanese took this idea and ran with it, and now tempura describes the method of cooking any fish, meat or vegetable in this way.
One of our favourite places to eat when in London is Koya Bar, a tiny Japanese restaurant in Soho, where fast-cooked food is prepared in front of you behind a long seating counter. While the queue to get a table can sometimes seem intimidating, the turnaround is so fast that waiting in line for 30 minutes is a small price to pay for food this delicious. It is the most authentic Japanese eating experience we have had outside of Japan. Although they specialise in udon noodles, there is always a blackboard of seasonal specials on offer and, of these, it is the kakiage tempura that we order without fail whenever we go. Kakiage tempura differs from regular tempura in that it is a mixture of sliced vegetables (sometimes combined with fish) in batter rather than the individual pieces of fish, crustacean and vegetables that we are more familiar with. Seasonality is key and, at Koya, they can be made of anything from wild carrot with carrot tops to broad beans and peas or squid and chrysanthemum.
We are now in the midst of our courgette glut and looking for new ways to use them as often as possible, while our sweetcorn is challenging us to eat it quicker than it becomes starchy. I have grown ‘Double Red’ this year, a new variety with seed from The Real Seed Catalogue, who sell some of the most interesting vegetable varieties in the country. The plants are highly decorative with stems and husks stained a deep purple-red and cobs of dark burgundy, almost black, kernels, which are almost too beautiful to eat. They have made a good partner to our ornamental red and tan amaranth this year. We have also just lifted all of our onions and so the combination of vegetables here reflects what is best to eat at this very moment. I could also have used green beans, carrots and beetroot or, later in the season, pumpkin, sweet potato, mushrooms, celeriac, kale or salsify. You can also add any herbs that you like to the mix. Here I have used the traditional purple shiso (Perilla frutescens var. crispa), which is used to impart the pink colour to umeboshi plums. It has a flavour somewhere between aniseed and basil. Dipped into batter and fried at the end of cooking the leaves also make a beautiful garnish.
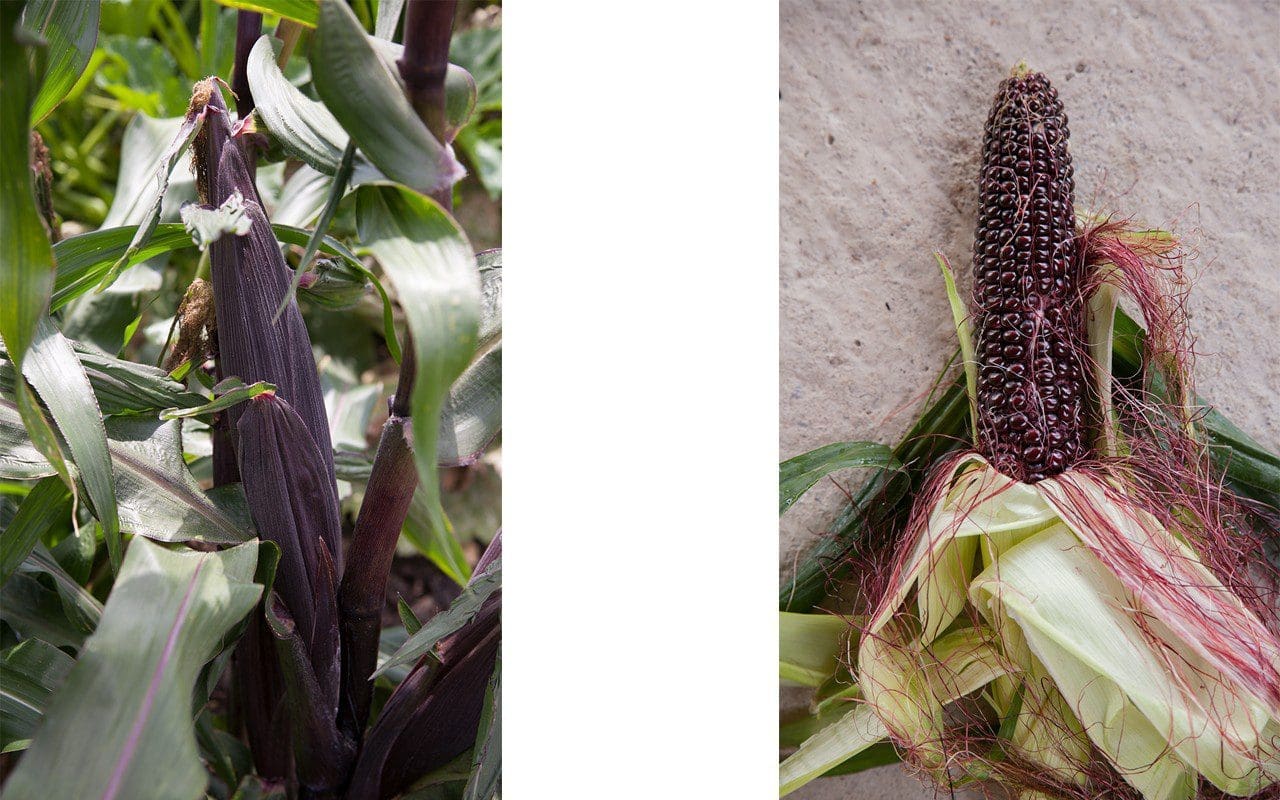
Sweetcorn ‘Double Red’
Although there is a plethora of recipes for tempura batter using either whole eggs or whisked egg whites, I have found that the simplest batter of just flour and water makes the crispest coating. However, there are a few golden rules to ensure that your tempura turns out as well as possible. Firstly, all of the vegetables must be cut to a size where they will cook in the same time. It is traditional for the vegetables to be coarsely julienned or grated. Secondly, get your oil hot enough to cook before you make the batter. It should be between 170°and 180°C. Thirdly, the batter should be as cold as possible, and must not be over-mixed or whisked which stretches the gluten and makes it tough and chewy. Chopsticks are used traditionally and it should have lumps of flour in it. Fourthly, before placing the batter-coated vegetables in the oil, allow as much batter to drain from them as possible. This ensures the lightest coating and avoids a doughy centre. Fifthly, only cook a couple of spoonfuls at a time, so as not to crowd the pan and lower the temperature of the oil. Sixthly, use a small wire strainer or slotted spoon to remove any overcooked bits of batter from the oil between batches to avoid them flavouring the oil and attaching to the next lot of fritters. And finally, do not be tempted to ‘worry’ the fritters in the oil, be patient and leave them be until they are ready to turn, or the batter will not have cooked and they will fall apart.
It is customary to serve tempura with a simple dipping sauce of dashi, soy sauce and mirin, but the lemon and miso sauce here, adapted from a recipe by Elizabeth Andoh from her excellent book of Japanese home cooking, Kansha, complements the richness of the fried fritters perfectly.
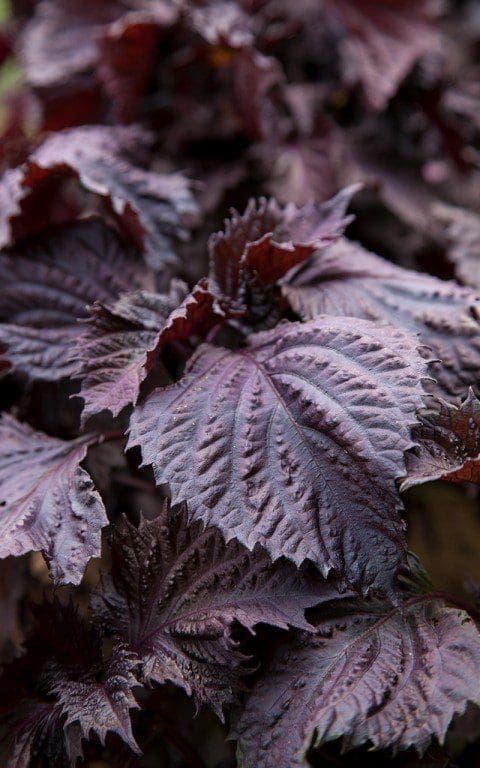 Purple shiso
INGREDIENTS
350g courgette, coarsely julienned or grated
2 large sweetcorn cobs, shucked
1 medium red onion, about 175g
8 large and 6 small shiso leaves
Sea salt
Sunflower or rapeseed oil
Batter
175ml iced sparkling water
65g self raising flour
65g cornflour, plus 1 tablespoon more
A few ice cubes, 4 to 6
Dipping Sauce
3 tablespoons white miso
3 tablespoons lemon juice
Finely grated zest of half a lemon
1 tablespoon maple syrup or lightly flavoured honey
1 tablespoon mirin or sake
Makes about 12, enough for 6 people
METHOD
Put the courgette into a sieve and sprinkle lightly with sea salt. Use your hands to mix the salt in well and then leave to drain over a bowl for 20 to 30 minutes.
To make the dipping sauce, put the miso and lemon juice in a small bowl and stir well. Add the maple syrup or honey and mirin and stir well again. Add the lemon zest and stir again. Transfer to a serving bowl.
Using a very sharp knife shave the corn kernels from the cobs over a bowl. Slice the onion in half down the centre and then cut each half across the grain into crescents the thickness of a coin. Separate the onion crescents and add to the bowl of corn.
Take small handfuls of the salted courgette and squeeze hard to remove as much water as possible. Add to the bowl of corn and onion. Cut the eight large perilla leaves into fine ribbons and add to the bowl. Using your hands, mix all of the vegetables and herbs together until the courgette strands are separated and all is well combined. Sprinkle over the one tablespoon of cornflour and toss with your hands again until everything is lightly coated. This helps the vegetables to stick together when fried.
Pour the oil into a medium-sized (25cm), deep-sided frying pan to a depth of about 2cm. Put over a medium heat until the surface begins to shimmer. Turn the heat down a little and make the batter. Put most of the iced water and some ice cubes into a bowl. Sift the two flours onto the water and then quickly mix together. The batter should be the consistency of single cream and just coat your finger. If it is too thick add more iced water. Turn the heat up under the oil and, when just smoking, test the temperature with a few drops of batter. It should sink and then immediately rise to the surface and puff up.
Pour two thirds of the batter over the vegetables and mix quickly until everything is lightly coated. Add a little more if you think it needs it. However, you may not need to use it all. The vegetables should not be swimming in batter. Using a tablespoon and a fork, take a scant tablespoonful of the vegetable mixture and hold it above the bowl, allowing most of the batter to run off. Then slowly place the vegetables into the hot oil, using the fork to quickly spread them out so that you have a thin fritter about 8cm in diameter. Now wait 30 seconds for the underside of the fritter to cook, before using two forks – or chopsticks – to carefully turn the fritter over. Cook for another 30 seconds until the other side is cooked and lightly coloured. In a medium-sized pan you should aim to cook no more than two fritters at a time, always allowing the oil to return to temperature before frying the next batch.
Remove the fritters from the oil with chopsticks or a slotted spoon, and hold them above the pan to allow as much oil to drain from them as possible, before transferring to a hot plate lined with absorbent paper. You can now either choose to serve them as they come from the pan or put the plate into an oven heated to 100°C to keep warm, while you cook the rest of the mixture.
When all of the mixture is cooked transfer the fritters to a clean plate. Quickly dip the remaining shiso leaves in the batter and fry until crisp. A matter of seconds. Remove and drain quickly on absorbent paper, then use to decorate the plate of fritters. Serve immediately with the dipping sauce.
Recipe & photographs: Huw Morgan
Published 11 August 2018
Michael Isted is the founder of The Herball, a company producing handmade herbal infusions and plant extracts in small batches. The plants he uses to produce them are sourced from a number of independent, organic producers and freshness and quality are of prime importance. Michael started out as a drinks specialist and is a trained phytotherapist and nutritionist. He is passionate about educating and celebrating the ways in which we can integrate plants into our diets to energise, enhance and heal.
Michael, you have a background in the beverage industry. Can you tell us how you came to see the importance of plants and how that inspired you to start The Herball ?
I was always fascinated with nature growing up as a child in the cradle of the South Downs in Sussex, picking blackcurrants and sticking cleavers to people’s backs. Then, whilst working in the beverage industry as a drinks consultant, I realised that everything (almost everything) I was working with was made from plants, whether working with gin, vermouth, tea, coffee or distilling eau de vie. I knew I had to dedicate more of my time to learning from plants and from people that worked with plants. It all happened fairly organically, nature called and it felt like a brilliant path to tread, intuitively right.
Where did your passion for plants come from? Are there any key people, influences or experiences that set you on this path?
I think we all have a passion for nature, it’s just sometimes hard to access or connect with nature, particularly in our urban environments, but I’m sure inside of us all is a burning desire to be with nature in some form. Plants are so diverse, colourful, vibrant and dynamic on so many levels. They are extremely influential companions.
Although I didn’t know it at the time, my earliest inspiration were the roses growing on the pathway leading up to our childhood house. That scent has stayed with me forever. The rose is a very powerful plant, it triggers so many memories. Like a form of time travel, it has taken me to some very magical times and places, it has been hugely influential.
Then I was inspired by learning about distilling plants with an eau de vie distiller in Alsace and connecting with herbalists such as Peter Jackson Main, Peter Conway, the work of Barbara Griggs and for sure the writing of Stephen Harrod Buhner. I urge everyone to read his book The Lost Language of Plants.
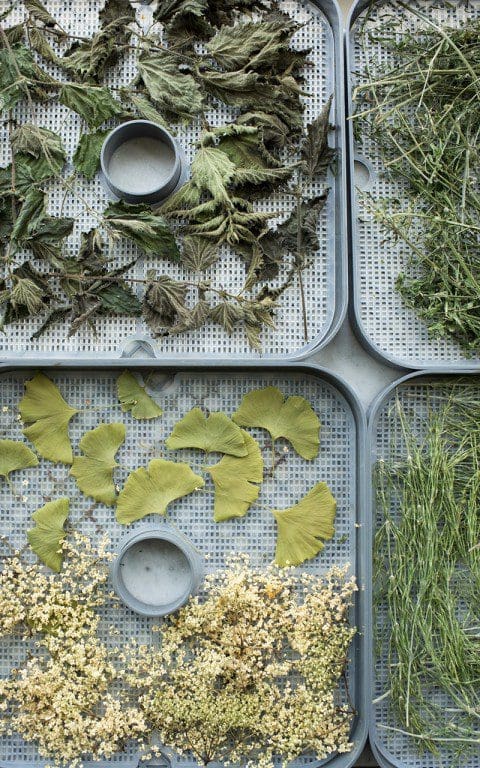 Dehydrator trays containing (clockwise from top left) dried nettle, cleavers, equisetum, elderflower and gingko.
Photo: Susan Bell
You are a qualified Phytotherapist. Can you explain what that means and what the training involves?
It’s a posh term for a herbalist, to make us sound more professional. It means somebody who works with plants to heal and nurture people. We introduce nature and look at ways in which plants can help support disease, illness or just enrich people’s lives.
I trained with many naturopaths, nutritionists, herbalists and plant workers on shorter courses and then went into a full time BSc (Hons) degree at the University of Westminster. It took four years of full time training, but some of the most valuable training is spending time with the plants themselves. They can teach you a great deal.
Tell us about the range of products you produce, and the process you went through to develop them.
It all started as I was unhappy with the quality of the herbs & spices in many herbal teas and commercial spice ranges. There was (is) a distinct lack of relationship between people and the plants that they are drinking or eating. Supermarkets are littered with herbs in tea bags and boxes, but you don’t see the plants or engage with them enough. You don’t know where they are from, when they were harvested, who harvested them, you can’t even see the plants. So I wanted to create a range of plant products where you could really engage with the plant itself, on a very basic level by looking at and identifying it, drinking its qualities. It’s about engaging with and respecting nature really. I want people to see the love and hard work (from both the plant and the people producing them) that goes into nurturing, growing, harvesting, drying and blending the herbs.
We take plants for granted most of the time. Just take black pepper for example. In almost all households it is just a commodity. It’s just not celebrated enough. It’s a sensational plant, with brilliant flavour. Just take a good quality black peppercorn and place it in your mouth and eat it. Taste it fully and consider its qualities. Phenomenal.
We really want people to engage with the nature that they are drinking, eating and ingesting. All of our plants are harvested in that growing year, we know when they were harvested and by whom. We make our infusions, waters and bitters in tiny batches. It’s all created by hand with lots of care using the most vibrant plant material possible.
 The Herball’s Of Aromatic Waters
Our aromatic waters (non-alcoholic distillations of plants) were sourced from two distillers in the UK and India, although we have since stopped working with them as we are now distilling everything ourselves. There will be some very special distillates available in 2018 as we are currently working on polypharmic distillations, distilling lots of different plants at the same time. There is a natural synergy between plants in the wild and it’s always interesting to see which plants like to grow together, for example nettle & cleavers. We are trying to capture this synergy and relationship in the form of a distillation.
We distil plants in traditional copper alembic stills (main image – photo by Susan Bell) to use as a flavouring for food and drinks and as ingredients for natural skin care. We are just starting to use CO² extraction, which produces the most beautiful and vibrant oils. We also work with co-operatives in Southern India and Sri Lanka who supply us with beautiful vibrant spices. Again it is crucial that we know who harvested the plants, where and when. We visit the growers on their tiny holdings – when I say tiny they are really tiny, 1 hectare and less – and they cannot afford organic certification, so that’s where the co-operative comes in, to help give the growers the sales platform and access to people like us.
The bitters are remedies and recipes that I had been using in practice and for drinks creation for years. They cover all of my inspirations, so there is an English-based blend with 20 herbs grown here, an Indian blend with spices like cinnamon, turmeric and one of my favourite bitter herbs, Andrographis, and a Chinese blend with Chinese herbs such as Schisandra paired with a beautiful rock oolong tea from our dear friends at Postcard Teas. We wanted to share these formulas with everyone.
From where and how do you source your ingredients?
The herbs we use are mostly grown, nurtured, harvested and dried by a wonderful grower called Diane Anderson who has a smallholding in Oxted, Surrey. Diane was one of my teachers at University. She was an amazing resource and she used to come into the dispensary with the most beautiful dried herbs. Seeing these wonderful dried herbs was also an inspiration to start blending infusions.
We also work with a biodynamic plantation in Somerset, we grow a few things ourselves and for the more exotic plants, as mentioned before, we source from our friends in Southern India and Sri Lanka.
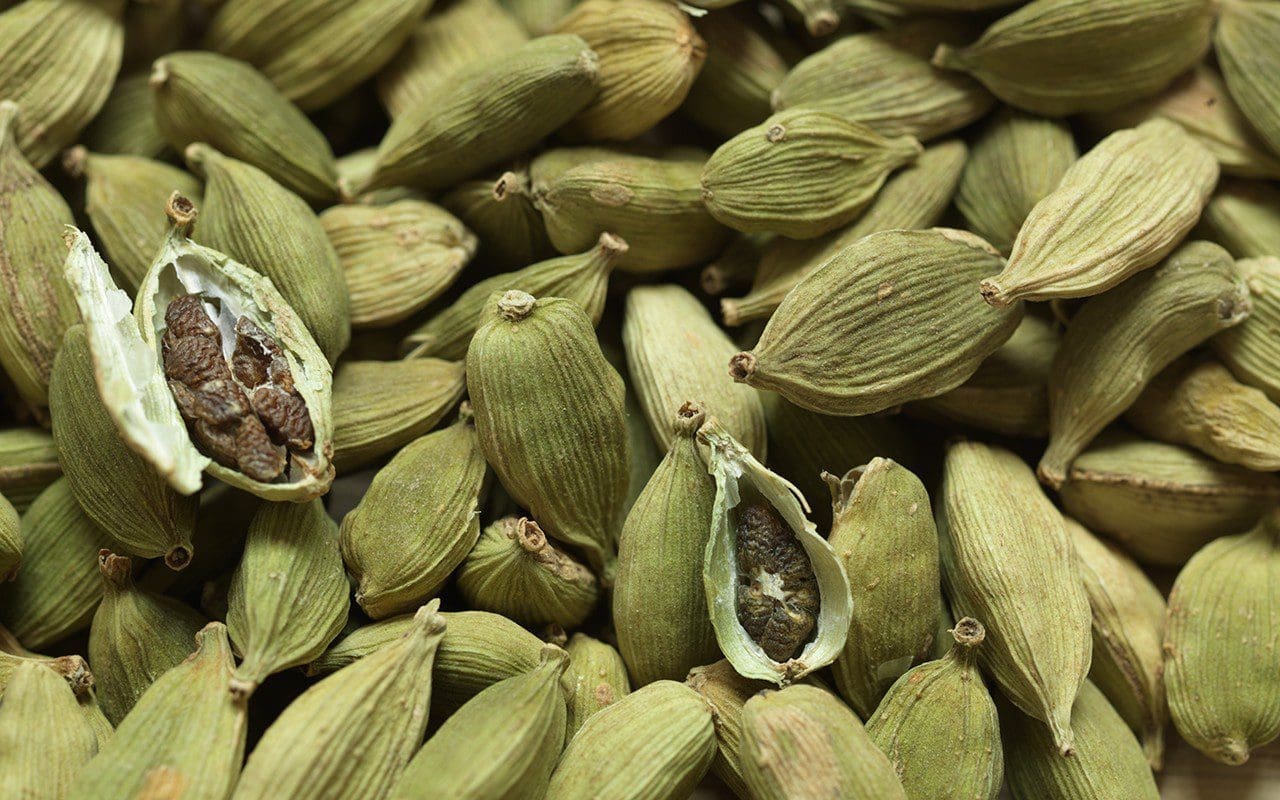 Cardamom
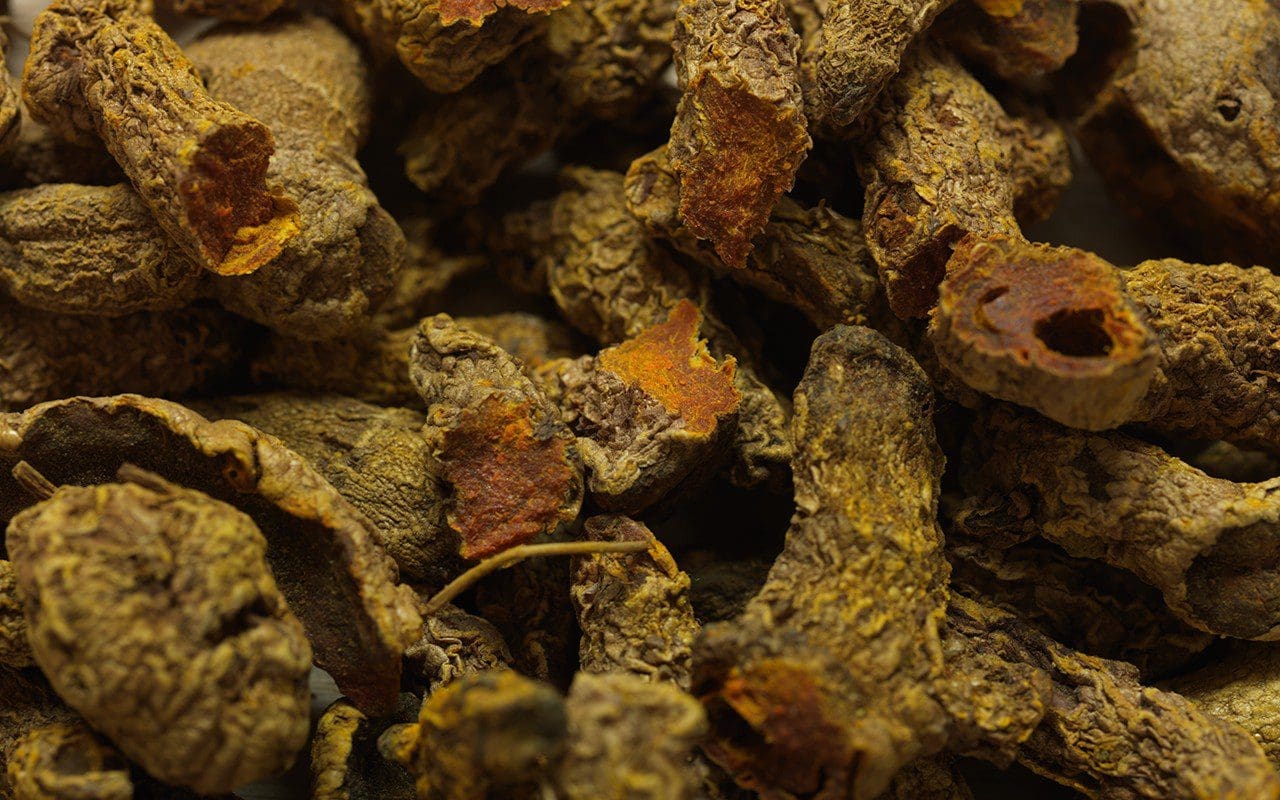 Turmeric
Can you explain how the bitters and herbal waters you produce might be used?
I’m not allowed to talk too much about the health benefits of our products, so broadly speaking their purpose is really to enhance and envigorate drinks and dishes and to give pleasure. The bitters are amazing just with water, or fresh juice, pre- and post-prandial, to stimulate digestive function and assimilate some of the metabolites from your meal. The aromatic waters are so diverse, I use them every day in a glass of water, sprayed directly on my face as a toner (rose), in salad dressings (rosemary & thyme are particularly good), to create cocktails with and without alcohol. They are amazing.
 The Herball’s Of Ayurveda Bitters
Can you tell us something of the therapeutic effects of some of your key ingredients?
Plants have endless therapeutic qualities on so many levels, physically, spiritually, emotionally, and I think it’s important that you are ingesting some good quality organic plants every day. I don’t want to say as part of a routine as that sounds boring, but use them prophylactically as a preventative. Have fun with plants, get to know them, enjoy their nature, enjoy their brilliance, it’s so rewarding for health and happiness.
The herbs we use and work with are packed full of complex secondary metabolites, diverse plant chemicals (phytochemicals) produced by the plants which enable the plants to interact with their environment. These phytochemicals have a wide range of functions, including protection from herbivores, to fight against infections and to attract pollinators such as bees and other insects. The plant’s secondary metabolites include constituents such as tannins, aromatic oils, alkaloids, resins and steroids. It is these chemicals that not only carry a raft of potential health benefits for us, but also offer a huge palette of flavours, textures and aromas to create delicious food and drinks.
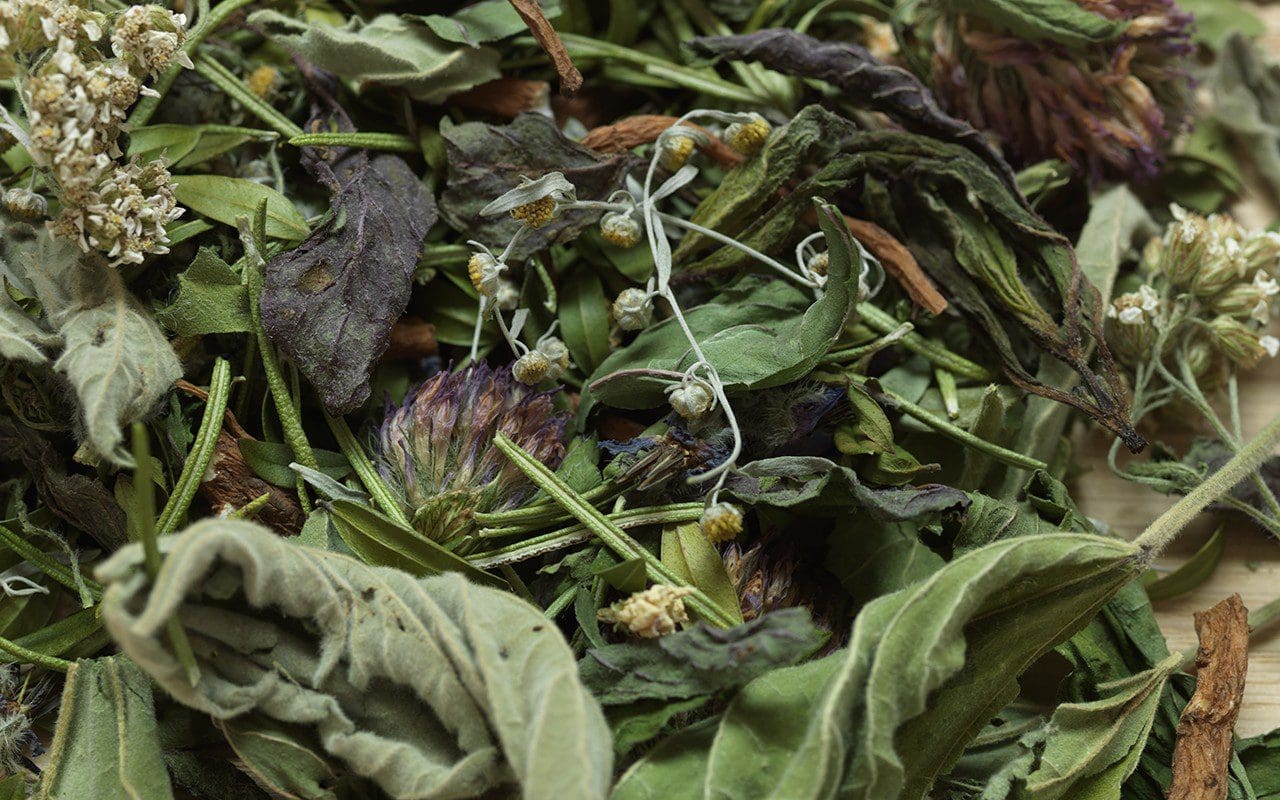 The Herball’s Of Herbs infusion contains marshmallow, peppermint, red clover, wormwood, burdock, lemon balm , rosemary, yarrow, goats rue and fennel
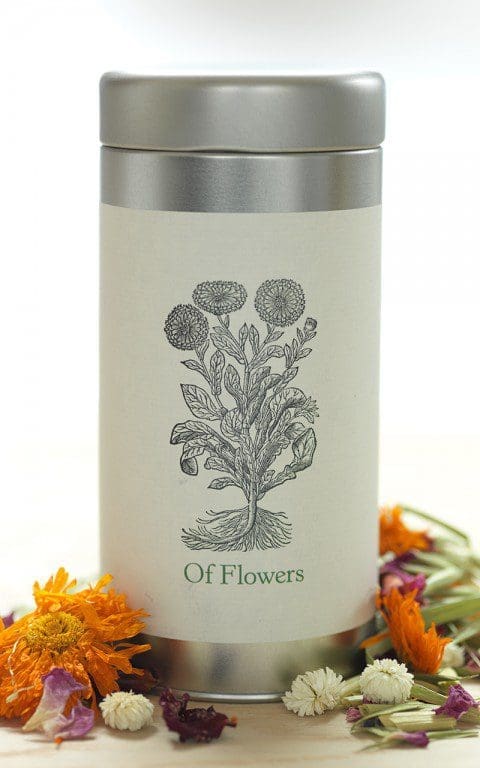
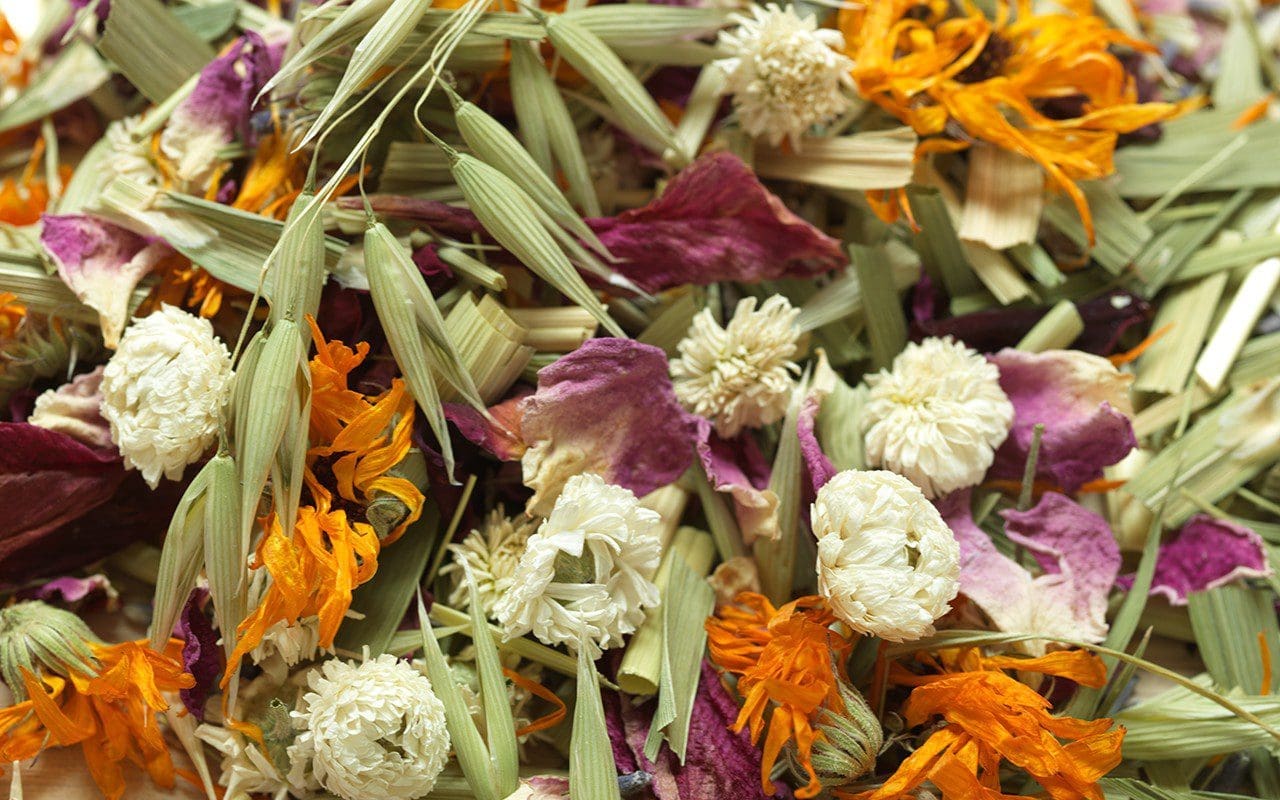 The Herball’s Of Flowers infusion contains oat straw, Roman chamomile, calendula, rose, lavender and goldenrod
You have a book coming out in the new year. Can you tell us a bit about it?
Super exciting, yes. It’s a book on my work really. I talk about my inspirations, some of the plants that I work with, when and how to harvest them and then how you can work with those plants to create dynamic and delicious botanical drinks. I talk about distillation, extraction methods, drying and processing the plants and then there are over fifty recipes, all without alcohol.
Would you share a recipe with us that readers can try at home?
Sure. I’m drinking a lot of sage right now so here is a simple recipe with sage including a quote from John Gerard, whose work we have been greatly inspired by, he wrote (or collated and published) the seminal text The Herball or Generall historie of plantes, 1597.
THE WISE ONE
‘Sage is singularly good for the head and brain, it quickeneth the senses and memory, strengtheneth the sinews, restoreth health to those that have the palsy, and taketh away shakey trembling of the members’. John Gerard 1545 – 1612.
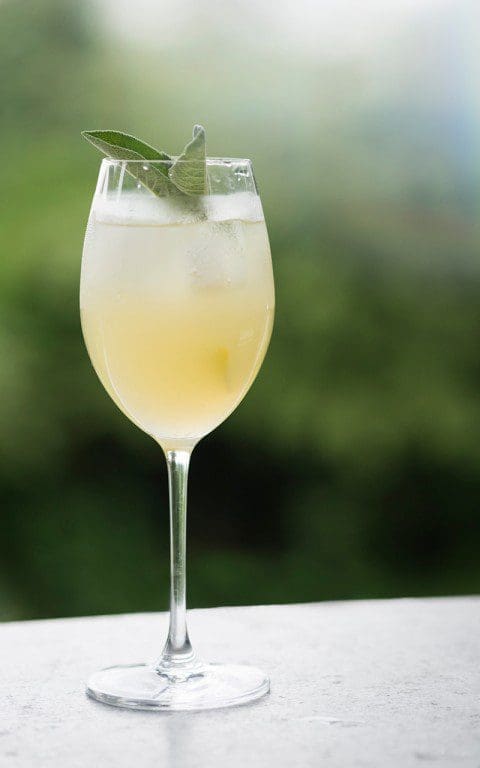 Photo: Susan Bell
This is a contemporary take on a classic sage preparation to produce a cooling, blood cleansing formula, which makes for a sensational afternoon tipple.
Plants & Ingredients
Sage Salvia officinalis
Lemon Citrus limon
Sugar Saccharum officinarum
Water
Recipe
15g fresh sage
4 lemons
500ml hot water
75ml lemon & sage sherbet (see below)
100g sugar
Method
Boil the water, then pour over 10g of sage into a pot with a lid. Infuse with the lid on for 30 minutes before straining into another jug or decanter. Peel 1 of the lemons and keep the zest. Add the juice of that lemon and the sherbet to the decanter and stir until dissolved. Keep the jug or decanter in the fridge to chill and serve once cold.
Serve in a wine glass with the remaining twist of lemon and fresh sage leaves
For the Sherbet
Peel the remaining 3 lemons, then put the zests in a container with the sugar and the remaining 5g of sage. Press the zests with the sugar and sage for a minute or so, then juice the lemons and stir the juice into the sugar mixture. Seal and leave to infuse overnight, or for at least 6 hours. Stir, strain and bottle. This will keep refrigerated for at least 1 month and can be enjoyed with still and sparkling water.
The Herball’s Guide to Botanical Drinks: A Compendium of plant-based potions to Energise, Cleanse, Restore, Boost Sleep and Lift the Heart by Michael Isted, photography by Susan Bell, will be published by Jacqui Small in February 2018. Pre-order here.
Twitter: @TheHerball
Instagram: theherball
Interview: Huw Morgan/All other photographs: Laura Knox
Published 30 September 2017
One of the goals we set ourselves when we started Dig Delve was for the writing to be as current as possible. A piece on crabapples the week they are in full bloom, a report of a garden visit made just a couple of weeks previously, and recipes using the best from the kitchen garden and hedgerows as they come into season. Many of the pieces are written the day before publication, so this ambition is not without its challenges, since Dan is often travelling for work, we need to have holidays, and sometimes other life events simply have to take precedence.
Dan has been up north this week. Firstly visiting the new RHS Chatsworth Flower Show and then on to Lowther Castle in Cumbria, where they are celebrating their official opening this weekend. So it was down to me to come up with this week’s piece.
However, like most of the country, I was up into the small hours of Friday morning watching the election coverage with bated breath. The consequent late morning start, with the accompanying time required to get a handle on what was happening in parliament, meant that I had to think on my feet to come up with a recipe for today’s issue.
I had originally thought to make a gooseberry and elderflower ice. Whether ice cream or sorbet I hadn’t decided, but, after half an hour Facetiming a friend in New Zealand who had called for an election update, it was clear that I wasn’t going to have the time to faff around with sugar syrups or custards or the freezing required afterwards. I needed something simple and immediate.
Earlier in the week I had got my first batch of elderflower cordial going and it was ready to strain and bottle. I try and make a large batch every year, but have been foiled for the past two by a combination of constant wet weather and being away in June. The recent clear, warm weather meant that, for the first time in a while I have been able to pick enough to be able to replenish our supplies.
It is essential to pick the flowers on a warm day when they are dry, and to only pick the freshest ones that have just opened and are purest in colour. If you live in a city don’t pick flowers near main roads (when we lived in Peckham I used to get my supplies from nearby Nunhead Cemetery). Don’t, whatever you do, wash the flowers, as you will wash away the pollen which gives the drink most of its flavour. For the same reason I don’t even shake the flowers before using, as many recipes suggest. Unless you are squeamish any small insects get strained out prior to bottling.
I can never get enough of the flavour of elderflower. Its floral taste announces summer. Sparkling elderflower cordial is the most refreshing way to slake your thirst during a hot afternoon’s gardening. Although I have found that a scant teaspoon of cider vinegar added to a glass is the most refreshing of all. Like orange blossom’s more demure, earthy cousin elderflower pairs well with any number of fruits, from strawberries to rhubarb, pears, raspberries, grapes and even grapefruit. It also works with gently flavoured vegetables that allow its floral notes to shine. A teaspoon or two of cordial adds fragrancy to a vinaigrette for a white chicory and goats cheese salad. A pickled salad of very finely sliced cucumber macerated in a dressing made with cordial, honey and, again, cider vinegar, and finished with poppy seeds and elderflowers, makes a sophisticated partner for poached trout or salmon.
Yesterday’s time shortage meant that I was thrown back on the reliable combination of elderflower and gooseberry, which crops up in a number of desserts I regularly make, including the unavoidable fool, a green summer pudding and a baked egg custard tart. The gooseberries aren’t quite ripe when the elder blooms, but for this drink you want the refreshing sharpness of the younger fruit.
This celebratory aperitif is a version of a Bellini where peach puree is replaced with gooseberries and a splash of elderflower cordial. I may have only had bad ones, but have always found peach Bellinis to be a little sickly. Here the combination of tart green fruit and scented flower create a drink with a distinct muscat flavour, which is dry, fragrant and deliciously quenching on a hot summer’s day. To ensure the best result, it is vital that everything, including the glasses, is ice cold before you make them.
First is the recipe I use for homemade cordial, but you could use a good quality shop-bought one.
Elderflower Cordial
Ingredients
Makes about 1.5 litres
30 elderflower heads
1kg white sugar
1 litre water
2 lemons, chopped
1 orange, chopped
2 teaspoons citric acid
¼ crushed Campden tablet (optional)
Put the sugar and water in a saucepan and bring to the boil. Stir and ensure the sugar is completely dissolved. Take off the heat and stir in the citric acid until dissolved.
Put the elderflowers and chopped citrus fruit into a sterilised plastic or glass lidded container large enough to take all of the ingredients. Pour over the hot sugar syrup. Put the lid on the container and leave in a cool dark place for 48 – 72 hours.
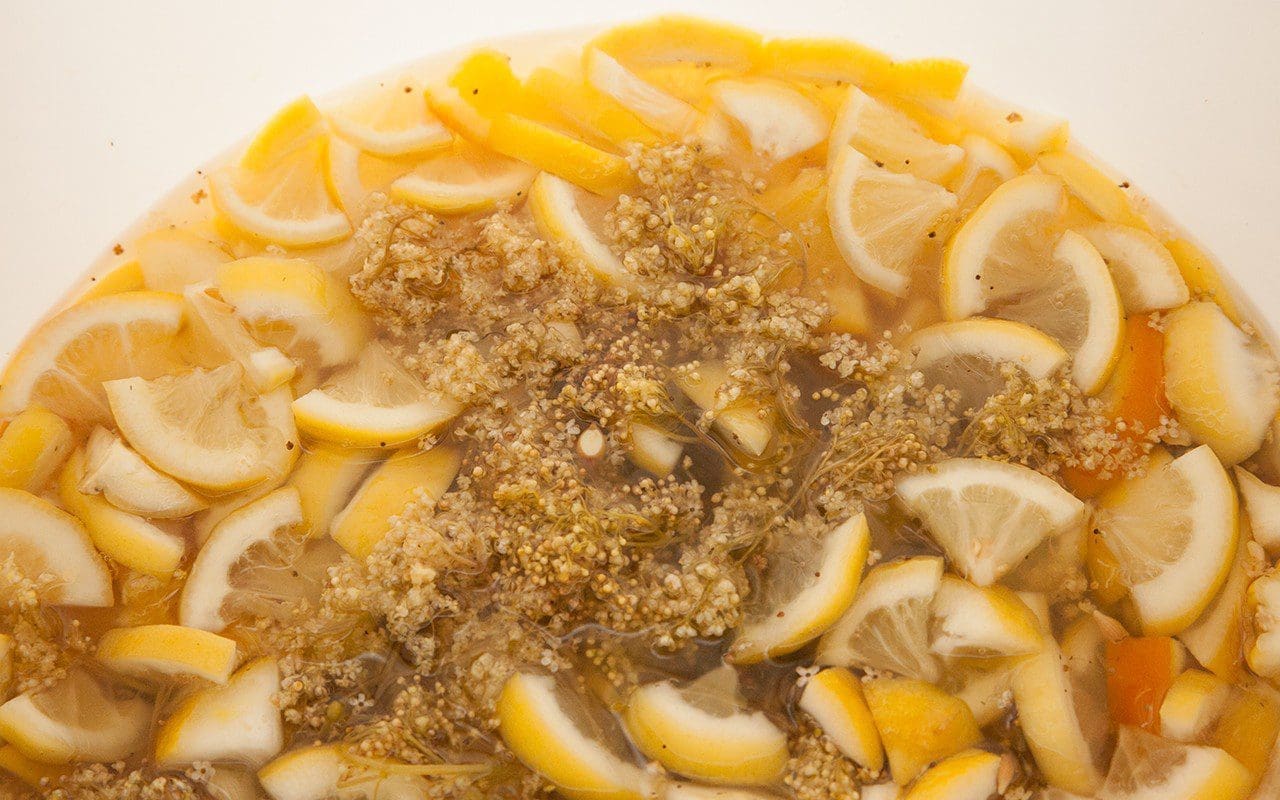
Strain the cordial through a fine muslin or tea towel that has first been sterilised with boiling water. Finely crush the Campden tablet and add it to the cordial. Stir until dissolved.
Using a funnel pour the cordial into sterilised bottles. Fasten the lid and store in a cool, dark place.
The Campden tablet (potassium or sodium metabisulfite) prevents the cordial from developing wild yeasts and bacteria which would cause it to ferment, and means that it keeps almost indefinitely. If you prefer not to use them the cordial will keep for 2-3 months, or longer if refrigerated.
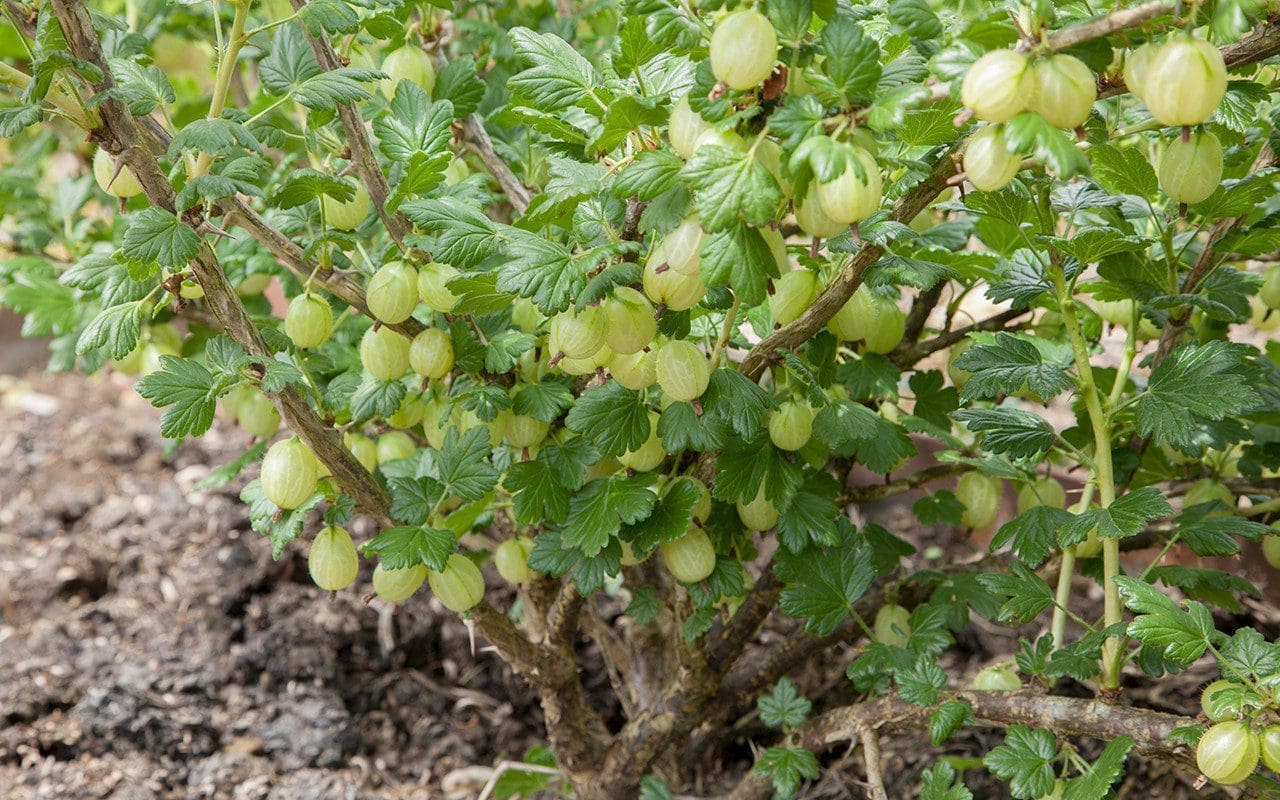 Gooseberry ‘Hinnomaki Green’
Gooseberry & Elderflower Bellini
Ingredients
Makes 6
100g green gooseberries
Elderflower cordial, chilled
1 bottle dry prosecco
Put the gooseberries in a saucepan with a splash of water. Put the lid on and cook over a low heat for about 10 minutes until the fruit has completely collapsed and given up its juice. Press the fruit through a sieve. You should have about 80ml of purée. Discard the seeds and skin. Put the purée into a covered container, then into the fridge until well chilled.
To make the drinks, take six champagne flutes or narrow tumblers that have been in the freezer for at least twenty minutes. Put two teaspoons of gooseberry purée and two teaspoons of elderflower cordial in the bottom of each glass. Slowly top up with very cold prosecco.
Decorate with a few elderflowers and raise a toast!
Recipe and photographs: Huw Morgan
Published 10 June 2017
The green sauce in this recipe is not the well known mediterranean salsa verde, but Grüne Sosse, a speciality of Frankfurt introduced to me by our friend Ariane, a native of the city, and a neighbour in Bonnington Square for many years. It is traditionally served with asparagus of the forced white variety, which is particularly prized in Germany, where Spargelfesten are held in its honour every spring. Although green sauce made from a variety of herbs can be found in German restaurants all year round, it is only in early spring that the truly authentic sauce can be made, when the herbs required are coming into their prime and the paper packages of them required to make it are found in farmer’s markets, together with the white asparagus which it traditionally accompanies.
Genuine Grüne Sosse requires seven specific herbs; sorrel, chervil, chives, parsley, salad burnet, cress and borage. However, it is seldom that any of us have access to all of these herbs, and so substitutions can be made. The crucial thing is to ensure a good balance of flavours, with the requisite amount of sourness, freshness, bitterness and spice. There is no hard and fast rule about how much of each herb to use, but a rule of thumb is that no one herb should make up more than 30% of the bulk. When possible I try to get a fairly even balance between all of them, but you should adjust to taste and to what is available.
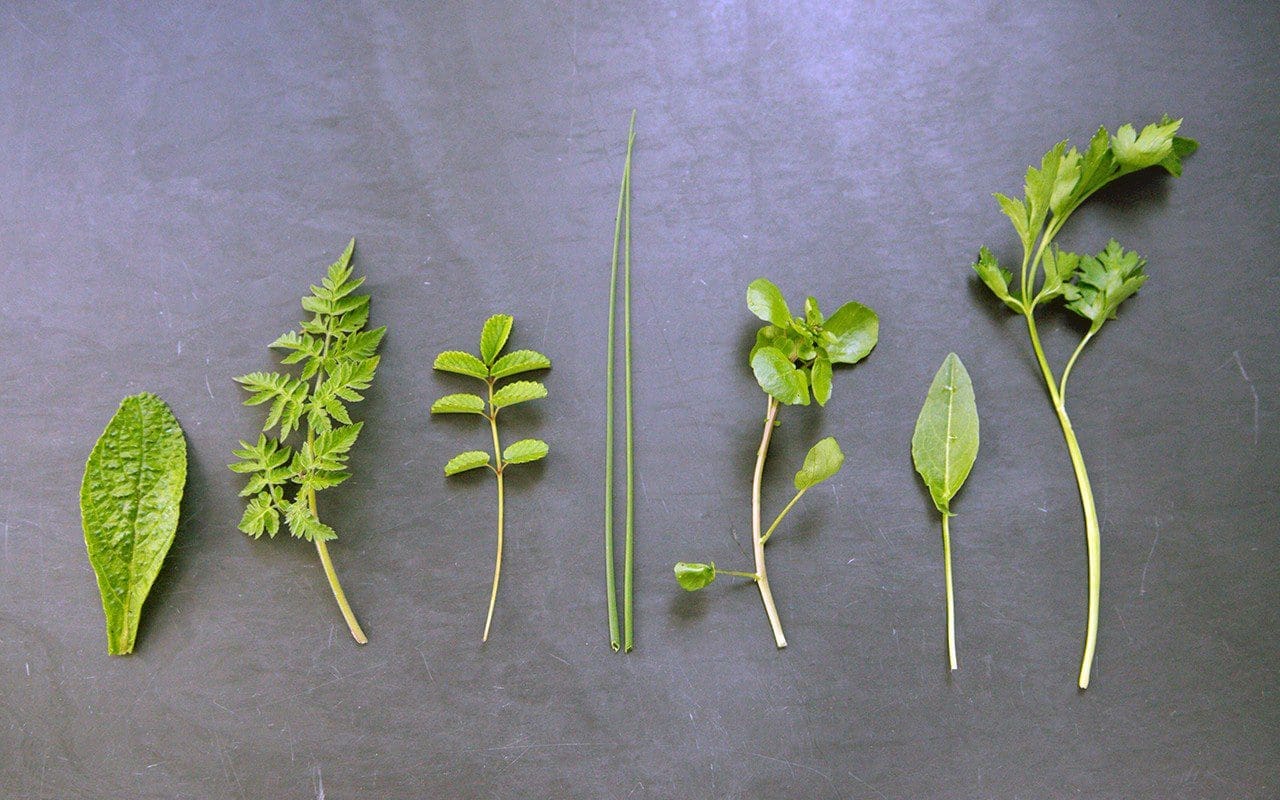
From left to right: borage, wild chervil or cow parsley, salad burnet, wild onion, watercress, sorrel, parsley
Since it is so plentiful in our fields I use wild sorrel (Rumex acetosa), which I suspect is what the authentic recipe calls for, however you can replace this with the more usually grown French or garden sorrel (Rumex scutatus). If neither of these are available you could use young chard or spinach leaves and an extra squeeze or two of lemon juice.
When it is available I use wild chervil instead of cultivated. Otherwise known as cow parsley (Anthriscus sylvestris), it is perfect to pick right now, and can be substituted for garden chervil (Anthriscus cerefolium) in salads or sauces for chicken and fish. If you are an inexperienced forager you must be extremely careful not to mistake poisonous hemlock for cow parsley. Use a good field identification guide (Miles Irving’s The Forager Handbook and Roger Phillips’ Wild Food are invaluable) and, if in doubt, do not pick it.
In place of chives I use wild onion (Allium vineale) from the fields, being careful to pick only the youngest quills, as the older ones are tough. The cress can be replaced with watercress, rocket or even nasturtium leaves, to provide the peppery note. And, from the hedgerows, I have also used the leaves of garlic mustard (Alliaria petiolata), young dandelion leaves and even nettle tops, when the other herbs are hard to come by.
The salad burnet and borage both impart a distinctive cucumber flavour which it is not possible to replicate with other herbs and which is particular to this sauce. When unavailable I have used peeled and finely grated cucumber in their place. Salt it and squeeze the juice from it before incorporating, to prevent it diluting or curdling the sauce.
It is also possible to make up the quantities with more easily available herbs such as dill, fennel, tarragon or mint but, with their pronounced flavours, these should all be used in moderation or they will overwhelm the flavour.
This sauce is also traditionally served with boiled new potatoes and halved hard boiled eggs, or as an accompaniment to boiled beef or poached fish.
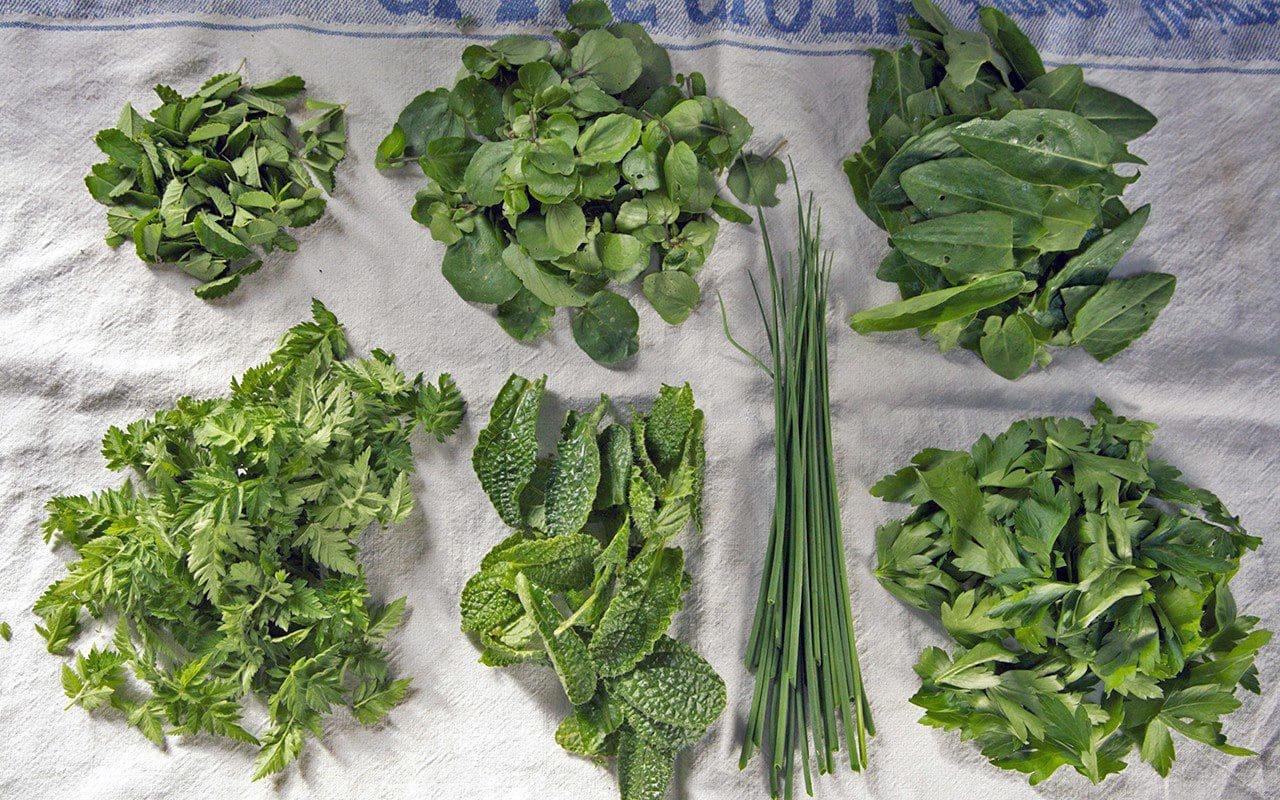
Clockwise from top left: salad burnet, watercress, sorrel, parsley, wild onion, borage, wild chervil
Ingredients
150g mixed green herbs
250g sour cream or quark
125g yogurt
2 hard-boiled eggs
3 tablespoons lemon juice
sea salt
7-8 spears of asparagus per person
Serves 4
Method
Wash the herbs. Put them in a salad spinner and then dry on a tea towel or paper towel.
Remove the leaves from the stems.
Discard the stems.
Peel the eggs and put the yolks in a mixing bowl. Coarsely chop the whites and reserve. To the egg yolks add the lemon juice, 2/3 of the herbs, 1/4 teaspoon salt and the yogurt . Liquidise using a hand blender.
Stir the sour cream into the mixture. Add the coarsely chopped egg white. Finally add the remaining finely chopped herbs.
Season with more salt and lemon juice to taste.
If possible allow the sauce to rest in the fridge for an hour or so for the flavours to combine. Allow to come back to room temperature before using.
Gently bend the asparagus spears until they snap. Trim the broken ends. If necessary finely peel the lower sections of the stalks of the outer fibrous layer.
Put water to a depth of 2cm into a lidded sauté pan that is wide enough to take the asparagus in a more or less single layer. Bring to the boil. Put in the asparagus and simmer until tender. For thicker or older spears this may take as long as 5-6 minutes. Fine spears and those just picked will take far less, 2-3 minutes at most. Take the asparagus from the water and spread out on a paper towel on a plate to drain and cool quickly.
Arrange the warm asparagus on plates. Spoon over some of the sauce. Decorate with reserved herb leaves. Eat with fingers.
Recipe and photographs: Huw Morgan
Although asparagus only became prized as a culinary vegetable in Britain in the 17th century it was grown, and indeed prized, by the ancients as a medicinal herb and vegetable. The Romans even froze it in the High Alps, with the Emperor Augustus creating the Asparagus Fleet to take the freshly pulled spears to be buried in the snow for later.
The tips, which are the sweetest part and known as the love tips or ‘points d’amour’, are always best when eaten fresh and, though we think nothing of seeing it on the supermarket shelves as an import, there is nothing like eating it in season, right there and then, when the energy of the new season is captured in young spears.
So it is a good feeling to have planted an asparagus bed, as they represent longevity and permanence. Plant one and it will take two to three years to yield, but established crowns can easily crop for a couple of decades if you give them the care they need; namely good drainage, plenty of sunshine and little competition at the root. The roots, which radiate out from a crown in spidery fashion, are shallow, and hoeing is not advisable, so an asparagus bed is also a commitment to hand weeding. You will have to work for your reward.
“…established crowns can easily crop for a couple of decades if you give them the care they need…”
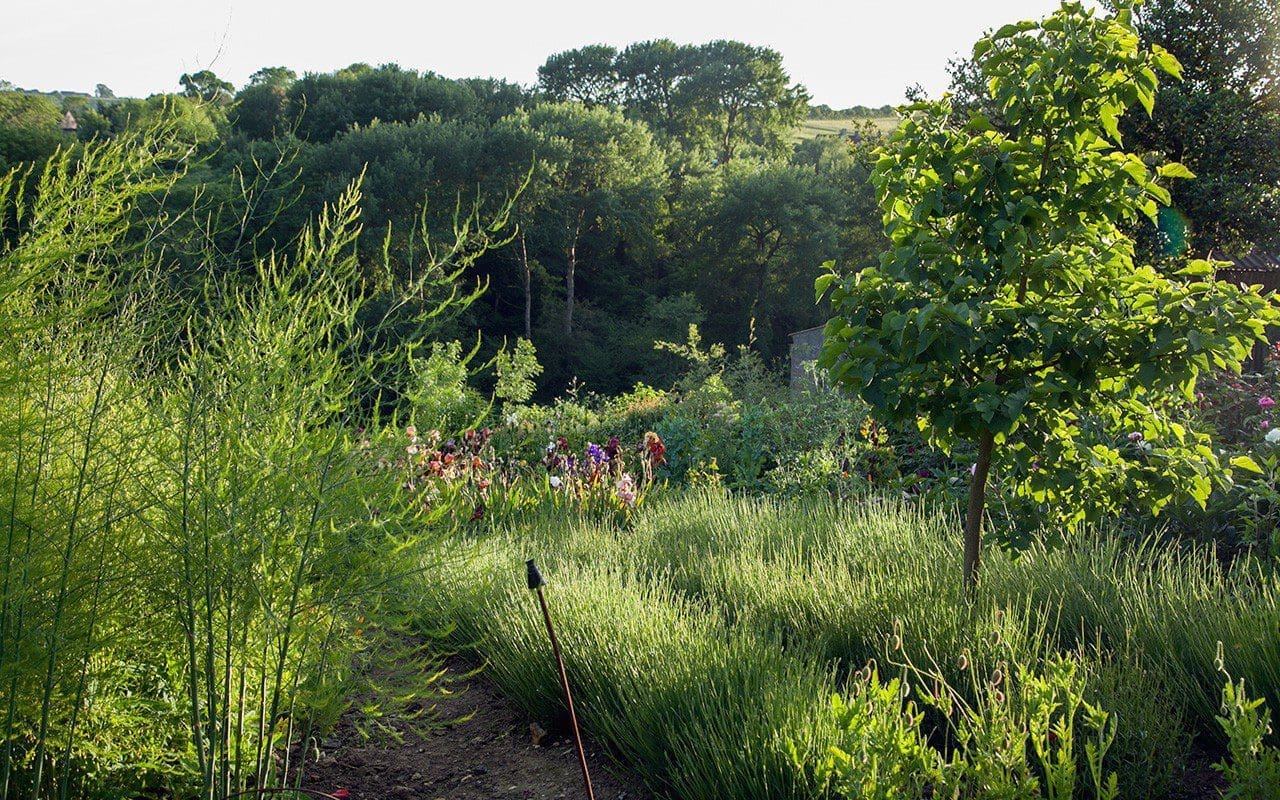
Being a coastal plant, Asparagus officinalis is tolerant of salt, indeed tradition has it that the beds be salted to keep weeds at bay. However, I do not. In truth my bed is far from text book perfect. I have not raised it above the surrounding ground like the carefully drawn diagrams in the books, and the Californian poppies and Shirley poppies have seeded into the open, weed-free ground to become the, admittedly attractive, weeds in the patch.
I winkle the Eschscholzia out where they seed too close to the crowns, but leave a handful, as they like the same conditions and sit brightly beneath the fronds once the asparagus is allowed to grow out after cropping. The few plants that are female pepper themselves with scarlet, pea-sized fruits, which hang in suspension like beads caught in a net as the fronds fade to butter-yellow later in the season. It is a fine but unadvisable association, if playing things by the book is your thing.
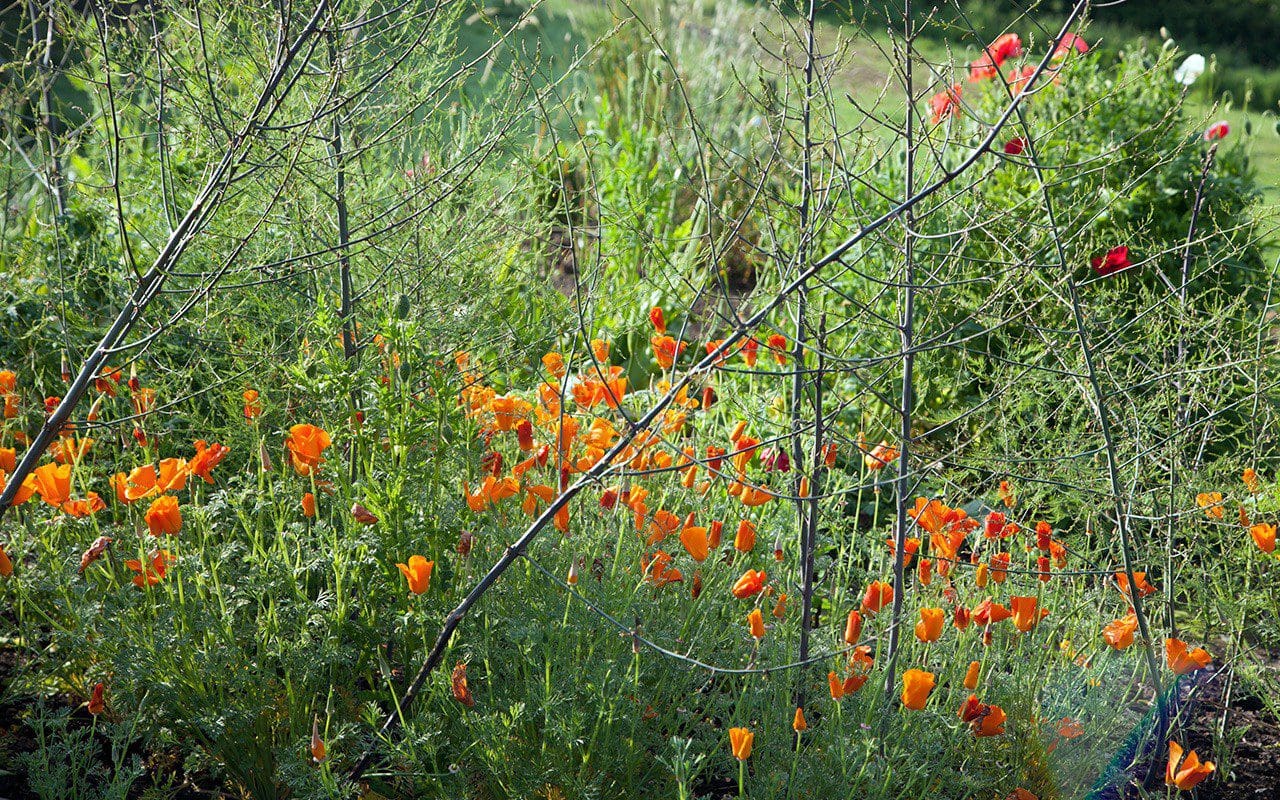 Californian poppies provide interest beneath the asparagus ferns later in the season
Our first asparagus bed was planted four years ago in the original mixed vegetable and trial garden. The crowns, which are best planted bare-root in the spring, arrived by post and were carefully planted in late April. The soil was manured the previous summer and the crowns laid out on an 18” grid. The books advise two feet between rows, but our slopes are sunny and the ground hearty, so I took the risk with a closer planting.
I opened a trench and fashioned a little mound of soil for each plant to allow the roots to radiate out, down and away from the crown. The trench was then backfilled with the crown just below ground level and marked with a cane to protect the position of the first emerging spears. Over the first year the crowns gather in strength, each frond outreaching the next so that, by the end of the first summer, they are already showing their potential. It is essential to wait before cropping to allow the plants to build up their reserves. I cropped them for the first time last year, but took only a few spears to avoid weakening them. This year, there will be no need to hold back.
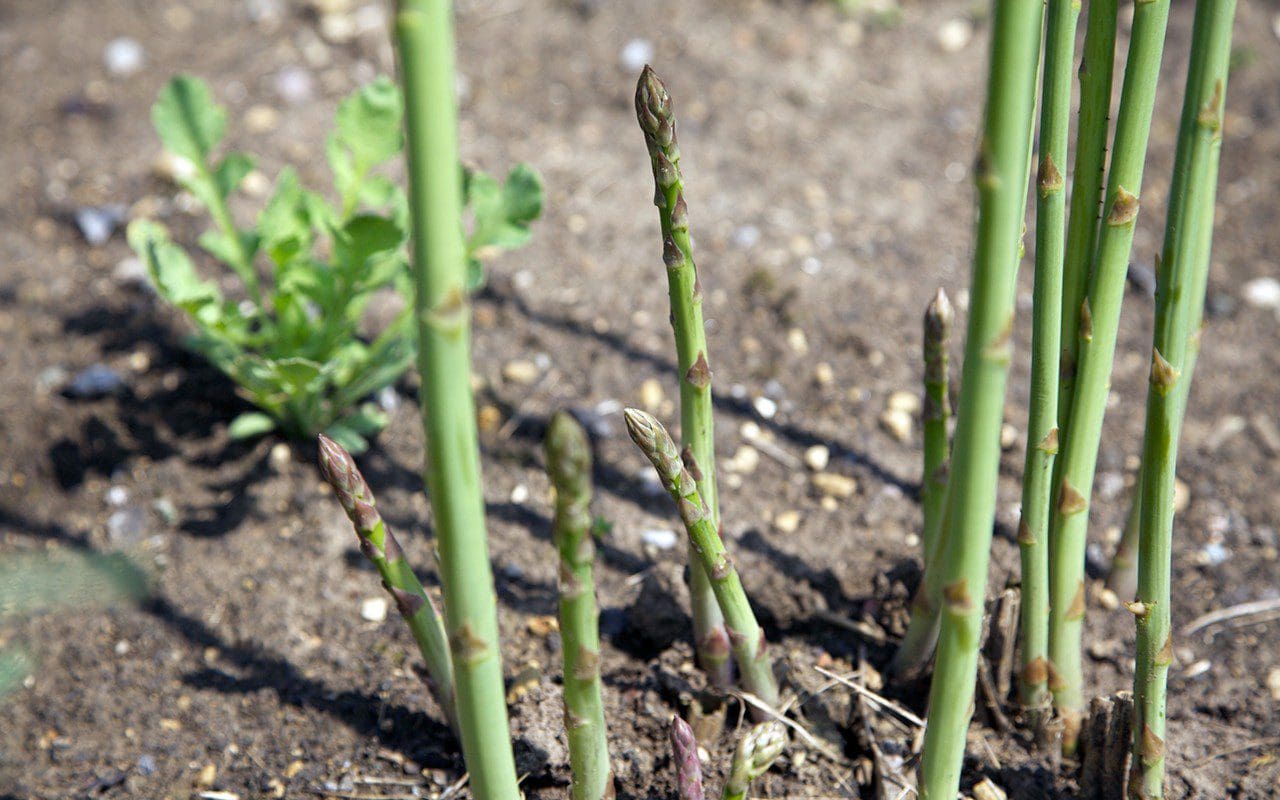 Asparagus officinalis ‘Connover’s Colossal’
I bought two varieties initially, both male, so I am not sure how I have females in the mix, but no matter. Male plants are more productive and so, according to the rules, the berrying females should be weeded out. ‘Connover’s Colossal’, an old 19th century variety, is a reliably strong cultivar, but ‘Stewart’s Purple’ has been disappointing. It is supposed to be higher yielding than many of the green varieties, but you only really know and understand what a plant’s habits are when you grow it for yourself and, for me, ‘Stewart’s Purple’ doesn’t cut the mustard.
A third of the plants have failed and, although the spears are a beautiful inky purple colour and deliciously sweet, even the plants that have survived have cropped very erratically. They require far too much space to waste on such a meagre harvest. Anthocyanins, which give vegetables and fruit their purple colouring, are valued as antioxidants, but I wouldn’t grow this variety again other than to possibly work it into the herb garden as an ornamental. Here, with moody fronds rising up prettily above chives and purple sage, occasional spears could be harvested and thinly sliced raw into salads.
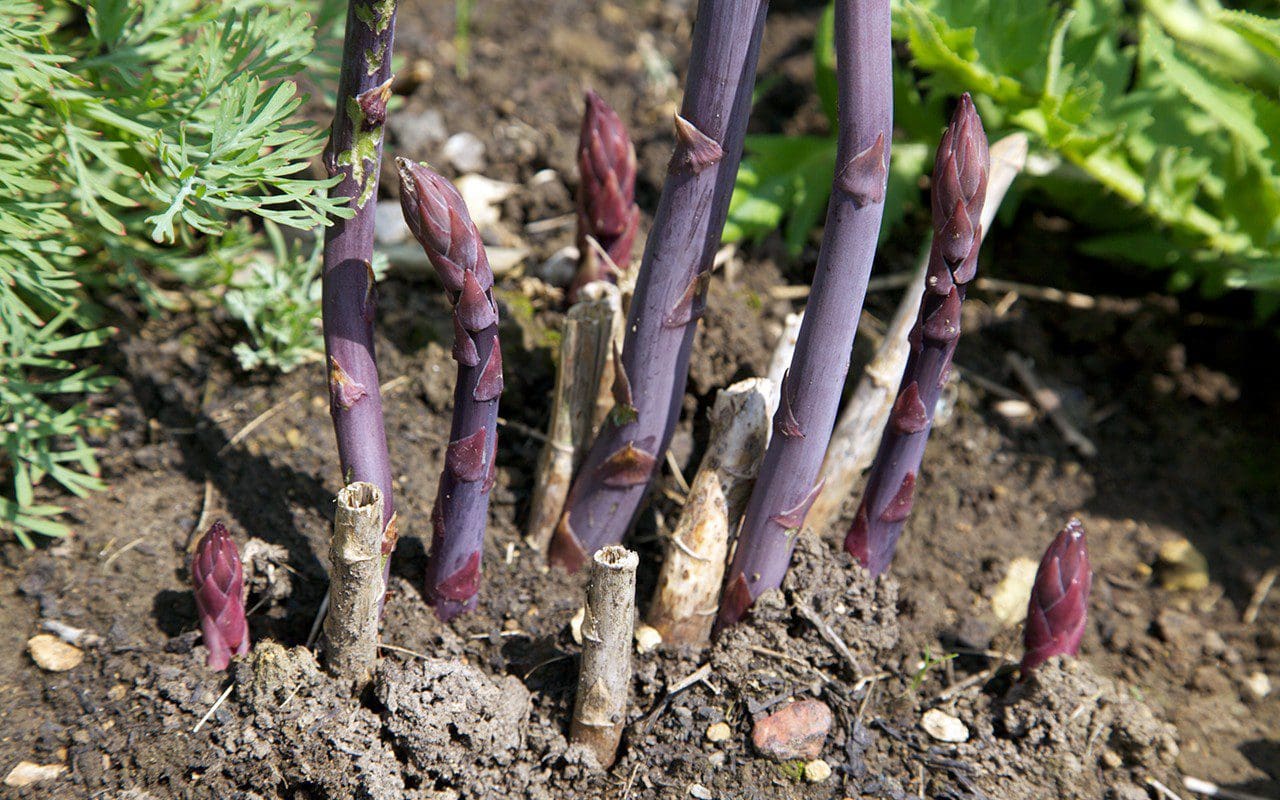 Asparagus officinalis ‘Stewart’s Purple’
There is an associated guilt attached to my original asparagus bed, which comes from the knowledge that the bed could never have been long-term. I always knew the test garden would give way to a new ornamental garden and, over the last couple of years, I have been relocating the vegetable garden to the other side of the house. The diggers are coming in shortly to shape the land for the new garden, but the asparagus bed will remain for one more year, like a boat anchored off shore.
Last spring I planted an F1 variety called ‘Gijnlim’ in the new vegetable garden to pave the way for the hand over from the old bed to the new. Having been selected for its hybrid vigour ‘Gijnlim’ is said to crop within a year, but I am still leaving it this year to build up reserves, mulching the bed with home-made compost before the spears emerge. It won’t be easy to cut my old bed adrift when I have to later in the autumn, but for now we are enjoying the luxury of eating the spears absolutely in season, when the garden is beginning to rush with energy.
“It won’t be easy to cut my old bed adrift when I have to later in the autumn….”
When a bed is up and moving in the spring, you can visit it daily for three weeks or so of harvesting. A sharp knife inserted carefully at the base of a spear and just below ground level is the best way to pick what you need, but be careful not to damage the crown. See it as a surgical exercise and, for best and sweetest results, pick just before you eat. Steam and serve al dente and every mouthful will be worth the commitment.
If you read up about asparagus yields to try and arrive at an ideal number of plants for a bed that suits your needs you get wildly differing advice. An American website says that 24 plants produce enough for a family of four. Big portions I’m guessing, but advice closer to home advises ten to twenty plants for the same number of people. We have sixteen crowns in the new bed and hope that this will be plentiful enough to pick what we need without providing a guilt-inducing glut. I’d have liked for there to be two varieties, so that we have an early cropper and a late, but we have had to draw the line somewhere. There is only so much ground that can be committed to perennial vegetables, even one as delectable as sparrow-grass.
Words: Dan Pearson / Photographs: Huw Morgan
ALREADY A PAID SUBSCRIBER? SIGN IN
ALREADY A PAID SUBSCRIBER? SIGN IN
