ALREADY A PAID SUBSCRIBER? SIGN IN
Last year was the first time that we have grown Jerusalem artichokes here. Not from a lack of desire, but a lack of space. That may sound crazy when our vegetable garden is larger than many peoples’ gardens, but Jerusalem artichokes are voracious plants and you must have enough space to give over to them if they are not to become problematic.
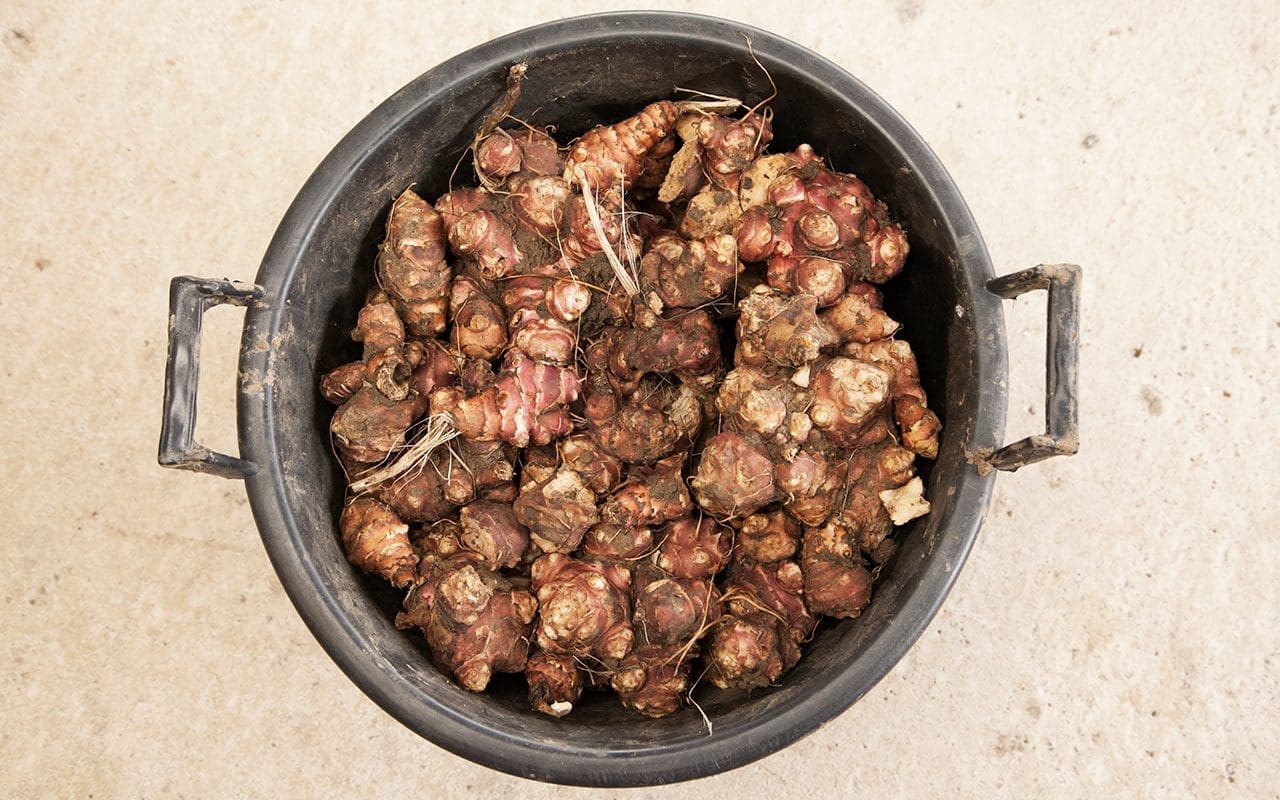
Growing to three metres tall and two metres across they should be placed on the north side of the garden so as not to shade out other crops. On the other hand they can be useful if you have vegetables that need shading or protecting from wind like some brassicas (broccoli, Brussels’ sprouts, kale), salad leaves and oriental greens. We fenced a new productive compound around the polytunneI last winter, so in the spring I ordered five tubers from Otter Farm. Planted 60cm apart and 15cm deep in April by August they had overreached their 4 metre by 1 metre bed and, on our rich soil, have produced a crop of almost 20 kilos in one season.
Not from Jerusalem at all, but a native of North America, Helianthus tuberosus is, as its Latin name indicates, a type of sunflower, a perennial variety which means it should be planted where you intend to keep it, as it will return year after year. Prone to spreading they should be planted where you can get at them easily to curb their invasive tendencies. For the same reason, when harvesting it is important to try to dig up all of the tubers, as a single one left in the ground will cause your colony to proliferate the following year. I have kept five tubers back this year to replant in the same position. Like potatoes Jerusalem artichokes can be a good first crop to plant in previously uncultivated or heavy ground as the growth of the tubers and their subsequent harvesting break up the soil. However, you must remove all trace of them if you plan to grow other crops in their place afterwards.
Ready to harvest from late October onwards Jerusalem artichokes do not store well once lifted and so are best left in the ground and harvested as required. Incredibly hardy they will tolerate winter temperatures down to -30°C. If you have to dig them all up they are best stored in a cool, dark place such as an outhouse, cellar or shed, although they will keep, well-washed and well-dried, in the salad drawer of the fridge for a week or so.
The fleshy, edible tubers are quite unlike any other vegetable in texture or taste. Although starchy like potatoes, they have a sweet, nutty flavour when cooked which is just about comparable to artichoke hearts, but also distinctly its own thing. Unlike potatoes they can be eaten raw, when their texture is reminiscent of water chestnuts. Thinly sliced with a sharp citrus dressing they make an unusual, crisp winter salad.
Their reputation for causing flatulence precedes them and is what often prevents people from growing or eating them. Caused by the inulin they contain, a starch which is difficult to digest, it is not a problem for everyone and it would seem, from personal experience, that the more often you eat them the less of a problem this is.
Their somewhat delicate, earthy flavour is also distinctive and although typically combined with woodsy flavours like bay, sage, thyme and nutmeg, it can hold its own with much stronger flavours and works unexpectedly well with punchy Mediterranean ingredients; tomatoes, red onions, black olives, capers and anchovies.
This recipe is for a rich, velvety and warming soup for a frosty day. Add more liquid if you prefer a thinner soup. Cooked with half the amount of water the resulting purée is a good accompaniment to game birds, chicken and firm white fish. Substitute the artichokes with celeriac or good floury potatoes if the prospect of a windy evening puts you off.
1kg Jerusalem artichokes
40g dried porcini mushrooms
1 small onion
A spring of thyme, to yield about 1 tsp of leaves
50g butter
4 tbsp rapeseed oil
150ml full cream milk
About 1 litre of water
Serves 4

Set the oven to 200°C.
Soak the dried mushrooms in 200ml hot water.
Heat 25g of butter in a large pan over a medium heat. Finely chop the onion and cook for a few minutes until soft and translucent, stirring from time to time.
Remove the porcini from their water. Squeeze the liquid out of them back into the bowl and retain. Coarsely chop two thirds of them and add to the onions with the thyme. Cook together for a few minutes more, stirring occasionally.
Scrub the artichokes extremely well and remove the fibrous hair roots. Trim off any black patches. Reserve one tuber of approximately 100g and cut the remainder into walnut-sized pieces. Put into a roasting pan in a single layer. Drizzle with olive oil and roast in the oven, turning occasionally, for about 30 minutes until softened and caramelised. Add them to the pot with the onions and mushrooms.
Make the mushroom soaking water up to 1 litre with fresh water and add to the pot. Bring to a gentle simmer and cook with the lid on for about 20 minutes until the artichokes are soft.
Blend the mixture until smooth. Add the milk and season with salt and pepper. Return to a very low heat to keep hot.
Melt the remaining butter in a small pan over a medium heat. Coarsely chop the remaining porcini and stew in the butter for a few minutes until soft and glossy. Remove from the pan and reserve.
Add the rapeseed oil to the a pan and raise the heat. Using a very sharp knife or mandolin slice the reserved artichoke very thinly. When the oil is smoking fry the artichoke slices in batches until brown. Drain on kitchen paper where they will crisp up.
Ladle the soup into warm bowls and place a few artichoke crisps and stewed mushrooms on top. Serve piping hot.
Recipe & photographs: Huw Morgan
Published 29 January 2022
As if in sympathy with the sicknesses, both physical and political, which have dominated the world since the beginning of the year, the kitchen garden got off to a half-hearted start this spring. The broad beans and peas were ravaged by mice, chard and brassicas were mildewed and slug-devoured and far too many of my first sowings germinated badly. The most concerning of these was the celeriac, which is a staple for us in the winter. We habitually plant 20 plants and eat them all.
Celeriac seed is small and notoriously erratic as it needs light and early warmth to germinate. It also has a long growing season and so needs to be started off in early spring indoors, under glass or in a heated propagator. We waited more than three weeks for ours to appear on a bright windowsill, before finally admitting that they probably weren’t going to. And so, in the knowledge that we simply couldn’t survive a winter without, I resorted to ordering some young plants from an online supplier. We hardly ever do this, but I am always grateful that they exist as you are effectively able to buy time and plug any gaps in the garden that might have appeared through misfortune or mismanagement.
However, what you do not have from mail order suppliers is control over the varieties, and I was obliged to buy ‘Giant Prague’, when our proven variety of choice for many years now has been ‘Prinz’. We have never had a problem with ‘Prinz’, which has been easy to grow and a reliably heavy cropper, with roots of a kilo or more being standard. So I have been keeping an eye on the newcomers this summer to see how they compared. I quickly noticed their different growth habit, as they are much taller, more upright and leafier and so have shaded the plants behind more than the lower growing ‘Prinz’. In late summer I also became aware that the roots were not bulking up as noticeably, despite the heavy watering that they like and regular feeding.
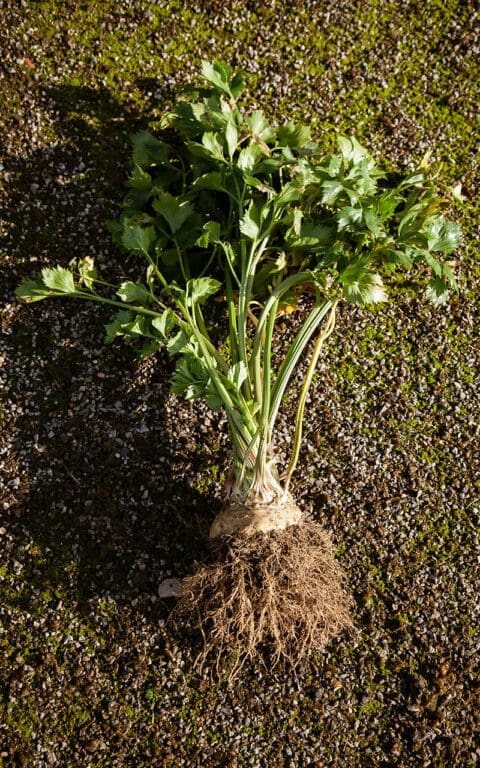
When I went to dig the first of the celeriac for this recipe this morning I was not impressed to find that several of the plants are bolting, and so have useless withered roots, and that the plants in the back row, in the deepest shade, have also failed to swell. Immediately the number of meals we have counted on them to provide is probably halved. Somewhat disheartening after all the effort and the ground given up for a disappointing crop of something we have taken for granted. At least it was good to know that I would be making the roots go further with the addition of chestnuts and windfall apples.
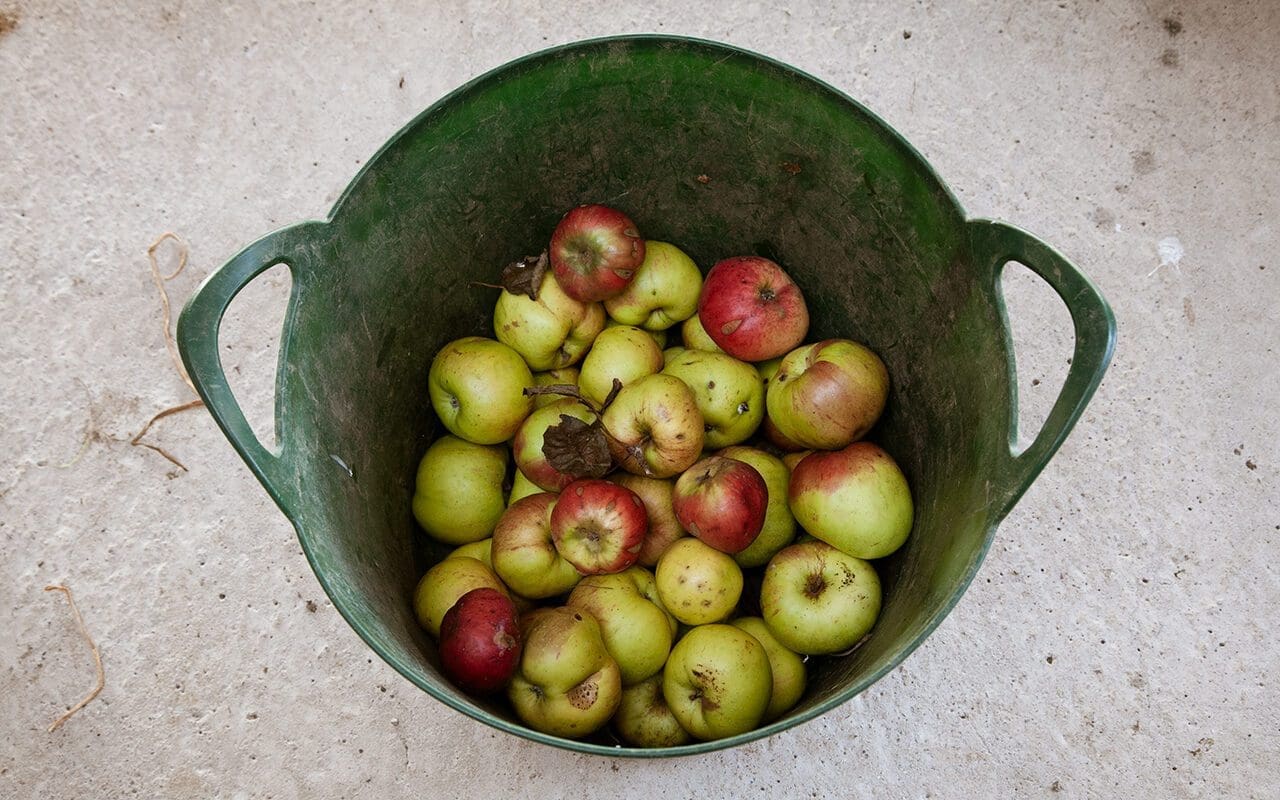
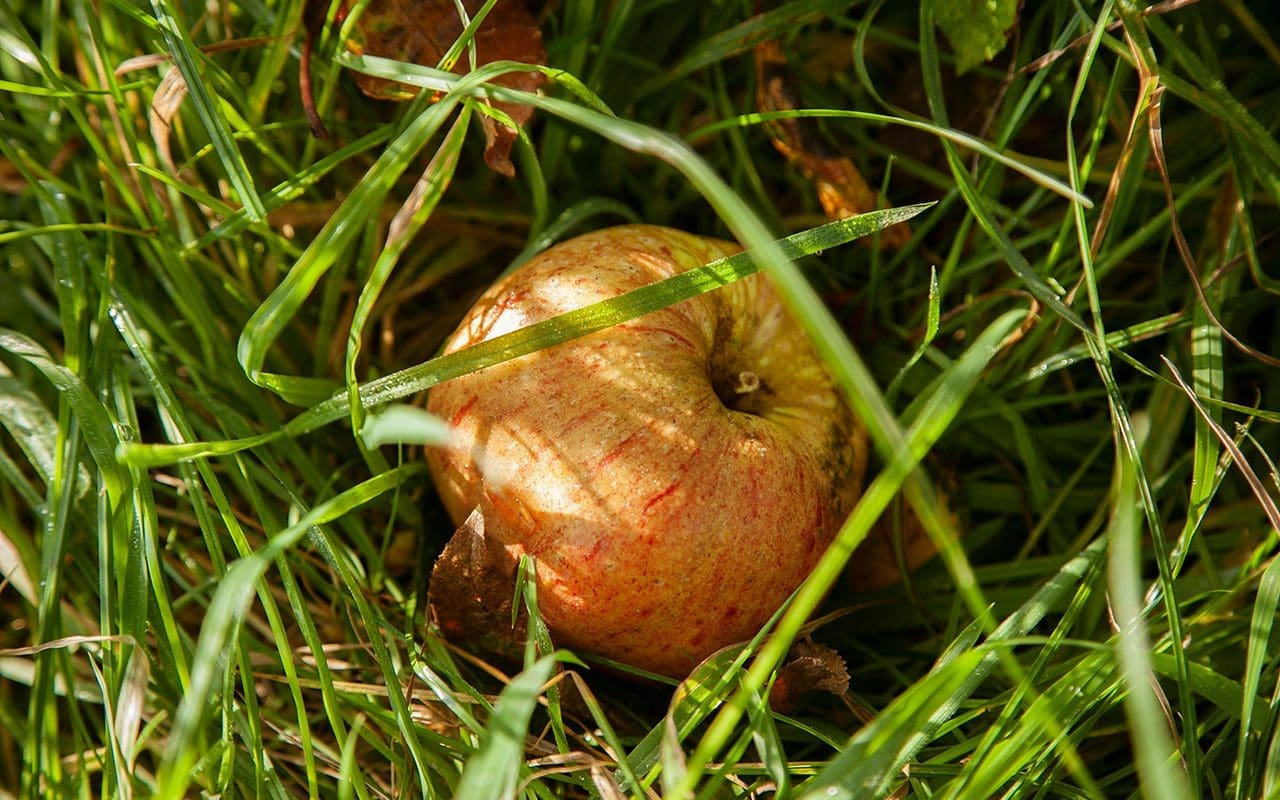
In the orchard the apple ‘Peter Lock’ has held onto its fruits the longest of all. This West Country variety has a long season of ripening, and so there are still apples on the branches that won’t fall no matter how vigorously you shake. The ripe windfalls are cushioned by the long grass of the pasture in which they grow and so, if you can get them before the mice, jackdaws and wasps do, they are seldom badly bruised or damaged. ‘Peter Lock’ is a dual-purpose eating and cooking apple with creamy white flesh. It is tart, yet sweet, and makes the most delicious golden apple puree which we always have a container of in the fridge, both for breakfast or evening dessert with yogurt or cream respectively. The large fruits also store well into the new year.

Our late spring frost on May 12th means we are without chestnuts this year, but the tree that Dan planted in memory of his dad has thrown out some good growth without the energy going into fruit so we hope, frost permitting, for a crop next year. Celeriac has an affinity with many nuts, particularly walnuts, hazelnuts and pecans. Here seasonal chestnuts enrich and thicken the soup. Wild mushrooms would be an appropriate addition. Rustic shards of bread fried in olive oil would provide textural contrast. The addition of cooked pearl barley would make it more substantial and go further. It would take well to the addition or substitution of other warming herbs and spices including rosemary, thyme, sage, winter savory, nutmeg and mace.
750g celeriac, after peeling, coarsely cubed
1 medium onion, peeled and coarsely chopped, about 200g
350g cooking or eating apple, peeled and cored and coarsely chopped
300g cooked chestnuts
2 bay leaves
8 juniper berries, crushed
2 cloves garlic, finely chopped
A 2cm length of fresh ginger, peeled and finely grated
50g butter
1 litre hot vegetable or chicken stock
Heat the butter in a large, heavy-bottomed saucepan until foaming. Add the onion and stir to coat thoroughly. Put on the lid and leave on a low heat to sweat. Stir from time to time and cook until translucent and golden.
Add the celeriac, garlic, juniper, ginger and bay leaves to the pan, stir everything together, and return to a low heat with the lid on. Stir from time to time and cook for around 15 minutes, when all should smell fragrant and the celeriac is starting to become translucent at the edges.
Add the hot stock and chestnuts, stir and return the lidded pan to the heat. Cook very gently for about 40 minutes until the celeriac is soft.
Add the apple and cook for another 10 to 15 minutes until it starts to break down.
Remove from the heat and use a potato masher to roughly smash the mixture into a course soup. Season generously with salt and black pepper.
Recipe & photographs: Huw Morgan
Published 7 November 2020
Yesterday we had our first snow. Just the briefest flurry, and it was too wet and warm for it to settle, but snow all the same. The colder weather demands something warm and hearty in the stomach and has finally given me the opportunity to make a long-planned silky soup from the coco beans that have been in the freezer since I harvested them over a month ago.
To date we have only ever grown climbing beans to eat fresh, but this year we grew a range of new beans, some of which I selected specifically for storing. At the end of the summer the bean which had cropped most heavily was ‘Coco Sophie’, a late 18th century variety which became commercially unavailable in 2006, and has only recently been re-introduced by The Real Seed Company. Due to the variety and quality of their seed, it has fast become our go-to seed supplier.
Coco beans are an old French large haricot type, producing shiny, round, creamy white beans with a texture comparable to normal haricot or cannellini beans. However, they are smoother and richer than either. The Coco de Paimpol, which is grown only in Brittany, has its own appelation d’origine contrôlée due to its incomparable texture and flavour. Although I had eaten coco beans in restaurants before and been struck by their silky texture, I had not, until this year, been able to find seed to grow them myself.
I picked the beans when semi-dry – which cuts down their cooking time significantly – and froze them immediately. However, they can be fully dried and then soaked before cooking. If using dried beans for this recipe 400g of dried beans will give a soaked weight of approximately 800g and, although you do not need to sieve the soup, it produces a superior result that is worth the little additional effort.
In my mind I had a velvety smooth, garlic-laden puree flavoured with woody herbs and a whiff of truffle. I had a recollection of having eaten something similar many years ago in Milan, as I associate it with distinct memories of risotto alla milanese, osso buco and whole pan-fried porcini.
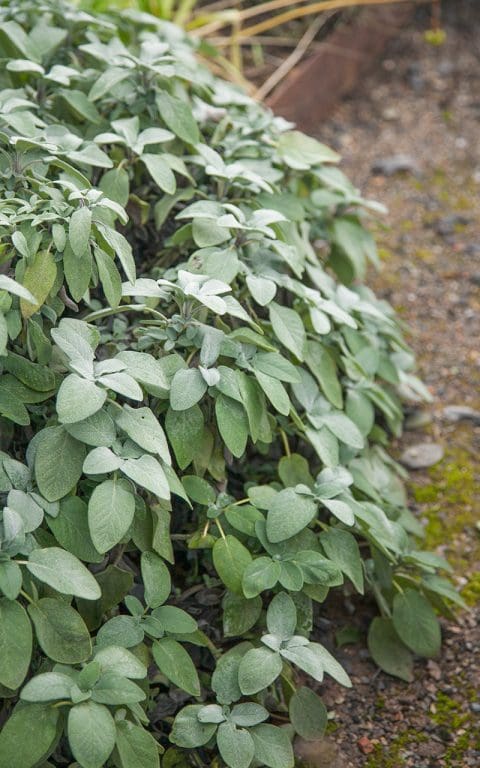
A whole bulb of garlic may seem too much initially, but since it is simmered in the stock its strength is tempered and sweetened. The seasonal combination of sage and bay is warm and aromatic. Although we have several types of sage growing here, the most robust and best-flavoured variety is known simply as ‘Italian’, with large silver-grey leaves that are winter hardy and perfect for frying.

Serves 6
3 large leeks, white and pale green parts only, about 250g
3 tbsp olive oil
800g fresh or cooked white beans
1 bulb garlic
2 large sprigs of sage
1 large bay leaf
1.5 litres water or vegetable stock
Freshly grated nutmeg
Salt
Ground white pepper
12 large sage leaves
3 tbsp olive oil
Truffle oil
Heat the olive oil in a large pan over a low heat. Wash, peel and trim the leeks and slice them finely. Put them into the pan, put the lid on and sweat over a low heat for 10 to 15 minutes until translucent. Stir occasionally.
Peel and trim the garlic cloves and leave whole. When the leeks are cooked add the garlic, beans, sage, bay leaf and grated nutmeg to the pan with the water or stock. Bring to the boil and then reduce to a simmer. Cook with the lid on until the beans are soft; about 20 minutes if fresh, or 40 if dried and soaked.
When the beans are done remove the sage and bay leaves, then liquidise the beans and their cooking liquid with a stick blender until smooth. Then, if you want the silkiest smooth soup, push the puree through a fine sieve with the back of a metal spoon. Season with salt and pepper to taste.
In a small frying pan heat the second lot of olive oil. When smoking, fry the sage leaves in batches for about 10 seconds until crisp and just beginning to brown. Remove from the oil onto a piece of kitchen paper.
Ladle the soup into warm bowls. Drizzle over a little truffle oil and garnish each bowl with two fried sage leaves.
Recipe & Photographs | Huw Morgan
Published 16 November 2019
ALREADY A PAID SUBSCRIBER? SIGN IN
