ALREADY A PAID SUBSCRIBER? SIGN IN
ALREADY A PAID SUBSCRIBER? SIGN IN
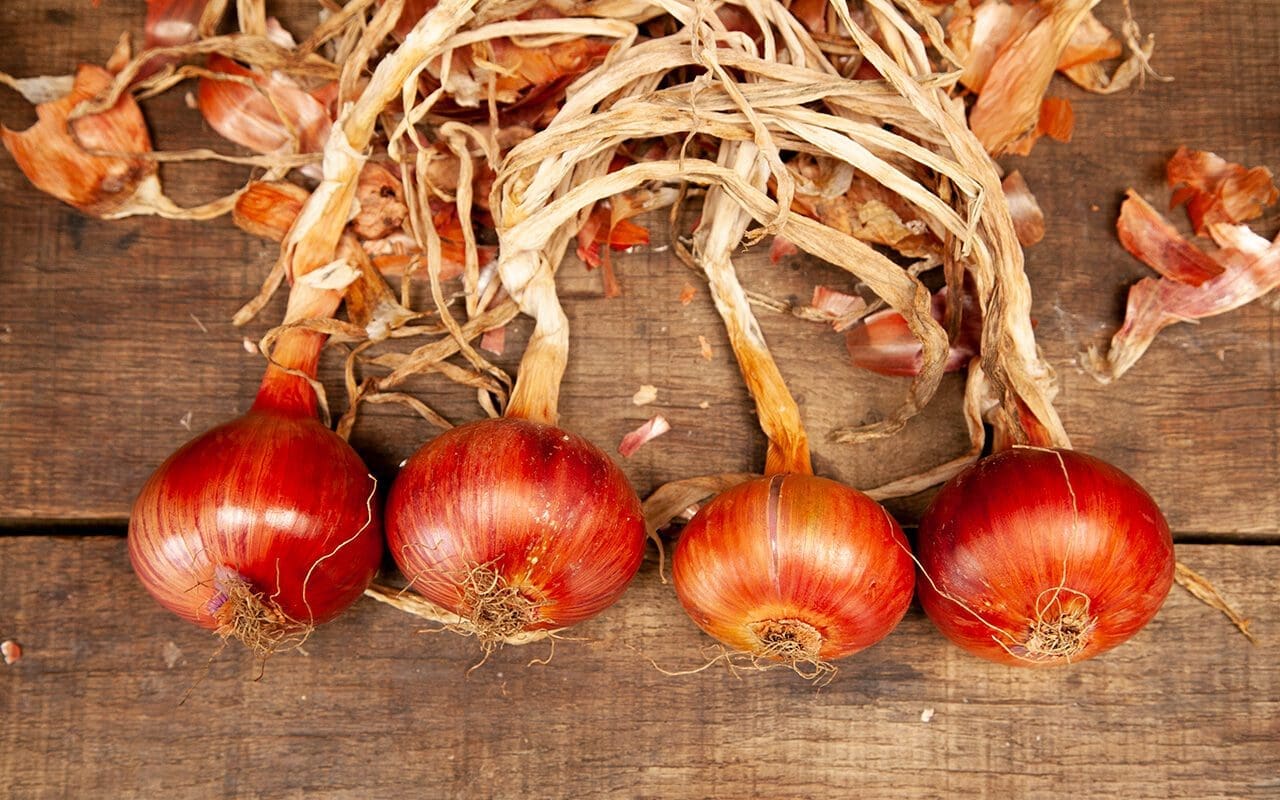
Almost without fail, every meal I cook begins with an onion. Despite the fact that I use so many and that they are both cheap and plentiful at the greengrocer, every year we grow our own. They are a straightforward crop, needing very little attention after planting, apart from weeding, and they always produce in bulk and without pests or problems. Given the frequency with which I use them, every meal time provides a sense of satisfaction and proof of a successful growing season.
We grow a number of onion and shallot varieties, and have settled on our favourites over the years; ‘Sturon’, a large white onion for everyday cooking, which has an RHS Award of Garden Merit due to its reliability and storage quality, ‘Red Baron’, a red onion, also with an RHS AGM, which is another good keeper and with a stronger flavour than most red onions and ‘Keravel Pink’, also known as ‘Rose de Roscoff’, a pretty pale pink onion with coppery skin, which is said to have the best flavour of all, sweet enough to eat raw and deliciously fruity when cooked. An old variety from Brittany this is the variety that my mother remembered beret-wearing Frenchmen – Onion Johnnies – selling from their bicycles on the streets when she was a child in Wales.
Over the years we have learned that onions do best in the sunniest beds of the kitchen garden, unshaded by other crops, do not like growing in beds that have been recently manured, benefit from heavy watering as they approach maturity and that, contrary to traditional growing advice to bend the tops over when the bulbs are fully grown and before lifting, that this is not good practice in reality, since it damages the base of the leaf shaft, which results in the bulbs being more susceptible to rot.
We grew only one variety of shallot this year, ‘Longor’, a large, yellow banana type shallot, which produces reliably high yields. We usually also grow ‘Red Sun’, but these had sold out last year before we could place our orders. All of our onions and shallots come from The Organic Gardening Catalogue as sets – small onions ready to be planted out in spring for a midsummer harvest – but I am tempted this year to try growing some from seed, as this is a lot cheaper and reportedly very easy. Unlike onions shallot sets can b e planted in autumn to produce an earlier crop, and I have recently received an order of ‘Échalote Grise’, an old variety, the gourmet French shallot also known as the ‘true shallot’, which I will plant before teh end of November. Every year we harvest around 100 mature, large onions and 10kg of shallots which, after they have been left out in the sun to ripen and dry out, are plaited together by Dan who is a dab hand, having done it for many years as a child with his mother.
Although the majority of our onions end up invisibly in soups, stews, casseroles, dhals and curries, sometimes you really want to taste the flavour of a home-grown onion, and this recipe makes them the focus of a meal. Many stuffed onion recipes have a lot of ingredients which compete with the subtle sweetness of the vegetable itself. Here onions’ well-known partner, sage, and just a little bread, nut and cheese ensure that the onion is what you really taste.

4 medium onions – around 250g each
1 stalk of celery– about 50g
40g butter
50g walnuts
40g white breadcrumbs
50g cheddar cheese, finely grated, plus extra for garnish
12 tender, young sage leaves, finely chopped
Nutmeg, freshly grated
4 cloves of garlic, finely chopped
Serves 4
Set the oven to 180°C and bring a large pan of water to the boil.
Remove any loose papery skins from the onions, retaining one complete layer of dried skin. Remove the root with a sharp knife being careful not to cut through the skin, then cut through the top of the onion to remove about 1cm, so that you all of the layers are visible.
Simmer the onions in the pan of hot water with a lid on for about 30 minutes until soft to the point of a knife. Remove with a slotted spoon and allow to drain and cool in a colander.
When cool enough to handle carefully remove the centre of each onion with a teaspoon, leaving a shell 2 to 3 layers thick. Put the onion shells into a buttered ovenproof dish.
Toast the walnuts in the oven for about 3 minutes until lightly coloured and fragrant. Chop finely.
Finely chop the celery and garlic and the centres from the onions. Melt the butter in a small pan over a high heat until foaming and smelling toasty. Turn the heat down and sauté the celery and garlic for about 3 minutes until translucent. Then add the onion and cook over a low heat for 10 minutes until the flavours have combined.
Remove from the heat and add the chopped walnuts, sage, the grated cheddar cheese and breadcrumbs. Season generously with salt, black pepper and grated nutmeg. Stir well and then spoon the mixture into the onion shells. Press the stuffing down well so that there are no air pockets and mound it up on the top so as to use all of the mixture.
Grate a little more cheese over the top of each onion and then put into the oven for 30-40 minutes until brown and bubbling.
Serve as a main course with a green salad and boiled potatoes or as a side vegetable with other dishes.
These can be made in advance and then, before roasting, kept covered in the fridge for up to three days until needed or wrapped in foil and frozen. Once defrosted you should add 10 to 15 minutes to the cooking time from cold.
Recipe & photographs: Huw Morgan
Published 16 October 2021
Whether it’s fish and chips after a day on the beach, calamares fritos at a Spanish bar or Indian pakora with an ice-cold Tiger beer at a festival, deep fried food is something that always tastes better outdoors and when the weather is hot.
In Greece recently I was staying with friends who, in late June, were already struggling to keep up with their courgette glut, so for lunch one day we decided to make kolokithokeftedes, the traditional Greek courgette fritters. Courgettes are coarsely grated, salted and then squeezed to remove as much water as possible, before being mixed with onion, garlic, feta, egg, breadcrumbs, dill and mint. Traditionally shaped into patties and shallow fried, they can be a little heavy, so my host decided to put loose spoonfuls of the mixture into deep boiling oil so that the shards of onion and courgette that made their way free of the mass became crispy and a deep, caramelised brown. They came out looking like tiny deep-fried, soft-shelled crabs. Served with a bowl of cold, garlicky tzatziki, six of us devoured about forty of them in quick succession.
In Japan, of course, it is tempura that fulfils this role. It is no surprise to learn that the technique of deep frying batter-coated fish and vegetables was brought to Nagasaki by the Portugese in the 16th century. Peixinhos da horta is believed to be the original dish that inspired a way of cooking that we now primarily associate with Japanese cuisine. These ‘little garden fishes’ are green string beans, coated in batter and deep fried, and were eaten in Portugal during Lent, when meat was off the menu. The Japanese took this idea and ran with it, and now tempura describes the method of cooking any fish, meat or vegetable in this way.
One of our favourite places to eat when in London is Koya Bar, a tiny Japanese restaurant in Soho, where fast-cooked food is prepared in front of you behind a long seating counter. While the queue to get a table can sometimes seem intimidating, the turnaround is so fast that waiting in line for 30 minutes is a small price to pay for food this delicious. It is the most authentic Japanese eating experience we have had outside of Japan. Although they specialise in udon noodles, there is always a blackboard of seasonal specials on offer and, of these, it is the kakiage tempura that we order without fail whenever we go. Kakiage tempura differs from regular tempura in that it is a mixture of sliced vegetables (sometimes combined with fish) in batter rather than the individual pieces of fish, crustacean and vegetables that we are more familiar with. Seasonality is key and, at Koya, they can be made of anything from wild carrot with carrot tops to broad beans and peas or squid and chrysanthemum.
We are now in the midst of our courgette glut and looking for new ways to use them as often as possible, while our sweetcorn is challenging us to eat it quicker than it becomes starchy. I have grown ‘Double Red’ this year, a new variety with seed from The Real Seed Catalogue, who sell some of the most interesting vegetable varieties in the country. The plants are highly decorative with stems and husks stained a deep purple-red and cobs of dark burgundy, almost black, kernels, which are almost too beautiful to eat. They have made a good partner to our ornamental red and tan amaranth this year. We have also just lifted all of our onions and so the combination of vegetables here reflects what is best to eat at this very moment. I could also have used green beans, carrots and beetroot or, later in the season, pumpkin, sweet potato, mushrooms, celeriac, kale or salsify. You can also add any herbs that you like to the mix. Here I have used the traditional purple shiso (Perilla frutescens var. crispa), which is used to impart the pink colour to umeboshi plums. It has a flavour somewhere between aniseed and basil. Dipped into batter and fried at the end of cooking the leaves also make a beautiful garnish.
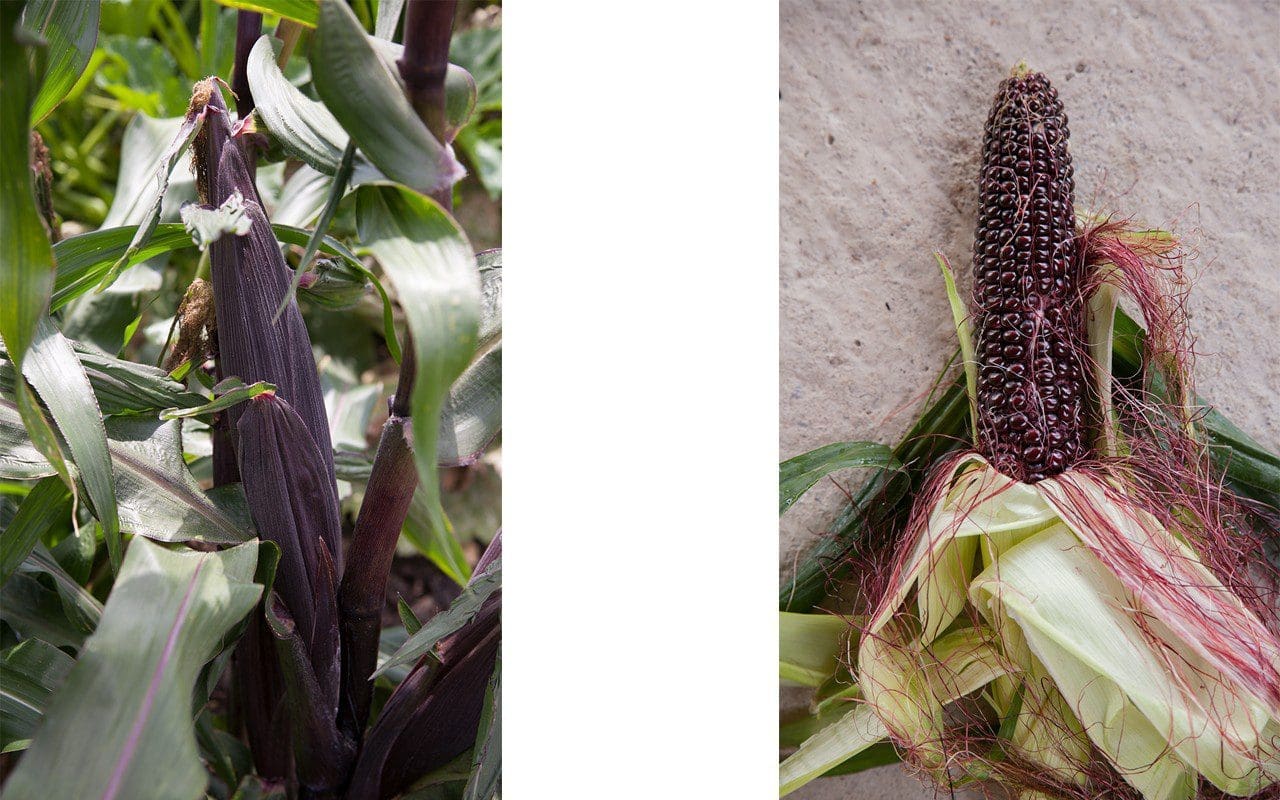
Sweetcorn ‘Double Red’
Although there is a plethora of recipes for tempura batter using either whole eggs or whisked egg whites, I have found that the simplest batter of just flour and water makes the crispest coating. However, there are a few golden rules to ensure that your tempura turns out as well as possible. Firstly, all of the vegetables must be cut to a size where they will cook in the same time. It is traditional for the vegetables to be coarsely julienned or grated. Secondly, get your oil hot enough to cook before you make the batter. It should be between 170°and 180°C. Thirdly, the batter should be as cold as possible, and must not be over-mixed or whisked which stretches the gluten and makes it tough and chewy. Chopsticks are used traditionally and it should have lumps of flour in it. Fourthly, before placing the batter-coated vegetables in the oil, allow as much batter to drain from them as possible. This ensures the lightest coating and avoids a doughy centre. Fifthly, only cook a couple of spoonfuls at a time, so as not to crowd the pan and lower the temperature of the oil. Sixthly, use a small wire strainer or slotted spoon to remove any overcooked bits of batter from the oil between batches to avoid them flavouring the oil and attaching to the next lot of fritters. And finally, do not be tempted to ‘worry’ the fritters in the oil, be patient and leave them be until they are ready to turn, or the batter will not have cooked and they will fall apart.
It is customary to serve tempura with a simple dipping sauce of dashi, soy sauce and mirin, but the lemon and miso sauce here, adapted from a recipe by Elizabeth Andoh from her excellent book of Japanese home cooking, Kansha, complements the richness of the fried fritters perfectly.
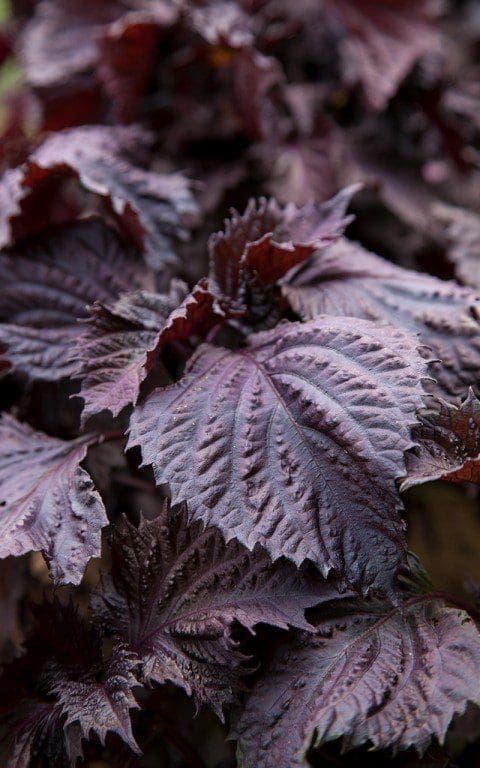 Purple shiso
INGREDIENTS
350g courgette, coarsely julienned or grated
2 large sweetcorn cobs, shucked
1 medium red onion, about 175g
8 large and 6 small shiso leaves
Sea salt
Sunflower or rapeseed oil
Batter
175ml iced sparkling water
65g self raising flour
65g cornflour, plus 1 tablespoon more
A few ice cubes, 4 to 6
Dipping Sauce
3 tablespoons white miso
3 tablespoons lemon juice
Finely grated zest of half a lemon
1 tablespoon maple syrup or lightly flavoured honey
1 tablespoon mirin or sake
Makes about 12, enough for 6 people
METHOD
Put the courgette into a sieve and sprinkle lightly with sea salt. Use your hands to mix the salt in well and then leave to drain over a bowl for 20 to 30 minutes.
To make the dipping sauce, put the miso and lemon juice in a small bowl and stir well. Add the maple syrup or honey and mirin and stir well again. Add the lemon zest and stir again. Transfer to a serving bowl.
Using a very sharp knife shave the corn kernels from the cobs over a bowl. Slice the onion in half down the centre and then cut each half across the grain into crescents the thickness of a coin. Separate the onion crescents and add to the bowl of corn.
Take small handfuls of the salted courgette and squeeze hard to remove as much water as possible. Add to the bowl of corn and onion. Cut the eight large perilla leaves into fine ribbons and add to the bowl. Using your hands, mix all of the vegetables and herbs together until the courgette strands are separated and all is well combined. Sprinkle over the one tablespoon of cornflour and toss with your hands again until everything is lightly coated. This helps the vegetables to stick together when fried.
Pour the oil into a medium-sized (25cm), deep-sided frying pan to a depth of about 2cm. Put over a medium heat until the surface begins to shimmer. Turn the heat down a little and make the batter. Put most of the iced water and some ice cubes into a bowl. Sift the two flours onto the water and then quickly mix together. The batter should be the consistency of single cream and just coat your finger. If it is too thick add more iced water. Turn the heat up under the oil and, when just smoking, test the temperature with a few drops of batter. It should sink and then immediately rise to the surface and puff up.
Pour two thirds of the batter over the vegetables and mix quickly until everything is lightly coated. Add a little more if you think it needs it. However, you may not need to use it all. The vegetables should not be swimming in batter. Using a tablespoon and a fork, take a scant tablespoonful of the vegetable mixture and hold it above the bowl, allowing most of the batter to run off. Then slowly place the vegetables into the hot oil, using the fork to quickly spread them out so that you have a thin fritter about 8cm in diameter. Now wait 30 seconds for the underside of the fritter to cook, before using two forks – or chopsticks – to carefully turn the fritter over. Cook for another 30 seconds until the other side is cooked and lightly coloured. In a medium-sized pan you should aim to cook no more than two fritters at a time, always allowing the oil to return to temperature before frying the next batch.
Remove the fritters from the oil with chopsticks or a slotted spoon, and hold them above the pan to allow as much oil to drain from them as possible, before transferring to a hot plate lined with absorbent paper. You can now either choose to serve them as they come from the pan or put the plate into an oven heated to 100°C to keep warm, while you cook the rest of the mixture.
When all of the mixture is cooked transfer the fritters to a clean plate. Quickly dip the remaining shiso leaves in the batter and fry until crisp. A matter of seconds. Remove and drain quickly on absorbent paper, then use to decorate the plate of fritters. Serve immediately with the dipping sauce.
Recipe & photographs: Huw Morgan
Published 11 August 2018
We are sorry but the page you are looking for does not exist. You could return to the homepage