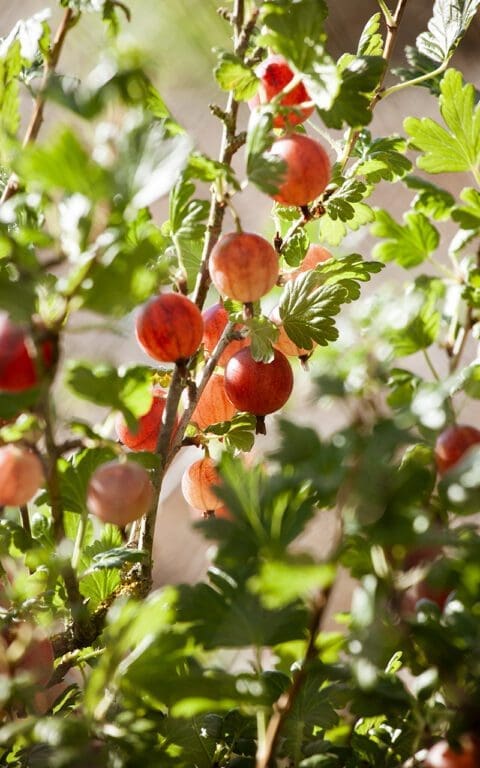
A tsunami of soft fruit is about to break. The gooseberries are first and so this weekend I’ll be crouched on a milking stool in the cool shade of the blackcurrant bushes picking ‘Hinnomaki Green’. As I pick, the blackcurrants brushing my shoulders will be a constant reminder that soon there will be consecutive weekends of picking. We have three varieties, each with different fruiting times to extend the season and the harvest. Last year around this time I found our dear friend Sophie (AKA Champion Picker) among the bushes at daybreak on a post heatwave misty morning, picking and breakfasting in tandem. A whole bush stripped before coffee time is par for the course for Sophie. This year it will be down to me, Dan and the lucky birds.
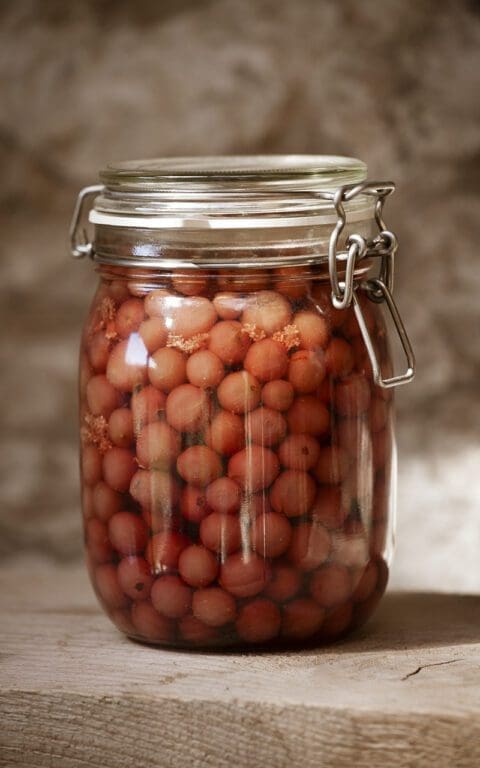
The gooseberry ‘Hinnomaki Red’ take a little longer to reach maturity than the green, which is a relief, since a Kilner jar full of the remainder of last year’s harvest has been judging me silently from a shelf in the pantry for a while now. We always reach this point in the year when the approaching harvest starts to throw a very different light on the frozen ends of last year’s crop in the freezer. A quick stock take this week revealed two half carrier bags full of gooseberries (green) and blackcurrants respectively, a huge Tupperware full of redcurrants and damsons. Just enough to stew for a week of breakfasts, unlike last year’s June’s freezer clearance which resulted in a memorably messy and sticky summer’s day making damson ketchup, damson chutney, damson shrub and damson fruit leather, again with Sophie, and other willing helpers.
Now that the kitchen garden is beginning to produce in earnest we are really missing our regular weekend housefuls to help harvest, prepare and cook food from the garden together, then share it at a large and usually raucous table late into the evening.
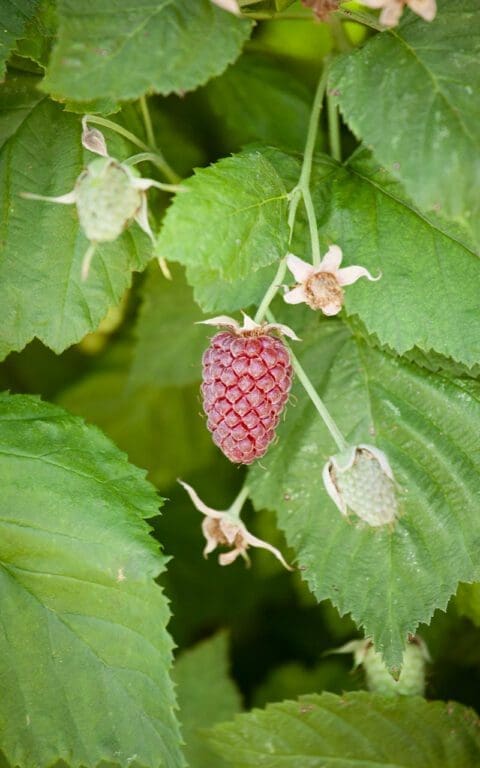
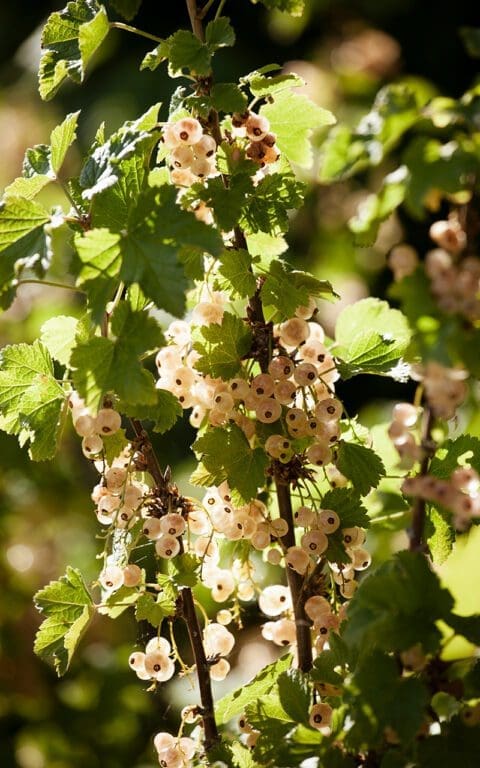
The absence of visitors in this unusual year has also meant that I have found far less reason to make puddings in recent months. When we do end a meal with something sweet it is invariably with some variety of stewed fruit and a spoonful of yogurt, sometimes cream. However, with that jar of red gooseberries on my conscience, a quick pass through the kitchen garden revealed that the whitecurrant and tayberry were dripping with jewel-like fruit, and a summer pudding of this and last summer’s fruits started to materialise. Sweetened with some elderflower cordial made last week and using up the end of a stale loaf of bread that was consigned to the freezer for breadcrumbs several weeks ago and is now taking up valuable space. Space that will very soon be filled by a new generation of soft fruit.
INGREDIENTS
750g mixed soft fruit – raspberry, blackcurrant, strawberry, gooseberry, bayberry, loganberry, redcurrant, whitecurrant
3 tablespoons elderflower cordial
3 tablespoons light honey or caster sugar
A couple of heads of elderflowers
7 slices 1cm thick of slightly stale good white bread
METHOD
Put any fruit that needs cooking (blackcurrants and gooseberries) into a lidded pan on a very low heat with two tablespoons of water and the honey or sugar. Cook until they start to burst and release their juices. Remove the pan from the heat and add the rest of the fruit. Remove the elderflowers from their umbels by dragging the tines of a fork through them over the pan of stewed fruit. Stir, return the lid and leave to stand until cool.
Cut a circle from one slice of bread to fit the bottom of a 1 litre pudding basin. Cut all but two of the remaining slices of bread into triangles of the same height as the pudding basin and use to line the inside of the basin. Fill any gaps with smaller pieces of torn bread. Once the basin is lined pour all of the stewed fruit (reserving three tablespoons) into the cavity. Press down with the back of a metal spoon and smooth level. Cut the remaining slices of bread into as few pieces as possible to make a lid that fits on top of the stewed fruit.
Take a side plate the same diameter as the top of the basin and put it on top of the pudding. Then secure the plate well. I use extra strong elastic bands or well-tied string to exert pressure on the pudding, but you can weight the plate down with a heavy jar. Stand the pudding basin in dish to catch any juice and put in the fridge overnight or for a minimum of 4 hours. Put the reserved stewed fruit into a small pan with a couple of tablespoons of water and one of honey or sugar and bring to a simmer. Press through a sieve and reserve.
When ready to turn out slide a blunt knife between the pudding and the basin until it is loosened. Take a deep serving dish and invert it over the pudding basin. Holding the basin and plate tightly together with both hands invert the whole lot and shake gently but firmly. You should hear the pudding slip out of the basin and onto the plate with a satisfying slurp. Carefully lift off the basin. Pour over the reserved fruit sauce. Decorate with more fruit if you like and serve with cold pouring cream.
Recipe and photographs: Huw Morgan
Published 27 June 2020
Raymond Lewis, the farmer who lived here before us, was born in this house shortly after his parents moved here in the early 1930’s. Although he raised cattle, his parents had been market gardeners and it is our nearest neighbour, Glad, who has been the fount of all knowledge regarding how the land here was used before we arrived. She too was born here, in the house just above ours on the other side of the lane, and went to school with Raymond. She has a prime view over our slopes.
It was she who told us that we were planting our new orchard on the site of the Lewis’ old orchard, that the hollies by the Milking Barn were harvested each year for wreaths destined for the Christmas Market in Bath and that the extra-scented, large violets we found growing everywhere were wrapped in leaves and tied with cotton for spring posies. When we expressed amazement at finding ‘wild’ gooseberries and redcurrants in our farthest hedgerow, Glad said that it bordered the field where the soft fruit had been grown and so we realised that they had arrived through the actions of thieving birds.
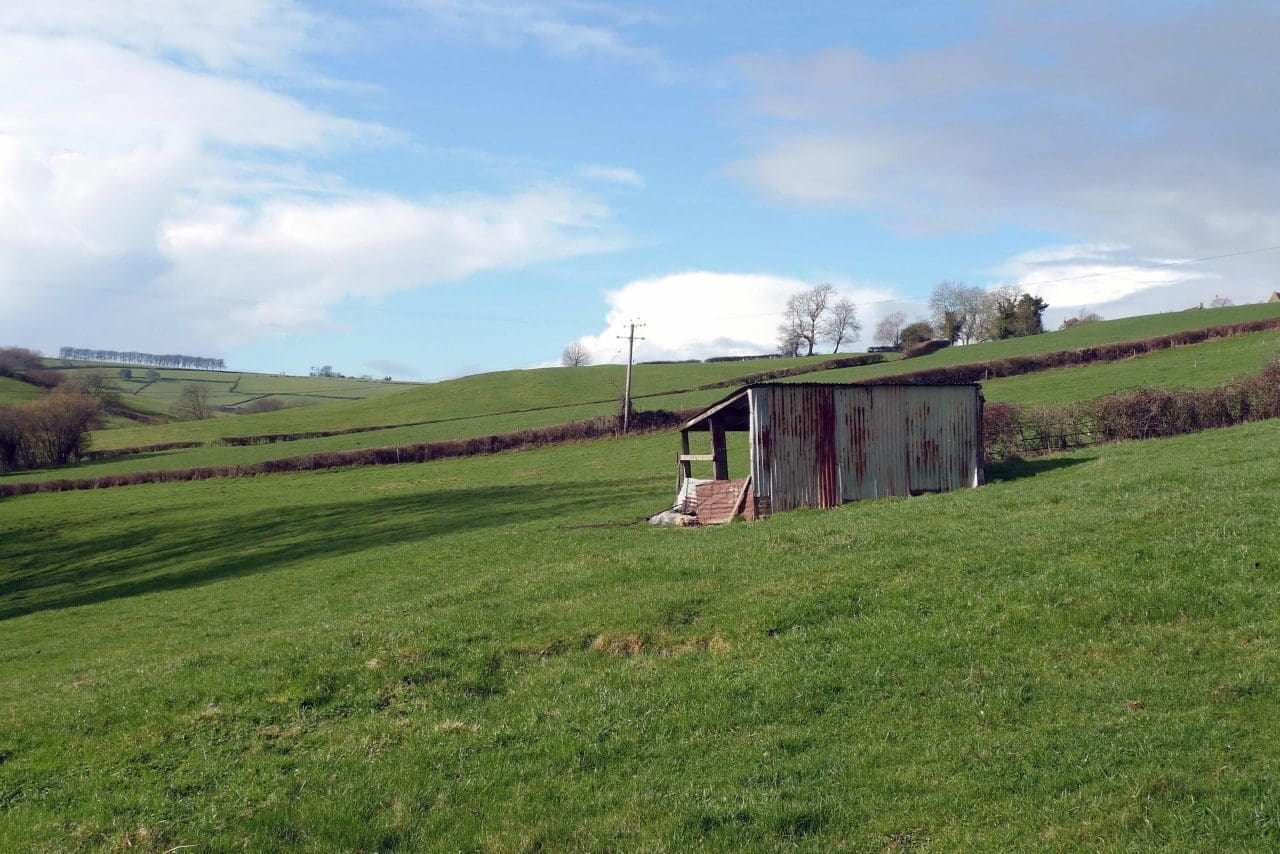
Another piece of growing history she imparted was to do with the ramshackle shed half way down the field in front of the house. We had been charmed by this little structure from the first time we saw it, but couldn’t work out what it had been used for. Made from a motley collection of wood and reclaimed corrugated tin sheeting and open on two sides it is barely high enough to stand up in. It evidently hadn’t been used by Raymond’s cattle, and it was too far from the house to have had any obvious purpose such as a vegetable or wood store. The clue to its use was revealed the winter after we arrived, when clearing the mess of bramble from the hedge that runs up behind it.
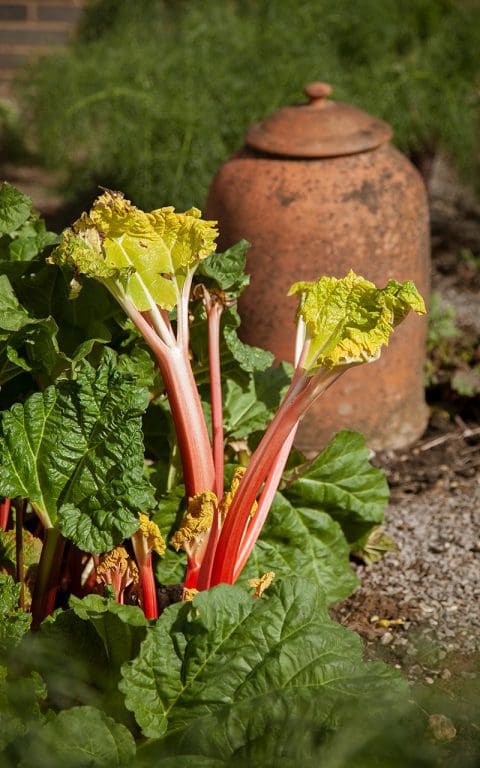
There in the undergrowth were a dozen or so terracotta rhubarb forcers. Unfortunately all but a couple were broken beyond use, but it was suddenly clear what the little shed had been used for. We asked Glad at the first opportunity and she confirmed that it had been ‘the rhubarb forcing hut’, which is how we have referred to it ever since. We have often imagined Mr. and Mrs. Lewis in there in deepest winter, inspecting the covered crowns by candlelight (as they still do in the Yorkshire rhubarb triangle to prevent the stalks colouring) and then carefully harvesting armfuls of the pale pink stems to take to market. Now it provides shelter for the sheep that graze our pastures and has sometimes protected us from sudden summer downpours when the water runs off the roof in sheets.

We have three varieties of rhubarb in the Kitchen Garden here which take us through spring and early summer; Timperley Early, Champagne and Victoria. The first is, not surprisingly, said to be the earliest, and has always been so for us. We have found it possible to force it for stems in February. The other two are later and tend to come together if left uncovered, but by forcing one of them and leaving the other – on a yearly rotation – we can have rhubarb until June. Beyond that and it can become a little long in the tooth and green to eat fresh, but is still perfectly serviceable for jam. When forcing rhubarb it is important to only cover part of the crown and, when ready to harvest, to take the slenderest stems and leave the strongest to feed that part of the plant for the future. To allow it to rebuild its reserves you should then choose a different part of the crown to force the following year.
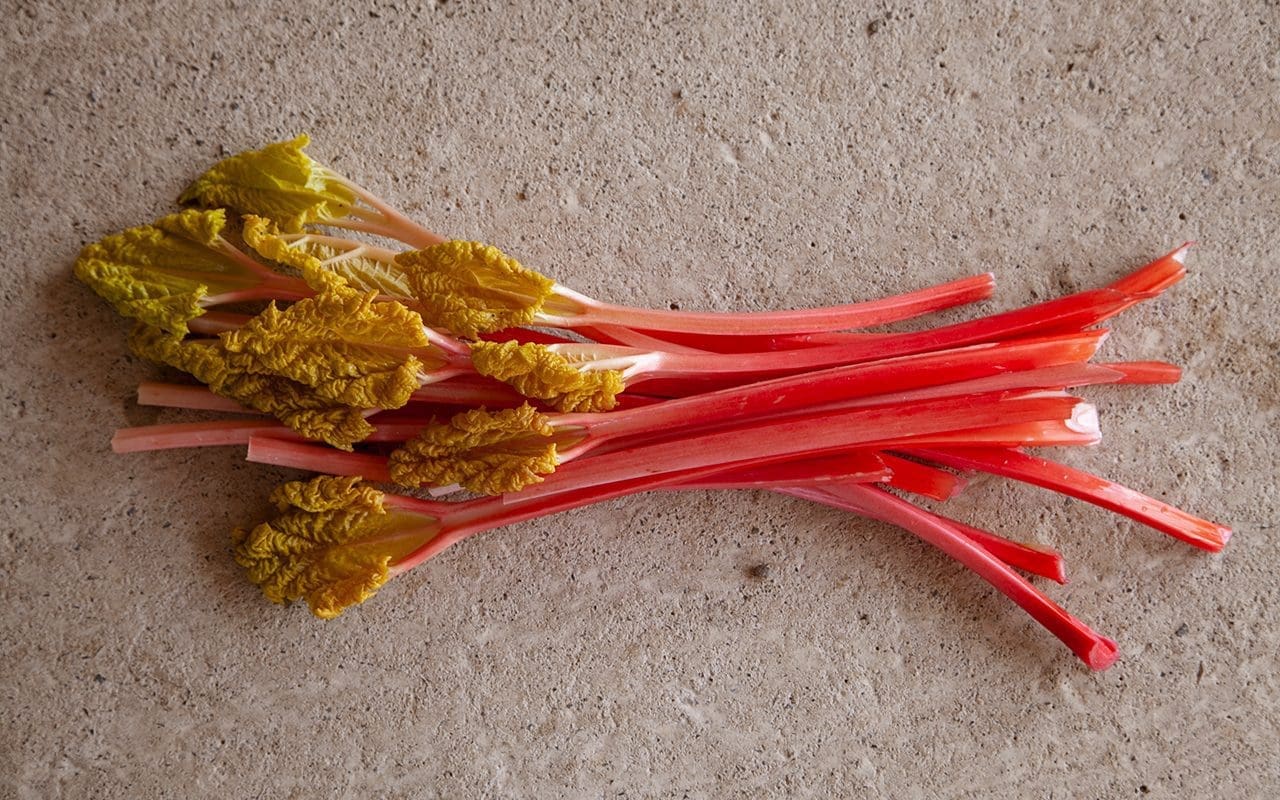
The flavour of forced rhubarb is so subtle that it needs the simplest of treatments to show it off to its best advantage. Most often I just roast it and serve with a creamy accompaniment of buttermilk pudding, pannacotta or, simplest, a mixture of whipped double cream and creme fraiche. I find orange, the customary partner of rhubarb, overwhelms this early season delicacy. However, judicious use of thyme or rosemary adds an unexpected counterpoint that suits this fruit that is actually a vegetable. It also has an affinity with the aniseed used here, but it’s not essential, so leave it out if you prefer.
The pastry is based on a recipe by Alice Waters of Chez Panisse, and is a fast and easy way to achieve a deliciously flaky result. Its success relies on using the best quality butter and flour and the very lightest of touches to ensure the pastry stays as cold as possible. If you are using open grown rather than forced rhubarb you will need to increase the quantity of sugar in the filling by at least 25g, depending on how tart you like your rhubarb.
200g plain flour, Tipo 00 preferably
150g unsalted butter
1 teaspoon icing sugar
A large pinch of fine sea salt
8 tablespoons iced water plus a couple more
500g forced rhubarb, trimmed weight
75g caster sugar
1/2 teaspoon vanilla essence
3 tablespoons ground almonds
1 teaspoon aniseed
2 teaspoons icing sugar
1 teaspoon water
2 tablespoons melted butter
Stalk trimmings from the rhubarb
5 tablespoons water
3 tablespoons caster sugar
Take the butter, still in its wrapping paper, and put it in the freezer for 20 minutes to harden.
Sift the flour into a bowl with the icing sugar. Add the salt. Remove the butter from the freezer. Unwrap about 2/3 of the block and, holding the end of the block in the paper, coarsely grate it onto the flour. To avoid grating your fingertips you may need to cut the very last of it into small pieces.
Using a sharp knife and rapid slicing and lifting movements cut the flour and butter together until the mixture resembles coarse gravel. The butter should be visible in a variety of different sizes, but few should be bigger than a pea.
Continuing to work as quickly as possible, sprinkle the iced water over the mixture 2 tablespoons at a time. Each time use the knife to mix the water into the flour and butter. When you have added all of the water the mixture should just start coming together, but there will still be dry flour visible. Use your fingertips to see it it feels like it will come together. If it seems too dry add another tablespoon or two of water – but no more – and mix through again. Then very quickly, using your fingers and not the palms of your hands, bring the dough together into a ball. Do not knead it or overhandle it. The dough should feel cold.
Lightly dust a piece of greaseproof paper about 40cm square with flour and place the dough onto it. Gently and quickly flatten the dough with the palm of your hand into a rough circle. Take a floured rolling pin and, using light, rapid movements, roll the dough out into a circle about 35cm in diameter, rotating the greaseproof paper in quarter turns after each pass. Reflour the rolling pin if it starts to stick. The pastry will be very short, so don’t worry about the edges cracking. Lift the greaseproof paper and dough onto a heavy baking sheet and put in the fridge for 20 minutes to chill.
Set the oven to 200°C (400°F, gas mark 6).
Cut the rhubarb into pieces about 8cm long. Put into a non-reactive (glass or ceramic) bowl. Sprinkle over the caster sugar and vanilla essence and toss together briefly. Leave to stand while the dough is chilling.
Remove the baking sheet from the fridge. Working quickly again, sprinkle the ground almond evenly over the pastry leaving a 5cm border. Arrange the rhubarb on top of the almond. You should have enough rhubarb for two layers. The first can be arranged somewhat haphazardly, and should use up any larger pieces. You may need to cut these in half lengthways to ensure they cook evenly. Retain the smaller stems for the top layer and arrange them more pleasingly.
Then, working around the circle, gently lift the edge of the pastry up over the rhubarb, folding, pleating and gathering as you go. Pinch it together quickly if any tears appear, since you want to keep the juices in as far as possible. Don’t worry too much about appearances though. You want to ensure that the pastry holds the rhubarb in place, but it is more important to get the chilled pastry into the oven quickly than for it to look primped and perfect.
In a small bowl put the aniseed or caraway seed, icing sugar and water. Stir until the sugar has dissolved. Add the melted butter and stir to combine. Brush this mixture generously over the pastry.
Put the tart straight into the oven and cook for about 40 minutes until the pastry is golden brown and the rhubarb bubbling.
While the tart is cooking put the rhubarb trimmings, water and sugar into a small pan. Bring to the boil, then simmer until the rhubarb has disintegrated and the liquid is syrupy. Strain the liquid off and, when the tart is cooked, gently brush this syrup over the rhubarb.
Serve warm with single cream.
Serves 8
Recipe and photographs: Huw Morgan
Published 23 March 2019
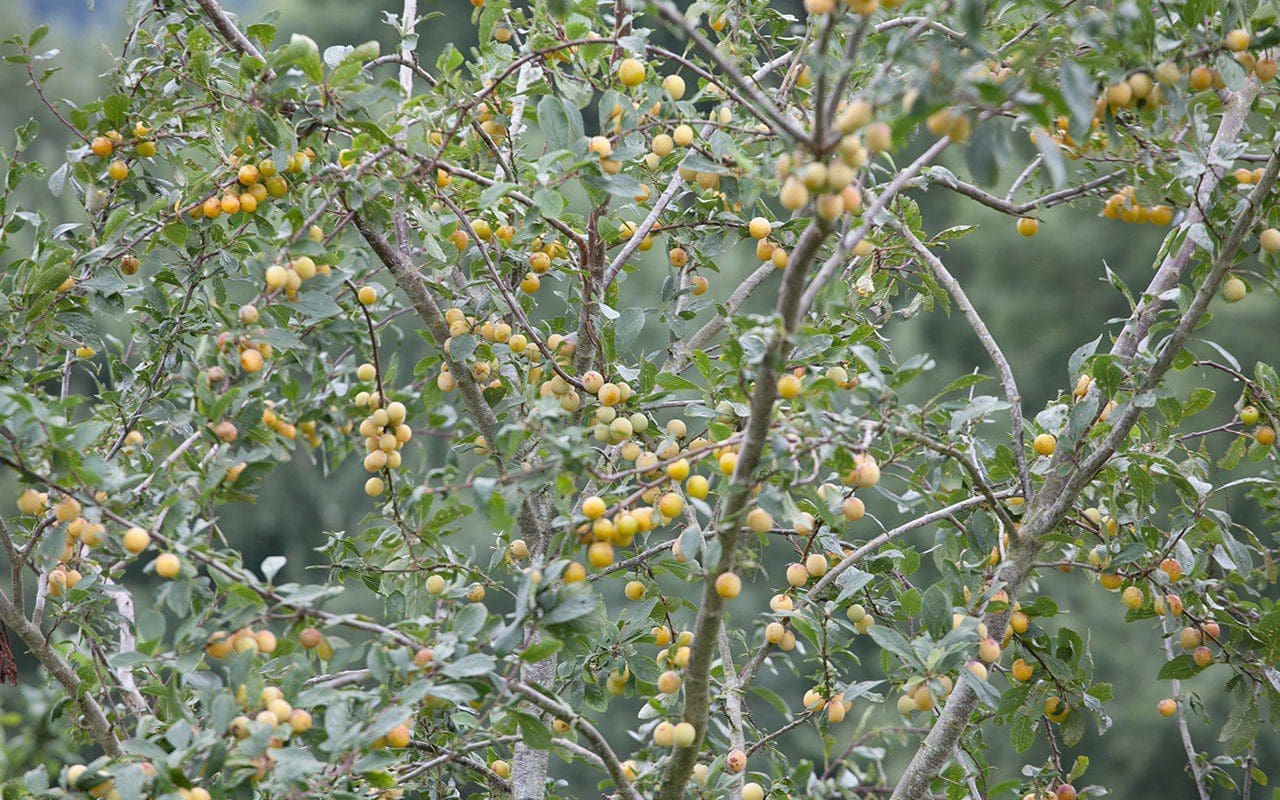
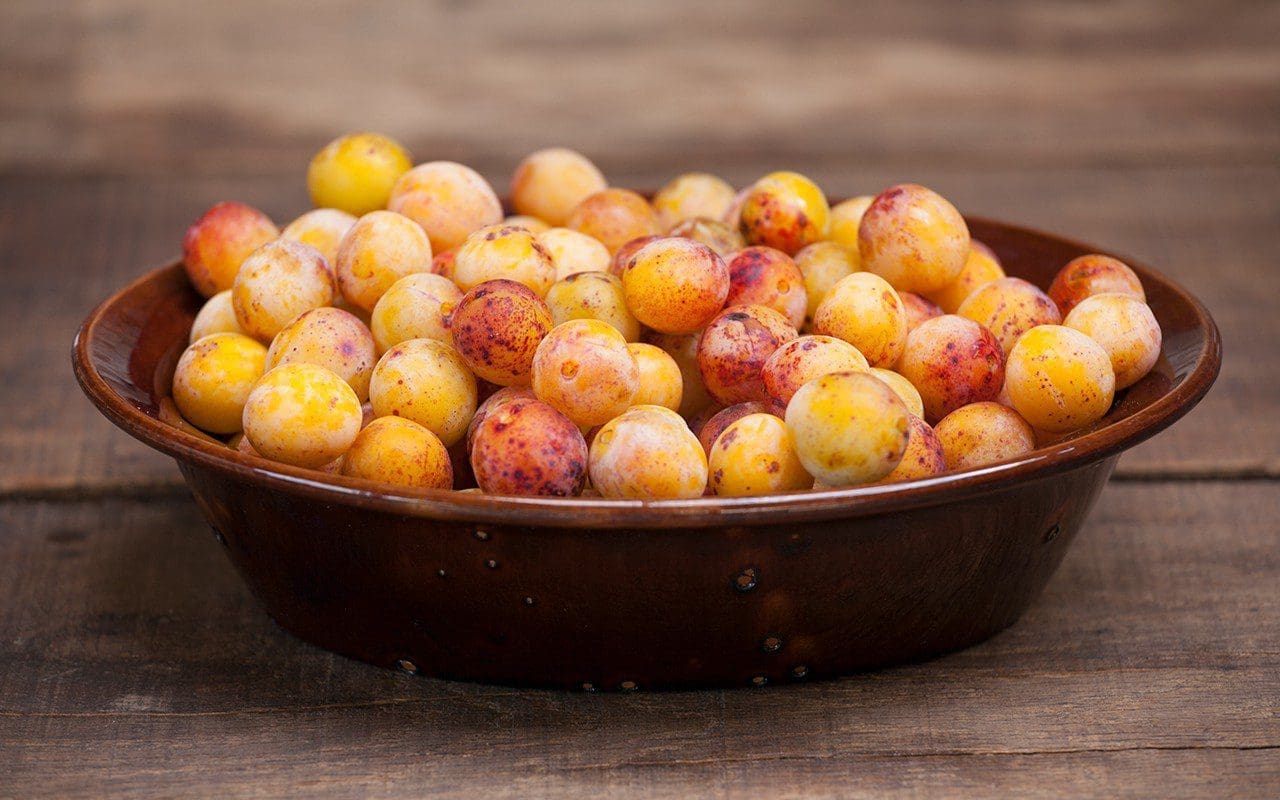
One of the best things about growing your own fruit and vegetables is the opportunity it provides to eat things that are seldom, if ever, available at the greengrocers. Before we planted our orchard I had never eaten a Mirabelle plum. Although I had pored over Jane Grigson’s description of their superior flavour, and heard from my Francophile friend Sophie of the delicious tarts and pies she had eaten in Lorraine, I had always had to imagine what they tasted like.
The Mirabelle is the smallest plum, barely bigger than a large marble, but what it lacks in size it definitely makes up for in flavour. Perfumed, and with the same floral hint of muscat that you get from the best gooseberries, they are the plum par excellence. We are now getting a very decent harvest and, when something so rare and prized suddenly becomes easily available, it feels important to celebrate the moment with a dish that makes the most of this fleeting moment.
You need a fair number of Mirabelles to make a tart of this size, but they are quick to pick. De-stoning a large bowl of them also appears an intimidating prospect but, being a ‘freestone’ variety of plum, where the stone separates easily from the flesh (unlike ‘clingstone’ plums where the flesh adheres to the stone) they are also easy to prepare.
Plums and almonds are all from the Prunus family, and so make perfect companions in in desserts. The flavour of the almond frangipane is improved by the addition of a number of kernels taken from the stones, which enhances the bitter almond flavour, but a few drops of almond essence or, if you happen to have it, a teaspoon or two of plum eau de vie do a similar job.
The Mirabelle season is painfully short. The tart here was made last weekend, when the plums were at their peak of perfection. This week the tree is bare. So, if you have missed the moment or can’t get hold of them, you can use any other stone fruit in their stead. Greengages are the next best choice of plum, but other yellow cooking plums would work, as would apricots. Later in the season the frangipane can be made with ground walnuts, which makes a more autumnal partner for sharp red or purple plums. This year I plan to try a walnut version with some of our damson glut but, being mouth-puckeringly sharp, they will need to be poached in a sugar syrup first.
 Mirabelle de Nancy
INGREDIENTS
500g Mirabelle plums, stoned and halved (weight after stoning)
Pastry
300g plain flour
150g unsalted butter, well chilled
3 tbsp icing or caster sugar
1 egg yolk, beaten
Iced water
Almond Cream
150g ground almonds
150g caster sugar
150g butter, melted
1 large egg, beaten
2 tbs double cream
Kernels from about 20 Mirabelles
Serves 12
METHOD
You will need a 30cm shallow, fluted tart tin.
Set the oven at 180°c.
Put the flour and butter into a food processor and process quickly until the mixture resembles very fine breadcrumbs. You can use your hands to do this, but a processor is better as it is important that the pastry stays as cold as possible. Add the icing sugar and pulse again quickly to combine. With the motor running add the egg yolk, and then enough chilled water, a tablespoon at a time, until the dough just starts to come together. Immediately turn off the processor and bring the dough together quickly and lightly with your hands until smooth. Do not knead it.
Immediately roll the dough out, preferably on a cold, floured slate or marble surface, with short, light movements until just large enough to line the tin. To get the pastry, which is very short, into the tin, ease your floured rolling pin underneath it and then very gently lift it over the tart tin until it is centred, before removing the rolling pin by sliding it out. Again handle the pastry very gently as you press it into the corner and fluted sides of the tin. Trim the pastry in line with the top of the tin, prick the base with a fork and then chill in the fridge for 20 minutes.
Remove the pastry case from the fridge, line it with baking parchment and then fill with baking beans. Bake blind for 20 minutes. Remove the baking beans and parchment and return to the oven for a further 10-15 minutes until the pastry looks dry but has not coloured. Remove from the oven and leave to cool.
Turn the oven up to 200°c.
Put the ground almonds and sugar in a mixing bowl, reserving a tablespoon of sugar. In a mortar and pestle crush the Mirabelle kernels with the tablespoon of sugar then add them to the ground almonds, before mixing in the butter, egg and cream.
Spread the almond cream evenly over the base of the cooled tart case. Then, starting from the outside, arrange the Mirabelles on the almond cream with their cut sides facing up and so that they are just touching. Push each one gently into the cream as you do so.
Bake for 30-40 minutes, until the pastry is well coloured and the mirabelles are bubbling.
Remove from the oven. Allow to cool for 15 to 20 minutes before carefully removing from the tart case.
Serve warm with cold pouring cream.

Recipe and photographs: Huw Morgan
Published 2 September 2017
We are sorry but the page you are looking for does not exist. You could return to the homepage