This year our pride and joy (as well as provider of steep learning curve) has been the polytunnel. As soon as we decamped to Somerset before lockdown in mid-March, we started to discuss the pros and cons of finally biting the bullet and getting one, which we have discussed at length and then shelved on several occasions. The reason to defer was always the same. We weren’t here enough and, once a polytunnel is up and running, it simply can’t be left for days untended. Suddenly we were compelled to be at Hillside for the foreseeable future and, with the thought of more complete vegetable self-sufficiency firmly in the forefront of our minds, we decided to take the plunge.
Our dreams of a cornucopia of tomatoes, peppers, aubergines, chillis, cucumbers and melons haven’t been fully realised due to a shortage of seed and plug plants immediately after lockdown, and the fact that the polytunnel couldn’t be delivered until the end of May. So our initial plan for a tomato trial with three plants of ten varieties quickly increased to twelve plants of each and so this year, although we have three chilli varieties and two of cucumber, the polytunnel has been pretty much dominated by them. I will write at more length about the polytunnel at a later date, once I have some more experience under my belt, but suffice to say that growing tomatoes in grow bags has this year taught me the importance of a regular watering regimen, the effects of lack of ventilation and the dangers of not starting to apply tomato feed early or regularly enough. We lost almost all the second trusses and, due to the cool August, the third and fourth trusses are only now just starting to ripen. Everyone will be getting Green Tomato Chutney for Christmas this year.
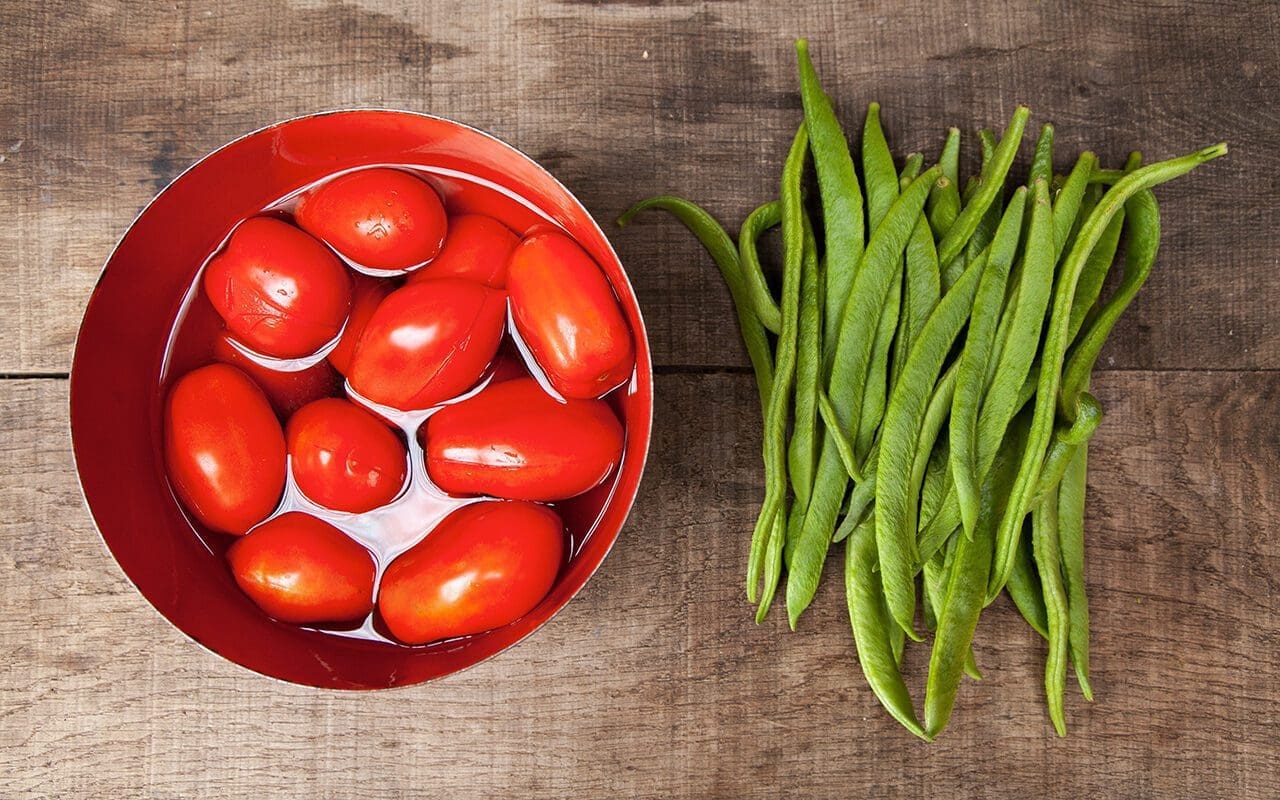
Apart from firm favourites ‘Sungold’ and ‘Gardener’s Delight’ I was keen to trial some plum tomatoes and chose the best known and most reliable varieties, ‘San Marzano’ and ‘Roma’. These are the varieties that are almost invariably in any tin of tomatoes you might buy at the shops. They were surprisingly productive at first and the mini-glut in early August produced ten large jars of bottled whole and chopped tomatoes, as well as several litres of passata and ketchup. Although ripening is definitely slowing down now, somewhat surprisingly it is still the plum tomatoes that are providing the largest usable harvests. This I don’t mind, since I cook with tomatoes pretty often in winter and the idea of being able to use my own preserved ones and not shop-bought is very appealing.

Despite their productivity only the best plum tomatoes are good enough for bottling, so there are always plenty left over. These end up as passata or a simple tomato sauce (which I either bottle or freeze depending on available storage space) and in ketchups, salsas and chutneys. Quite often, however, they end up in our dinner and one of my daily challenges of recent weeks has been ‘What can you make with any combination of courgettes, tomatoes and runner beans ?’. After many nights of making things up as I went along I have started to run out of inspiration and so this week there has been much rifling of recipe books.
I very seldom present another cook’s recipes here, although my own are often tweaked and altered versions of dishes I have eaten or cooked from recipes in the past. However, when I came across this yesterday, it jumped out at me for the intriguing use of two of my main available ingredients in a previously completely unimagined form. What is in effect a tomato and bean pie is elevated in this recipe into a memorable dish of unctuous and exotic richness. Given the apparent humility of the primary ingredients I was unprepared for quite how delicious it is and feel that it is only right to share the original, untweaked, recipe with full credit to Maria Elia from whose excellent book of modern Greek cuisine, Smashing Plates, it is taken. As she says (and as I did myself) it is best to make the filling the day before you plan to assemble it so that the flavours can come together overnight. Of course, not everyone has access to vine-ripened plum tomatoes, so I weighed mine and they came to around 600 grams, equivalent to around two cans drained of their juice.
To balance the richness this would be good served with something fresh and bright such as a citrussy Greek cabbage and carrot coleslaw or a raw fennel, chicory, orange and watercress salad.

Serves 6-8 as a main, 8-12 as a small plate
100 ml olive oil
2 Spanish onions, halved and finely sliced
2 garlic cloves, finely chopped
2 tsp ground cinnamon
5 tbsp tomato purée
10 vine-ripened plum tomatoes, skinned and roughly chopped
500 g runner beans, stringed and cut into 4cm lengths
A pinch of sugar
1 bunch of dill (approx. 30 g), finely chopped, or 2 tbsp dried
1 packet of filo pastry (9 sheets)
100 g melted butter
100 g Medjool dates, stoned and finely sliced
250 g feta, crumbled
6 tbsp clear honey
Sea salt and freshly ground black pepper
Heat the olive oil in a large, heavy-based pan over a low heat and sauté the onion until softened and sticky; this can take up to 20 minutes. Add the garlic, cinnamon and tomato purée and cook for a further 2 minutes. Add the tomatoes and their juices and cook over a medium heat for about 8 minutes, before adding the runner beans, sugar, dill, a pinch of sea salt and 150ml water.
Reduce the heat to a simmer, cover and cook the beans for about 40 minutes, stirring occasionally, until the beans are soft and the sauce is nice and thick. Check the seasoning and cool before assembling.
Preheat the oven to 180°C/gas mark 4. Unfold the pastry and cover with a damp cloth to prevent it from drying out. Brush a baking tray (approximately 30 x 20cm) with melted butter. Line the tin with a sheet of filo (cut to fit if too big), brush with butter and repeat until you have a three-layer thickness.
Spread half the tomato and bean mixture over the pastry, top with half each of the dates and feta. Sandwich another three layers of filo together with melted butter and place on top. Top with the remaining tomato mixture, dates and feta. Sandwich the remaining three filo sheets together as before and place on top.
Lightly score the top, cutting into diamonds. Brush with the remaining butter and splash with a little water. Cook for 35 – 45 minutes or until golden. Leave to cool slightly before serving, drizzling each portion with a little honey.

Words & photographs: Huw Morgan | Recipe: Maria Elia
Published 12 September 2020
So this is my lunch. No, really, it is. Or I should say, was. Yesterday’s to be exact. Dan has been away for the past three days, his first trip of any length away from here since lockdown was eased, and suddenly I have found how much there is to do here when you are here alone. So time has been at a premium and yesterday the solution to not giving myself more to do than was manageable was to make my real life lunch the subject of today’s recipe.
The Kitchen Garden provides one of the main focusses of attention right now, with a tidal wave of produce rapidly gathering momentum, which needs harvesting, preparing and preserving. Every day there is a new round of beans, courgettes and tomatoes to harvest and these ingredients have featured in some way or another in most of our meals for the last couple of weeks.

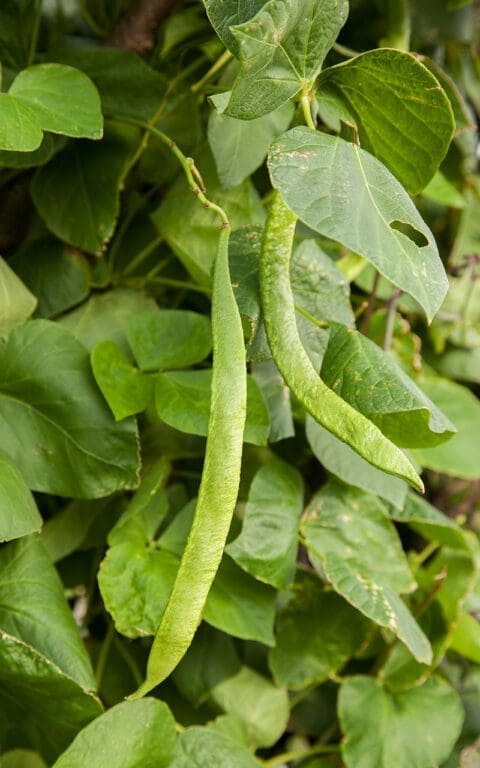
The bush beans, ‘Cupidon’ and ‘Aquilon’ (the first of which we grew for the first time last year, the latter of which was new to us this year) have been providing a steady stream of fine green beans for around a month now. Although you do have to crouch to pick them it is very easy to de-top them while picking by pinching the stalk end of the bean, and it is possible to amass quite enough for dinner for two in a matter of seconds. We have probably blanched and frozen around 5kg over the past couple of weeks, and probably eaten the same amount. Although they are now on the wane and showing signs of exhaustion the first of the climbing beans are just forming, so we should have a perfect handover.
The bean recipe features the first of our polytunnel tomatoes, of which we are inordinately proud. We are still at the point where we are just keeping on top of the harvest and managing to eat them all, but plans are afoot to dry, bottle and puree the tomato deluge when it arrives. The simple tomato ‘sauce’ here can be made in bulk, flavoured with any herbs you like such as thyme or fennel, and kept in a container in the fridge or frozen to add to any number of simply cooked vegetables when you like.
The Italian way of serving summer vegetables in a sweet and sour agrodolce dressing or sauce is a favourite summer way with anything from cauliflower to mushrooms to fennel and courgette. The sharp, salty flavours are good on a hot day, but work equally well warm from the pan or at room temperature if the weather takes a colder turn.
The vinegar and honey dressing can be flavoured with anything you feel like. I might use fennel seed, bay leaf, marjoram, cumin or pink peppercorns depending on what is available. Some sliced anchovy, finely grated lemon zest and toasted pine nuts would work well too.
When time is of the essence it is best to keep things simple in the kitchen. No more ingredients or food preparation than is absolutely necessary. I use whole herbs and spices and keep cooking methods the same for multiple dishes so that things can be cooked together. This has the added benefit of reducing washing up. The method below is written to make both dishes at the same time, as I did today, so that they arrive at the table together.
You will need a large saucepan, a small saucepan, a colander, a small bowl and two medium mixing/serving bowls.
These dishes are perfectly filling alone, but can easily be augmented with a tin of sardines, a boiled egg, a slab of feta cheese or a piece of grilled halloumi.
Serves 2

Green beans & tomatoes
200g fine green beans
200g cherry tomatoes, mixed colours are good
1 large clove garlic
A small handful of small fresh basil leaves
2 tbsp olive oil
Salt
Zucchini in agrodolce
1 medium or 2 small courgettes, around 350g
5 tbsp white wine or cider vinegar
3 tbsp honey
1 fat clove of garlic
1 tbsp currants
2 tbsp extrafine capers
¼ tsp dried chili flakes
½ tsp whole coriander seed
12 black olives, stoned
A couple of stalks of flat leaved parsley, leaves removed
A small handful of small, whole mint leaves
Salt
Fill the large saucepan with water and bring to the boil.
Make the agrodolce. Put the vinegar and honey into the small saucepan with the coriander seed, chili flakes and clove of garlic which you have crushed under the blade of a knife. Put over a low heat until the honey has melted and the mixture is hot. Take off the heat and pour over the currants in a small bowl. Leave to soak.
Put the courgettes and beans into the pan of boiling water. Bring back to a simmer and cook with the lid on. Remove the beans after 10 minutes, refresh under cold water and drain. After a further 5 minutes cooking carefully remove the courgettes from the pan and leave to drain on a plate until warm enough to handle.
While the courgettes are cooling put the olive oil into the cleaned small pan and put it back on the heat. Roughly crush the second clove of garlic and fry in the hot oil until lightly browned. Tip in all of the tomatoes, put the lid on the pan and turn the heat up high. Cook hard for 2 to 3 minutes, shaking the pan frequently, until the tomatoes are breaking down, but still retain some shape. Take off the heat. Season with salt. Scatter over the mint and parsley.
While the tomatoes are cooking cut the courgettes into chunky pieces and put into one of the mixing/serving bowls. Pour over the agrodolce mixture while the courgettes are still hot, add the capers and olives and mix gently so that all the pieces are coated. Leave to stand while you finish the beans.
Put the green beans into the other serving bowl and pour the still warm tomato sauce over them. Mix gently to combine. Pour over a little more olive oil if you like. Scatter over the basil leaves.

Recipes, words and photographs: Huw Morgan
Published 8 August 2020
After endless days of low cloud cover, chill winds and drizzle, suddenly the sun blazed yesterday and again today. Last night I dreamt of Greece.
Our planned Easter break had to be cancelled, of course, and neither of us have the stomach yet for travelling that far. Like many our relationship to international travel has changed over the past months, due both to quarantine requirements and the clear proof, as if any were needed, of the contribution flying makes to climate change when emissions plummeted after lockdown. Travelling overland and by sea have become our preferred means of getting away, but it will be some time before we feel confident enough to make the 4 day journey by train and ferry to our beloved island.
When I dream of our holidays in Greece food figures strongly in my memories and there is one dish in particular that I miss more than any other. Pythia is the local name given to the chick pea fritters that are more commonly known across Greece as revithokeftedes. They are doubtless related to falafel, but are lighter and fresher tasting, although recipes vary from region to region, village to village and family to family. In fact, one of our holiday pastimes is to judge who, this year, is making the best pythia. There are a couple of regulars who mantain total consistency from meal to meal and year to year, but every year there may be a surprise newcomer.
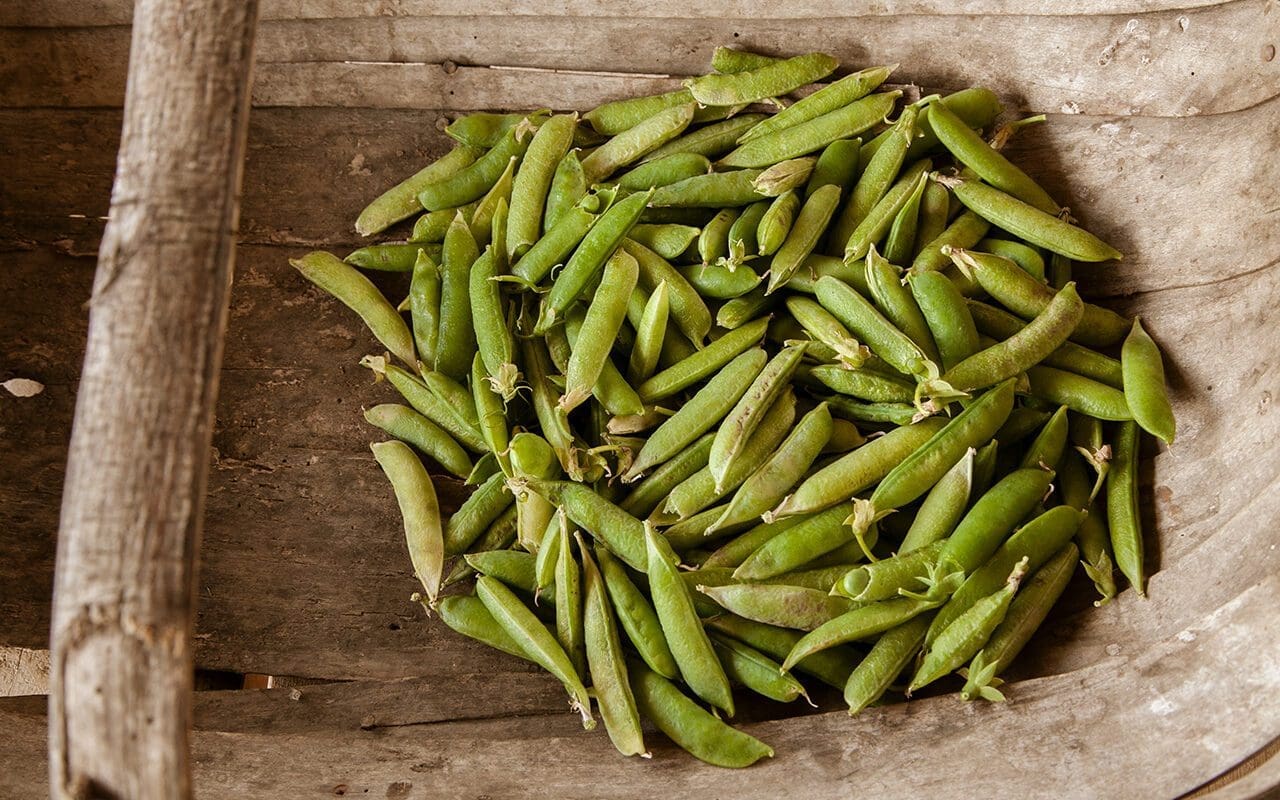
We have never tried to grow chick peas here, since they need a long season of heat for the peas to ripen. However, I was heartened to read this growing information recently, which suggests that with a sunny, sheltered position it is possible to get a substantial crop of green peas that are good to eat fresh. We learned a lesson this year, after planting our peas on the ‘frontline’ of the kitchen garden. After a slightly false start due to mice eating some of the first sowing, they were then slow to get going and, once they did, hated the hot winds of May and the cold winds of June equally, never really hitting their stride. The short-growing petit pois ‘Charmette’ fared the better of the two we grew, but only provided for around four meals, as the pods wizened on the plants before maturing. Early this morning, whilst picking the last of the very disappointing and elderly crop of Glory of Devon peas, I was wondering what to do with them, as they were too old to simply eat boiled. With visions of Greece still floating in my head I thought that they would make a good substitute for chick peas in a fresh, green version of pythia.
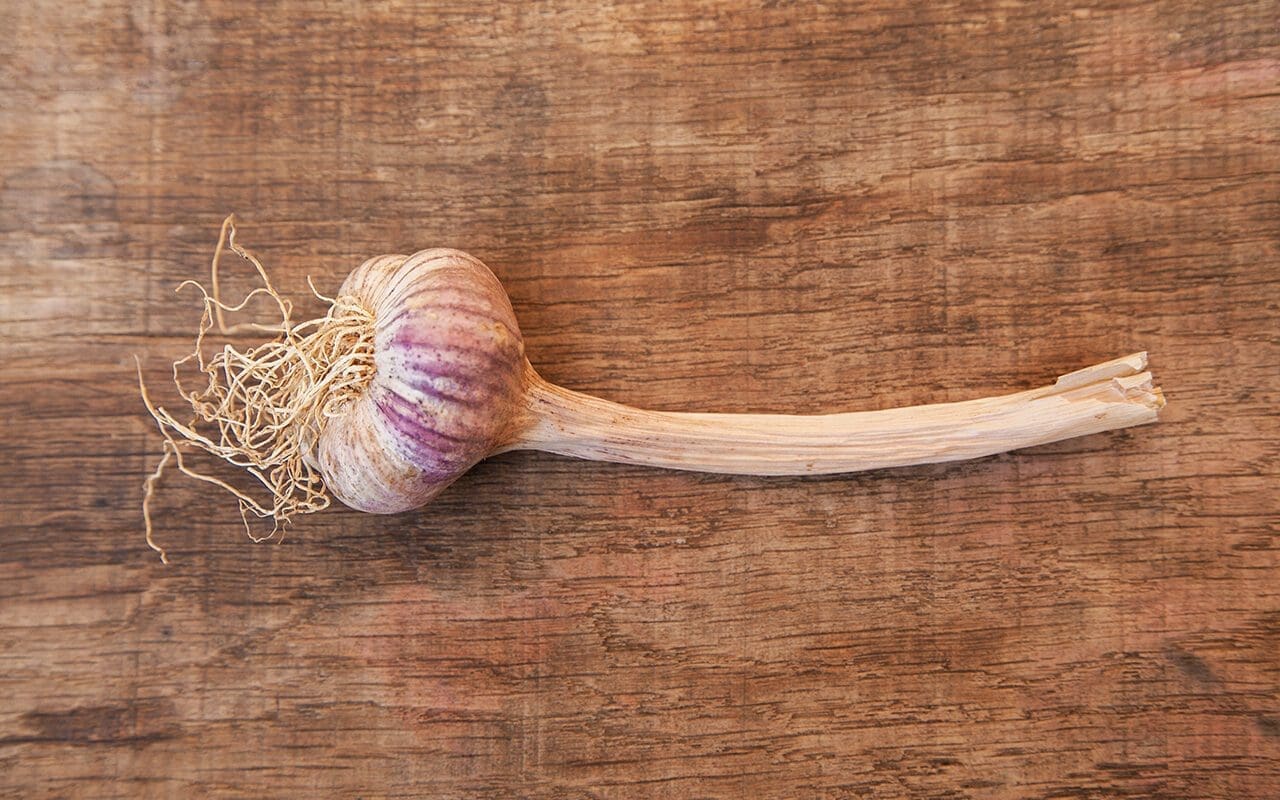
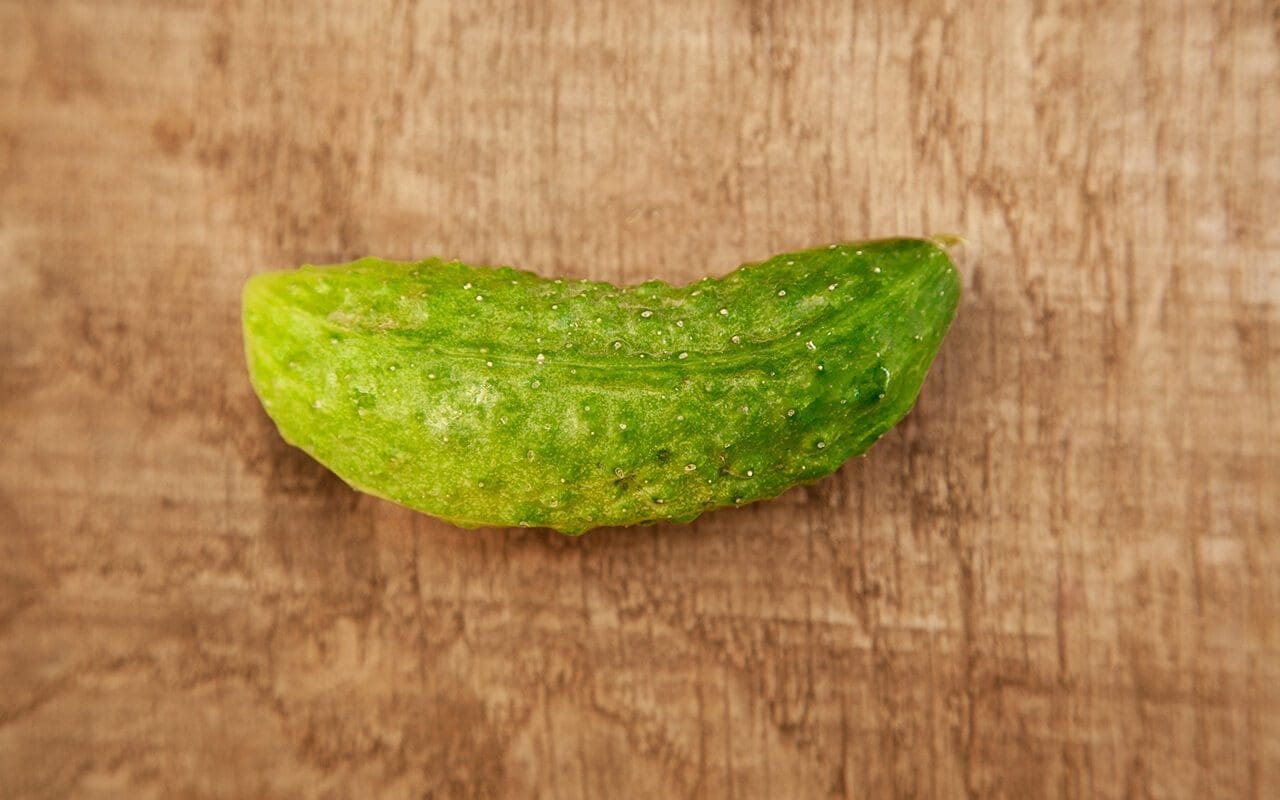
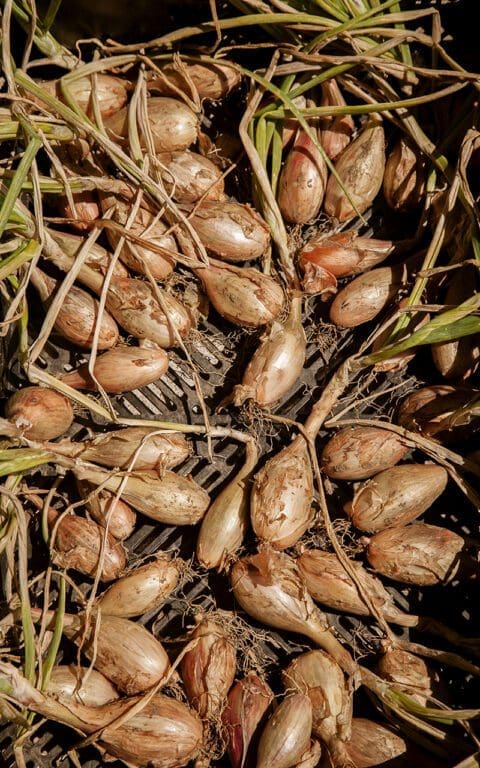
Last weekend I dug up the shallots and three weeks before that the first of the summer garlic, both of which feature in this recipe, as well as the cucumber and herbs which are all from the garden.
If you can’t find chick pea flour and have a Nutribullet type blender you can make your own from dried chick peas. It can also be found at suppliers of Indian foods as gram flour. You can, of course, use frozen peas in place of fresh, or broad beans or the traditional chick peas.
Makes 12, enough for 4 as a starter
250g shelled peas
1 shallot, finely chopped, about 40g
2 fat cloves of fresh garlic
A small handful of flat-leafed parsley, stalks removed
The leaves from two stems of fresh oregano, about 2 tablespoons
1 teaspoon ground coriander
1 long green chilli
The zest and juice of one lemon
8 tablespoons of chick pea flour
1 teaspoon of baking powder
Ice cold fizzy water
Salt and finely ground black pepper
1 small cucumber
100ml strained Greek yogurt
1 tablespoon mint, very finely chopped
1 tablespoon dill fronds, very finely chopped
1 clove of garlic
Salt
Flavourless oil for frying such as rapeseed or rice bran
Firstly grate the cucumber finely into a sieve. Sprinkle with some salt and leave to drain over a bowl while you make the pythia mixture.
Blanch the peas in boiling water for two minutes. Drain them well in a colander then put them with the shallot, garlic, herbs, coriander, chilli, lemon zest and juice into a food processor fitted with a blade. Pulse process until the mixture resembles coarse breadcrumbs. Tip the mixture into a bowl and season with salt and pepper.
Add the chick pea flour and baking powder and stir well to combine. Then add the fizzy water a little at a time until you have a mixture that is soft, but that still holds its shape on a spoon. If it looks too wet add more chick pea flour a little at a time. Leave to stand.
Put the oil into a high sided frying pan to a depth of about 2cm and heat to smoking point.
Using your hands squeeze as much liquid as possible from the cucumber. Put into a bowl with the yogurt and herbs. Grate the clove of garlic into the mixture, season with salt and stir.
When the oil is smoking test fry a small amount of the fritter mixture by gently lowering half a teaspoonful into the oil. It should sizzle and float and brown rapidly. Turn it over to brown the other side, then remove from the oil with a slotted spoon and drain on kitchen towel. Allow to cool a little before tasting, then adjust the seasoning if necessary.
Bring the oil back up to temperature, then take dessertspoonfuls of the mixture and gently lower them into the oil. Do not overcrowd them or they won’t develop a crisp exterior. I use a 22cm diameter, high sided skillet and cook three at a time. Fry for approximately a minute and a half each side until a deep, golden brown, turning them gently once. Remove from the oil with a slotted spoon allowing excess oil to drain back into the pan before moving them onto a small baking tray lined with absorbent kitchen paper. Put them into a warm oven while you cook the rest of the mixture.
Put three pythia on a plate for each guest, with a spoonful of tzatziki and a slice of lemon. Eat piping hot with a glass of something cold.
Recipe & photographs: Huw Morgan
Published 18 July 2020
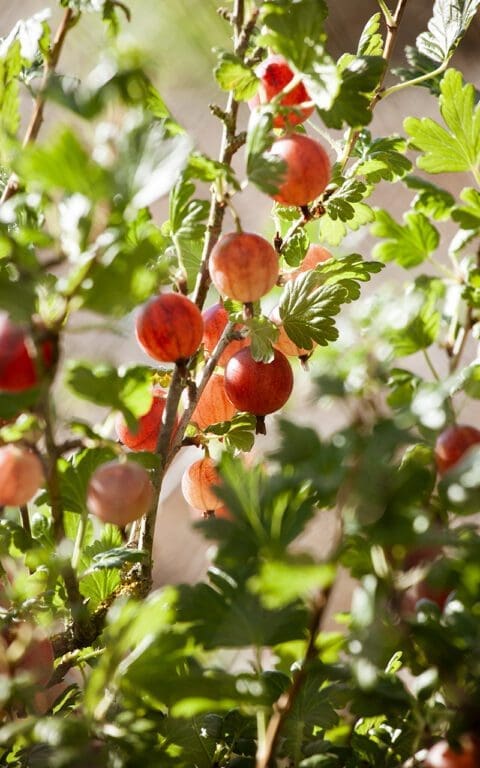
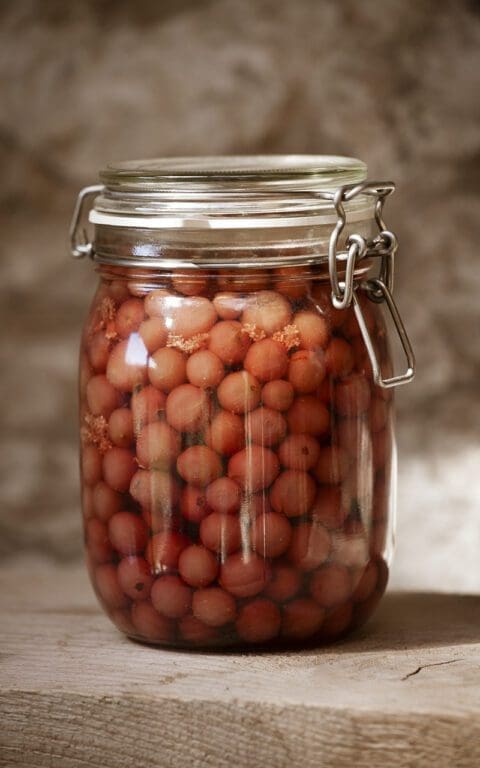
A tsunami of soft fruit is about to break. The gooseberries are first and so this weekend I’ll be crouched on a milking stool in the cool shade of the blackcurrant bushes picking ‘Hinnomaki Green’. As I pick, the blackcurrants brushing my shoulders will be a constant reminder that soon there will be consecutive weekends of picking. We have three varieties, each with different fruiting times to extend the season and the harvest. Last year around this time I found our dear friend Sophie (AKA Champion Picker) among the bushes at daybreak on a post heatwave misty morning, picking and breakfasting in tandem. A whole bush stripped before coffee time is par for the course for Sophie. This year it will be down to me, Dan and the lucky birds.
The gooseberry ‘Hinnomaki Red’ take a little longer to reach maturity than the green, which is a relief, since a Kilner jar full of the remainder of last year’s harvest has been judging me silently from a shelf in the pantry for a while now. We always reach this point in the year when the approaching harvest starts to throw a very different light on the frozen ends of last year’s crop in the freezer. A quick stock take this week revealed two half carrier bags full of gooseberries (green) and blackcurrants respectively, a huge Tupperware full of redcurrants and damsons. Just enough to stew for a week of breakfasts, unlike last year’s June’s freezer clearance which resulted in a memorably messy and sticky summer’s day making damson ketchup, damson chutney, damson shrub and damson fruit leather, again with Sophie, and other willing helpers.
Now that the kitchen garden is beginning to produce in earnest we are really missing our regular weekend housefuls to help harvest, prepare and cook food from the garden together, then share it at a large and usually raucous table late into the evening.
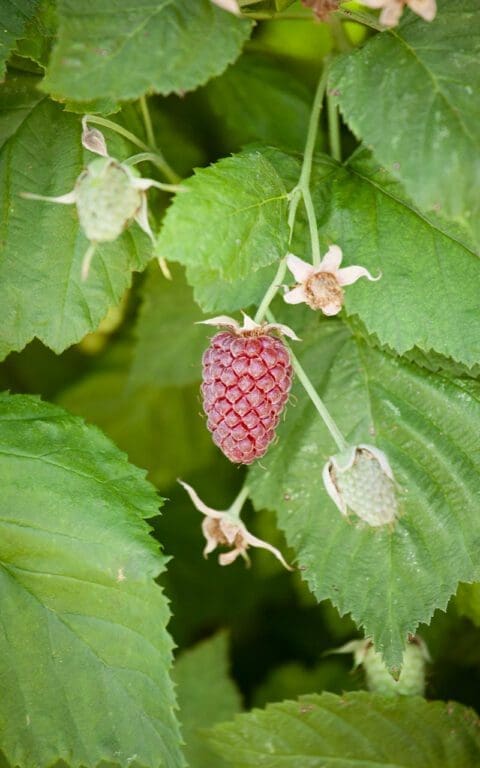
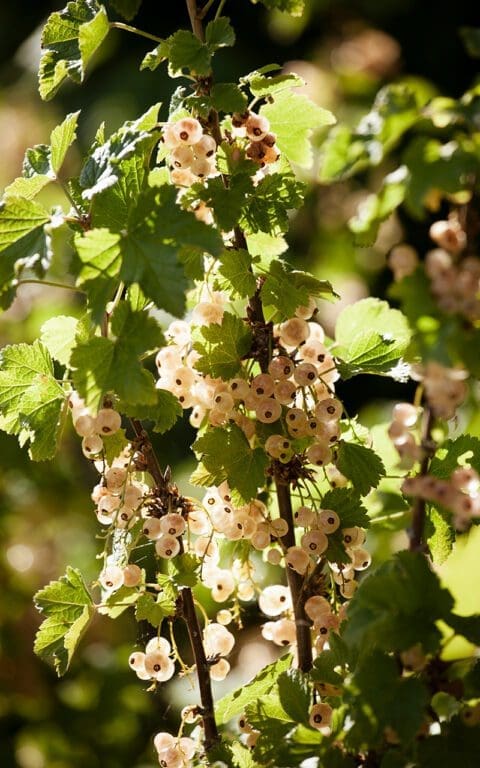
The absence of visitors in this unusual year has also meant that I have found far less reason to make puddings in recent months. When we do end a meal with something sweet it is invariably with some variety of stewed fruit and a spoonful of yogurt, sometimes cream. However, with that jar of red gooseberries on my conscience, a quick pass through the kitchen garden revealed that the whitecurrant and tayberry were dripping with jewel-like fruit, and a summer pudding of this and last summer’s fruits started to materialise. Sweetened with some elderflower cordial made last week and using up the end of a stale loaf of bread that was consigned to the freezer for breadcrumbs several weeks ago and is now taking up valuable space. Space that will very soon be filled by a new generation of soft fruit.
INGREDIENTS
750g mixed soft fruit – raspberry, blackcurrant, strawberry, gooseberry, bayberry, loganberry, redcurrant, whitecurrant
3 tablespoons elderflower cordial
3 tablespoons light honey or caster sugar
A couple of heads of elderflowers
7 slices 1cm thick of slightly stale good white bread
METHOD
Put any fruit that needs cooking (blackcurrants and gooseberries) into a lidded pan on a very low heat with two tablespoons of water and the honey or sugar. Cook until they start to burst and release their juices. Remove the pan from the heat and add the rest of the fruit. Remove the elderflowers from their umbels by dragging the tines of a fork through them over the pan of stewed fruit. Stir, return the lid and leave to stand until cool.
Cut a circle from one slice of bread to fit the bottom of a 1 litre pudding basin. Cut all but two of the remaining slices of bread into triangles of the same height as the pudding basin and use to line the inside of the basin. Fill any gaps with smaller pieces of torn bread. Once the basin is lined pour all of the stewed fruit (reserving three tablespoons) into the cavity. Press down with the back of a metal spoon and smooth level. Cut the remaining slices of bread into as few pieces as possible to make a lid that fits on top of the stewed fruit.
Take a side plate the same diameter as the top of the basin and put it on top of the pudding. Then secure the plate well. I use extra strong elastic bands or well-tied string to exert pressure on the pudding, but you can weight the plate down with a heavy jar. Stand the pudding basin in dish to catch any juice and put in the fridge overnight or for a minimum of 4 hours. Put the reserved stewed fruit into a small pan with a couple of tablespoons of water and one of honey or sugar and bring to a simmer. Press through a sieve and reserve.
When ready to turn out slide a blunt knife between the pudding and the basin until it is loosened. Take a deep serving dish and invert it over the pudding basin. Holding the basin and plate tightly together with both hands invert the whole lot and shake gently but firmly. You should hear the pudding slip out of the basin and onto the plate with a satisfying slurp. Carefully lift off the basin. Pour over the reserved fruit sauce. Decorate with more fruit if you like and serve with cold pouring cream.
Recipe and photographs: Huw Morgan
Published 27 June 2020
We have now been at Hillside for six weeks during which time we have left the village just twice. Our daily lives have settled into a regular routine, which provides the reassurance of structure. The furthest we venture from the house each day is for two dog walks, one around the valley after breakfast and the other shorter one up the lane to our top fields after we finish work. Apart from our DPD delivery man (with whom we have rapidly become much more familiar) the only people we see regularly are our immediate neighbours.
Living in a tiny community the local support network kicked in very quickly here in mid-March. Josie and Rachel, sisters who live up the lane, are in their 80’s and have lived here almost all their lives and still live to the rhythm of an earlier time. When we first moved here they told us that our top fields used to be known as the ‘hospital fields’, since they were left ungrazed for the cows to be allowed in at certain times of year to self-medicate on wildflowers. When we first got a swarm of bees they arrived, unannounced and kitted up, to see if we wanted some help learning how to manage them, as they have been beekeepers for decades.
Each evening we meet them at the gate to the hospital fields as we return from our dog walk, where they feed the two beef cattle they raise each year in the neighbouring field. We have always stopped for a quick hello in the past, but there is now an enforced closeness and intimacy in our communications. Very quickly after lockdown we started talking chickens. The fenced orchard that abuts their garden is home to a large brood and their cockerel can be heard most mornings waking the upper reaches of the village. We had thought that now, unable to leave home, might be the time to get chickens of our own. While we still haven’t committed, we rely on our now weekly delivery of eggs from the ladies up the lane.
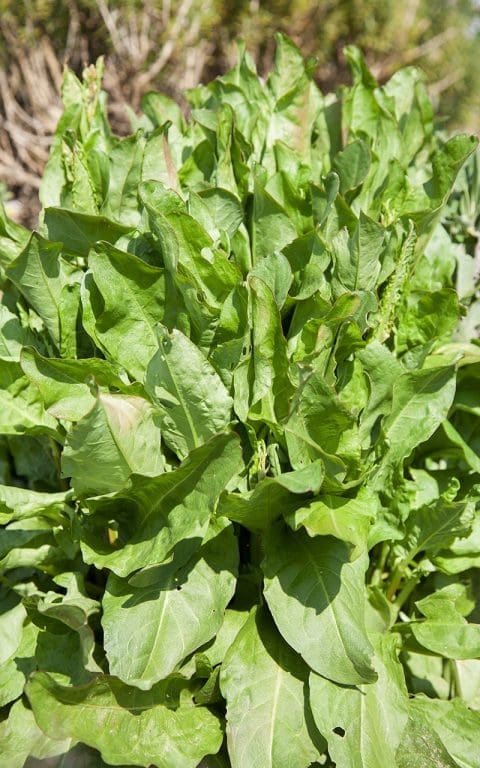
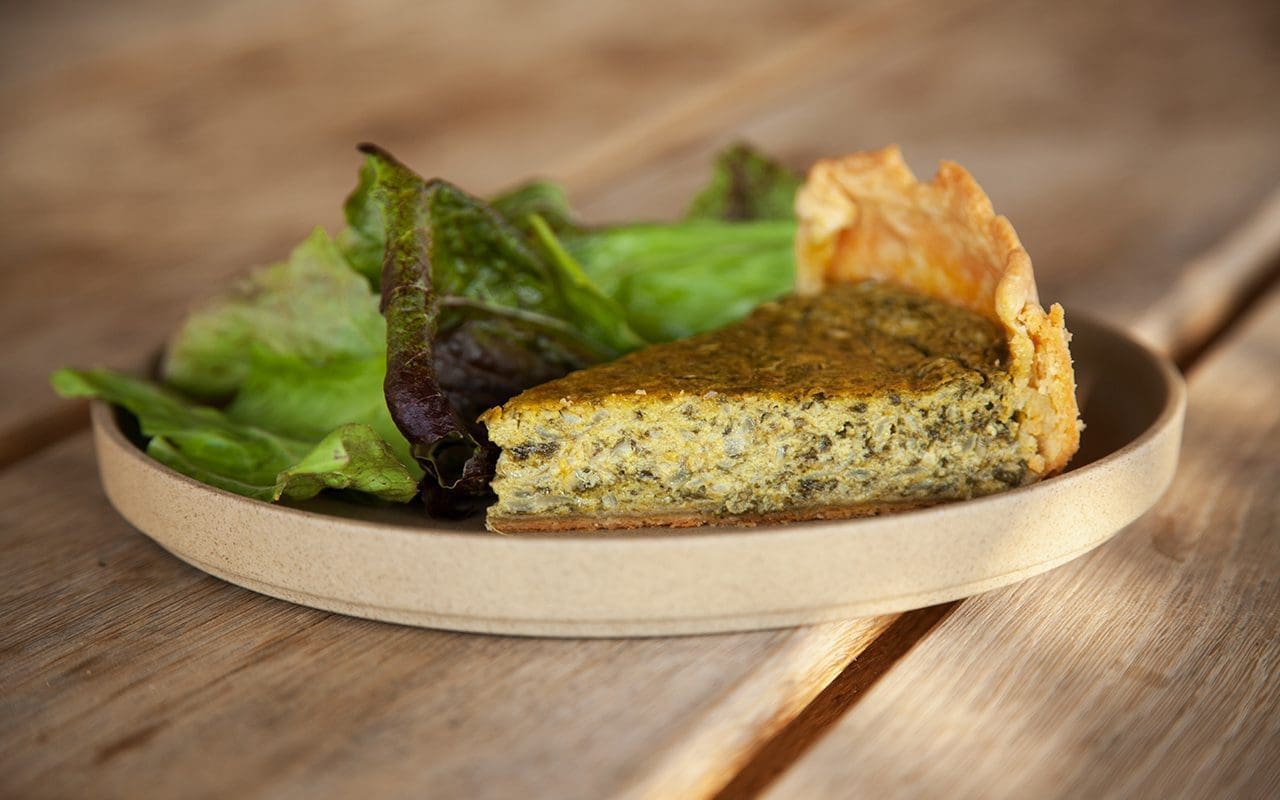
Now that we are smack in the middle of the hungry gap, everything in the vegetable garden is up for kitchen consideration and things that may once have been a passing fancy demand a treatment that will turn them into a real meal. The sorrel, which is in its prime right now, is sending out sheaves of squeaky green leaves that just invite harvest. Due to its reputation for sourness, and the fact that, like spinach, it cooks down to nothing (whilst also turning an unappetising shade of khaki) it is not the easiest of leaves to use. However, the sorrel custard filling of this tart both extends and carries the lemony flavour of the leaves beautifully, while also disguising the somewhat murky colour since, with the yellow of the eggs, it cooks to an attractive chartreuse. Since sorrel isn’t available to everyone it could be replaced by young spinach, de-stalked chard or wild foraged greens like wild sorrel and nettle. The addition of a tablespoon or two of lemon juice will add the requisite tang.
This recipe is essentially Richard Olney’s from Simple French Food. My only adjustments are the addition of a tablespoon of fine polenta to the pastry (I like the sandy crunch it brings to savoury pie crusts) and a little less double cream. However, more than that I would not be tempted to fiddle. The plain simplicity of this recipe is its secret, particularly in these times of renewed frugality. The alchemy and pleasure of turning straightforward pantry items and produce from the garden into something memorable and delicious.
Pastry
125g plain flour
125g unsalted butter, put into the freezer for 30 minutes
1 tablespoon fine polenta
A pinch of salt
5-6 tablespoons iced water
Filling
300g sorrel leaves, weight with stalks removed
2 medium onions, about 300g
60g butter
250ml double cream
3 eggs
Ground black pepper
Sea salt

First make the pastry. Put the flour into a medium sized mixing bowl and then grate the frozen butter into it. Using a sharp knife and fast cutting motions, cut the butter into the flour, until the mixture resembles sand. Add the salt and polenta and stir to combine.
Sprinkle the iced water over the flour and butter mixture two tablespoons at a time, and use the knife to incorporate it after each addition. Then when it looks as though it is damp enough, use the very tips of your fingers to quickly pull the dough together into a ball. Wrap tightly and put in the fridge for 1 hour.
While the dough is chilling boil the kettle and put the sorrel leaves into a large saucepan. Pour the boiling water over the sorrel and stir with a wooden spoon. The leaves will turn khaki. Drain immediately and thoroughly.
Gently heat half the butter in a smallish pan. Press the sorrel leaves against the side of the colander to remove as much water as possible, then stew in the melted butter over a low heat, stirring from time to time, until you have a puree with no surplus liquid. Remove from the heat and allow to cool.
While the sorrel is cooking gently heat the other 30g butter in a smallish pan. Add the onion and saute over a very low heat, with the lid on, for about 30 minutes, or until they are very soft, translucent and completely uncoloured. Allow to cool to room temperature, then add to the sorrel. Heat the oven to 180°C.
Take the pastry from the fridge and roll out very quickly on a well floured surface into a circle 28-30cm in diameter. Carefully use to line a 23cm tart or cake tin. Prick the base with a fork several times. Line with baking parchment, fill with baking beans and bake blind for 15 minutes. Remove the beans and baking parchment and return to the oven for 5 minutes or until the pastry looks dry and lightly coloured. Remove from the oven and allow to cool.
Beat the eggs and cream together in a bowl. Season with pepper and salt. Add to the sorrel and onions and mix thoroughly. Pour the mixture into the pastry case and bake for 40-50 minutes until firm in the middle and lightly coloured.
Serve warm with a green salad.
Recipe and photographs: Huw Morgan
Published 24 April 2020
I will make this brief. We are all preoccupied right now. The world has changed in the blink of an eye and we begin to understand the true meaning of survival. Adjusting to this new order has been stressful. New behaviours that contradict our human instincts and impulses to be together must be curbed. The fear of illness can stop us from functioning properly so we must ensure, now more than ever, that we are feeding our bodies with nutritious and simple food.
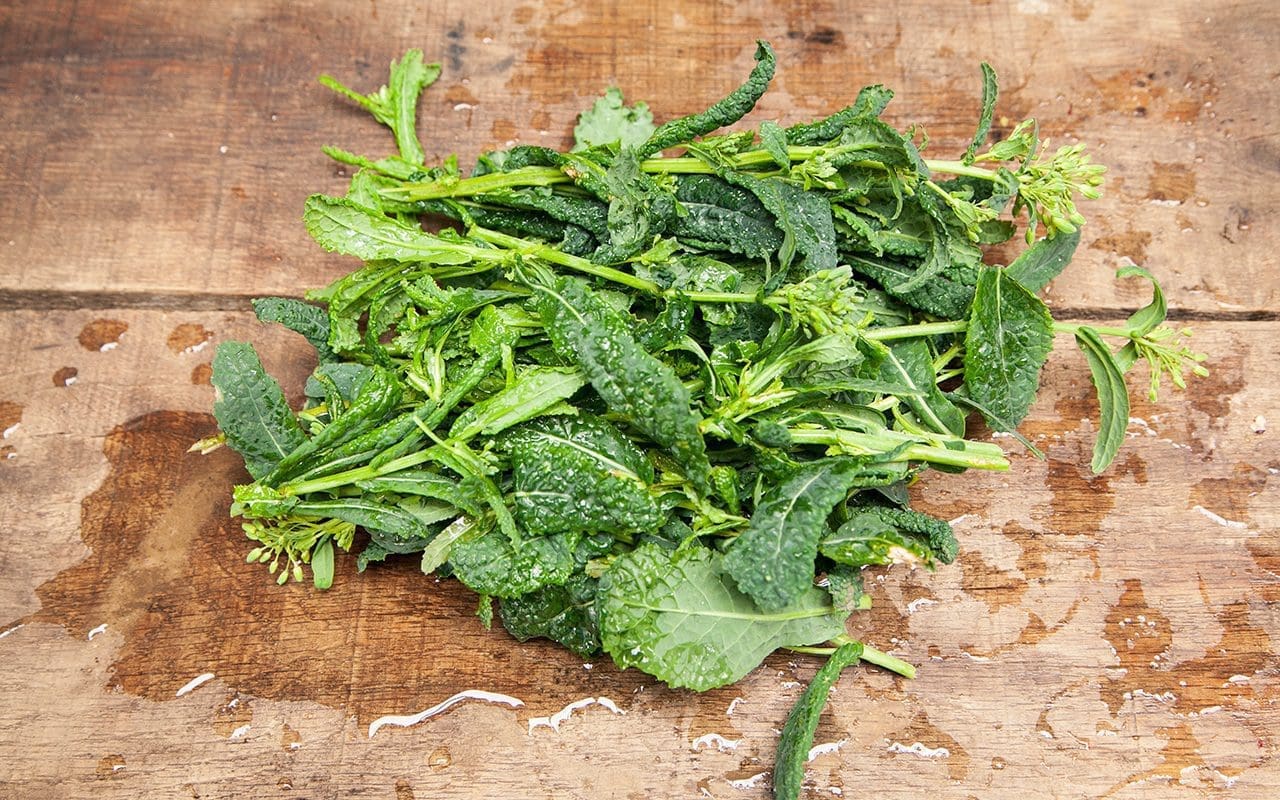
As I surveyed the kitchen garden early this week I made a mental note of how many meals there still remain in the beds. The last three celeriac roots and a handful of parsnips, the purple sprouting has come on stream, and our autumn sown salad of winter purslane, lamb’s lettuce and radicchio will provide for some time to come, but the remaining beds appeared to offer slim pickings. A clutch of wormy carrots, beetroot the size of swedes, cavolo nero running to flower with moth-eaten leaves and chard sown last summer which, although valiantly sending out some new growth, is looking past its best.
In the course of our previous life I might have consigned the shabbiest veg to the compost heap, preferring to eat the best and freshest looking. That has all changed. Now, with the need to make things last and avoiding going out more than necessary, anything that is still green is potentially valuable and edible.

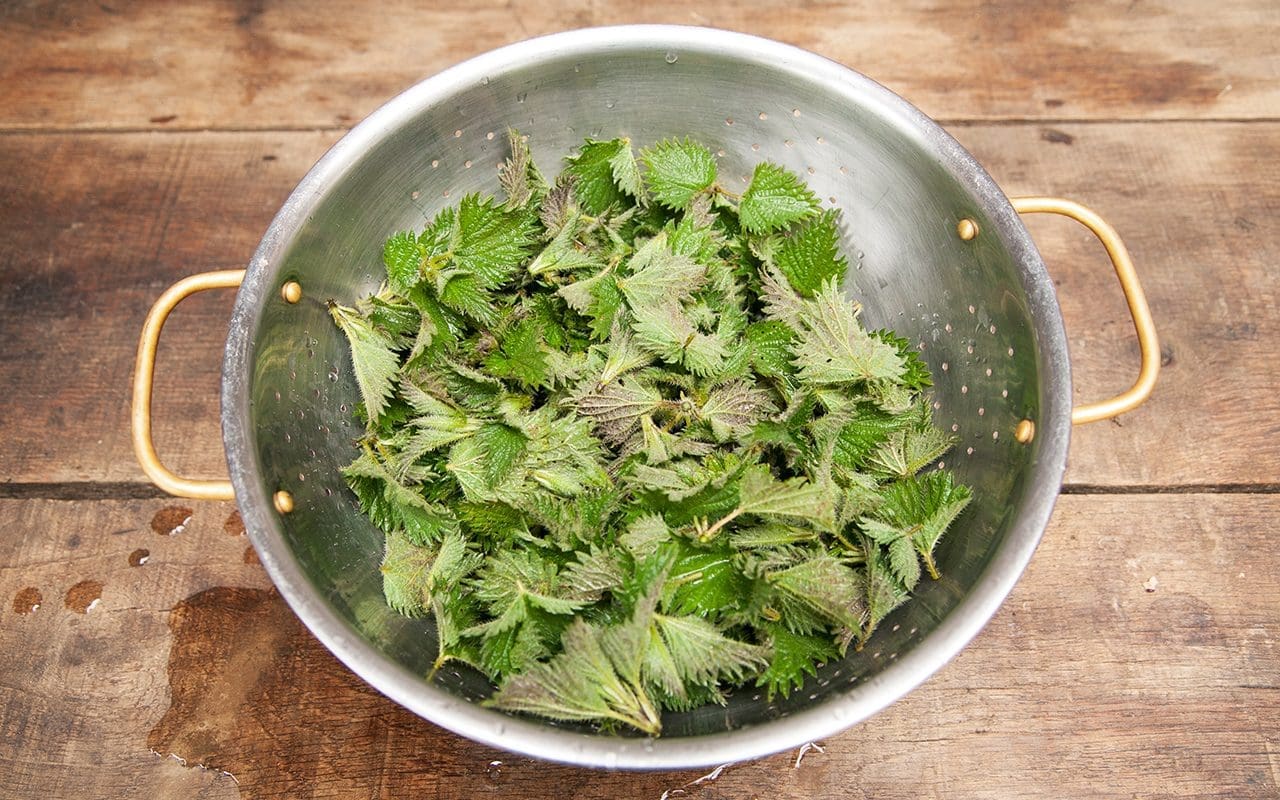
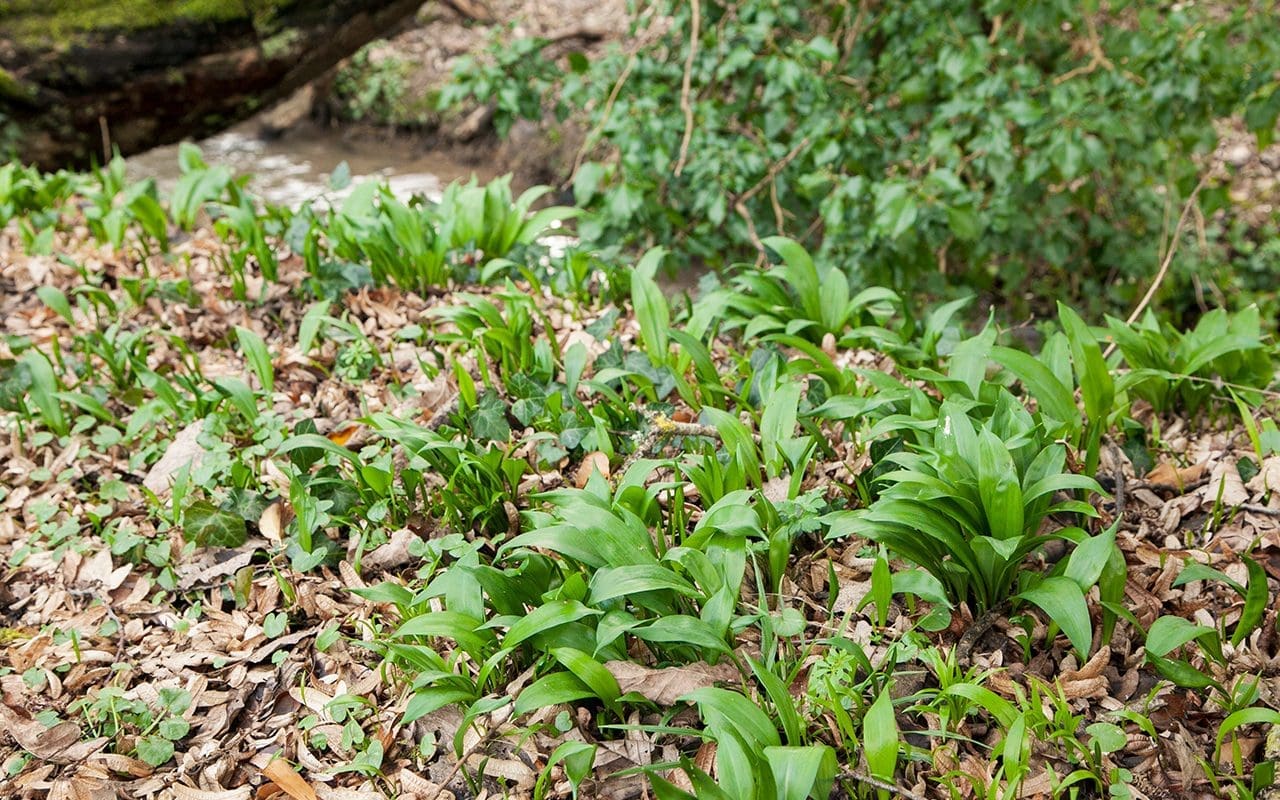
Although the kitchen garden is on the very brink of the hungry gap, there is plenty shooting in the landscape around us, and there is a surfeit of nettles and wild garlic. The former is one of the most nutrient-rich herbs available containing calcium, chromium, iron, magnesium, potassium, selenium, trace minerals and vitamins A, B and C. When picked at their peak, right now, they have a protein content of 25%. Pick only the tops, as the stalks, once used to make a linen-like fibre and cloth, are tough and inedible. Wild garlic is well known for it’s antibacterial and antibiotic properties, and also contains vitamins A and C, calcium, copper, iron, phosphorus and sodium.
In these times when we must be more mindful of resources, more frugal in what we use and what we discard, and more determined to only eat food that really feeds our bodies and its natural defence systems, this is a soup that will be seeing us through until the veg garden is up and running. This weekend I plan to harvest as much nettle and wild garlic as I can and either blanch and freeze (nettles) or preserve them under oil (wild garlic), so that we are able to keep eating nourishing greens until our own veg starts to produce more.
Older vegetables, particularly the brassica flower shoots, celeriac tops and chard stalks can be fibrous and stringy by this point in the season, but in the spirit of ‘waste not, want not’ I used everything in this soup and then put it through the finest screen of a Mouli-legumes. You could also liquidise it and then pass it through a sieve.
This is not so much a strict recipe, rather a guide to use whatever you might have to hand whether it be a carrot from the salad drawer that has seen better days, a few of the last winter-stored potatoes just starting to shoot or a slightly mouldering cabbage. This is also a good way to use up any vegetable peelings which would otherwise be heading for the compost heap. Use any green herbs you can lay your hands on. Last year’s parsley and chervil are all in fresh leaf now, as are other hedgerow herbs such as Alexanders (go easy on these, they are strongly flavoured), Jack-in-the-Hedge, Fat Hen and dandelions.
Serves 8-10
12 large chard leaves
150g wild garlic leaves
180g brassica flower shoots
200g nettle tops
2 medium onions
180g celery or celeriac tops
2 litres water or vegetable stock
Olive oil
Sea salt and ground black pepper
Grated nutmeg

Coarsely chop the onion and celery or celeriac tops.
Heat 3 tablespoons of olive oil in a large pan.
Saute the onion and celery with the lid on until they become translucent.
Remove the green leaf from the chard stalks and chop the stalks coarsely. Add them to the onions and celery and continue to cook with the lid on until almost tender.
Add the water or stock to the pan and bring to a simmer.
Coarsely chop the brassica flower shoots and add to the pan. Grate in some nutmeg and season with salt and pepper. Simmer for about 15 minutes until the brassica shoots are cooked.
Take the soup off the heat and add the wild garlic. Stir well, put the lid back on the pan and allow to stand for a minute or two until the garlic has wilted.
Liquidise the soup and then, if necessary, pass it through a mouli-legumes or sieve. Check the seasoning.
If you have it a spoonful of cream, creme fraiche, or homemade yogurt can be added before serving.
Recipe & photographs: Huw Morgan
21 March 2020
This article is dedicated to Susan Sheehan, a longstanding American client of Dan’s, who writes the most wonderful emails that frequently have us doubled up in tears. One of these sent last year started (all Susan’s capitals), “I always read DIG DELVE…naturally, it is my absolute fantasy life blog. I imagine myself calm and RELAXED looking at the row of trees you have on the horizon, at your enchanting house and garden, and whipping up a batch of ELDERFLOWER AND ROSE cordial and a RHUBARB GALETTE…all sounds so romantic, and utterly doable. Then I just have to slap myself in the face and out of the TRANCE your blog, Instagram posts and new website induce…it is all just lovely. I want to be just like you when I grow up.”
So Susan, here is a picture of my RELAXED life this week. Dan has been away for 10 days. I am working on the picture edit of the book he has written about the Tokachi Millennium Forest. There have been, and I kid you not, around 40,000 images to go through, which has required an insane amount of focus, concentration and organisation. At around 4pm each day I Facetime Julie, our American friend who is designing the book. She lives in Portland, Oregon. It is usually around 8pm before we finish looking at layouts, discussing the design and swapping images around. Then a walk for the long-suffering dog, dinner (or more likely cheese and biscuits) and then bed. Then repeat. Yesterday, I had the florist Flora Starkey here, squeezing in a winter photoshoot en route to Bristol airport, while an old university friend also arrived to stay for the weekend. Fortunately Sophie is an excellent cook since, on Saturday, I have also invited good friends and godchildren for lunch.
Trying to shoehorn cooking, writing and photographing a recipe for Dig Delve into that schedule is, unfortunately Susan, the very opposite of RELAXING and, although not every week is this extreme, it is closer to the usual state of affairs than the idyll you describe. It doesn’t always feel very doable or very grown up. Sometimes we have to cut corners and speed things up to fit everything in, so this extremely easy recipe was directly inspired by a starter we were served at our Waterloo local, The Anchor & Hope, just last week.
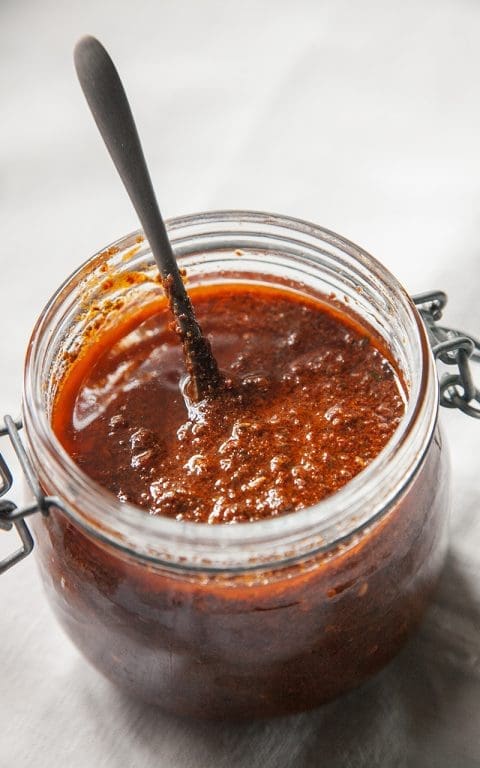
I used to love the crispy ‘seaweed’ that my dad would order from our local Chinese restaurant when I was a kid. I thought I was eating something very exotic, of course, when the mundane truth was that it was just shredded, deep-fried cabbage. When this plate was brought to our table last week it took me straight back to those foil takeaway containers, with the same crisp texture and delicious savoury taste. The bright and smoky harissa was the perfect foil to the dark leaves, while the cool contrast of crème fraiche, made the whole plate sing. I immediately knew that I wanted to reproduce it at home.
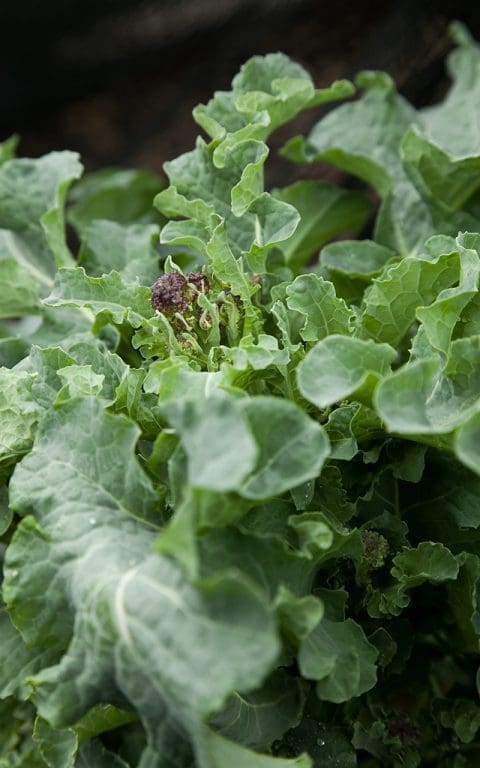
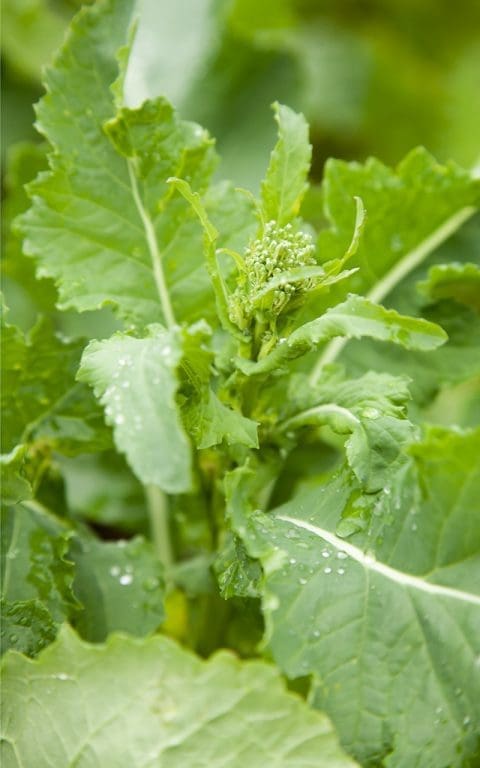
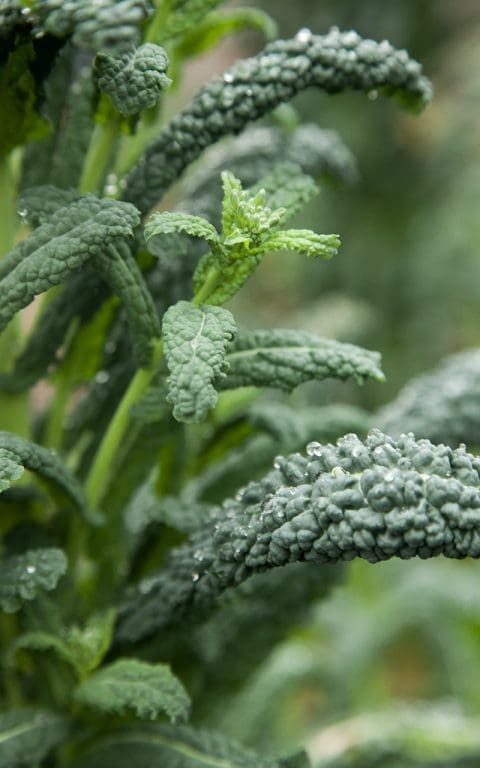
We have 5 beds of brassicas that keep us going through the winter, and are now close to having only two still producing. Many of the red cabbages, which were our most successful germinator last year, are still standing, as are the second sowing of curly kale. The Cavolo nero are producing less leaf, but have started to send out flower spikes in step with the Early Purple Sprouting broccoli. A new winter crop for us, which I will definitely be sowing a lot more of next September, is the turnip green Rapa Senza Testa from Real Seeds, which has stood fresh and green all winter. From one row we have only had a handful of servings of the delicious buttery greens, but they are still producing and now also going to flower.
Two weekends ago in the woods I was a little perturbed to see the tiny emergent leaves of the wild garlic, which seemed far too early and too young and few to harvest. However, already they are here in number, and so yesterday I picked a handful to flavour the harissa. I made the harissa with a variety of smoky, medium and hot dried chilies from the pantry together with some fresh red chilies from the greengrocer. Unless you like it very hot avoid the bird’s eye and scotch bonnet types. The recipe below makes more than you require. It keeps well in the fridge covered with olive oil.
To make this into more of meal it is delicious topped with a poached or fried egg.
Serves 2
200g mixed brassica flower sprouts, tender stems only
2 litres rapeseed oil
HARISSA
25g mixed dried chilies
25g fresh red chilies
1 tablespoon cumin seeds
1 tablespoon coriander seed
1 tablespoon fennel seed
A small handful of young wild garlic leaves
1 teaspoon smoked paprika
1 tablespoon tomato puree
1 teaspoon sea salt
2 tablespoons lemon juice
1 tablespoon red wine vinegar
100ml olive oil
Crème fraiche, to serve
First make the harissa.
Put the dried chilies in a heatproof bowl and pour over enough freshly boiled water to cover. Leave to soak for 30 minutes.
Toast the seeds in a small dry frying pan over a high heat until they become fragrant. Tip into a mortar and grind to a fine powder.
Remove the seeds and stalks from the fresh chilies and do the same with the soaked dried chilies. Put them all into a small blender with the other ingredients. Blend until a fairly rough paste is achieved.
Transfer to a small Kilner type jar.
Heat the oil in a large deep pan until smoking. Fry the flower sprouts in batches for a minute or two at the most. Be very careful as you put them into the oil as they will splutter. Keep a close eye on them, as they can take differing lengths of time to cook. When done, lift them from the oil with a slotted spoon and put into an ovenproof dish lined with kitchen paper. Put the dish in a low oven while you cook the remaining flower sprouts, transferring them each time to the oven to keep warm.
When the sprouts are all done transfer them to a hot serving plate. Toss over a couple of pinches of sea salt. Spoon over some of the harissa. Put some crème fraiche on the side of the plate. Eat immediately.
Recipe & photographs: Huw Morgan
22 February 2020
When I returned to London in 1988 after four years at Manchester University, my first job was as a Wardrobe Assistant for the English National Opera at The Coliseum. I was responsible for half of the male chorus, laundering, pressing, mending and preparing their costumes for every performance, during which I and the team of other Wardrobe Assistants were on standby for intervals, quick changes and emergencies. Hours were irregular with late nights and early starts when there were matinees and, with a 4 day on, 3 day off shift, weekends were not always at the weekend. This meant that I was frequently in the West End at meal times and in the company of others, so very quickly I was introduced to, or discovered for myself, a number of eateries that were dependable, affordable and had an edge of West End dirty glamour to seduce this city returnee.
Many of these were institutions, but although some of them are still there, many are now sadly gone due to development. Gaby’s Deli on Charing Cross Road, famed for falafel and kofta, the New World Dim Sum restaurant on Gerrard Place (only recently closed), where it was easy to get seriously stuffed on the trolleys that kept passing with delicious new dishes. Pollo Bar, with its greasy vinyl booths upstairs and smoky beatnik vibe in the basement, where huge bowls of pasta and endless carafes of red wine were cheap as chips, and Jimmy’s Greek restaurant on Frith Street, where the clattery basement and copious retsina was conducive to increasingly raucous evenings. If you wanted something more traditional there was New Piccadilly, the classic greasy spoon or The Stockpot, where tomato soup, Shepherd’s Pie and apple crumble and custard were the order of the day.
Another much-loved restaurant, although far from Soho, was Daquise, the Polish in South Kensington, which was my habitual destination after a visit to the V & A. The smell of the restaurant was very particular, a combination of boiled cabbage and meat overlaid with home-baked cakes that instantly transported you to eastern Europe. Favourites were the cheese and onion dumplings, boiled beef or schnitzel followed by their superlative cheesecake. However, no matter what else I ordered I would always order borscht.
This borscht was the first I had ever eaten and it became the benchmark by which I have measured all others. Clear, rich, jewel-bright stock, with enough vegetables to fill you up, but leaving just enough room for a plate of cheese pancakes with apple. Since then I have made any number of ‘borschts’, many of which I am sure would infuriate purists, but nothing comforts on a chill winter’s day like beetroot soup. I came up with the version below as I had a hunch that the comparable earthy flavours of beetroot and wild mushrooms would work well together. When researching this piece, however, it came as no surprise, although some little disappointment, to find that the Polish had had this bright idea a long, long time ago. In particular an age-old borscht traditionally served on Christmas Eve is a clear beetroot broth with wild mushroom pierogi floating in it. Now on my list to try.
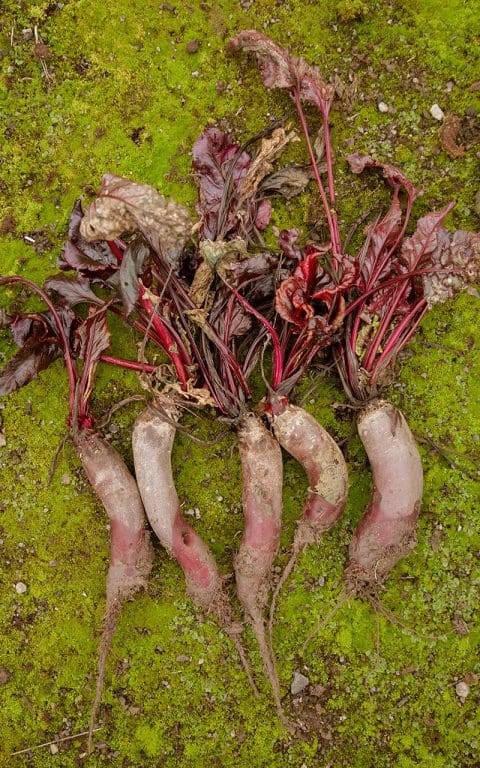
Here at Hillside we grow up to four crops of beetroot in a season, starting with an early sowing as soon as the weather warms in April and resowing every month or so. The last sowing is made in early August and these are the ones we leave in the ground to overwinter. One day, when we have a frost-free root store, we will lift them before the frosts in November and cover them in just damp sand. Until then, the roots take their chances with the weather and the slugs, but most make it to the table.
This year we have grown our standard favoured varieties. The flattened, dark ‘Egitto Migliorata’ which we tend to harvest young, the saffron ‘Burpees Golden’ and the long-rooted ‘Cylindra’, which is favoured in eastern Europe for pickling, as the long roots create many identical slices rather than the fewer central slices from a spherical root. Their upright shape means you get more plants to a row and, although they can reach up to 500g in weight, they remain sweet and not woody. It stands very well for us in the ground over winter.
Serves 6
2 medium onions, coarsely chopped
2 sticks celery, coarsely chopped
1 large carrot, diced
500g beetroot, peeled and coarsely grated
30g dried porcini or other wild mushrooms
1 large bay leaf
3 allspice berries
8 juniper berries
1.7 litres water or vegetable stock
2 tablespoons sunflower or rapeseed oil
Apple cider vinegar
Salt
Finely ground black pepper
Soured cream or sauerkraut
Bring 750ml of the water or stock to the boil in a pan. Remove from the heat, add the dried mushrooms and cover. Leave to stand while you prepare the vegetables.
Heat the oil in a large thick-bottomed pan. Add the onion, celery and carrot and fry, stirring frequently, until the vegetables start to brown and caramelise.
Finely crush the juniper and allspice in a mortar and add to the vegetables. Continue to cook over a low heat for a minute or two until fragrant.
Drain the soaked mushrooms and retain the soaking water. You should have around 700ml. Make up the total amount of liquid required with water or stock. Coarsely chop the mushrooms, add to the pan of vegetables and cook for another minute or two. Add the grated beetroot.
Pour the mushroom stock into the pan through a sieve. Bring to the boil and then reduce the heat and simmer with the lid on for 45 minutes until all the vegetables are soft and the flavours have combined.
Season with salt, pepper and brighten the flavour with vinegar to taste. I like my borscht to be well seasoned.
Ladle the soup into warm bowls. Spoon on some soured cream or sauerkraut. The golden turmeric sauerkraut from Bath Culture House I have used makes a nice contrast to the rich, ruby soup.
Recipe & Photographs | Huw Morgan
Published 25 January 2020
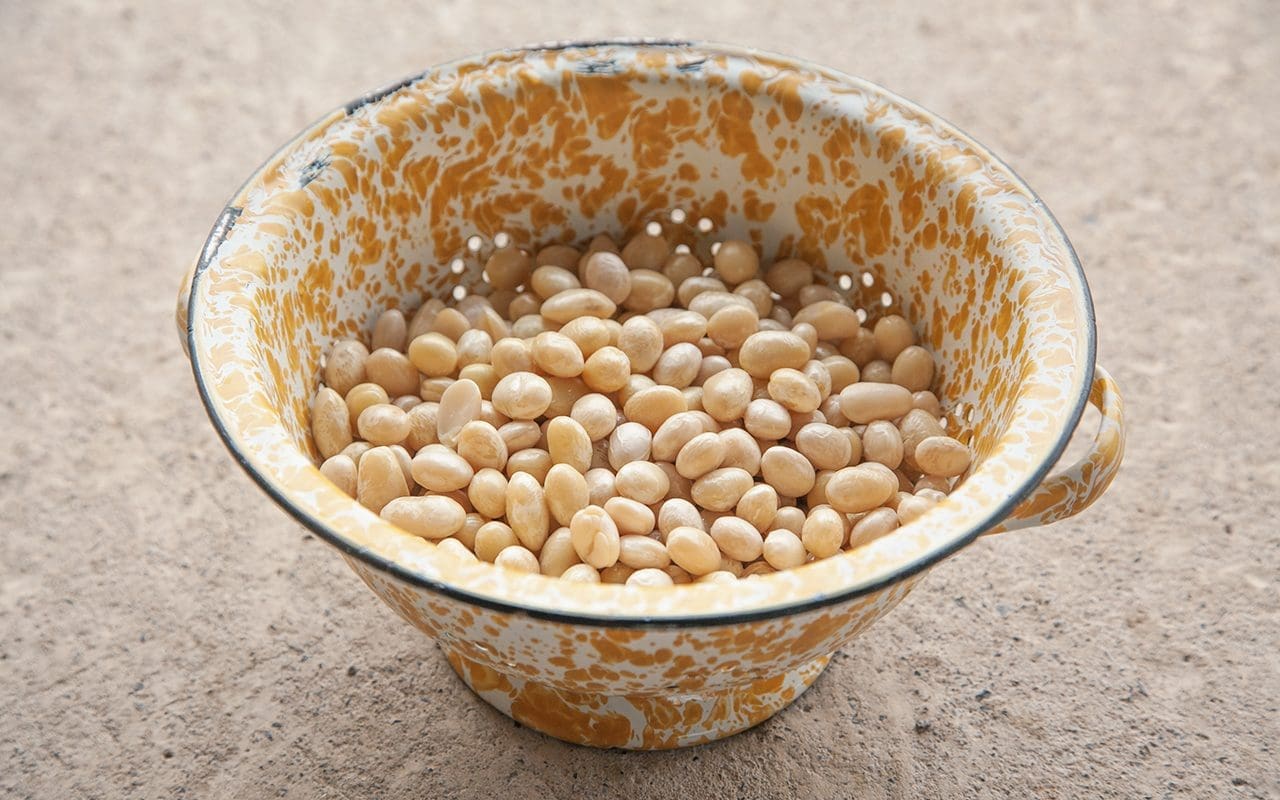
Yesterday we had our first snow. Just the briefest flurry, and it was too wet and warm for it to settle, but snow all the same. The colder weather demands something warm and hearty in the stomach and has finally given me the opportunity to make a long-planned silky soup from the coco beans that have been in the freezer since I harvested them over a month ago.
To date we have only ever grown climbing beans to eat fresh, but this year we grew a range of new beans, some of which I selected specifically for storing. At the end of the summer the bean which had cropped most heavily was ‘Coco Sophie’, a late 18th century variety which became commercially unavailable in 2006, and has only recently been re-introduced by The Real Seed Company. Due to the variety and quality of their seed, it has fast become our go-to seed supplier.
Coco beans are an old French large haricot type, producing shiny, round, creamy white beans with a texture comparable to normal haricot or cannellini beans. However, they are smoother and richer than either. The Coco de Paimpol, which is grown only in Brittany, has its own appelation d’origine contrôlée due to its incomparable texture and flavour. Although I had eaten coco beans in restaurants before and been struck by their silky texture, I had not, until this year, been able to find seed to grow them myself.
I picked the beans when semi-dry – which cuts down their cooking time significantly – and froze them immediately. However, they can be fully dried and then soaked before cooking. If using dried beans for this recipe 400g of dried beans will give a soaked weight of approximately 800g and, although you do not need to sieve the soup, it produces a superior result that is worth the little additional effort.
In my mind I had a velvety smooth, garlic-laden puree flavoured with woody herbs and a whiff of truffle. I had a recollection of having eaten something similar many years ago in Milan, as I associate it with distinct memories of risotto alla milanese, osso buco and whole pan-fried porcini.
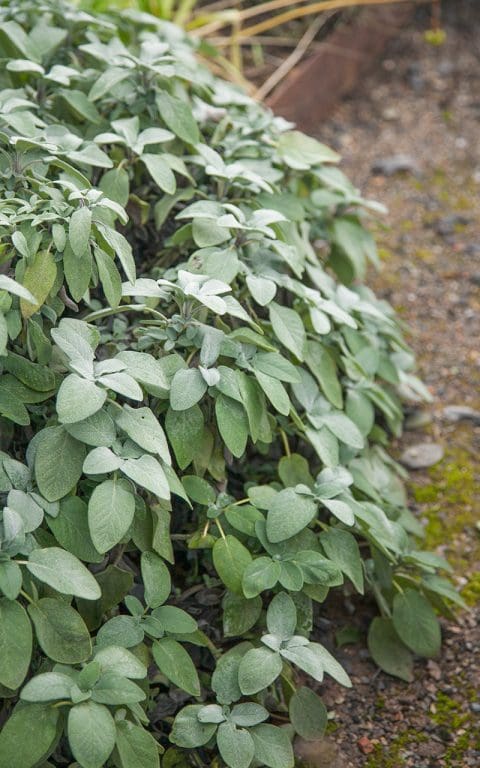
A whole bulb of garlic may seem too much initially, but since it is simmered in the stock its strength is tempered and sweetened. The seasonal combination of sage and bay is warm and aromatic. Although we have several types of sage growing here, the most robust and best-flavoured variety is known simply as ‘Italian’, with large silver-grey leaves that are winter hardy and perfect for frying.
Serves 6
3 large leeks, white and pale green parts only, about 250g
3 tbsp olive oil
800g fresh or cooked white beans
1 bulb garlic
2 large sprigs of sage
1 large bay leaf
1.5 litres water or vegetable stock
Freshly grated nutmeg
Salt
Ground white pepper
12 large sage leaves
3 tbsp olive oil
Truffle oil
Heat the olive oil in a large pan over a low heat. Wash, peel and trim the leeks and slice them finely. Put them into the pan, put the lid on and sweat over a low heat for 10 to 15 minutes until translucent. Stir occasionally.
Peel and trim the garlic cloves and leave whole. When the leeks are cooked add the garlic, beans, sage, bay leaf and grated nutmeg to the pan with the water or stock. Bring to the boil and then reduce to a simmer. Cook with the lid on until the beans are soft; about 20 minutes if fresh, or 40 if dried and soaked.
When the beans are done remove the sage and bay leaves, then liquidise the beans and their cooking liquid with a stick blender until smooth. Then, if you want the silkiest smooth soup, push the puree through a fine sieve with the back of a metal spoon. Season with salt and pepper to taste.
In a small frying pan heat the second lot of olive oil. When smoking, fry the sage leaves in batches for about 10 seconds until crisp and just beginning to brown. Remove from the oil onto a piece of kitchen paper.
Ladle the soup into warm bowls. Drizzle over a little truffle oil and garnish each bowl with two fried sage leaves.
Recipe & Photographs | Huw Morgan
Published 16 November 2019
We have just returned from the Climate Strike march in Bath City centre.
Like many of us this year I have been inspired by the school children’s and young students’ worldwide strikes in the name of Fridays for Future, initiated by the example of Greta Thunberg.
Like many of us I have also felt guilt and shame at the fact that we, the older generation, have left it to the young to draw international attention to something that we have been aware of since before these young people were born.
Well, now there is no turning away. There can be no more heads buried in the sand.
During 7 minutes of seated silence this morning I looked around me at all of the people. I thought about how all these like minds and their kind around the globe will have all been trying to make small differences to counteract what we know are the causes of climate change, global pollution and environmental pillage.
I thought about the corporations, businesses and individuals that have benefitted from the destruction of our environment fully aware of the cost to the planet, and reflected on the kind of person who knowingly robs future generations of their future for short term financial profit.
I berated myself; for not engaging, for not doing enough, for consuming too much, for judging others for their apparent profligacy.
I considered how we can have an effect. What can we all do that will make the biggest change ?
The word that entered my head was simplicity. No more than you need.
I intend to make changes. I plan to be stricter with myself. I am sure I will lapse. I know there will be challenges.
It is also essential to enjoy what life offers. To know that it is not only our responsibility to effect change. We must force those that are able to create the biggest and most meaningful changes – governments, manufacturers, agriculture, industry – to face up to their responsibilities to ensure there is a future world that humans can inhabit.

The main ingredients in this dish are from the garden, prepared simply and just enough for one
100g fine green beans
1 pear, about 100g
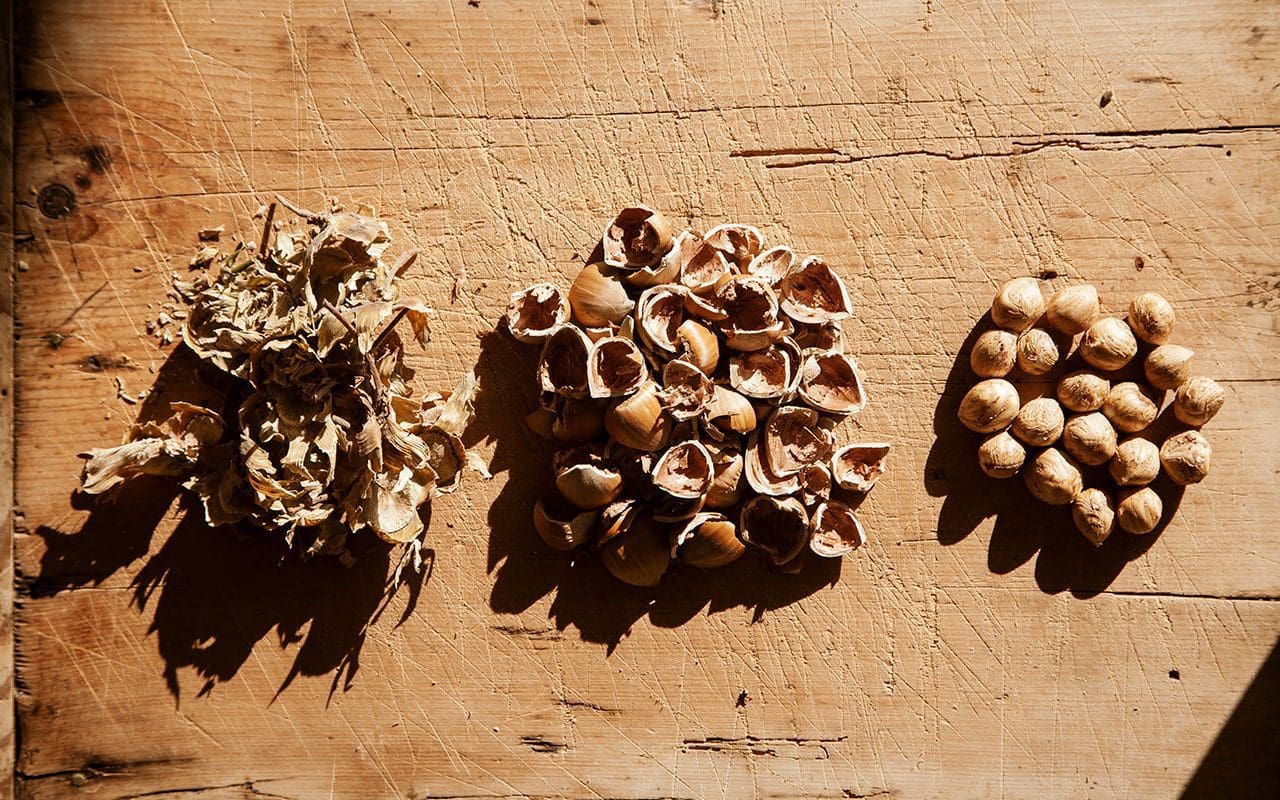
10 cobnuts, about 20g
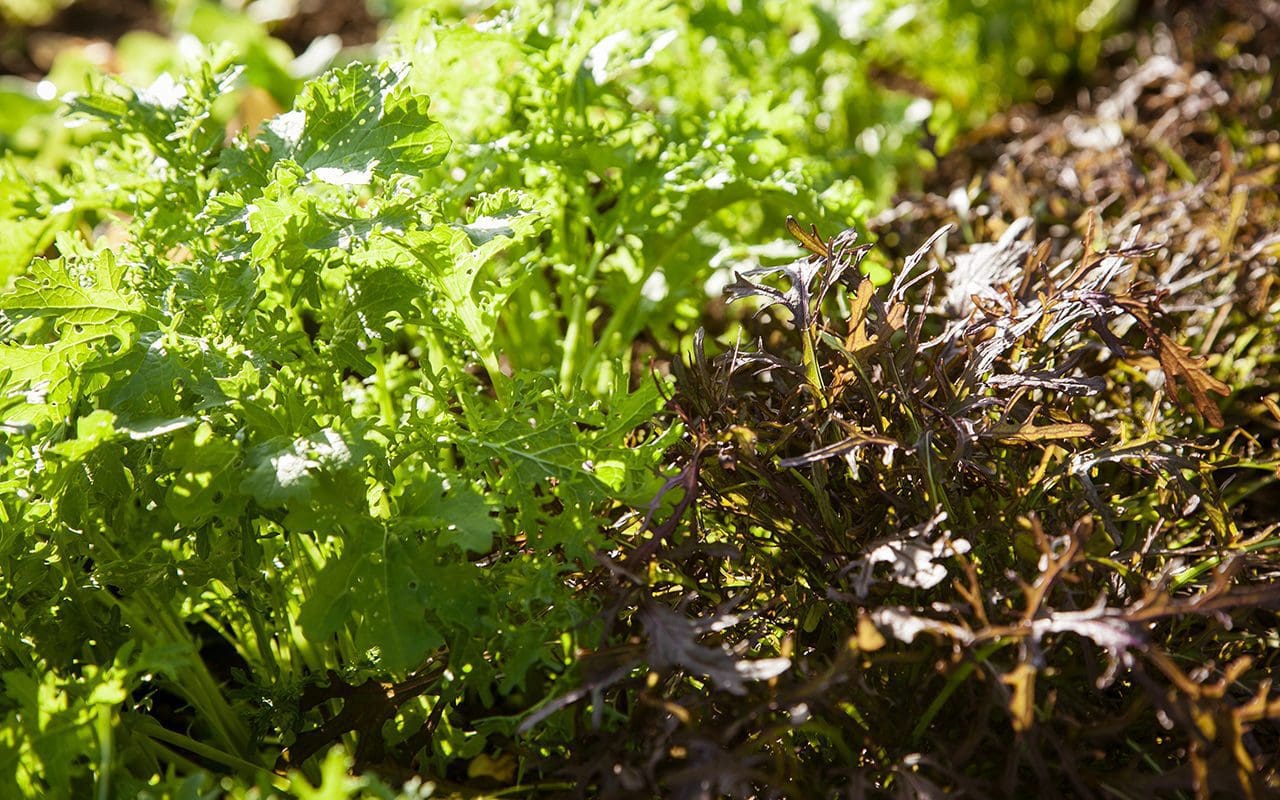
A small handful of young salad leaves – lettuce, mizuna, mustard greens, rocket, spinach
1 tablespoon lemon juice
1 tablespoon hazelnut oil
Salt
Put a saucepan of water on to boil.
Remove the tops from the beans and boil for 3 minutes. Drain and refresh in cold water.
Shell the cobnuts and slice coarsely.
Wash and dry the salad leaves.
Put the lemon juice into a large bowl.
Quarter the pear and core. Cut each quarter lengthways into 3 pieces. Put them immediately into the bowl with the lemon juice and toss to coat.
Add the beans, salad leaves and cobnuts.
Drizzle over hazelnut oil.
Season with salt and toss everything together.
Serve.
Recipe & photographs | Huw Morgan
Published 21 September 2019
We are sorry but the page you are looking for does not exist. You could return to the homepage