This first week in the month has brought with it change. The tip in the season is mapped in the scoring of luminous hazel catkins, their streamers hatching verticals into the backdrop of dark wood and hedgerow. These catkins are one of my favourite moments, catching the push of the cold easterlies and the sun when it breaks through the grey. And at their feet, pushing up leaf mould, the snowdrops have made their claim on the shortest month.
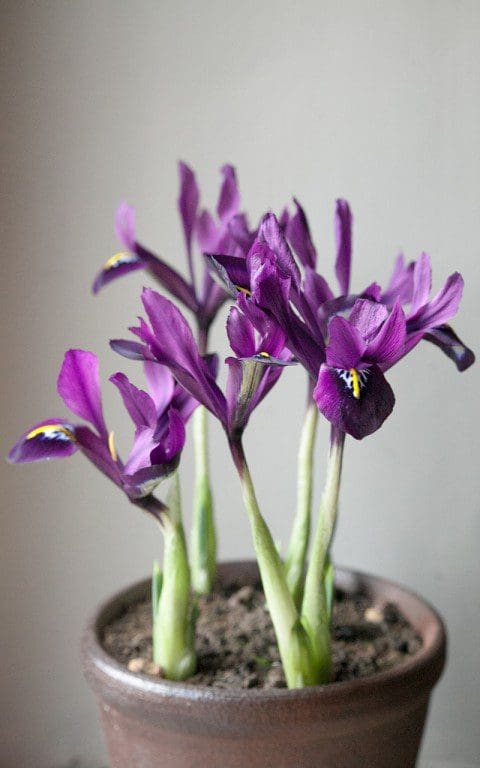
Despite the evidence that the grip of winter is loosening, I am always happy to have planned for more. Be it a small effort in the fullness of the previous autumn, a few pots of Iris reticulata are an essential. Just a handful of bulbs is all that is needed to bridge the need for new life and the trickle of spring which, by the time the iris are over, will be sure to be moving and constant.
Hailing from the Middle East, where they bask in winter sunshine when they are in leaf and bake whilst dormant in summer, they are difficult to keep here in the damp of Britain. That said, the bulbs are cheap and easy if you are open to the fact that they are fugitive, so the act of throwing the bulbs after they are over is less guilt-inducing. Plant them deep, to the depth of a trowel in free draining ground and you may have success, but on our hearty soil here they make nothing but leaf in the second year. I prefer the surety of an annual order and the promise they bring to the kitchen table.
 Iris histrioides ‘George’
I’ve learned over the years that, if you are growing them for display, less is definitely more and that three to five bulbs is enough in a six inch pot. Plant any more and the flowers collide and become confused. The greater part of their charm is in their exquisite outline, slim as pencils when in bud and then pure and finely drawn in their asymmetry once in flower.
Potted in a free-draining compost and kept in a protected place such as the closeness of a house wall or a frame, they need little attention in the first half of winter. Come January, you will see that the spears of foliage have already broken the compost and, towards the end of the month, the tissue-paper sheath reveals the presence of buds held tightly in the base of the leaves. When you see the colour of the buds through the sheath, it is time to bring them in to a cool room to force the flowers and steal a march on the season.
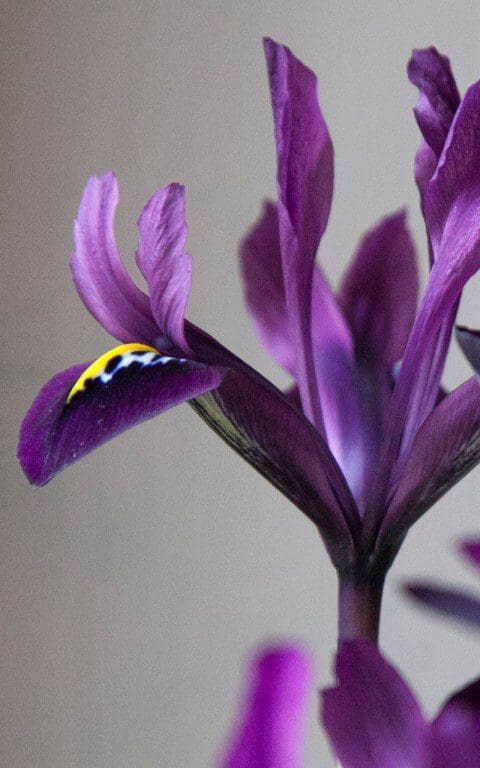
In the warmth, the bud pushes free of its papery protection and rises a little, like a champagne flute on a pale, fine stem so that you can see the full outline. This happens fast when they are ready, over a day or two days at most and, if you are patient, you might witness the flowers open. One fall first, the next and then the third, jerking quietly out and then down to reveal the inner markings. These are exquisite, and variable in the many named varieties, some spotted and flecked, others pure colour broken only by a flame in the throat and the pollen of stamens. Inside, in the still and warmth of a room, you will also catch their delicate perfume. As welcome and as soft as that of primroses and easily lost outside in the blow of an easterly.
 Iris histrioides ‘Finola’
Every year we experiment with a new variety or two, buying ten bulbs of each and three or four varieties at most. We have found our favourites over the years. The slim, dark elegance of ‘J S Dijt’ is one that I would grow every year, and I generally prefer the rich plums of ‘George’ and ‘Pauline’ to the royal and denim blues of ‘Edward’, ‘Gordon’ and ‘Cantab’. However, we loved ‘Blue Note’ last year, with its narrow petals of deepest midnight and ‘Harmony’ (main image) is the quintessential blue spring iris of Japanese woodcuts.
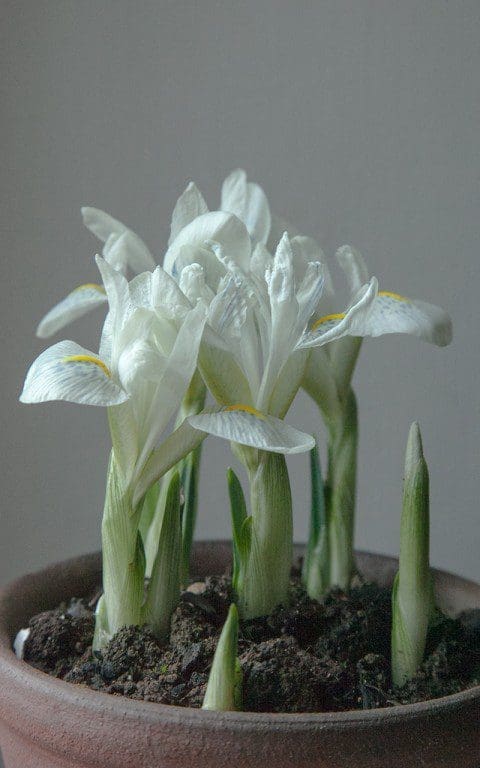
I also have an enduring fondness for the curiosity of ‘Katherine Hodgkin’ with her washed-out, pale blue flowers with greenish veining and yellow leopard spots. Though we do not have it this year, the ghostly mother-of-pearl whiteness of ‘Finola’ is a recent find that I would like to revisit. It is always worth growing something new as there are many to choose from and a wealth of potential future favourites if you see each year as an opportunity for discovery. I already have the clear, sherbet-yellow ‘Katherine’s Gold’ and palest blue ‘Polar Ice’ picked out for next year.
 Iris reticulata ‘Harmony’
As you perfect the art of knowing when to bring them in, you can relay your pots for succession. Though the flowers last just a few days inside, if you have a half dozen pots and keep half in a shadier spot than the others, you will have flower for a fortnight to three weeks. Time enough to bridge the seasons.
Words: Dan Pearson / Photographs: Huw Morgan
Published 3 February 2018
The hamamelis have burst their tight, velvety buds. Huddled darkly along bare branches, it is as if they have waited until we are hungry, our appetites pining for a break with winter. Welcome for the absence of life elsewhere, I fall under their spell again yearly, without fail and willingly. I first encountered them in maturity at Wisley, where in winter they were a mainstay of the winter plant idents, but it was not until my early twenties that I saw the true potential of the witch hazels. My friend Isabelle had taken me to Kalmthout Arboretum in Belgium to meet the owner, Jelena de Belder, the grower of many witch hazels and breeder of several of the best. The first, ‘Ruby Glow’ amongst them, were planted at the arboretum in the 1930s and the De Belders started their own breeding programme in the ’50’s. By the time we saw her collection in the early eighties, they were reaching out in maturity to touch one another, their fiery limbs, on a deep February winter’s day, an unforgettable understorey. The branches were bare and filled with the light of a million tiny filaments. The darkest as deep and red as rubies, and from there running through fire colours from the glow of smouldering embers to incandescent gold, flame yellow and palest sulphur. Writing now with a sprig of ‘Barmstedt Gold’ on the table in front of me, so that I can look in close detail, I remember further back to Geraldine’s Hamamelis mollis. Our neighbour, and my gardening mentor when I was a child, always picked a sprig to enliven her winter table. We would marvel at the strength of the perfume and its combination of delicacy and brazenness pitted against the odds of winter. So my witch hazel affair goes far back, but now is the first real opportunity I’ve had to put a shrub in open ground and be happy in the expectation of its future.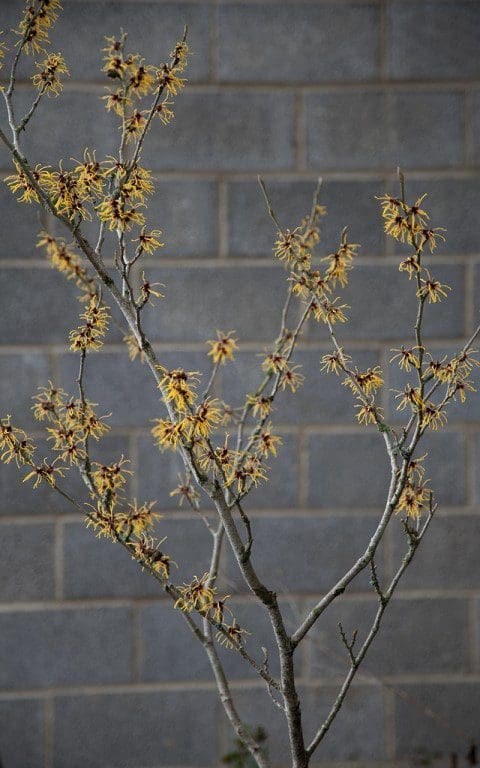
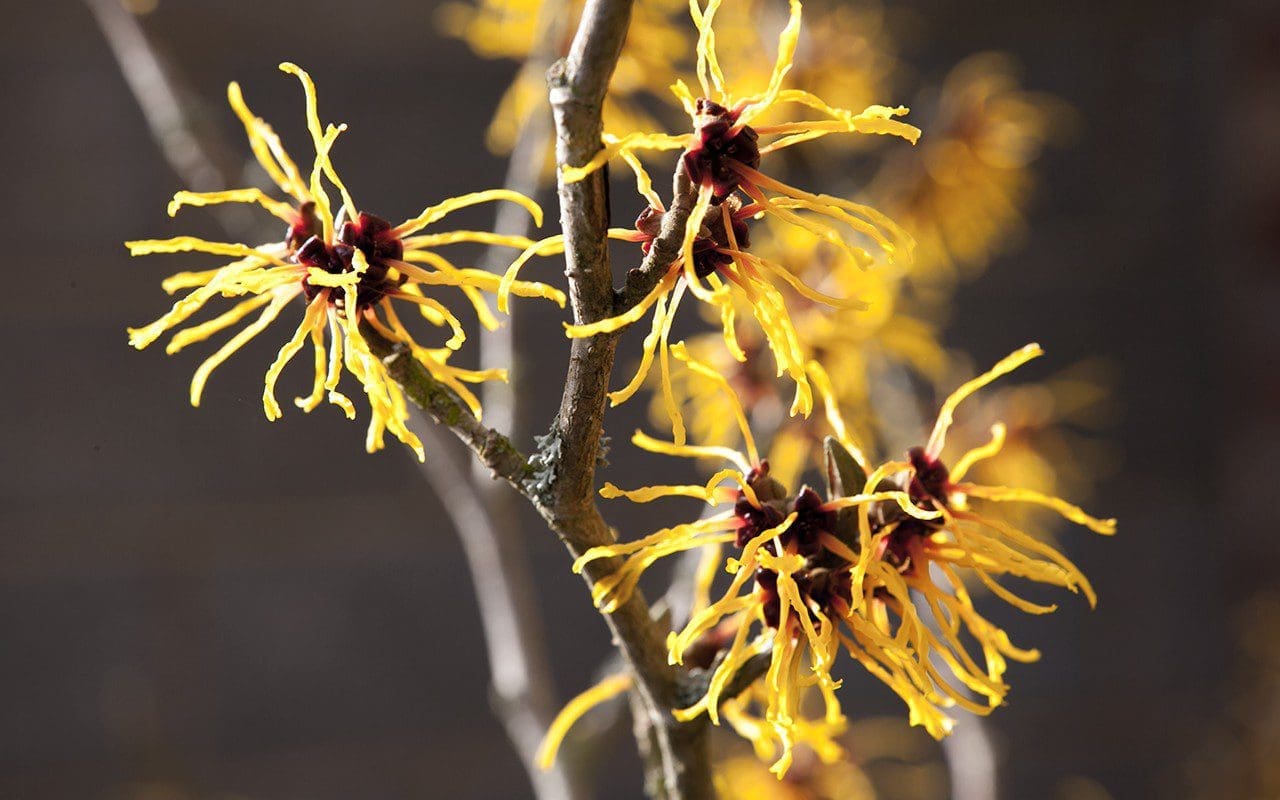 Hamamelis x intermedia ‘Barmstedt Gold’
 Hamamelis mollis
Before here, in the Peckham garden, I grew hamamelis in pots, because there simply wasn’t space in the beds. They were surprisingly tolerant and it afforded me the opportunity of bringing them up close to the house in the winter to watch their buds unravel at close proximity. ‘Jelena’, a soft orange Hamamelis x intermedia hybrid named after Mme. de Belder, was always the first to flower, before Christmas in London and running through the length of January. It outgrew me, its limbs reaching wide and elegantly in a stretch that became harder and harder to accommodate when I moved it back into the semi-shade at the end of the garden. In the end I gave it away to Nigel Slater when creating a secret garden for him. A good home where I knew he would enjoy it, and every year I am delighted to see him post pictures of the first flowers on Instagram.
H. x intermedia ‘Gingerbread’ (main image) and ‘Barmstedt Gold’, together with a plant of Hamamelis mollis, a gift from Geraldine, came with me from Peckham to here in pots. The intermedia hybrids produce the greater bulk of the coloured varieties but, though they are scented, not all have the pervasive scent of the straight H. mollis. It is often something you have to find and put your nose to, which is why it is worth placing them in a sheltered corner which will hold the perfume, or upwind of where you know you are going to pass. Growing most happily in open woodland, they are adaptable to being out in the open as long as their roots are kept cool and moist in the summer months, and will flower more heavily in the light. Scorched edges to the foliage will show you that they have been under stress and if, like me, you have no choice but to grow them in an open position, this can be alleviated with a summer mulch and long, deep watering when it gets dry.
The books will tell you that they prefer acid soil, but I have found them to be tolerant of alkaline conditions, as long as they have plenty of organic matter in the ground, do not dry out in summer nor lie wet in winter. However, what few books tell you is that they can be short-lived if they find themselves under stress. A tree of thirty years is doing well if you force them too far beyond their comfort zone. They are also slow to attain size, or feel slow because you have an image of wide-spreading limbs in your mind, not the stark twiggery of a young plant. In five to seven years you can begin to see the plant as you want it to be, but if you spend a little more than you’re comfortable with, seeking out a 10 or 15 litre plant that has some substance, the immediate payback is worth it. This year’s purchases – I find it very difficult to resist extending my experience of witch hazels – saw the instant benefits of a waist high ‘Aphrodite’ for nearly £40 and a twig of ‘Orange Peel’ for £15.
Hamamelis mollis
Before here, in the Peckham garden, I grew hamamelis in pots, because there simply wasn’t space in the beds. They were surprisingly tolerant and it afforded me the opportunity of bringing them up close to the house in the winter to watch their buds unravel at close proximity. ‘Jelena’, a soft orange Hamamelis x intermedia hybrid named after Mme. de Belder, was always the first to flower, before Christmas in London and running through the length of January. It outgrew me, its limbs reaching wide and elegantly in a stretch that became harder and harder to accommodate when I moved it back into the semi-shade at the end of the garden. In the end I gave it away to Nigel Slater when creating a secret garden for him. A good home where I knew he would enjoy it, and every year I am delighted to see him post pictures of the first flowers on Instagram.
H. x intermedia ‘Gingerbread’ (main image) and ‘Barmstedt Gold’, together with a plant of Hamamelis mollis, a gift from Geraldine, came with me from Peckham to here in pots. The intermedia hybrids produce the greater bulk of the coloured varieties but, though they are scented, not all have the pervasive scent of the straight H. mollis. It is often something you have to find and put your nose to, which is why it is worth placing them in a sheltered corner which will hold the perfume, or upwind of where you know you are going to pass. Growing most happily in open woodland, they are adaptable to being out in the open as long as their roots are kept cool and moist in the summer months, and will flower more heavily in the light. Scorched edges to the foliage will show you that they have been under stress and if, like me, you have no choice but to grow them in an open position, this can be alleviated with a summer mulch and long, deep watering when it gets dry.
The books will tell you that they prefer acid soil, but I have found them to be tolerant of alkaline conditions, as long as they have plenty of organic matter in the ground, do not dry out in summer nor lie wet in winter. However, what few books tell you is that they can be short-lived if they find themselves under stress. A tree of thirty years is doing well if you force them too far beyond their comfort zone. They are also slow to attain size, or feel slow because you have an image of wide-spreading limbs in your mind, not the stark twiggery of a young plant. In five to seven years you can begin to see the plant as you want it to be, but if you spend a little more than you’re comfortable with, seeking out a 10 or 15 litre plant that has some substance, the immediate payback is worth it. This year’s purchases – I find it very difficult to resist extending my experience of witch hazels – saw the instant benefits of a waist high ‘Aphrodite’ for nearly £40 and a twig of ‘Orange Peel’ for £15.
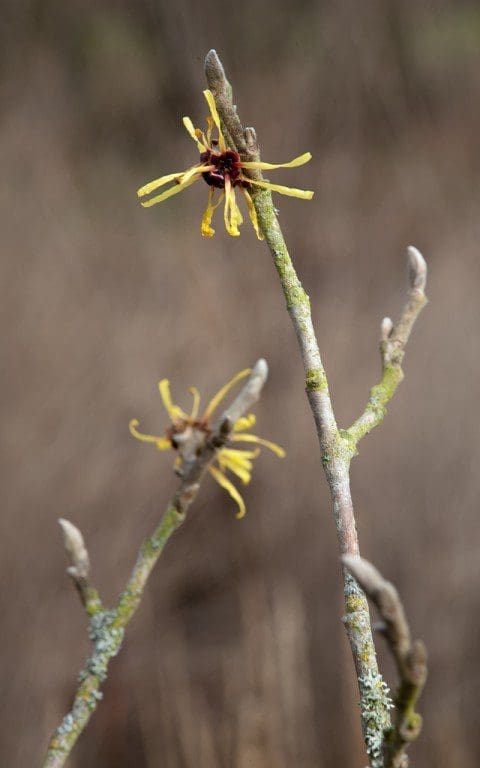
 Hamamelis x intermedia ‘Aphrodite’
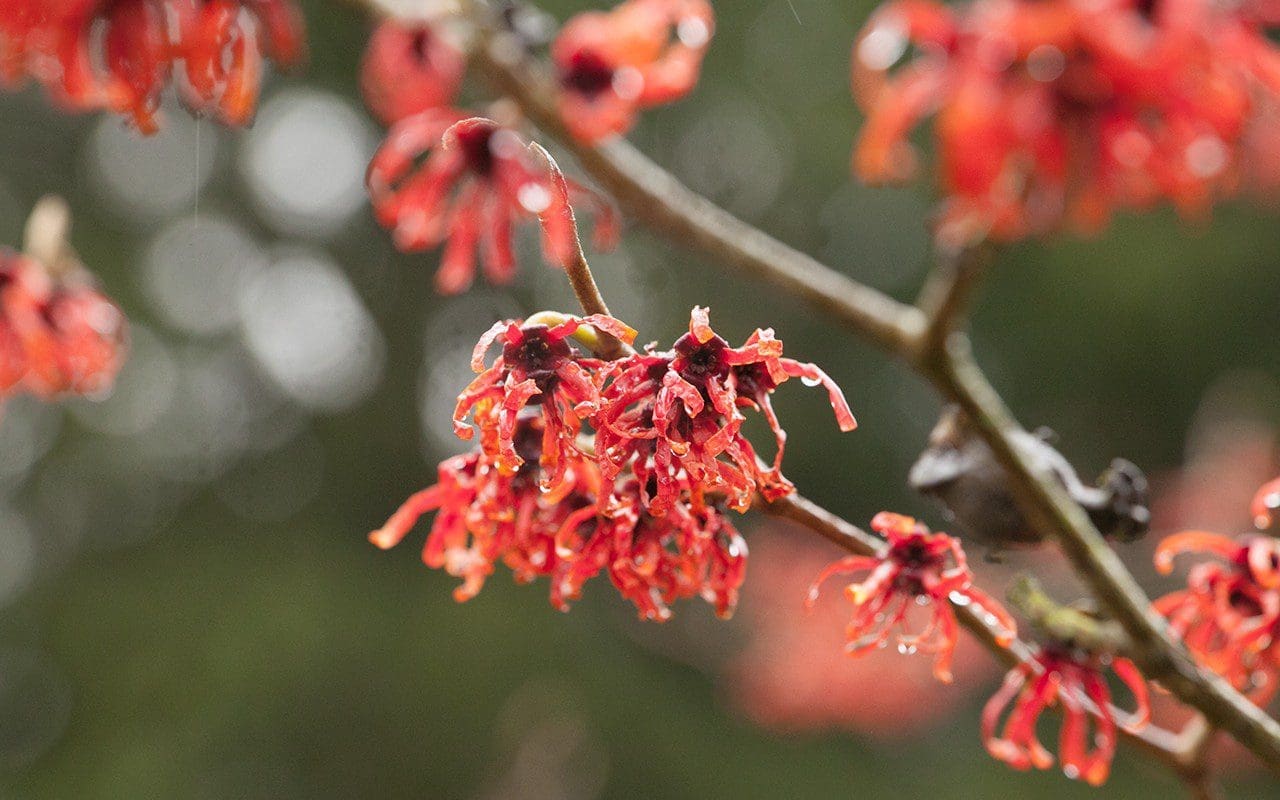 Hamamelis x intermedia ‘Diane’
Choosing the very best of a bewilderingly beautiful bunch is not easy, but my dabbling over the years has been worth it, for the named varieties have very differing habits. Being red-green colour blind, and losing some but not all reds, I must try hard to find ‘Diane’ when planted out in a garden. Up close I can see it is a wonderful colour and often use it for clients, but it is not one that I gravitate to for myself. It has a well-behaved, rounded habit and reliably scarlet autumn foliage, which singles it out as a variety to return to for two seasons of interest.
Several of the intermedia hybrids are problematic in my opinion for not losing leaves in winter, hanging on too long, like hornbeam or beech, to clutter what should be a naked stage of branches for the flowers. I have found that they do this in some gardens and not others and often they grow out of it as they mature, but I prefer the varieties that drop properly and most enjoy those that colour well in the autumn.
Hamamelis x intermedia ‘Diane’
Choosing the very best of a bewilderingly beautiful bunch is not easy, but my dabbling over the years has been worth it, for the named varieties have very differing habits. Being red-green colour blind, and losing some but not all reds, I must try hard to find ‘Diane’ when planted out in a garden. Up close I can see it is a wonderful colour and often use it for clients, but it is not one that I gravitate to for myself. It has a well-behaved, rounded habit and reliably scarlet autumn foliage, which singles it out as a variety to return to for two seasons of interest.
Several of the intermedia hybrids are problematic in my opinion for not losing leaves in winter, hanging on too long, like hornbeam or beech, to clutter what should be a naked stage of branches for the flowers. I have found that they do this in some gardens and not others and often they grow out of it as they mature, but I prefer the varieties that drop properly and most enjoy those that colour well in the autumn.
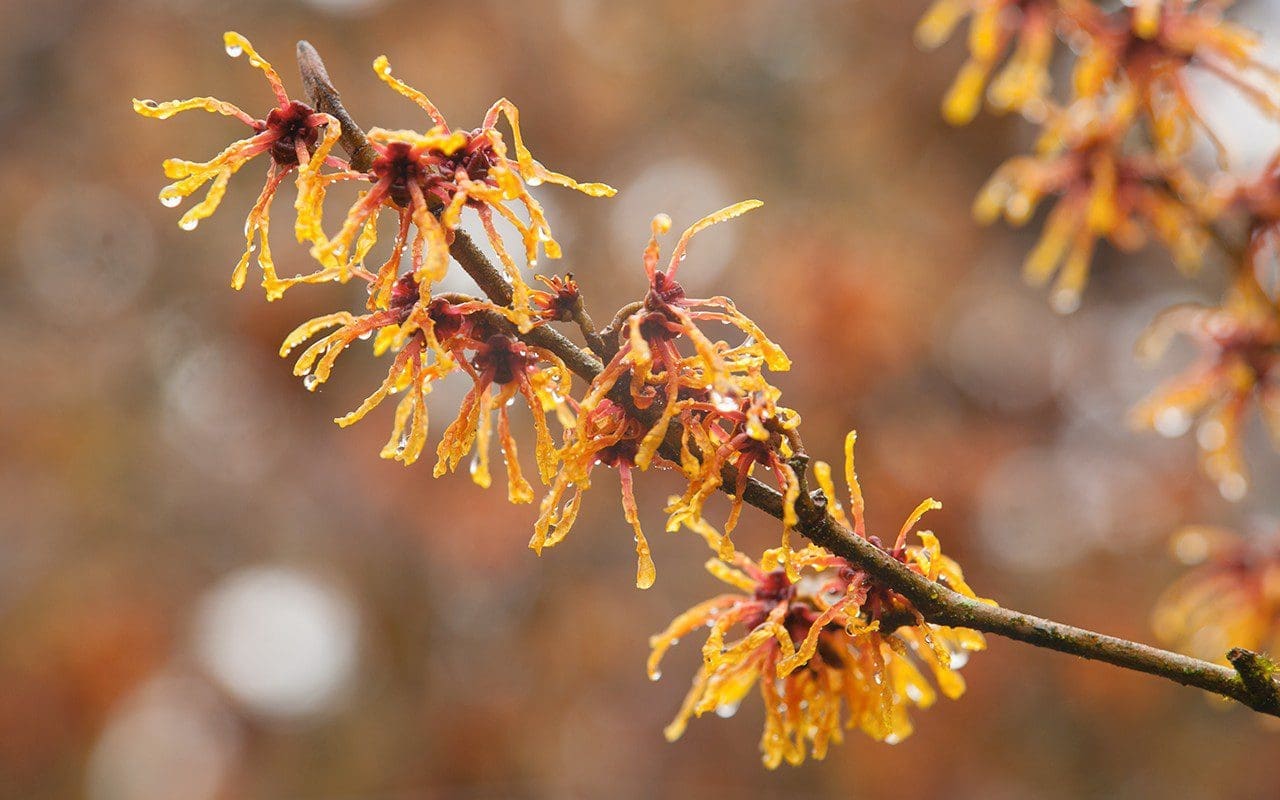
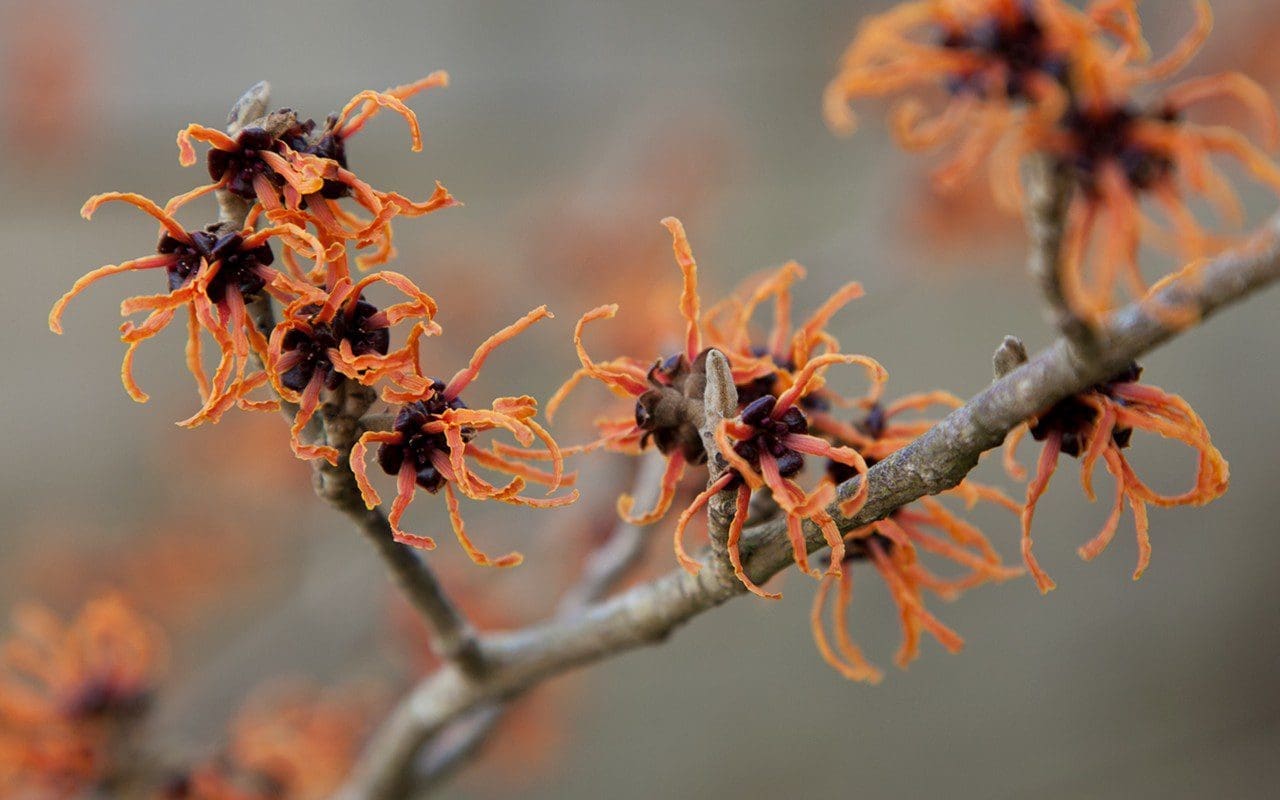 Hamamelis x intermedia ‘Gingerbread’
My plants here will be happy in our retentive loam despite the exposure, but I do mulch heavily with compost to emulate their natural wooded habitat. They have been planted here not only for the winter draw they provide, but also for the benefit of shade they bring to plants around them come summer. Rooting lightly and without heavy competition, they will provide home to spring flowering pulmonaria and erythronium which will come as they fade. The foliage of ‘Gingerbread’ has a copper flush as it comes into leaf, which is good with the Bath Asparagus planted beneath it, but later in the summer the branches provide a frame for Tropaeolum speciosum. The Flame Flower makes the branches flare again, when I have all but forgotten the winter spell that I am bewitched by today.
Words: Dan Pearson / Photographs: Huw Morgan
Published 27 January 2018
Hamamelis x intermedia ‘Gingerbread’
My plants here will be happy in our retentive loam despite the exposure, but I do mulch heavily with compost to emulate their natural wooded habitat. They have been planted here not only for the winter draw they provide, but also for the benefit of shade they bring to plants around them come summer. Rooting lightly and without heavy competition, they will provide home to spring flowering pulmonaria and erythronium which will come as they fade. The foliage of ‘Gingerbread’ has a copper flush as it comes into leaf, which is good with the Bath Asparagus planted beneath it, but later in the summer the branches provide a frame for Tropaeolum speciosum. The Flame Flower makes the branches flare again, when I have all but forgotten the winter spell that I am bewitched by today.
Words: Dan Pearson / Photographs: Huw Morgan
Published 27 January 2018 Although the excesses of Christmas and New Year may already seem far behind us, there are still a few culinary reminders lingering in the pantry. Now is the time to use up these last festive remnants, before they are consigned, with lashings of guilt, to the bin or the compost heap. A tin of macaroons will be crushed to make a crumble topping for damsons from the freezer, while the end of a jar of mincemeat mixed with some apple puree will make a filling for some quick turnovers. In the fridge are the last heels from the cheeseboard, including a fairly large piece of Stilton that defeated us, while in the fruit bowl, along with some wizened lemons and limes, are a few handfuls of shell on walnuts wondering what they did to deserve such ignominy.
When the days are as cold as they have been recently, with the icy damp getting into your bones, a slow-cooked vegetable gratin holds the heat and is guaranteed to warm you from the inside out. This might be a simple potato boulangère, one made with spiced pumpkin and tomato, or something earthier made with roots. In the Kitchen Garden, alongside the cabbages and kales, we have a good stock of roots, but it is the celeriac to which we most often turn, preferring it to the sweetness of parsnips. While it has a mineral, earthy flavour with natural umami that pairs well with nuts and sharp cheeses, the delicacy of leeks – growing in the neighbouring bed – are a less overpowering companion than onions.
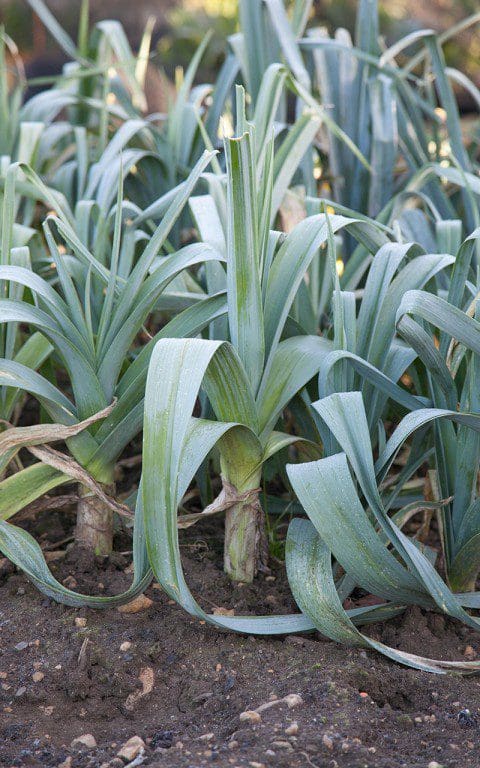 Leek ‘Carentan’
So much do we like celeriac that we give over half a bed to it. Twenty plants that see us through the winter from November to early March. Celeriac requires a long growing season, and it is only a few weeks until we sow the seeds of this coming winter’s crop, usually at the end of February. This we do under cover, as the seedlings are minuscule and prone to damping off. Germination can also be a bit erratic, so we always sow half as many again as we need to cover for losses and no-shows. Once germinated they take a couple of months to reach transplanting size. This happens in early summer, when they are planted out into soil that has been previously manured, as celeriac needs open, moisture-retentive ground with plenty of light to thrive. We have also found that the secret to good-sized roots is consistent watering throughout the summer, while a straw mulch also helps to retain moisture.
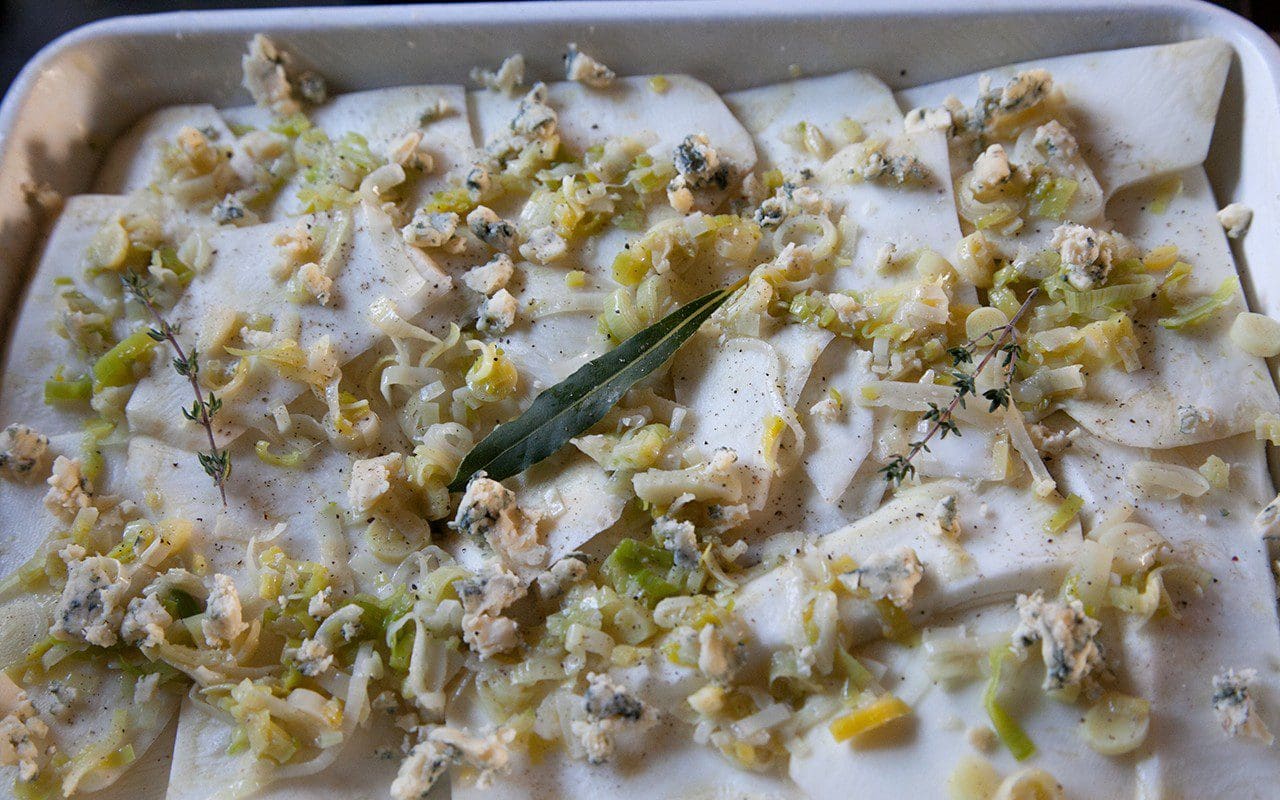
This gratin is rich enough to serve as a main course, in which case a simple green salad or boiled, buttered cabbage are accompaniment enough. However, with its strong flavours, it makes a good side dish for roast chicken or beef.
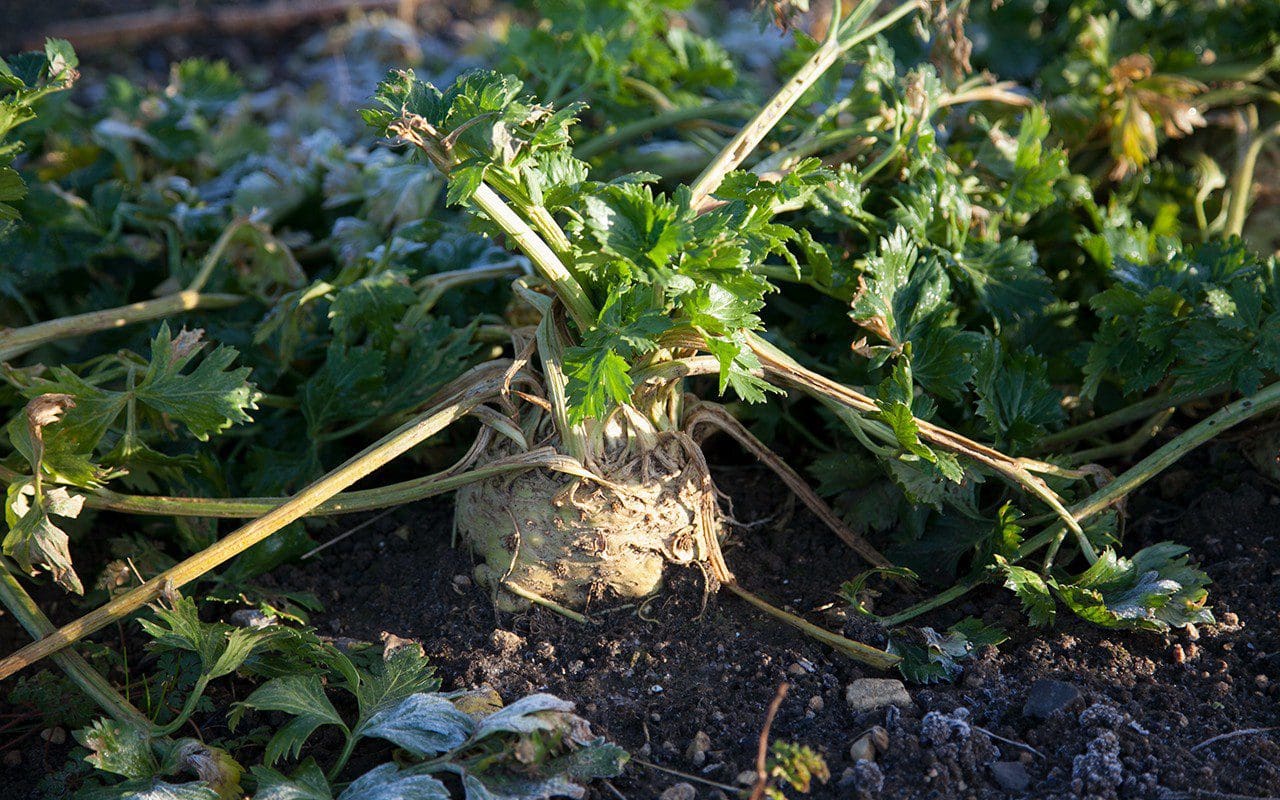 Celeriac ‘Prinz’
INGREDIENTS
1 large or 2 medium celeriac, about 1.2 kg peeled weight
3 medium leeks, about 100g trimmed and finely sliced
2 cloves garlic, minced or grated
100g butter
4 small bay leaves
8 springs fresh thyme
Fresh nutmeg, grated
175g Stilton or other blue cheese
250ml single cream
50g breadcrumbs
75g walnuts, coarsely chopped
Serves 6 as a main course or 8 as a side dish.
METHOD
Preheat the oven to 200°C.
Melt 20g of butter in a saucepan over a low heat. Add the leeks and garlic and a good grating of nutmeg. Stir to coat the leeks with butter. Put the lid on the pan and sweat the leeks until soft and translucent, stirring from time to time. Do not allow them to colour. Remove from the heat and allow to cool.
Quarter the celeriac roots and slice to the thickness of a pound coin using a sharp knife, mandolin or food processor. Put the celeriac slices into a bowl of water to prevent browning.
Melt another 20g of butter in a small pan. Using a pastry brush use it to generously coat the base and sides of a ceramic gratin dish measuring around 22 x 30cm.
Drain the celeriac, pat dry with a clean tea towel and cover the base of the gratin dish with one layer of slightly overlapping slices. Take 100g of the Stilton and scatter a quarter of this and a quarter of the leeks over the celeriac. Place one bay leaf and two sprigs of thyme on top. Season with a little salt and pepper. Arrange another layer of celeriac on top and press down with the palms of your hands to flatten. Repeat with the remaining ingredients, finishing with a fifth layer of celeriac.
Pour the cream over the top and dot with some butter. Cover the gratin dish with foil and bake in the oven for 45 minutes to an hour, until the celeriac yields to the point of a knife. Remove the foil. Press down on the top of the gratin with a fish slice to compress and flatten.
Melt the remaining butter in a small pan. Put the breadcrumbs and walnuts in a mixing bowl and stir to combine. Pour over the melted butter and stir until the breadcrumbs are well coated. Crumble the remaining 75g of Stilton into the breadcrumbs and stir to combine. Spread the breadcrumb mixture over the top of the celeriac and return to the over for 30 minutes until well browned and bubbling. Take out of the oven and allow to stand for 10 minutes before serving.
Recipe & photographs: Huw Morgan
Published 20 January 2018
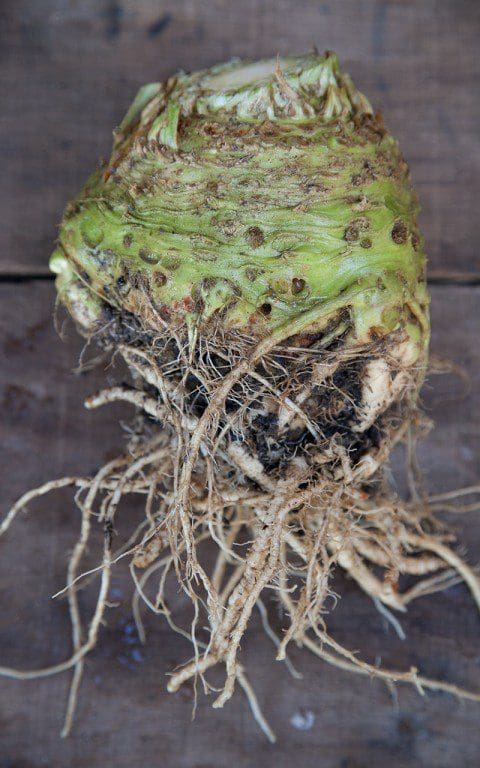
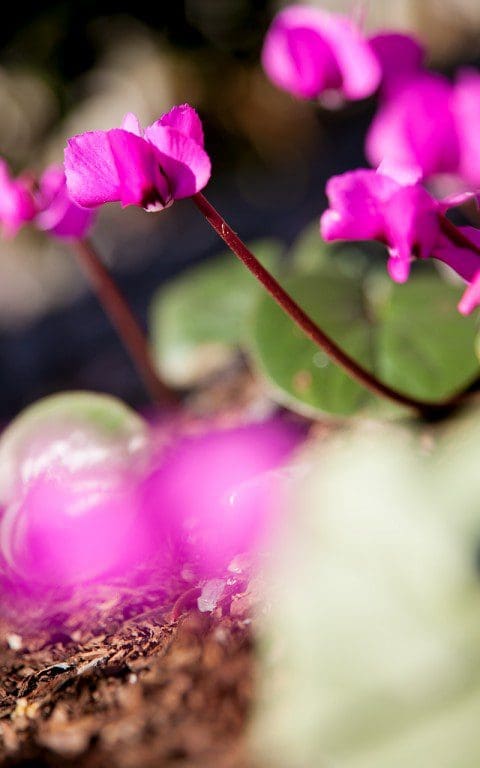
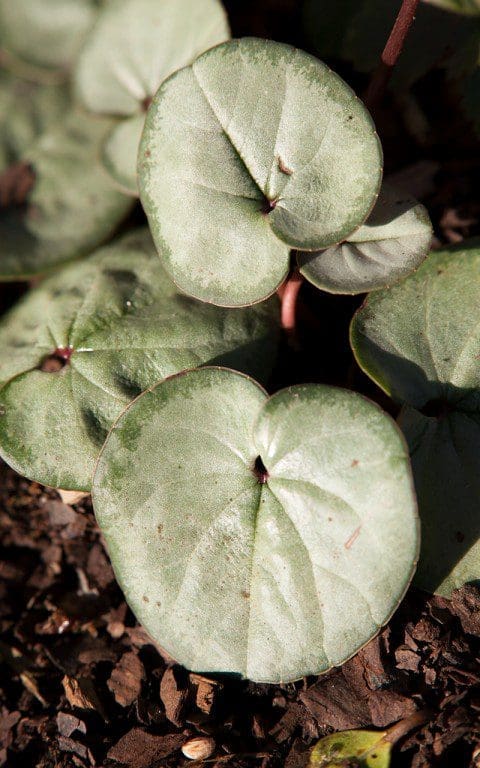
Late in December, and before I expected such a prompt return, the Cyclamen coum made their re-appearance. The tiny beaks of magenta broke bare earth, buds soon reflexing to flower, sturdy and gathering in number and oblivious, it seemed, to the winter. Of all the flowers that come in these darkest weeks Cyclamen coum seem to have the most stamina, flowering for what must be the best part of three months and, in that time, providing a continuity of hope. During their season, they will see the snowdrops in and out and be companion to witch hazel and wintersweet and be happy to be in the root zone where little else will grow.
The rooty places where the ground is already taken are where they prefer to be. Here they will spend their summer dormancy underground, their tubers kept cool but on the dry side and in perfect stasis. Come the autumn rains their season is activated and, without the competition of summer growth either above or around them, they are free to flower and build up a colony. Choosing the place where they can be allowed to reign is the secret and it has taken a while for me to find the perfect spot under the old hollies. The ground is steeply sloped here and the trees, with their high dense canopy and fibrous roots, make for strong competition.
 Cyclamen coum
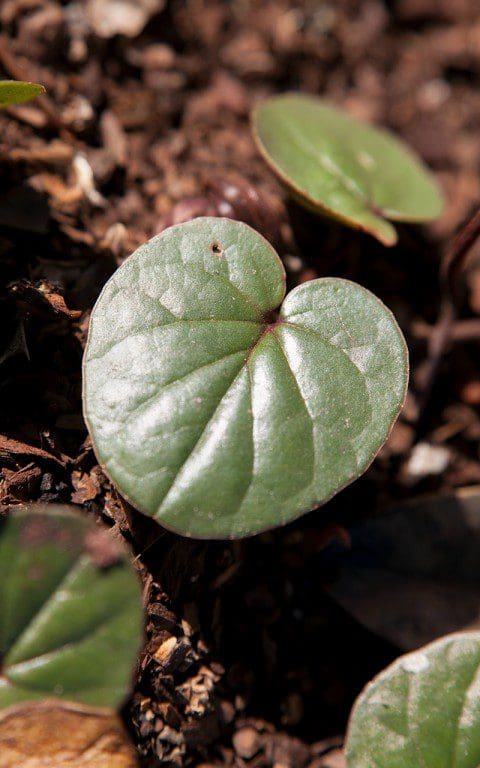
Cyclamen are always best planted when in growth and not bought as dormant tubers, which have often been kept too dry for too long by the suppliers. Hailing as they do from the Caucasus, Turkey, the Lebanon and Israel Cyclamen coum prefer to be kept on the dry side when dormant, which is easier and less disruptive in a pot. The second advantage to planting when they are in growth is that you can hand-pick for best leaf variation and flower colour. The leaves are as variable as pebbles on a beach. Some, often sold as the ‘Pewter Group’, are almost completely silvered, others are green overlaid with silver, and others almost entirely bottle-green. The foliage, which is the size of a chocolate coin and held close to the ground, doesn’t like competition and you have to be careful not to team them with the leafier Cyclamen hederifolium which is more vigorous and will smother them or with other winter flowering bulbs such as Eranthis, which are prone to leafiness once they start to form seed.
A dozen plants were winkled in where I could find gaps between the holly roots last winter and top-dressed with a mix of gravel and bark to do no more than cover the tubers. I hand-picked my plants for the strong magenta forms, as I prefer the punch of their pure, bright colour to the softening influence of the paler pinks and white, which is what you more often see where they have naturalised. Last year’s plants have all returned with a clutch of seedlings held tight within their crowns. These miniature new plants look true to type (or more-of-less) in terms of leaf marking, but I will see in three years or so if the flowers are true to their magenta parents.
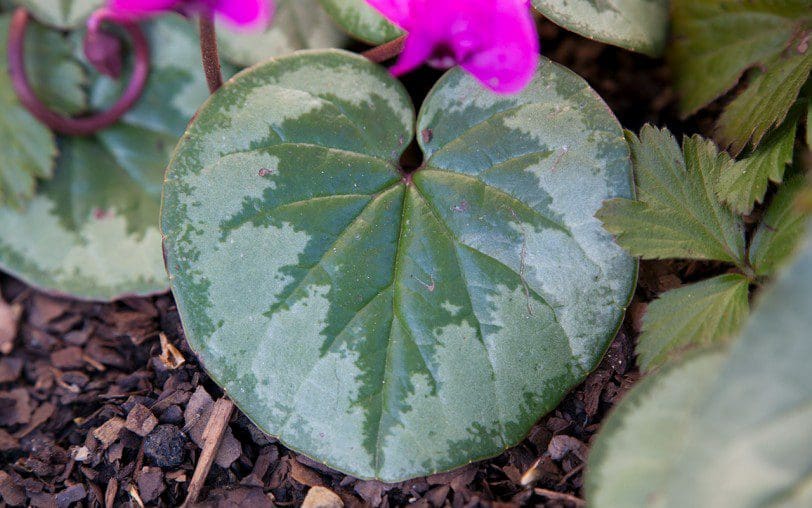
 Various foliage colouration
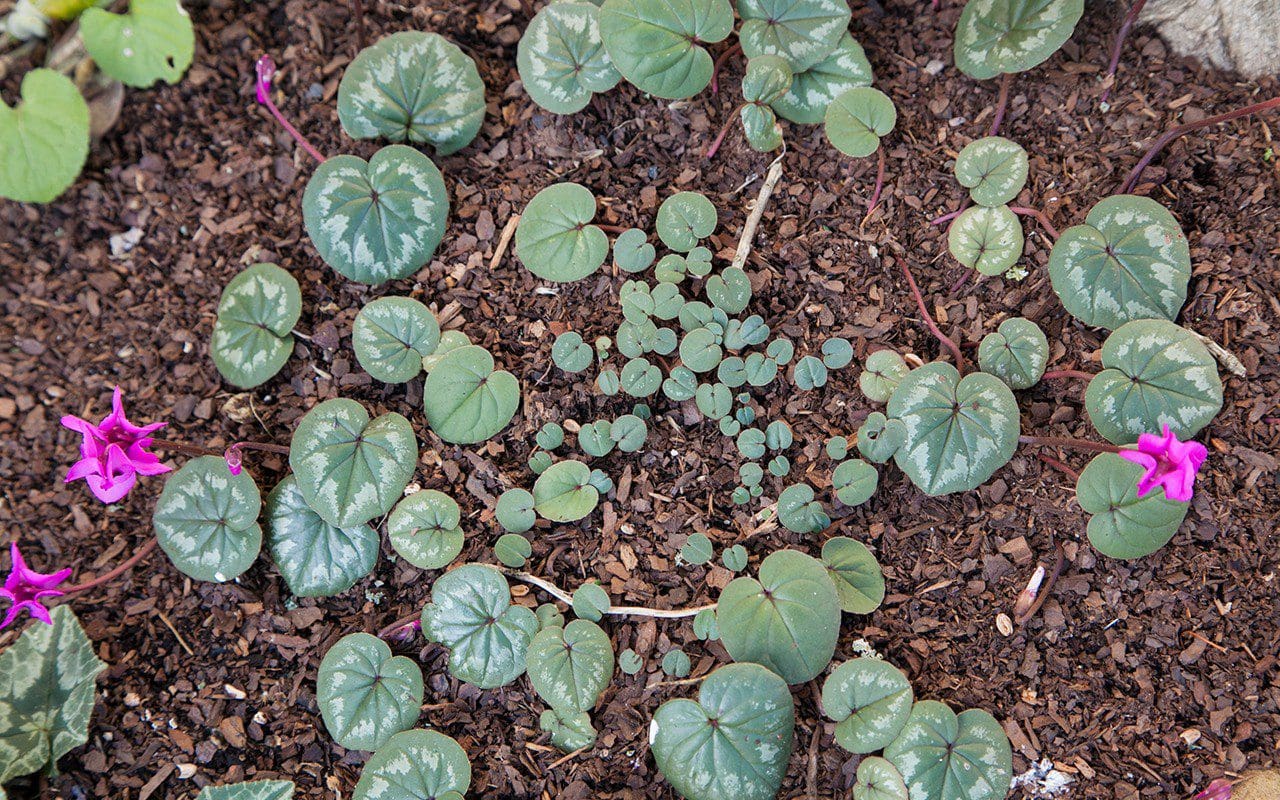 Seedlings have appeared in the crowns of last year’s plants
Tania Compton has raved to me about her Cyclamen coum naturalising best in pure gravel and I have hopes that mine will break free from their mound under the holly and venture into the sleeper steps that run alongside, their rubbly treads being the perfect habitat for them to run free. Cyclamen are prolific seeders if they decide they like you and a sweet coating on the seed makes them a delicacy for ants which will carry them quite some distance, so that they often appear in surprising and unexpected places. I have an image of the steps in a few years’ time being somewhere that you have to pick your way down in the winter as though on a glowing magenta runner, threadbare where our footfall influences where the cyclamen appear and where they don’t.
Words: Dan Pearson / Photographs: Huw Morgan
Published 13 January 2018
The hush and the breathing space that comes, now that the leaves are down and the grass has finally slowed, is palpable. In the mild spells between freezes I take this opportunity to square up the holding area by the barns. This is where one day I plan for a greenhouse, but for now it is where I propagate and look after the plants that are waiting for a home. The cold frames which reared the spring seedlings are now packed to the gunnels with plants that need protection from the lethal combination of winter wet and freeze. Auriculas and the Mediterranean herbs are kept on the dry side and the autumn seedlings and cuttings will make a surprising leap forward with this little extra shelter. Out in the open and hunkered together for protection are bulbs to go out in the spring, once I can see exactly where they need to be and that they are the correct varieties, as well as youngsters that are ready and waiting for areas that are not quite prepared in which to set them loose. This backlog is a perpetual conundrum, but I have a three-year rule so that the holding ground avoids becoming a corner of shame. If they cannot be found a place, they will be put out on the lane with a sign saying, “Please help yourself”. Very few are left unclaimed and I trust they find good and unplanned for new homes.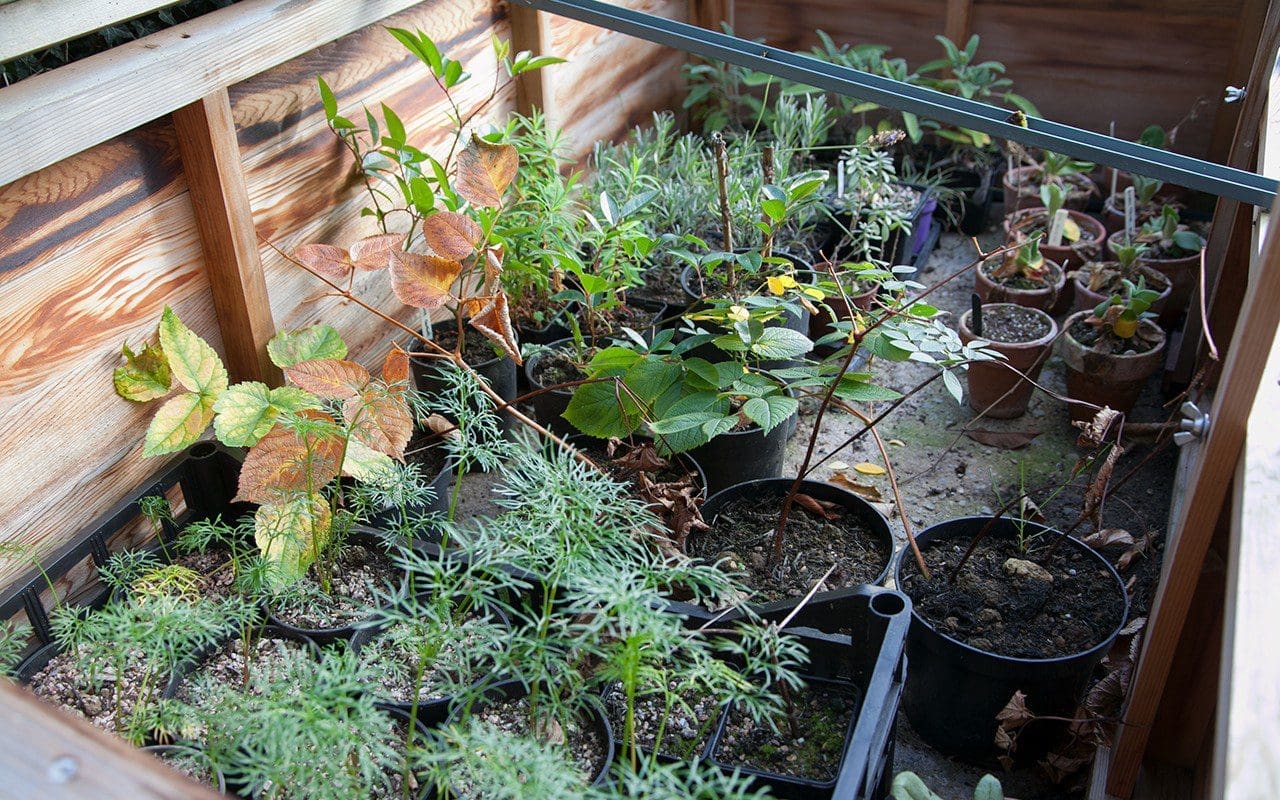 One of the cold frames
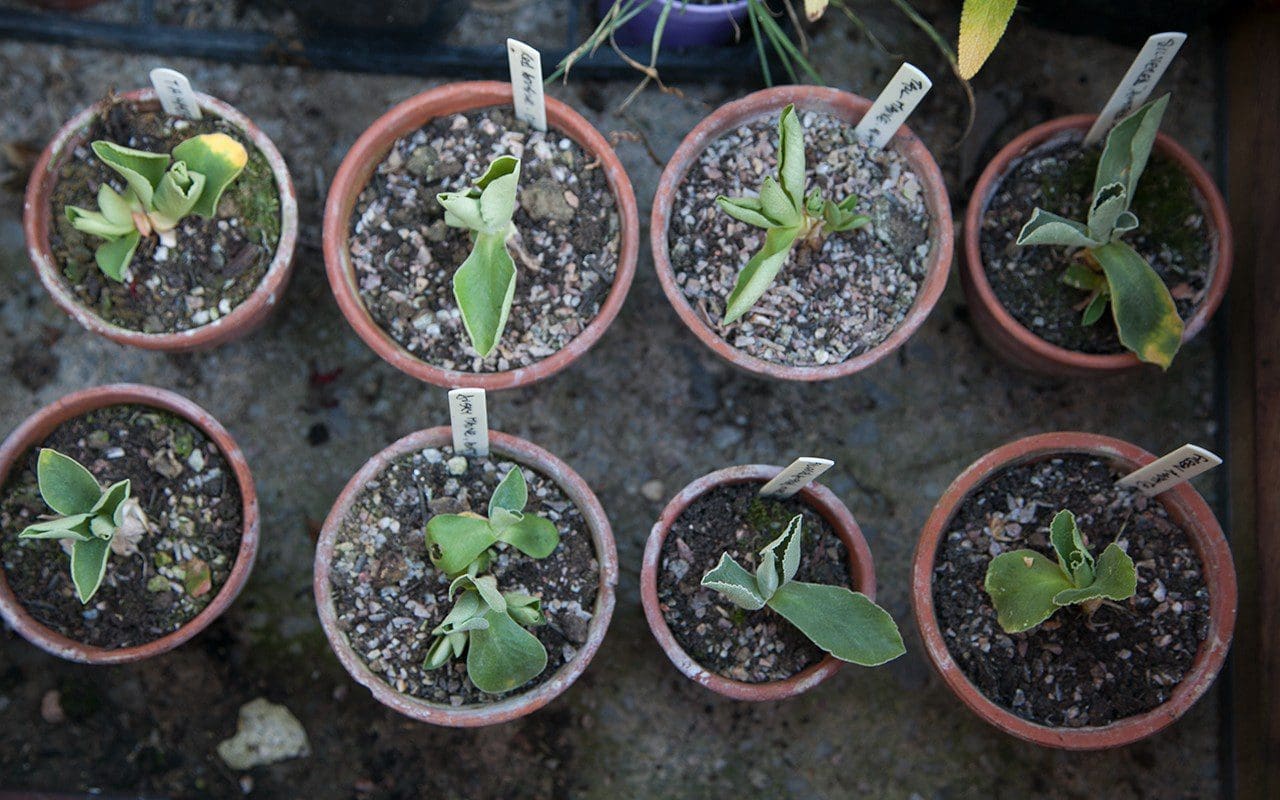 Auriculas
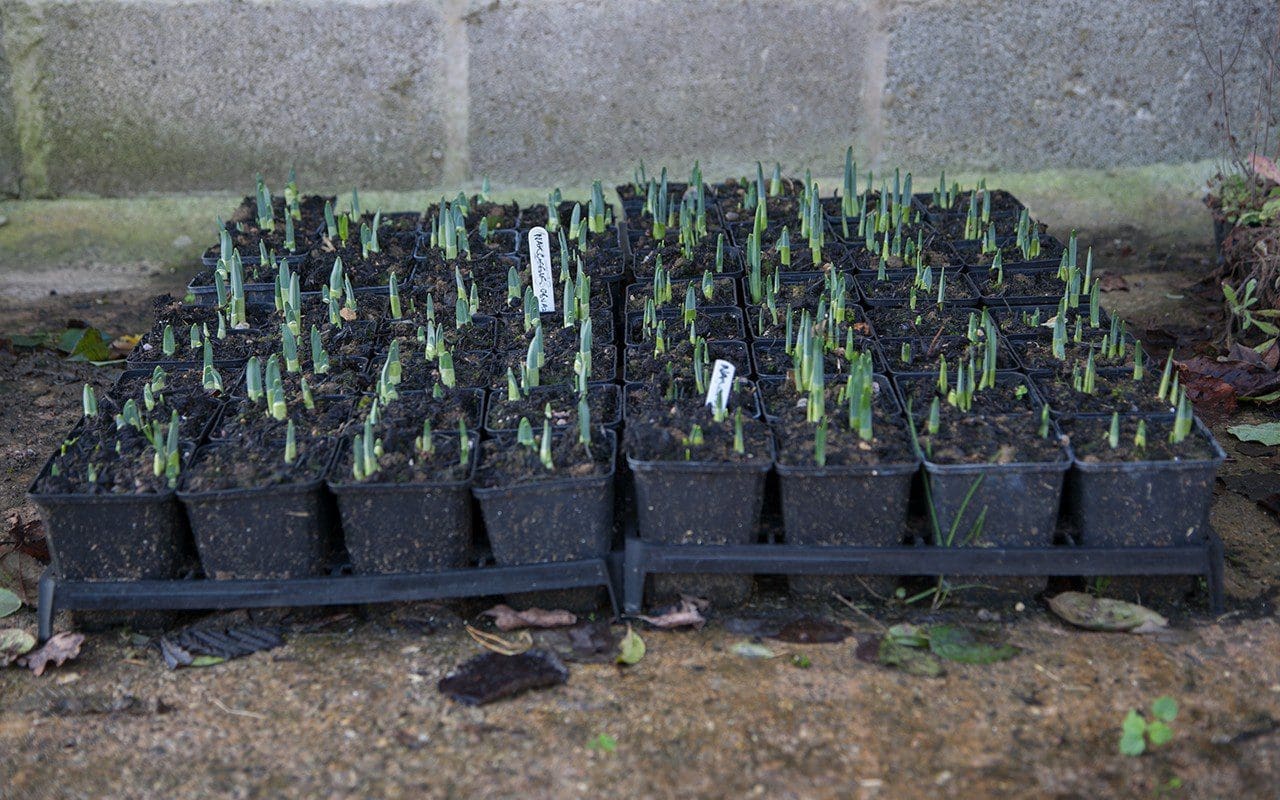 Narcissus
It is always good to start the year by planting trees and I am happy to use this window in the season to liberate the chosen few so that by the end of the holidays I am organised and ready for a new year. If they have been potted on annually, the woody seedlings are just about perfect at the end of a three-year period. This year, the first to be liberated will be the small-fruited form of Malus hupehensis, which were grown from the fruit of the single plant I have up in the blossom wood and are ready now to make the leap into open ground.
The seedlings are part of the learning curve that is illustrated in the trees they are going to join and in part replace. Destined for our highest ridge above the house, I plan for a huddle of berrying trees that will burst a cloud of blossom against the skyline in the spring. Three plants will join the hawthorn that were frayed out into the field from the Blossom Wood and the fourth will replace an ailing Malus transitoria. I have staggered this small, amber-fruited crab up the slope to meet the Blossom Wood on the high ground, but I have obviously pushed this Chinese species to the limit, for the higher up the slope they go the weaker they become, despite the fact that it is reputed to be resistant to drought and cold. With barely a finger’s worth of growth in the five summers they have been there, compared to several feet on those lower down the slope, they have demonstrated exactly what they require in the time they have been there.
I have dutifully mulched and watered and fed, but five years is quite long enough to know if a plant doesn’t like you, and so I feel justified in making the change. As I mature as a gardener, the question of time becomes more acute. I want to spend it wisely and use my energy well which, when you are investing years in trees, is important. That said, I am happy to plant young and though the saplings are barely up to my knee, they have the vigour of youth and will jump away with the below-ground growing time of winter ahead of them. The Malus hupehensis further up the slope has shown me that it has the stamina its cousin doesn’t and it is a good maxim that if you fail with one species, try another before giving up entirely.
Narcissus
It is always good to start the year by planting trees and I am happy to use this window in the season to liberate the chosen few so that by the end of the holidays I am organised and ready for a new year. If they have been potted on annually, the woody seedlings are just about perfect at the end of a three-year period. This year, the first to be liberated will be the small-fruited form of Malus hupehensis, which were grown from the fruit of the single plant I have up in the blossom wood and are ready now to make the leap into open ground.
The seedlings are part of the learning curve that is illustrated in the trees they are going to join and in part replace. Destined for our highest ridge above the house, I plan for a huddle of berrying trees that will burst a cloud of blossom against the skyline in the spring. Three plants will join the hawthorn that were frayed out into the field from the Blossom Wood and the fourth will replace an ailing Malus transitoria. I have staggered this small, amber-fruited crab up the slope to meet the Blossom Wood on the high ground, but I have obviously pushed this Chinese species to the limit, for the higher up the slope they go the weaker they become, despite the fact that it is reputed to be resistant to drought and cold. With barely a finger’s worth of growth in the five summers they have been there, compared to several feet on those lower down the slope, they have demonstrated exactly what they require in the time they have been there.
I have dutifully mulched and watered and fed, but five years is quite long enough to know if a plant doesn’t like you, and so I feel justified in making the change. As I mature as a gardener, the question of time becomes more acute. I want to spend it wisely and use my energy well which, when you are investing years in trees, is important. That said, I am happy to plant young and though the saplings are barely up to my knee, they have the vigour of youth and will jump away with the below-ground growing time of winter ahead of them. The Malus hupehensis further up the slope has shown me that it has the stamina its cousin doesn’t and it is a good maxim that if you fail with one species, try another before giving up entirely.
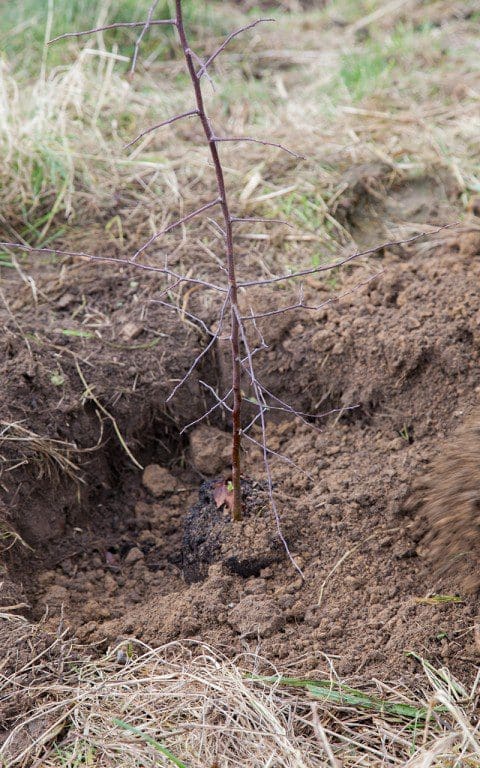
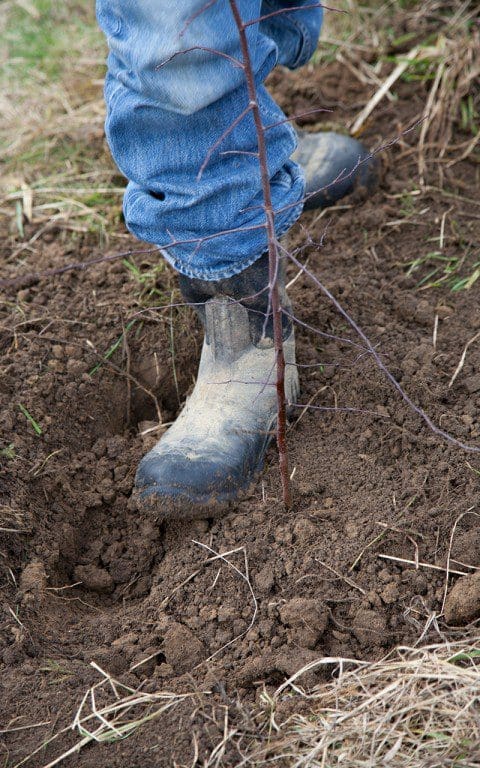 Planting a seedling Malus hupehensis
When planting woody material, and trees in particular, I prefer not to include organic matter to avoid an enriched planting hole from which the young tree prefers not to venture. Instead, the top sod, where the best soil lies, is upturned into the bottom of the hole where, by spring, it will have rotted down to provide the young roots with a good layer of loam. The roots of the young trees are given a sprinkling of mycchorhizal fungi to help in their establishment and from here they can make an easy way out into the surrounding ground. If I am to add compost, it will be as a mulch to keep the moisture in and the weeds down, and, in time, the worms will pull it to ground. Three years of clear ground around the base of a new tree is usually enough to give it the chance to get the upper hand and for the competition not to stunt growth. Growth which, in the case of my young Malus, and now that they have been liberated from the holding ground, will have nothing to hold it back come spring.
Words: Dan Pearson / Photographs: Huw Morgan
Published 6 January 2018
Planting a seedling Malus hupehensis
When planting woody material, and trees in particular, I prefer not to include organic matter to avoid an enriched planting hole from which the young tree prefers not to venture. Instead, the top sod, where the best soil lies, is upturned into the bottom of the hole where, by spring, it will have rotted down to provide the young roots with a good layer of loam. The roots of the young trees are given a sprinkling of mycchorhizal fungi to help in their establishment and from here they can make an easy way out into the surrounding ground. If I am to add compost, it will be as a mulch to keep the moisture in and the weeds down, and, in time, the worms will pull it to ground. Three years of clear ground around the base of a new tree is usually enough to give it the chance to get the upper hand and for the competition not to stunt growth. Growth which, in the case of my young Malus, and now that they have been liberated from the holding ground, will have nothing to hold it back come spring.
Words: Dan Pearson / Photographs: Huw Morgan
Published 6 January 2018
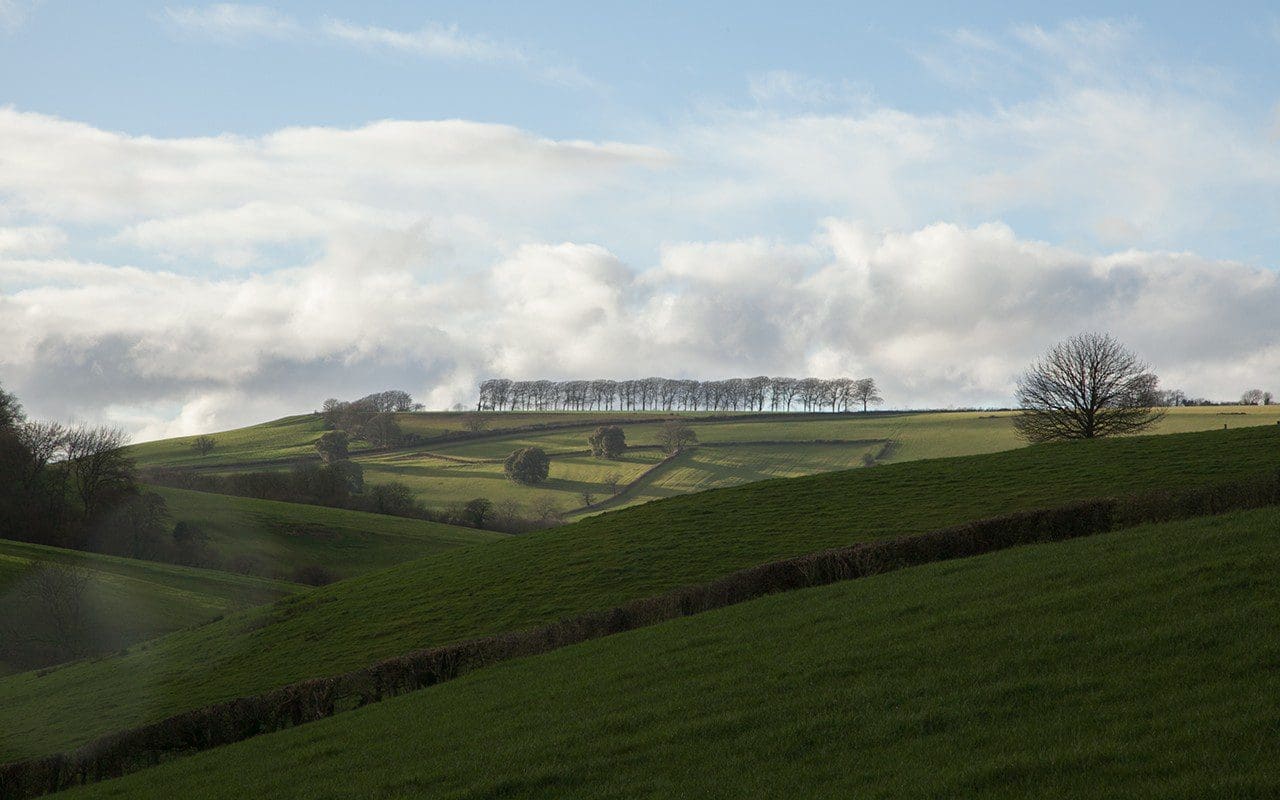
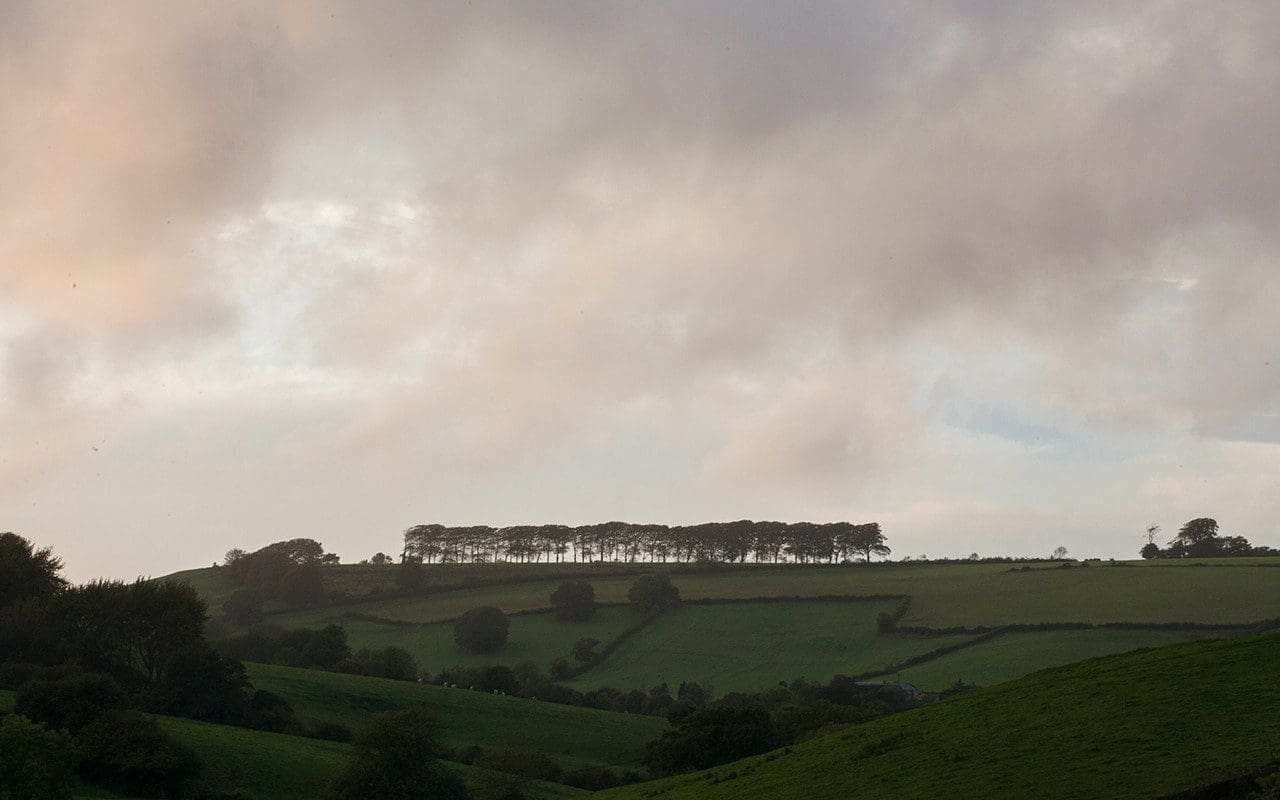
It took time after moving here to get used to the focal point of Freezing Hill. Scoring one of the few horizontals in a landscape that dips and sweeps and undulates, our horizon to the west is drawn more keenly for the line of trees that teeter on the ridge. A dark score mark perched between land and sky, which focusses the eye and draws you back.
We gaze upon them daily, several times a day, and always last thing before closing the house for the night. However, to start with I found the horizontal difficult, until it was grounded by the addition of the new footprint around the house. Our own landform of flatness, even the little we have, helps to make sense of it and the granite troughs echo the line and frame the land between and the sky above and beyond.
Last winter, the sixth we had been here, for the first time we walked the fields between us and there to bring our focal point into a new perspective. It was Christmas Day and, as we scaled the hill, the beeches reared up like giants above us. The air was still on the leeward slopes that protected us from the westerlies, but the roar of the wind coming from the valley beyond was in their branches. It was deafening where we stood in the beech mast at their feet and saw for the first time that they were pitched along the top of an earthwork* running along the ridge and now held in place by the clutch of their roots.
Over the year, drawn back to the shifting scene that they give focus to, we witness change. The transparency in their branches in the winter. A sometimes-near sometimes-farness, depending on the moisture in the air. The sweep of emerald field in spring. The piping line of ochre hay as the harvest is cut and then dried and bailed, the lines appearing and vanishing over the course of 48 hours in August. The line at its strongest on the chill, white days of frost and snow, when the trees and hedges score charcoal marks on the landscape. We see the sky differently for the anchor the trees provide between land and cloudscape over the course of the year. They act as a guide to the position of the setting sun, which dips far to their right in June and then, in a quickening progression as the summer slips, to their left and then so much further that you find it hard to imagine that it ever set behind them.
*Freezing Hill is the site of a Bronze Age earthwork and is a Scheduled Ancient Monument.
 19 January | 13:34
 8 February | 17:12
 4 March | 17:18
 19 April | 19:53
 16 May | 20:30
 9 June | 01:10
 16 July | 20:40
 7 August | 20:34
 3 September | 18:32
 1 October | 18:08
 25 November | 15:57
 10 December | 16:14
Words: Dan Pearson | Photographs: Huw Morgan
Published 16 December 2017
Now that the garden is resting and the woods drop back into winter nakedness we are drawn out into the landscape. Mosses greener than ever, now that the winter wet is here again, lighting up the tree trunks brilliant emerald where sunshine slides through bare branches. The north side of the trunks colonised by the green algae, Pleurococcus, act as a woodland wayfinder and, on the eldest limbs and marking their age, the colonies of polypody are once again thrown into focus.
I am happy to see them now that it is winter and enjoy the primitive feeling the ferns bring to the woods and stream edges. Higher up on the slopes, where we garden almost exclusively in sunshine, is not the place they want to be. I have planted for shade but, until I have the cover, ferns will have to have their place out of the garden season and we in turn the opportunity to visit them where they choose to be.
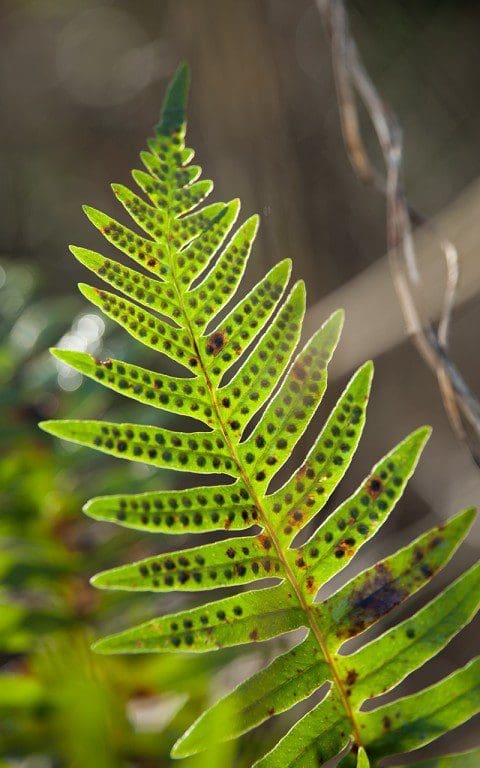
 Polydpodium vulgare
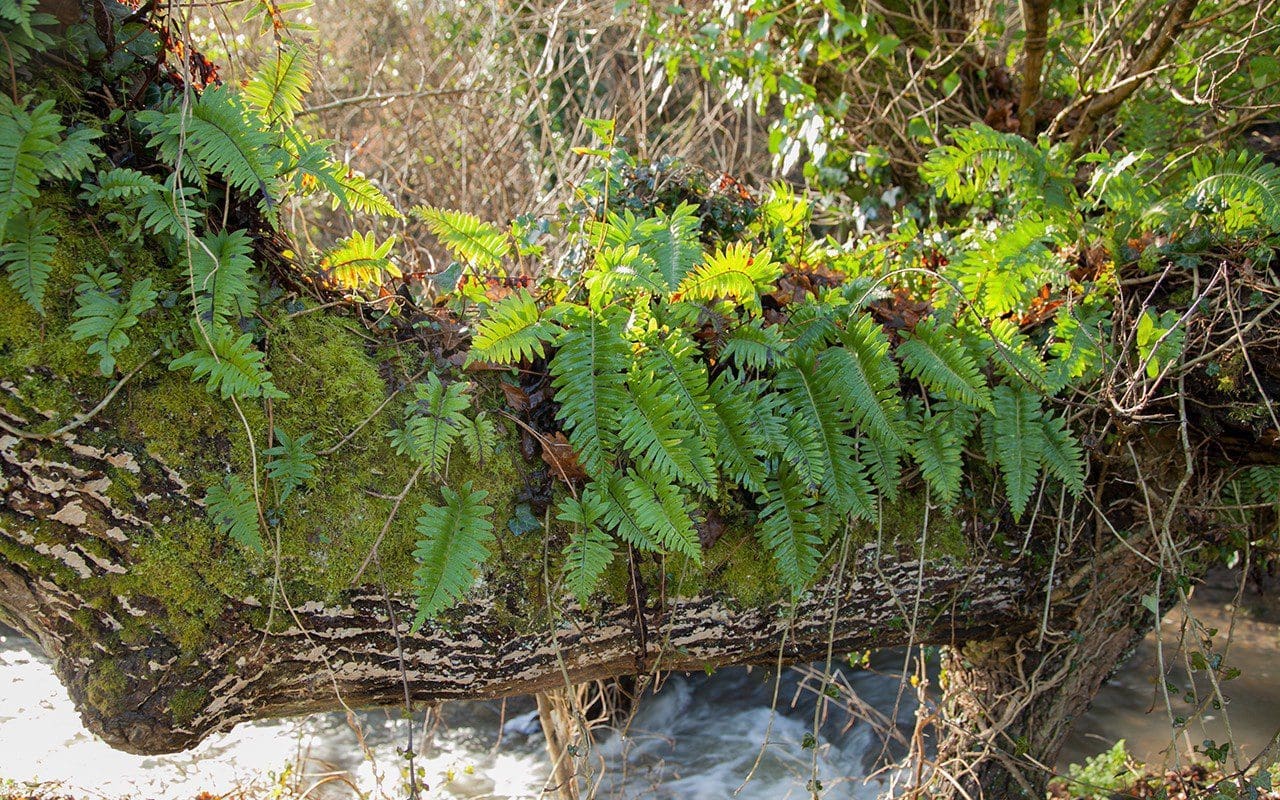
There are three main species in the woods around us. Polypodium vulgare is perhaps the most adaptable, choosing in the main to live up in the branches, inhabiting the places where moisture is harboured. Clefts in branches, where the moss holds accumulated dampness, is where you will find them making home and, from there, they travel slowly outwards forming a matt of fibrous root that in turn collects the moss and the accumulated leaf mould so extending their reach.
 Polydpodium vulgare
The finest colonies sit on the topside of the oaks that, over the years, have leaned from the slopes to strike informal bridges across the streams. Running along their branches like feathered epaulettes, the polypody strikes an exotic mood that you might more usually associate with the epiphytic bush of New Zealand or cool temperate rainforest. They are an adaptable fern, shrivelling and browning in dry summer weather to return again with the autumn wet and remain evergreen throughout the dark months. I harvested a number of plants that arrived in the wood where we logged a fallen tree by the stream and have simply laid them down in one of the few shady places up by the barn, where they have taken root. I have plans to add them to the north side of the house where I will insert them into a wall close to where I keep the epimediums so that we can enjoy them at closer quarters.
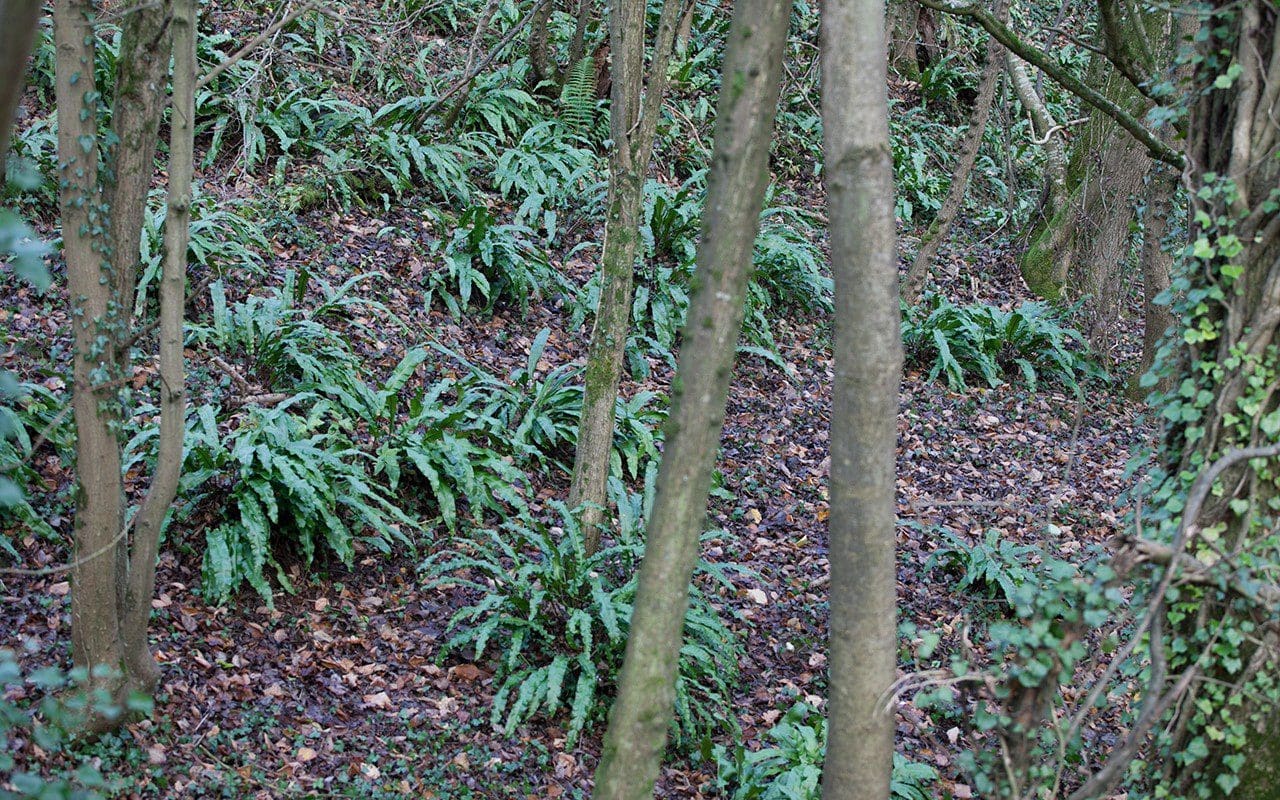 A colony of Asplenium scolopendrium
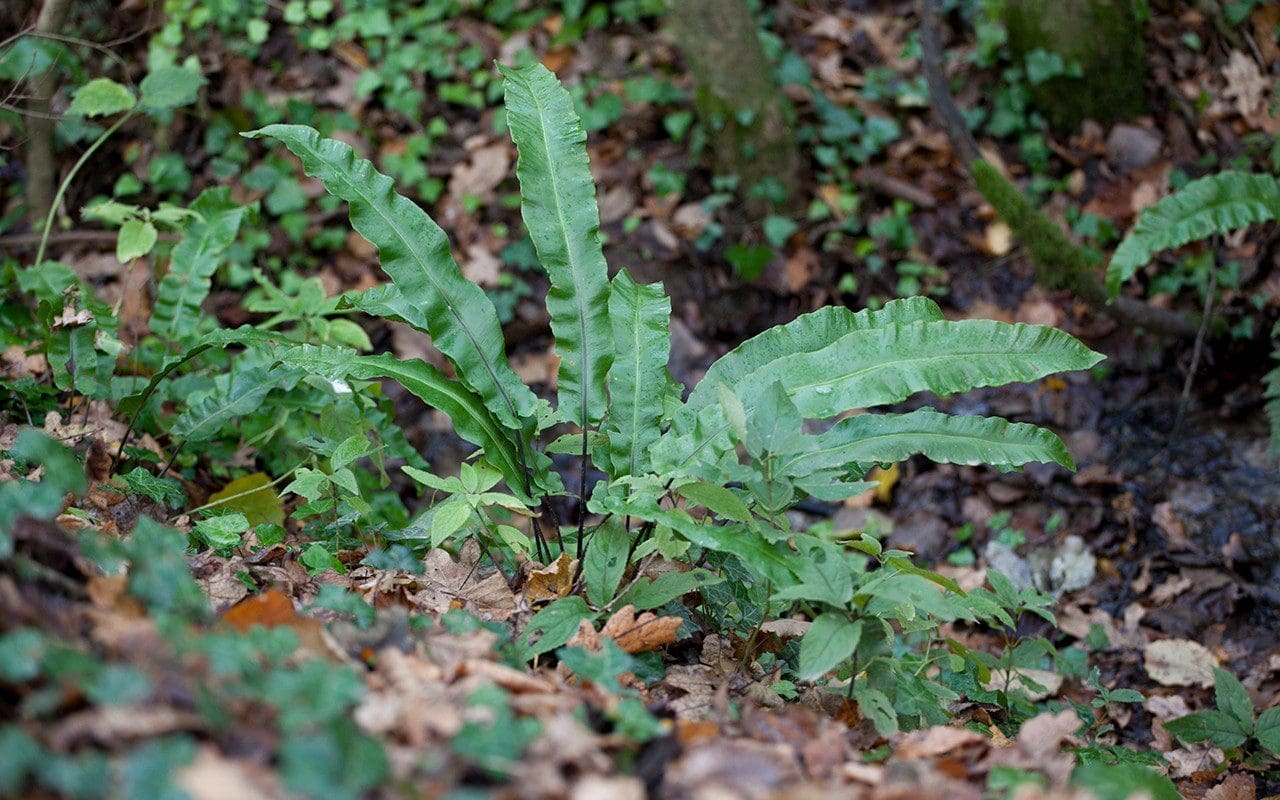 Asplenium scolopendrium
The hart’s tongue fern (Asplenium scolopendrium) is one of the key plants you register on the ground in the winter woodland. Clinging to the steep banks of the ditches and streams where the soil is thinnest, they make fine colonies with mature plants almost touching, but not so much that you can’t appreciate their architecture. The simplicity of their foliage, each tongue arching elegantly downward, is a feature of limestone woodland and around here it is the most prevalent fern. The Victorian pteridoligists collected the hart’s tongue ferns with great fascination, naming and selecting the occasionally crested, fasciated and undulating variants. Several are still available today and are good in the winter garden for their long season of interest. The fronds last right through the winter to the point at which the new croziers unfurl in spring. You will know exactly when to cut them and refresh the plants, as the winter foliage begins to look tired with the contrast of spring around it.
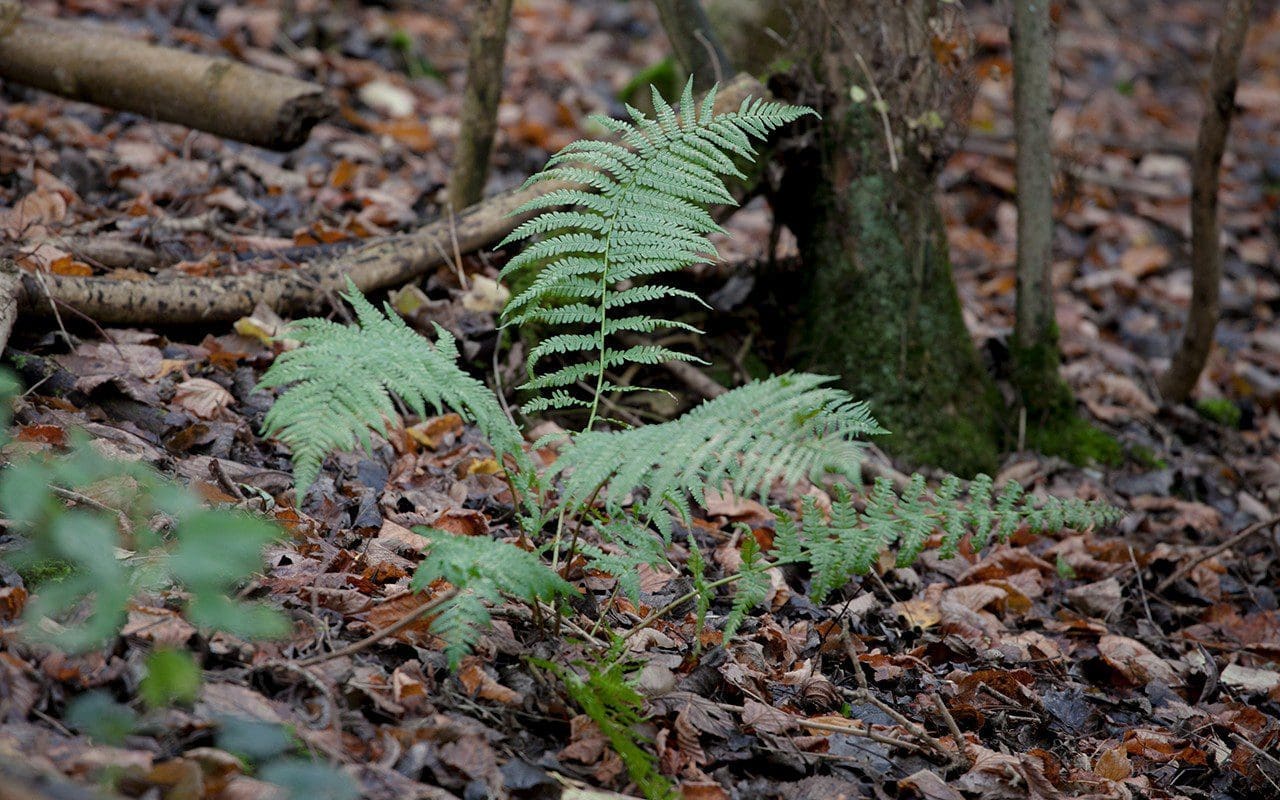 Dryopteris filix-mas
The male fern (Dryopteris filix-mas) is less common here, where our soil lies heavy at the bottom of the slopes, but they do occur and I aim to introduce more when the hazel coppice matures. When I was a child, gardening in the thin, acidic woodland that faced the South Downs, Dryopteris filix-mas was a staple of the woodland and the clumps were many crowned, some as much as a metre across and aged. Where the polypody and the hart’s tongue last the winter, the male fern tends to brown and eventually collapse as the frosts work at the growth of the previous growing season. But they are beautiful in death and more so for the contrast of old and new as the dramatic unravelling of croziers happens in the spring. Brilliantly soft and scaled dark green over light, the fronds unfurl to reach waist height before filling out and relaxing for the summer.
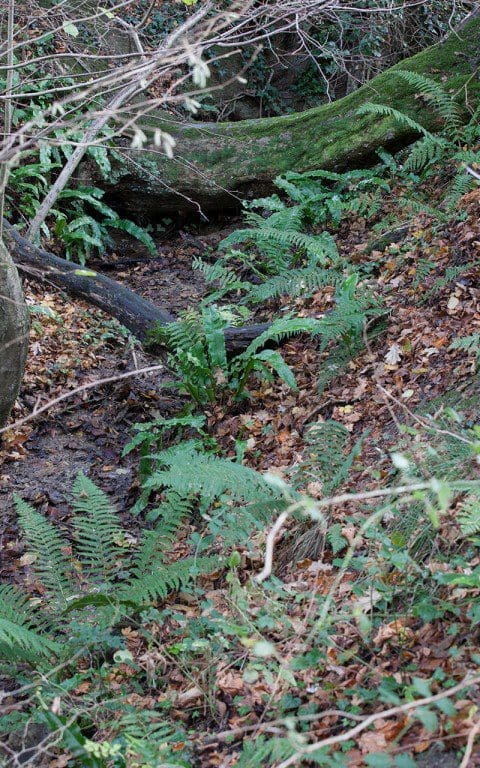 A colony of Dryopteris filix-mas
Osmunda regalis, the royal fern, is the most spectacular of our native ferns rising up to shoulder height as the croziers reach and teeter before expanding lushly to lie back in a tropical splay of fronds. The royal fern is now rare in the wild due to pillaging by Victorian fern-lovers but, where it does occur naturally in parts of Ireland, you find it in wet, boggy ground or on the edges of ditches.
Whereas I have not been able to include the ferns as part of the palette in the exposed new garden, I have introduced the Osmunda around the new bridge at the end of the ditch. The plants have a horticultural edge, in that they are the dark form, Osmunda regalis ‘Purpurascens’. Though not as voluminous as the regular green form, this selection is notable for the extraordinary purplish-bronze colouring of the young croziers and the tint to the unfurling leaves. I have them in the delta of wet ground to either side of the zig-zag bridge as a companion to the ink-stained foliage of Iris x robusta ‘Dark Aura’.
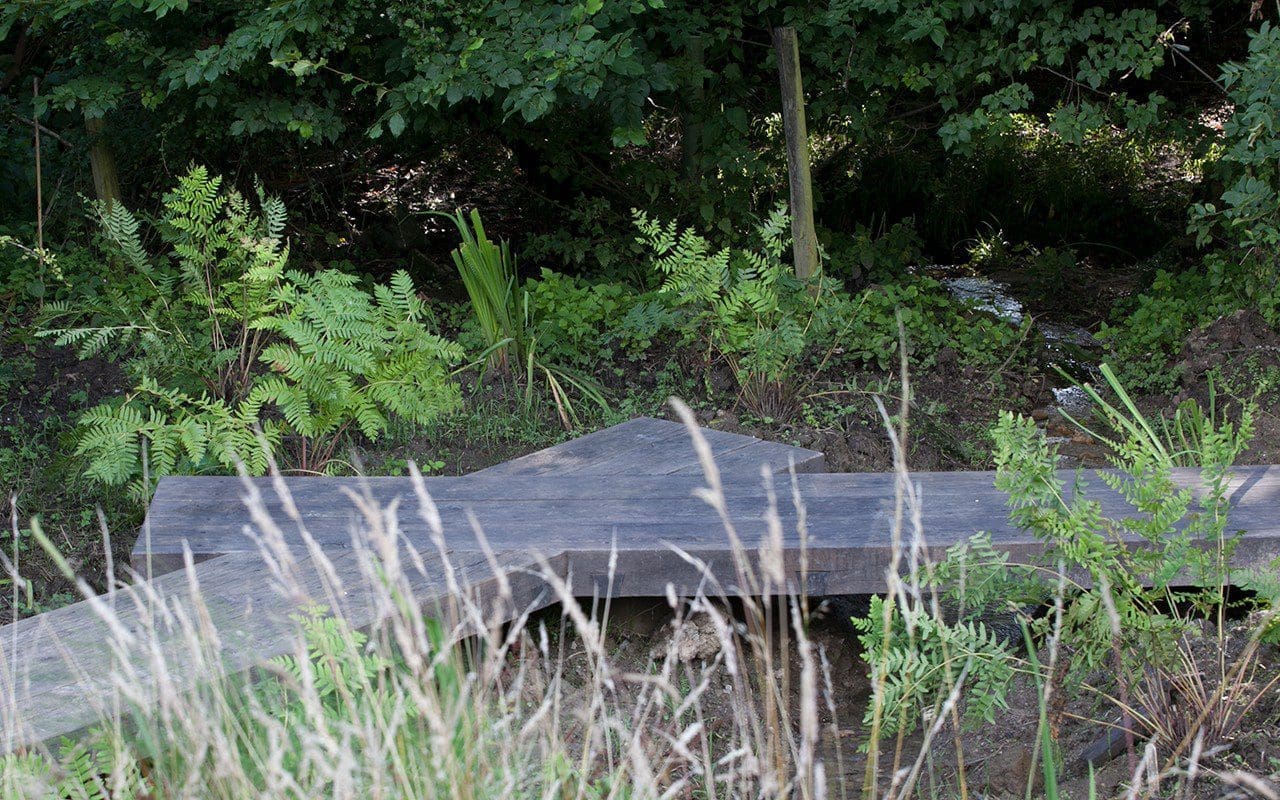 Recently planted Osmunda regalis ‘Purpurascens’ around the new bridge in July
New life appears in April from the knobbly knuckles that have been waiting out the winter in rafts of spongy root, once prized as a growing medium by orchid growers. It is a fast and marvellous ascent when the weather turns at the other side of the winter, the new growth the colour of Victoria plums and then copper as the fronds expand. At this point a daily vigil is necessary for there is not a moment to be missed. For now, however, I am happy for the wait that is made easier by their friends in the woods.
Words: Dan Pearson / Photographs: Huw Morgan
Seldom has anyone said, “I really fancy a turnip for dinner.” Along with their cousin the swede, turnips suffer from a longstanding reputation as being good only for animal fodder or the poverty-stricken.
The first reference to turnips (Brassica rapa ssp. rapa) is in John Gerard’s Herball, or Generall Historie of Plantes (1597), where he writes, “It groweth in fields and diverse vineyards, or hoppe-gardens in most places in England. The bulbous or knobbed rotte, which is properly called rapum or turnip, and hath given the name to the plant, is many times eaten raw by the poor people, but most commonly boiled.” Over two hundred years later little appears to have changed when John Rogers states in The Vegetable Cultivator (1839), “That turnips are nourishing has been proved. In Wales, a few years since, they formed a considerable portion of the food of the lower classes’.
Even those doyennes of middle class Victorian cuisine, Eliza Acton and Mrs. Beeton, can suggest little more to do with turnips than boiling or mashing them. The most complicated treatment from both requires only a dressing of white cream sauce on the boiled roots. This addition of dairy produce in the form of milk, butter or cream provides the contrast to their slight bitterness – common to all brassicas – and which I imagine made them more acceptable to palates unatuned to this flavour. In oriental cooking, where bitter flavours are more highly prized, turnips are simply steamed or braised and cleanly flavoured with soy, mirin and fresh ginger. It is more common for them to be used raw as brined pickles or as a grated accompaniment, in the same manner as daikon, and they can replace these large radishes in all recipes that call for them, although their flavour is not as strong.
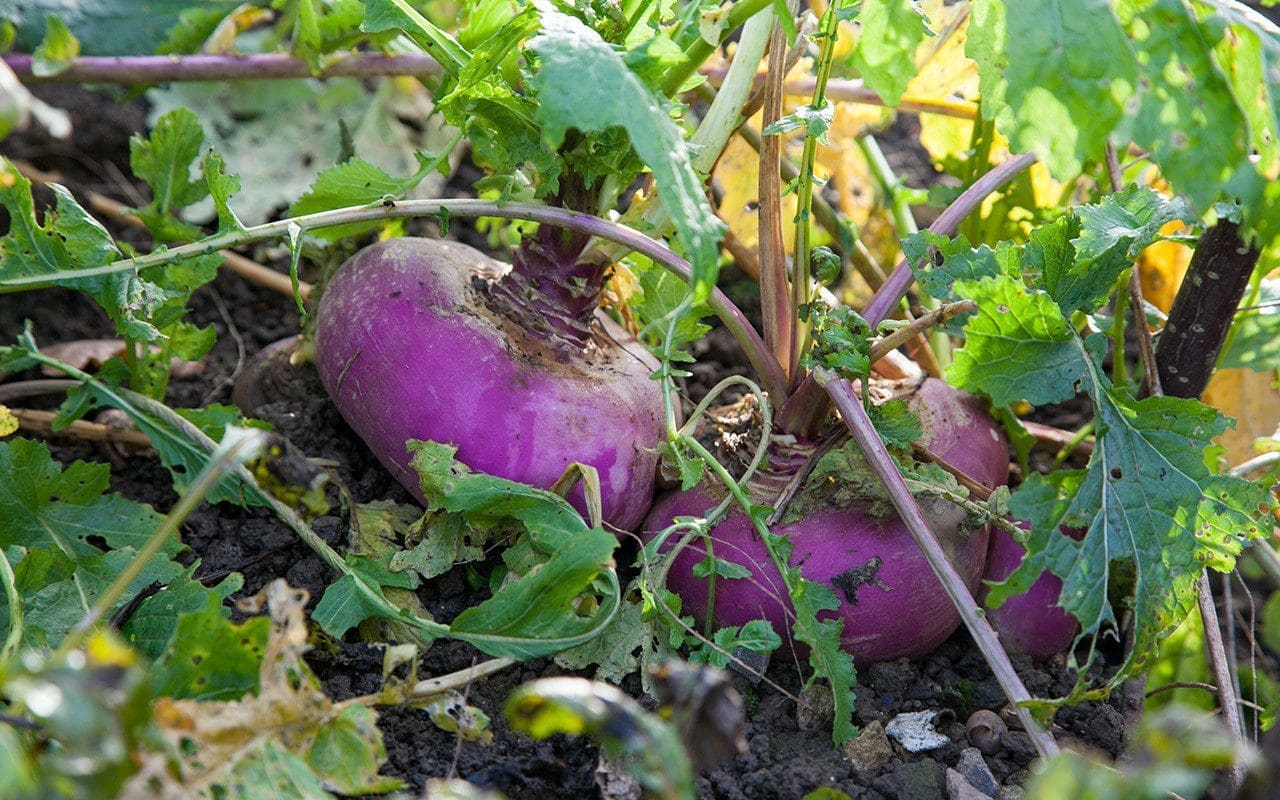 Turnip ‘Purple Top Milan’
There are now a number of varieties available to grow, from the traditional purple top types through more decorative red and orange skinned varieties to the small, sweet, snow white cultivars from Japan. We rely on the commonly available ‘Purple Top Milan’, and successional sowing throughout the year from April to August provides us with a steady supply from late spring to early winter. Being fast growing and water lovers turnips do best in moisture retentive soil which has been enriched with manure for the previous crop. Early sowings are very prone to attack from flea beetle, which can decimate the young foliage, so these we protect with a layer of fleece or Enviromesh until the seedlings are large enough to fend for themselves. With a higher water content than swedes, turnips do not respond well to frost, so they should be lifted now and stored in sand or dry compost in a cool, dark shed for winter stores.
This recipe came from a desire to do something with our turnips that would give them the lead role in a main dish that would challenge people’s opinion – ours included – of this vegetable as a nothing more than a supporting player. With the current nip in the air as winter’s grip gets hold we are also increasingly drawn to spiced food, and a fresh curry is a great way to warm up after a day in the garden. Ample use of mustard seeds keep things in the brassica family, while coconut milk provides the contrasting equivalent of dairy. Unsurprisingly this recipe works just as well with swede, or any of the more commonly available root vegetables such as beetroot, parsnip and celeriac, although you may want to adjust the seasoning to counteract the sweetness of these last three with the addition of some lemon or lime juice just before serving. The coconut chutney is by no means essential, but the extra effort involved is minimal and helps turn this humble vegetable into a memorable main meal.
INGREDIENTS
Curry
800g turnip peeled and cut into 1cm dice
1 large onion, peeled and coarsely chopped
4 garlic cloves
4cm long piece fresh ginger, peeled
3 small green chillies, or more to taste
The stems of a small bunch of coriander
3 teaspoons brown mustard seeds
8 fresh curry leaves
½ teaspoon freshly grated turmeric, or ¼ teaspoon of powdered
2 teaspoons ground cumin
½ teaspoon ground fenugreek
2 small bay leaves
300ml coconut milk
400ml tomato passata
2 tablespoons red lentils
2 tablespoons rapeseed or sunflower oil
Salt
Chutney
150g fresh coconut, peeled, or unsweetened desiccated coconut
2 tablespoons chana dal
1 small green chili
2cm long piece fresh ginger
Salt
Temper
1 teaspoon urid dal
½ teaspoon brown mustard seed
½ teaspoon cumin seed
4 curry leaves
2 dried red chillies
A pinch of asafoetida
2 tablespoons rapeseed or sunflower oil
Serves 4 as a main or 6 as part of a mixed meal
METHOD
To make the curry first put the onion, garlic, ginger, chillies and coriander stalks into a small liquidiser (a Nutribullet type is ideal for this). Process into a paste. Scrape the sides of the bowl down several times to ensure a smooth consistency.
Heat the oil in a pan large enough to take all of the ingredients. When smoking add the mustard seeds and curry leaves and cook until the seeds begin to pop and the leaves are translucent.
Add the onion puree and cook over a high heat, stirring continuously, until the mixture has given up most of its water and is starting to become golden. About 5 minutes. Add the ground dried spices and the bay leaves and cook for another minute until fragrant. Add the tomato and stir well. Cook for another 3 minutes, stirring frequently.
Add the turnip to the pan. Stir well to coat all the pieces. Bring to the boil then turn the heat to low and simmer until tender. This will take about 20-25 minutes, but will be less for young turnips and maybe more for older ones. The turnips create quite a bit of liquid, but stir from time to time to ensure that it doesn’t catch.
Add the lentils and stir to incorporate. Continue to cook on a low heat for 15 minutes until the lentils soften.
Add the coconut milk and turn the heat back up to high. Boil until the lentils have disappeared into the sauce, and then reduce until there is enough to just coat the turnips. Season with salt. Keep warm.
 Coconut Chutney
While the curry is cooking make the coconut chutney. Heat one tablespoon of oil in a small frying pan. When smoking put in the chana dal and fry for a couple of minutes until toasted and dark orange in colour. Put the chana dal, coconut, green chilli and ginger into a small liquidiser and process until smooth. You may need to loosen the mixture with a few tablespoons of water or, if you have some coconut milk left from a 400ml can opened for the curry, some of that. Season with salt to taste.
To make the temper heat the remaining tablespoon of oil in the same small frying pan in which you cooked the chana dal. Add the urid dal and fry for a minute or two until golden, then add the remaining ingredients. Continue to cook until fragrant and the mustard seeds start to pop.
Mix half of the temper into the chutney. Transfer this to a serving bowl and then pour the remaining temper on top.
Put the hot curry into a warmed serving dish. Garnish with a few fried curry leaves, some rings of finely sliced red chilli and a scattering of torn coriander leaves. Serve with boiled rice or sponge dosa. This also makes a very good filling for a crisp masala dosa.
Recipe & photographs: Huw Morgan
Published 2 December 2017
Although the garden has its carefully drawn boundary – the fence that keeps the sheep out and my garden domain within manageable bounds – I want the eye to move freely up onto the Tump and then down to follow the ditch below it. The gates where the paths terminate give access to the pasture beyond, but they also provide a visual draw to the garden’s edge, where you can lean and contemplate the prospect of the wilder places.
I had planned for an engagement with the ditch for some time before the garden went in, but until this summer this damp crease in the land was a place that required a pair of watertight boots and a sense of adventure. When we came here its steep, muddy banks were deep with ruts where the cows had made their way down to the water that all year runs freely and constantly from the springs above us. The sedge was the indicator that the ditch had a wetland flora and, since it was fenced to protect it from grazing, this has evolved and diversified. We have the best of the primroses here in the spring, large self-sown communities that are happy on the cool slopes and remarkable for their ability to survive beneath the total eclipse of summer growth, which starts soon after they have peaked. First come ragged robin and campion, followed by the brutish and deadly hemlock water dropwort (which we are controlling by cutting as the flower spikes rise) and then meadowsweet, great willowherb and wild angelica.
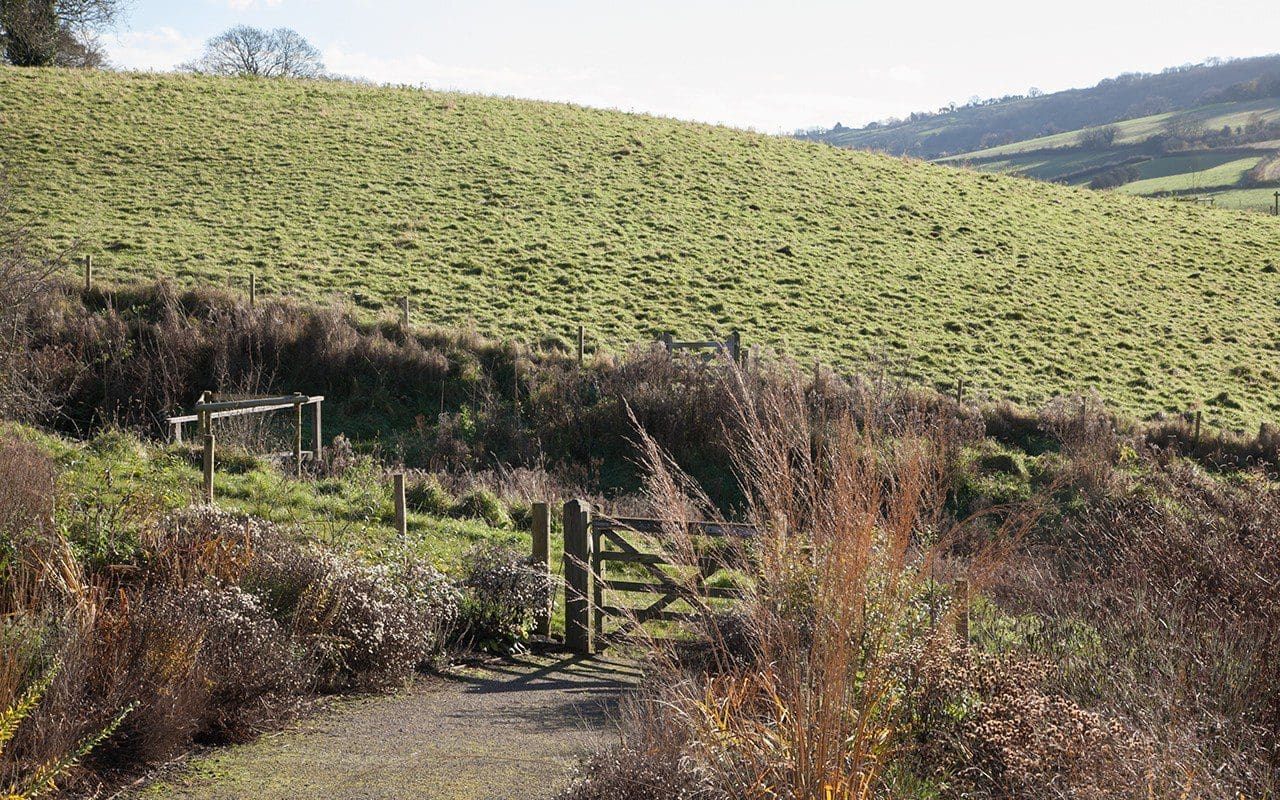 The gate from the garden into the pasture with the gate to the Tump on the slope above the ditch beyond
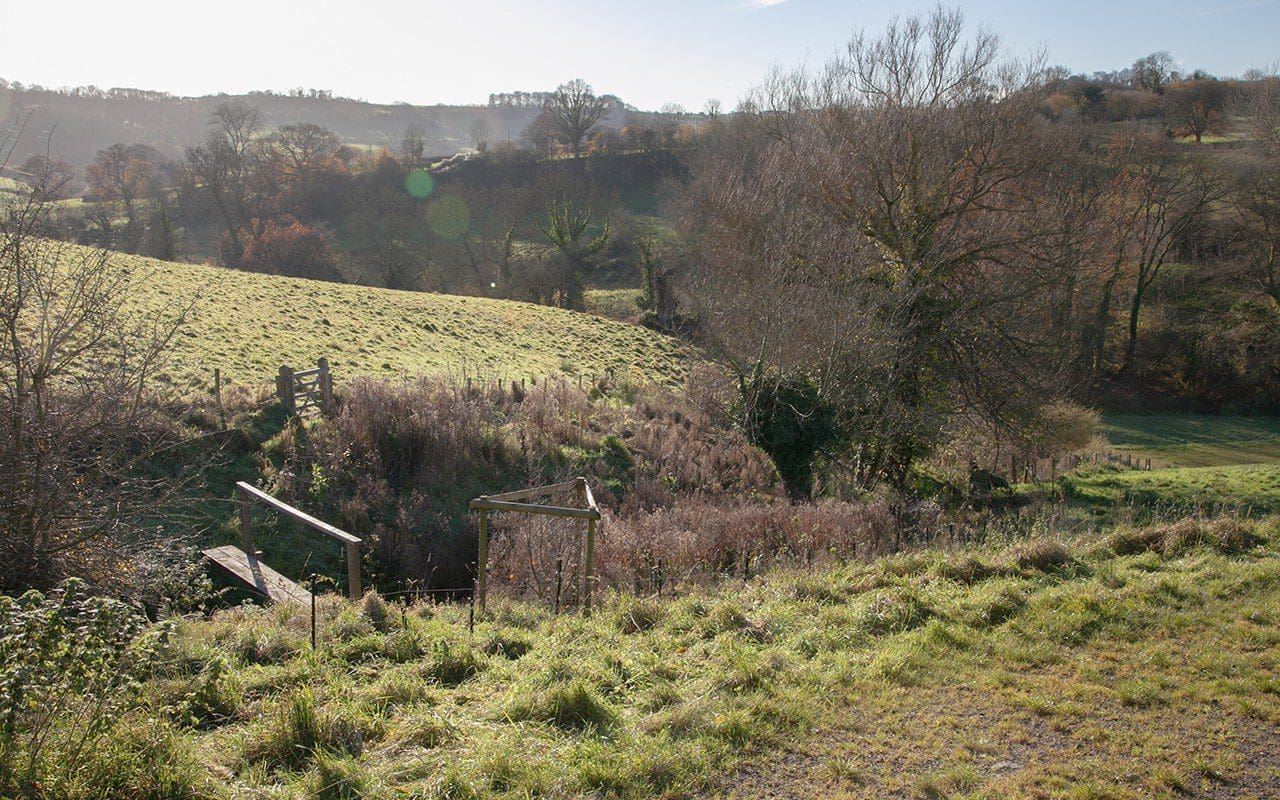 The ditch forms a crease below the Tump, with a pollard ash and large crack willow at the bottom of the left bank
As we have been getting on top of the brambles, which have been kept in check with strimming in February, I have been carefully adding to the ditch banks to provide another layer of interest; snowdrops for winter, marsh marigolds and our Tenby daffodil to kick-start the spring and, in summer, the upper reaches are now populated by a community of Inula magnifica. Salix purpurea ‘Nancy Saunders’ (which I also have on the garden boundary to help the eye jump the fence) runs in stops and starts along its length and, in the shade of the crack willow, we have the surprise of Gunnera manicata.
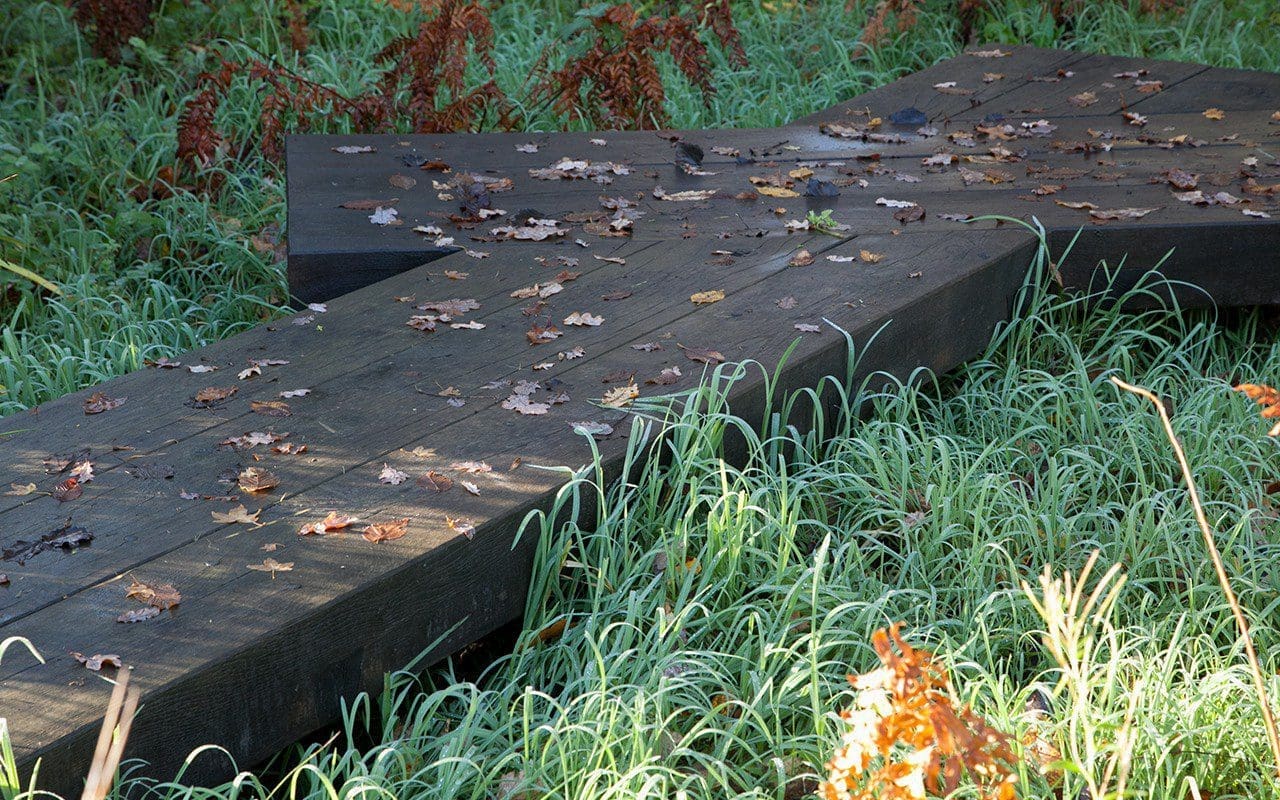
I had always imagined switching back and forth from bank to bank to enjoy this environment and, once the shaping of the garden was complete, the next logical step was to make it more accessible. Over several seasons I identified four positions for crossings that would each provide a different experience. A link from the garden directly up onto the Tump draws a line through the Cornus mas I’ve grouped below where we keep the bees. The cut in the land is steepest here, with the water falling unseen beneath growth in the summer, but the rocky streambed provides a good acoustic that makes you aware of the source. The rivulet reveals itself again in the winter to sparkle in sunshine. The prospect is good here so we made a sleeper crossing (main image) with a handrail to lean on that is suspended well above the water. I have planned for a bench to go on the far bank next summer, so that from there you can look back over the garden before moving on.
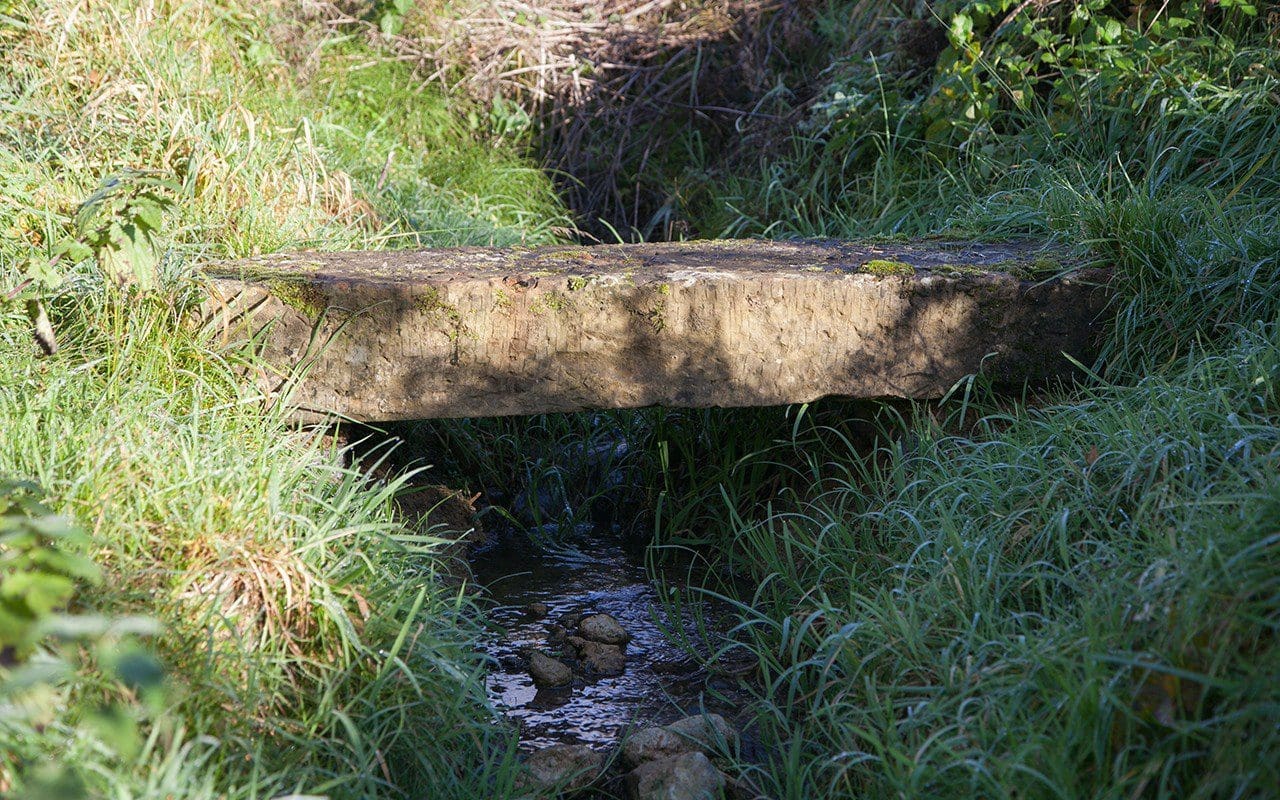
Once through the far gate you can walk up onto the meadow of the Tump or downhill to a lower gate behind the crack willow which allows you onto the slope above the ditch again. The path pushes into the shade where in time, as the gunnera grow and meet overhead, you will be able to duck under their canopy and cross the water on a simple stone sleeper bridge where the banks splay and slacken out under the tree.
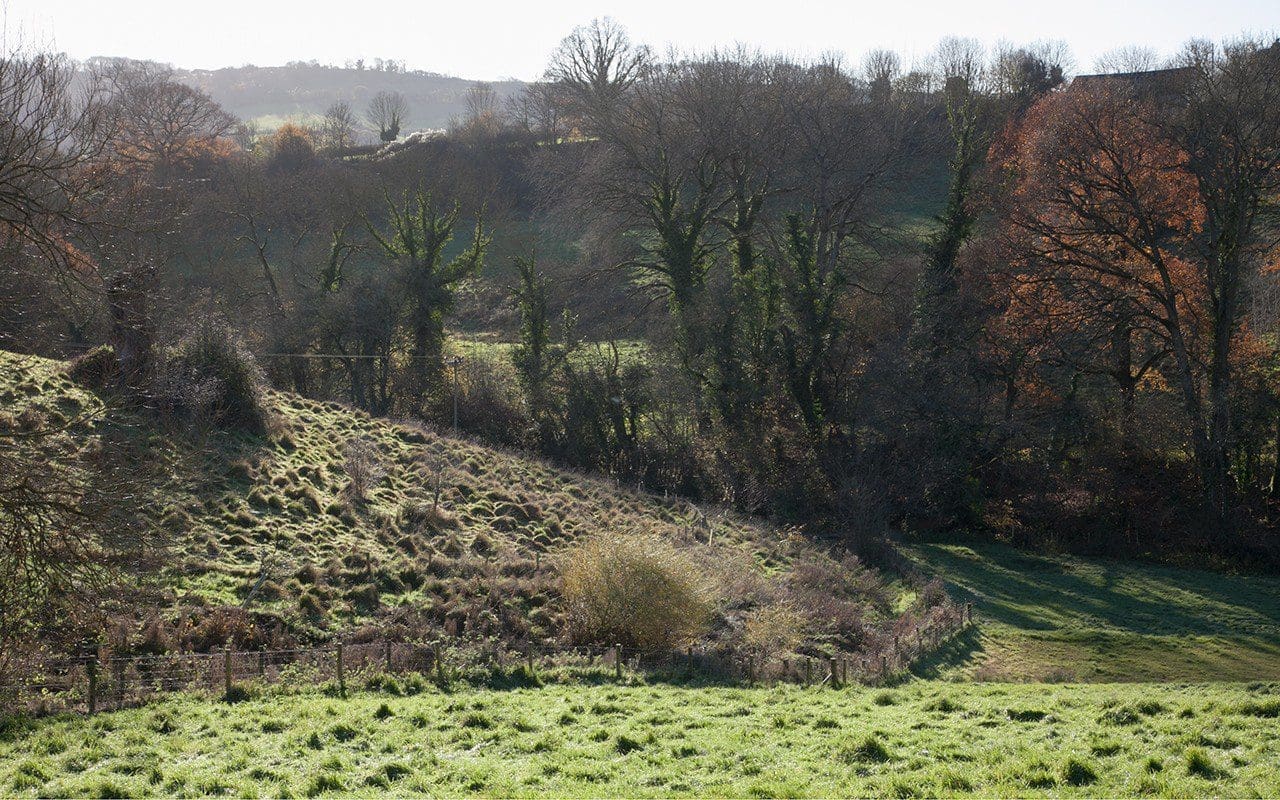 The banks below the crack willow ease where the slope flattens into the field
 The stone sleeper bridge beneath the crack willow
 The second stone slab crossing further down the ditch
Before the land eases where the fields flatten in the stream basin there is a stile and another slab crossing to take you back across where the primroses grow most strongly. From here you push into a track cut in the wet meadow of angelica and meadowsweet and then on and down to the ankle of the slopes where the ditch forms a marshy delta before dropping into the stream. Here between the fields the farmer before us had made a ford of sorts for easy droving so, when we first got here, we made a makeshift crossing with logs and stones that required a number of leaps to traverse it.
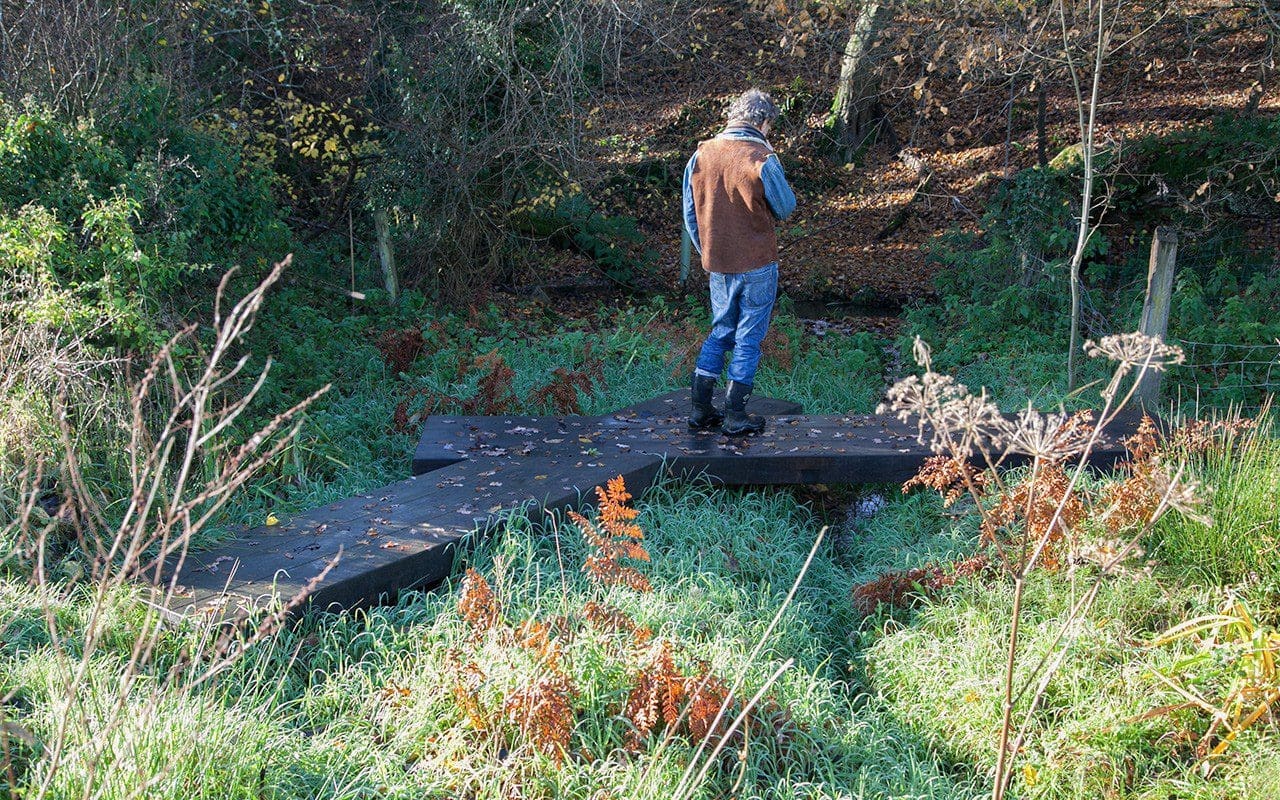
I had always envisioned a bridge here that changed direction, to echo the journey back and forth across the ditch. In Japan these bridges are kinked to confound devils that can only move in a straight line, but here the change in direction would slow your passage and make you pause.
As luck would have it, one of the bridges we made for the 2015 Chelsea Flower Show was not required when the garden was relocated to Chatsworth, and Mark Fane of Crocus kindly gifted it to me. So in August of this year long-term collaborator Dan Flynn of Gardenlink came down to install it. The ditch delta was temporarily drained in order to make the pilings that support the bridge, and the carefully planned installation went more smoothly than expected. It immediately looked like it was meant to be there.
 Dan Flynn installing the wooden bridge from the 2015 Chelsea Flower Show garden
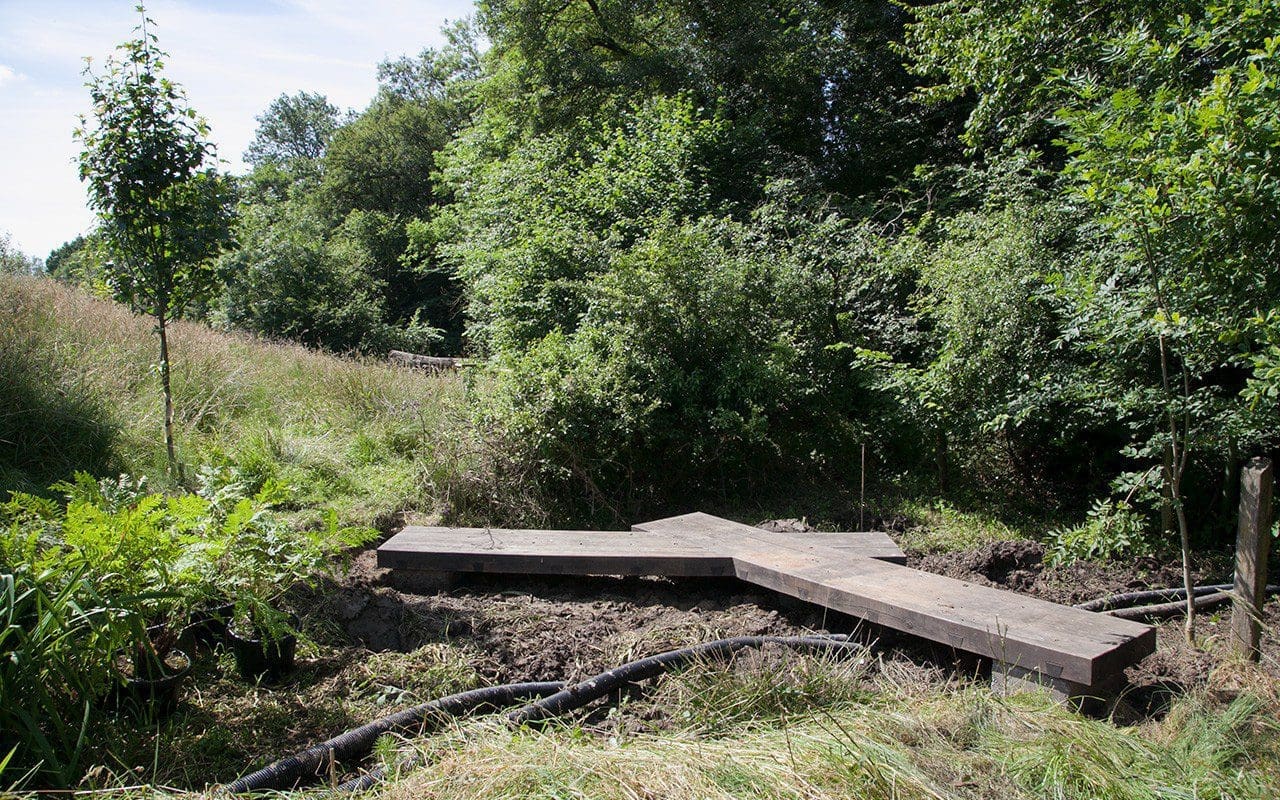 The newly installed bridge
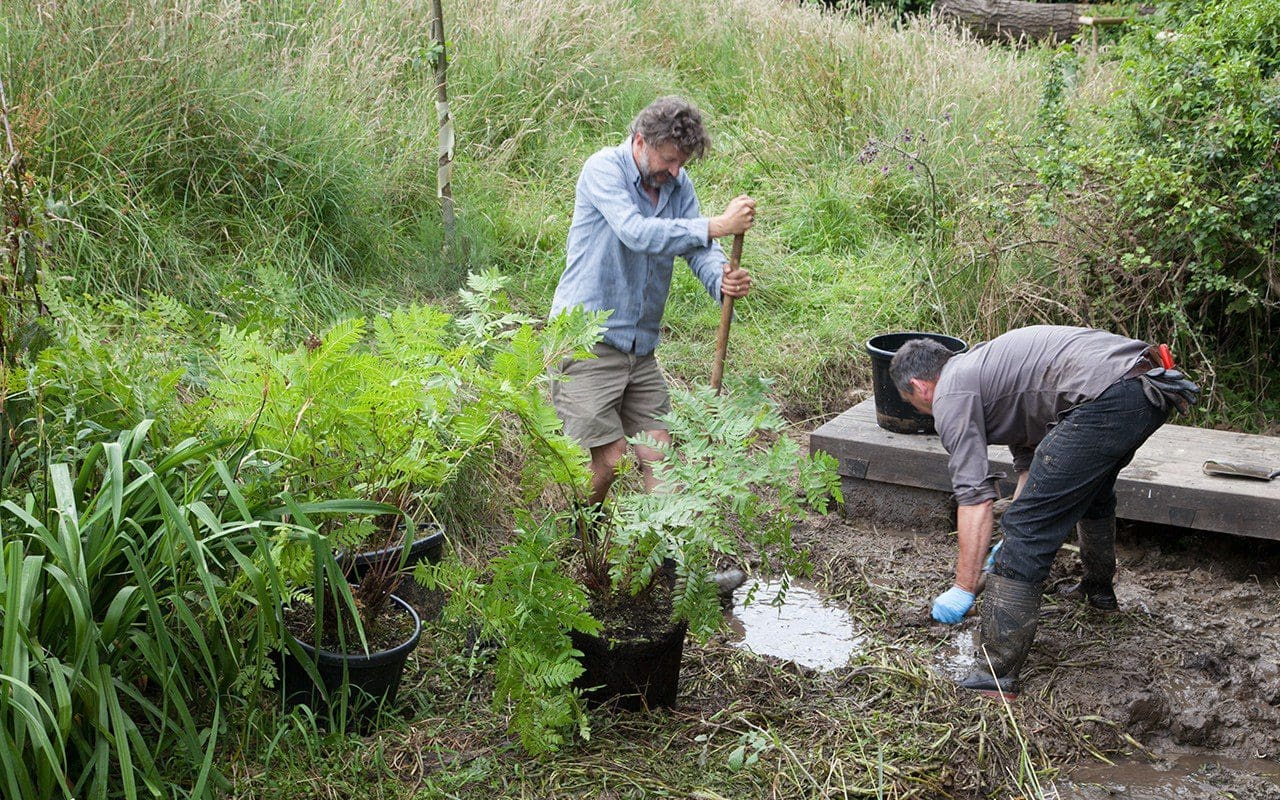 Dan and Ian planting Osmunda regalis ‘Purpurascens’ and Iris x robusta ‘Dark Aura’
The zig-zag bridge has been the making of a place that was previously damp and difficult to traverse. It has turned a swampy stumble between one field and the next into somewhere you now want to head for. I like it for being the only intervention you are aware of here and for the fact that it lifts you above the ground to give new perspective. I have worked Osmunda regalis ‘Purpurascens’ and Iris x robusta ‘Dark Aura’ into the wet ground to either side. And I have planned for another gate from the field side, which will catch the eye from the garden above and serve as a focus to draw you down to the end of this journey or, if you are tempted to continue into the coppice beyond, the beginning of the next.
Words: Dan Pearson / Photographs: Huw Morgan
Published 25 November 2017
This year is the first we have truly been able to enjoy an autumn in the garden, it being less than a year old and rewarding us with the shock of the new. Until now my gardening was all in preparation for the making of this new space, and so the landscape around us was the place to be to take in the change in the season. Hedgerows flaming with red hawthorn and bryony or the gold and black of buttery blackthorn foliage and the suspension of inky sloes. Now we have a new palette, some previously untried in this place, and all of it for the first time held together by something more considered. Despite being at the tail-end of the season there is still a huge amount to look at, with the last flowers in their tattered death throes, and any remaining colour thrown into sharp relief.
I planted new trees last year to hold the new garden on the slope and to provide anchor points for the planting. A Prunus x yedoensis (main image) made a concession to the milking barn yard being domesticated now that we have repurposed this barn as a studio. It took some time to make the leap and break the mood here, but it has been a good one to have made, marking spring with its blossom and now flaring red and orange in these last few days of autumn. The mulberry has been good this year too, now that it has attained some stature. I planted it in our first winter here as a whip in what was then the vegetable garden, with the promise of what has now become garden around it. Although it has a reputation as a temperamental grower mulberry is never as slow as you might think, indeed it has grown almost two feet a year so that now it has real presence. This week the frost coloured it lemon and lime. Maybe it has done this before, but maybe it is the context of the new garden around it, which has given it a new setting and pulled it into focus.
The freeze has also started the bletting process on the medlar fruits, turning them to a curious pasty pulp that we are acquiring a taste for as we get to know it. The cold also stripped the crab apples of foliage to leave their berries held like atoms of colour against whatever coloured skies were on offer. As the flowering plants ebb and disappear, there is a robust counter-movement in the vegetable garden where the winter roots and brassicas are in rude health and soaking up every minute of sunshine.
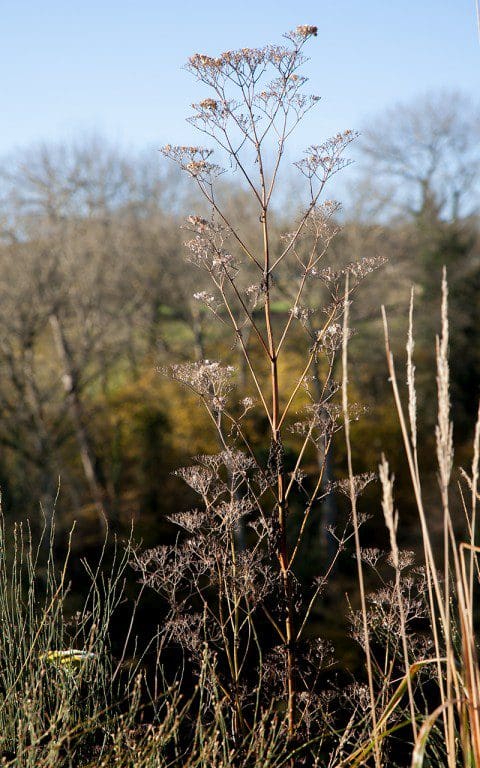
As the days have moved firmly towards winter, the perennials have coloured too so that the last tatters of flower no longer matter. I will leave the perennial garden standing now until late February before beginning the process of cutting back so that the gradual retreat and skeletons can be savoured. Aruncus dioicus ‘Horatio’ colouring a burnt-butter yellow to throw the spent flower spikes into relief and an un-named astilbe that I’d almost not noticed now showing off sturdy dark skeletons contrasting with the luminosity of miscanthus plumage. The seed heads are still good on the Eryngium giganteum and the last of the cardoon flowers are almost better for not having the distraction of foliage. Pale starbursts against dark earth on the Eurybia diviricata and the cloud-like umbels of the Selinum wallichianum arresting the light. They will change as they age and continue to evolve as they decay to make the next few weeks – for the true winter is weeks, not months – a season that holds interest.
 Euphorbia x pseudovirgata
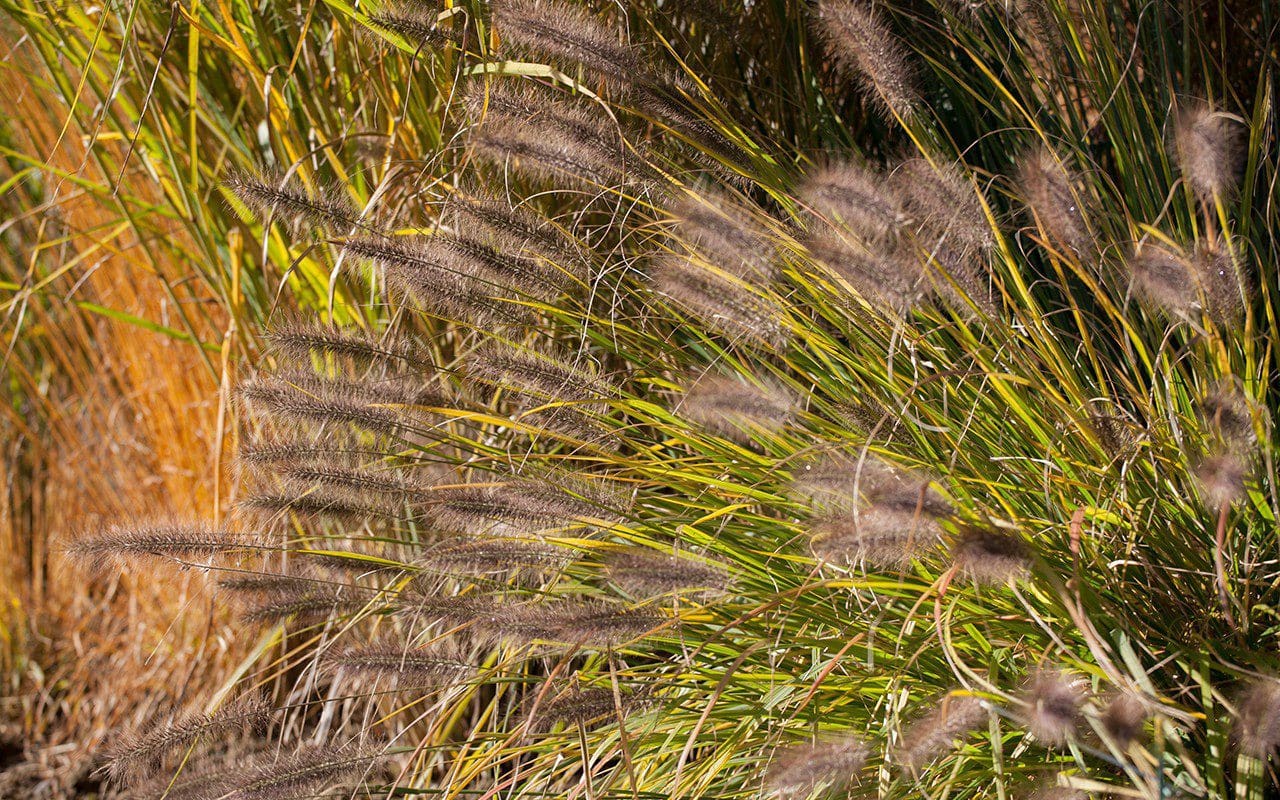 Pennisetum ‘Dark Desire’
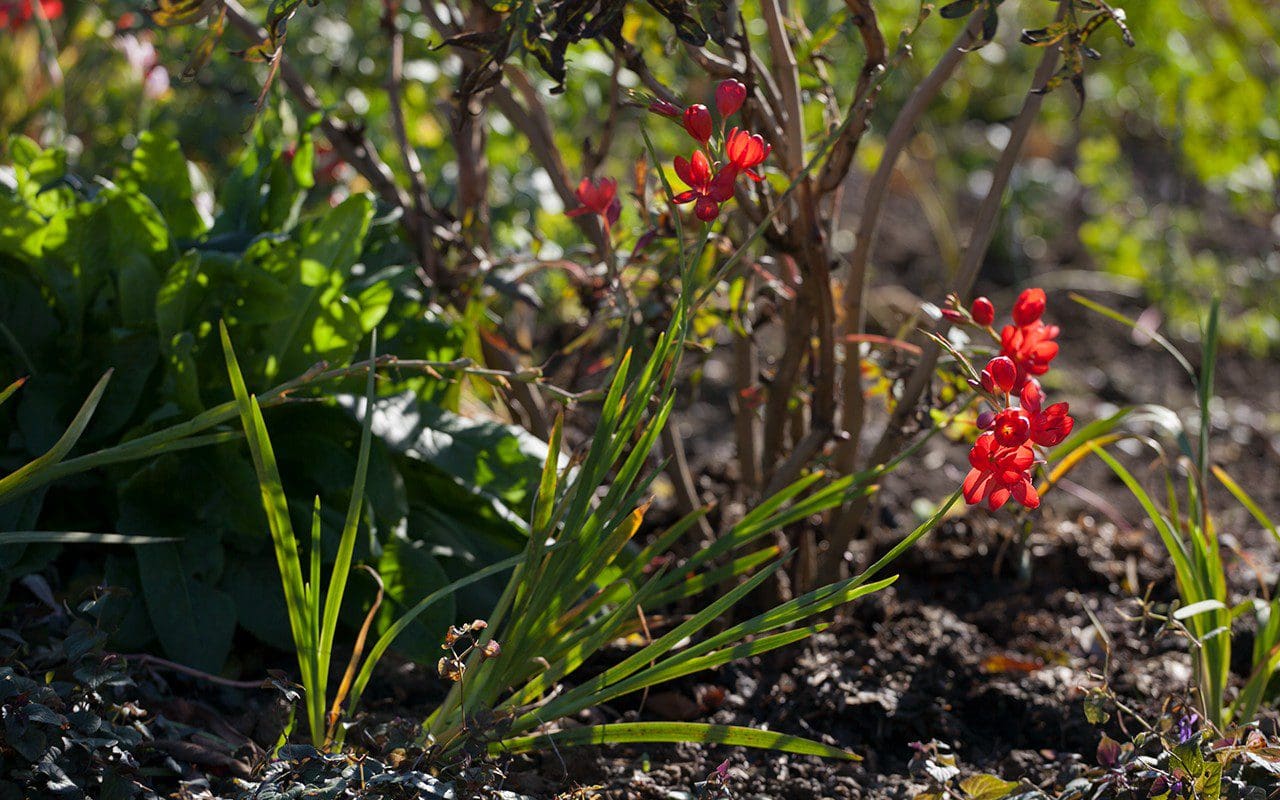 Hesperantha coccinea ‘Major’
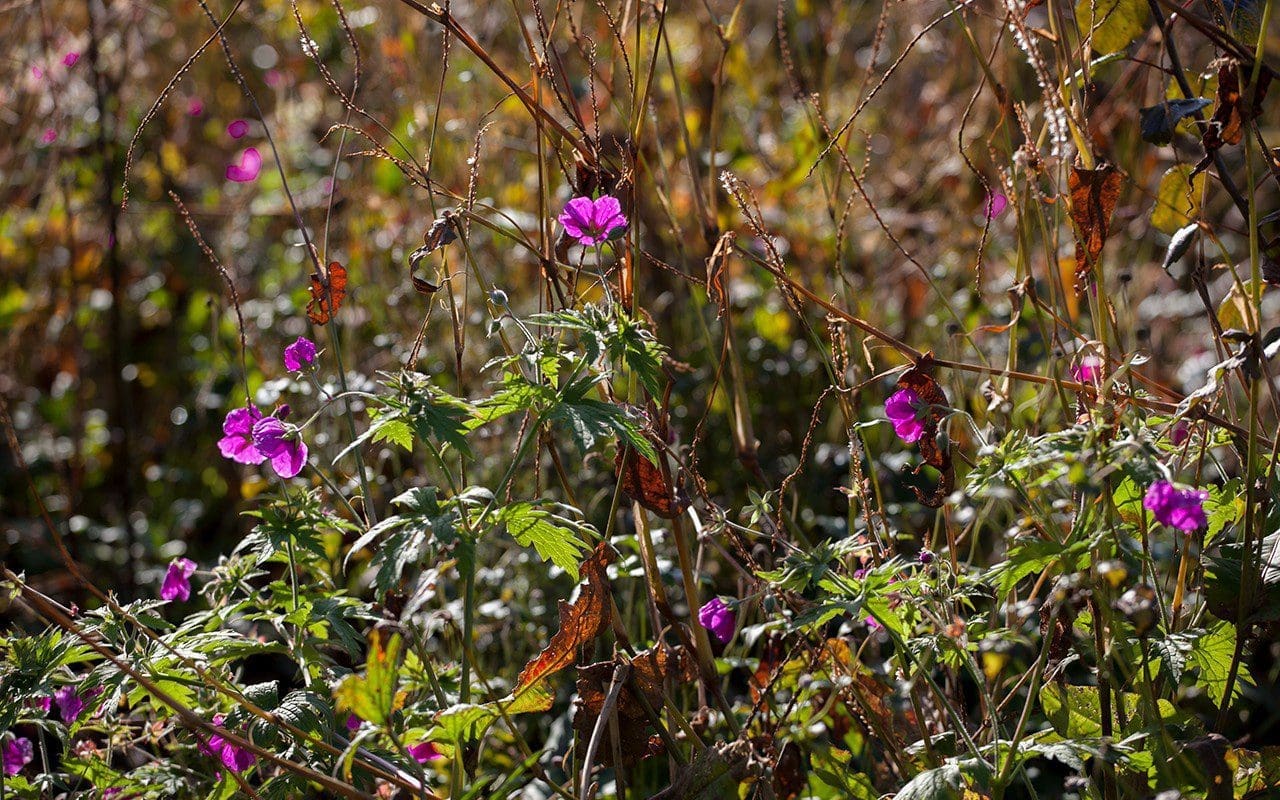 Geranium psilostemon
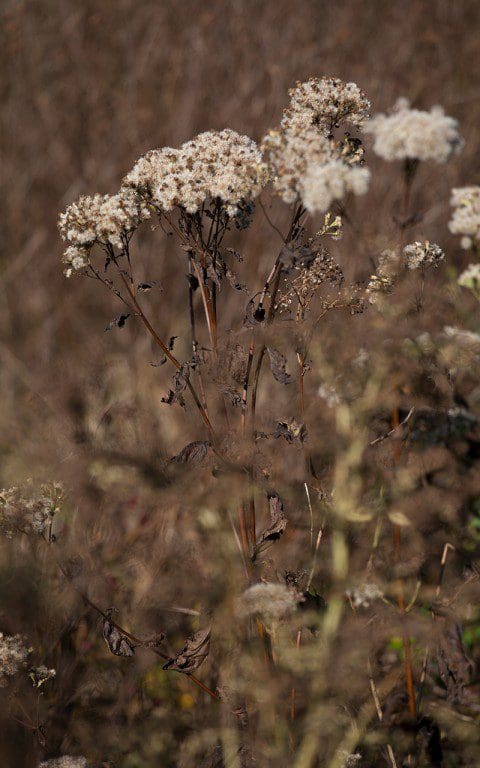 Ageratina altissima ‘Braunlaub’
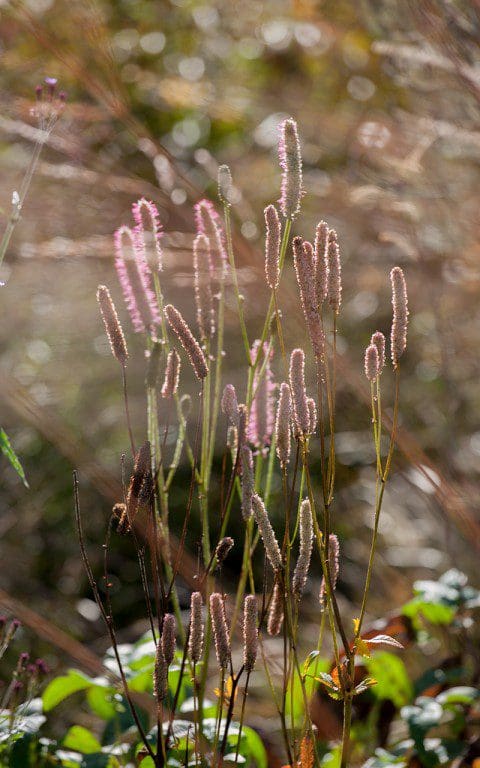
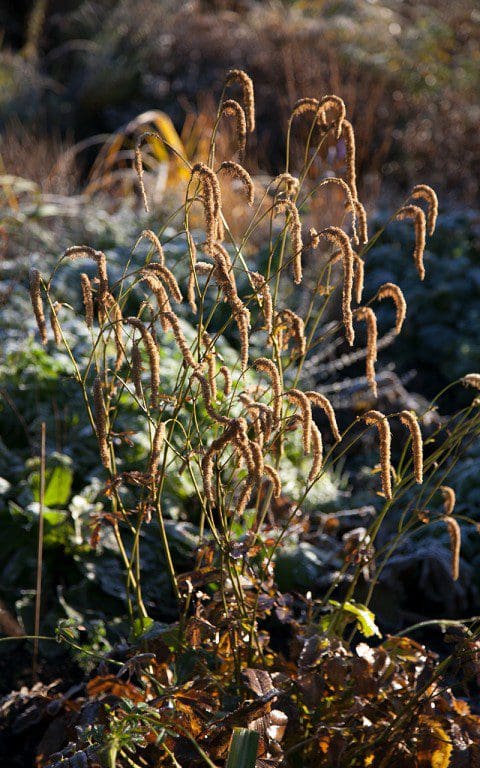 Sanguisorba hakusanensis
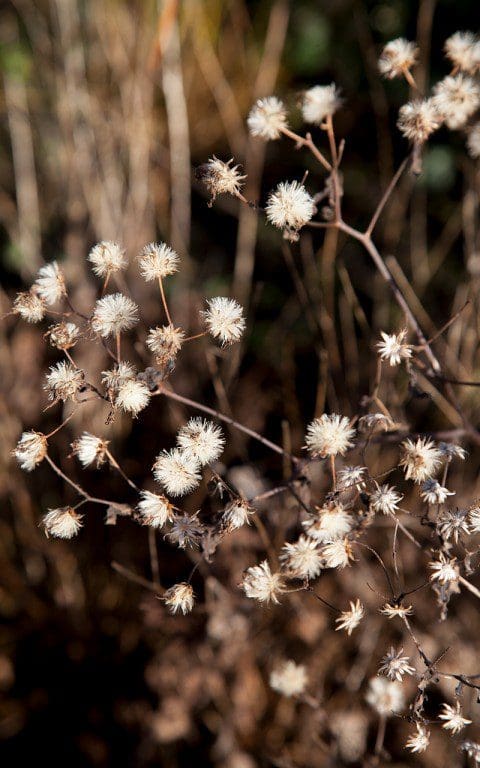 Eurybia divaricata
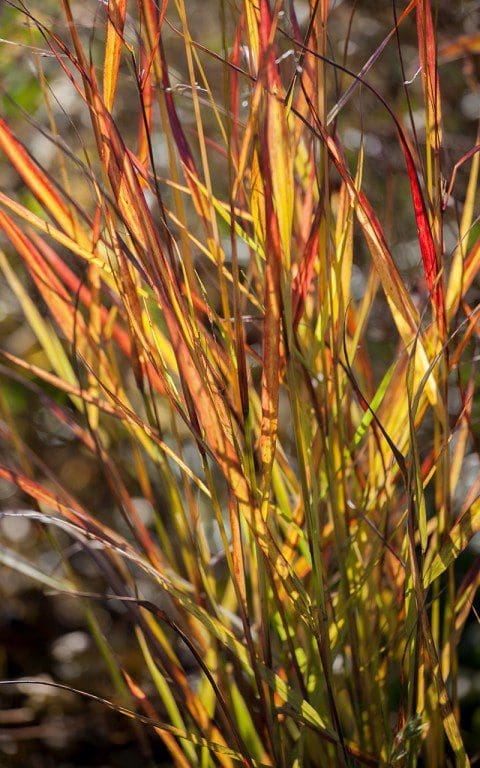 Panicum virgatum ‘Rehbraun’
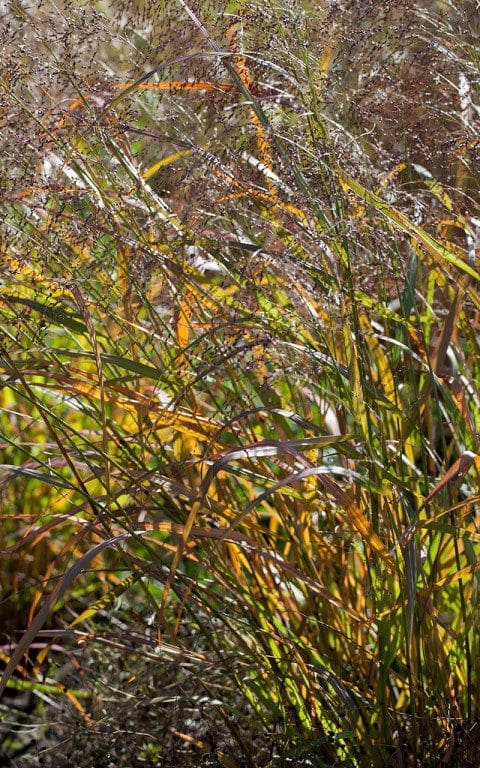 Panicum virgatum ‘Shenandoah’
 Sanguisorba ‘Blackthorn’
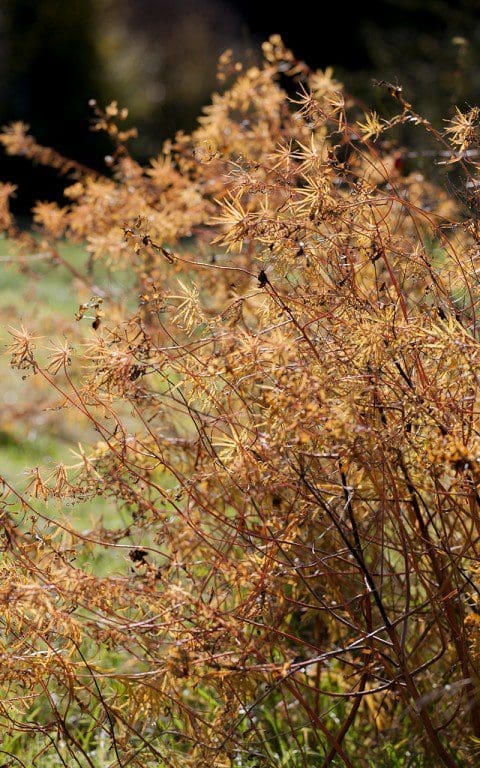
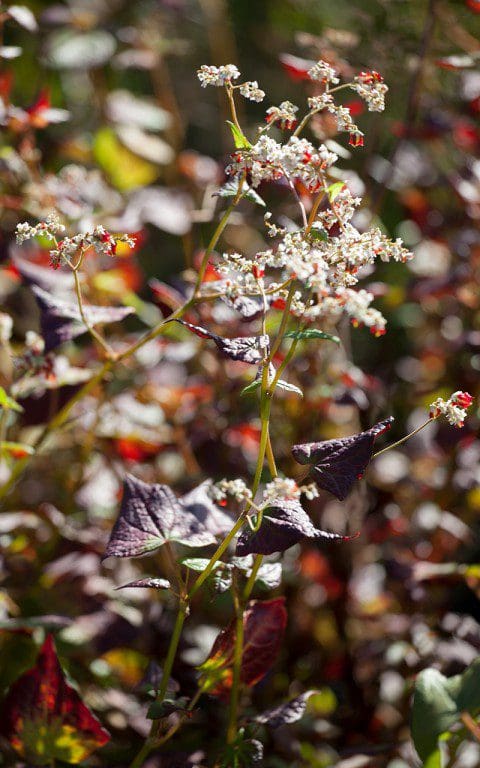 Fagopyrum dibotrys
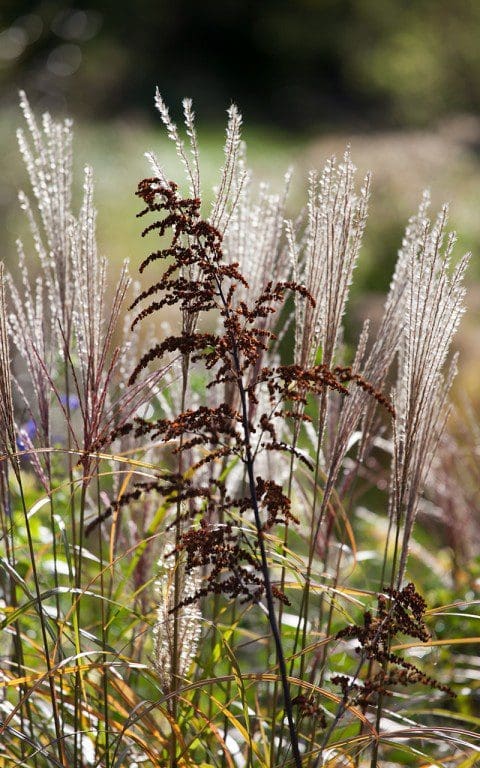 Unknown astilbe with Miscanthus ‘Krater’
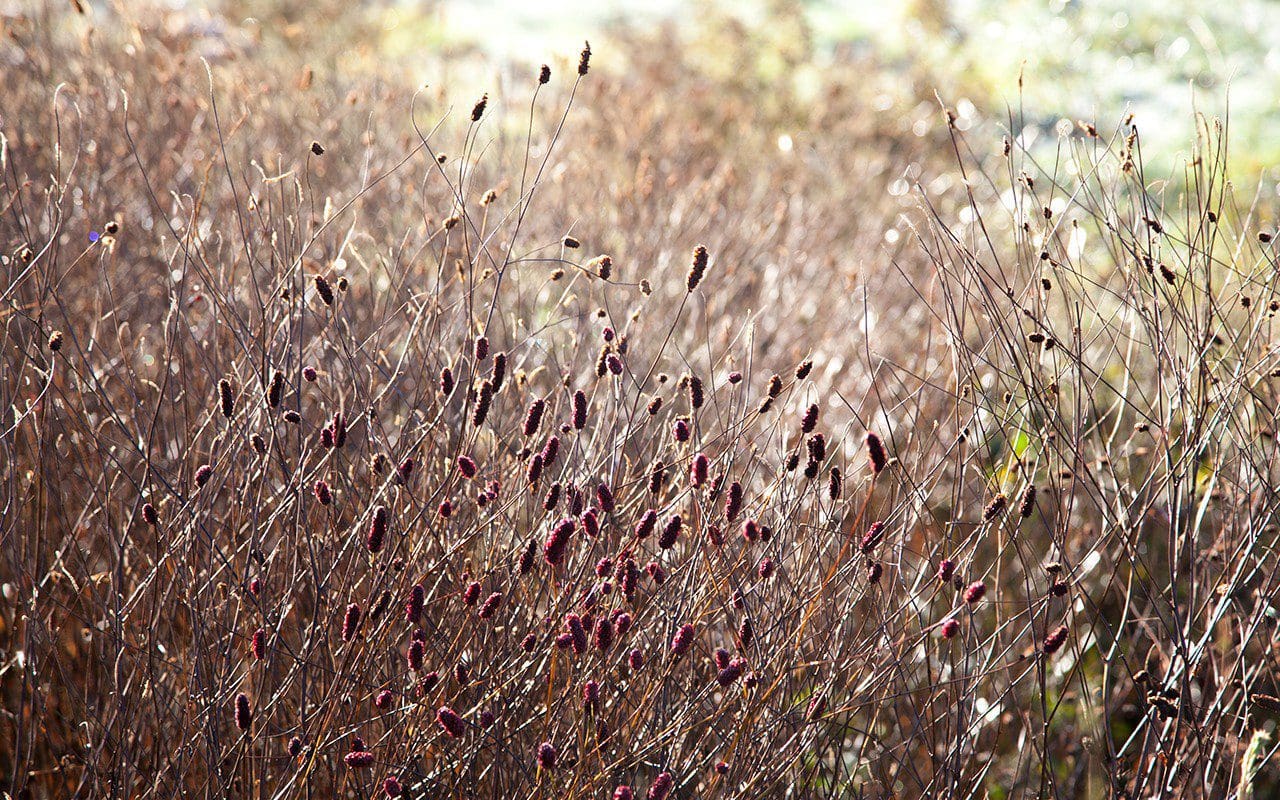 Sanguisorba officinalis ‘Red Thunder’
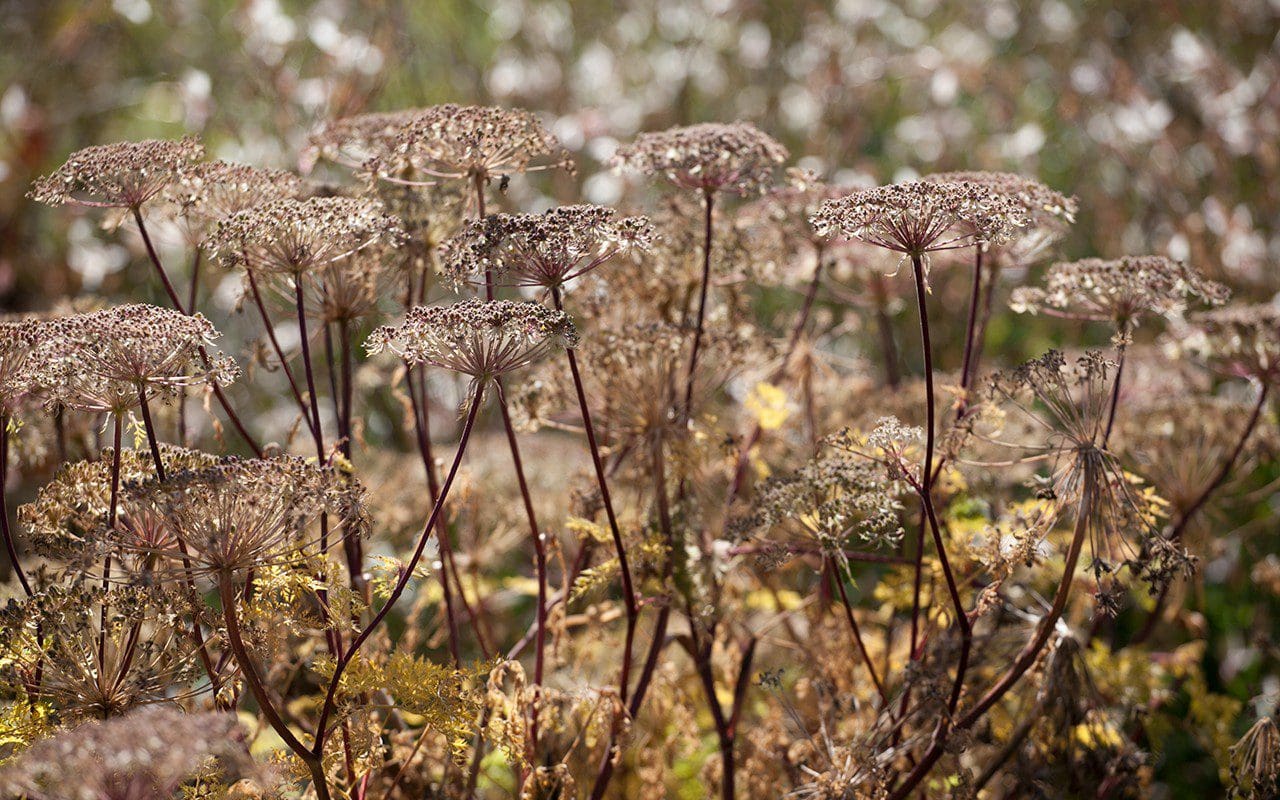 Selinum wallichianum
 Patrinia scabiosifolia
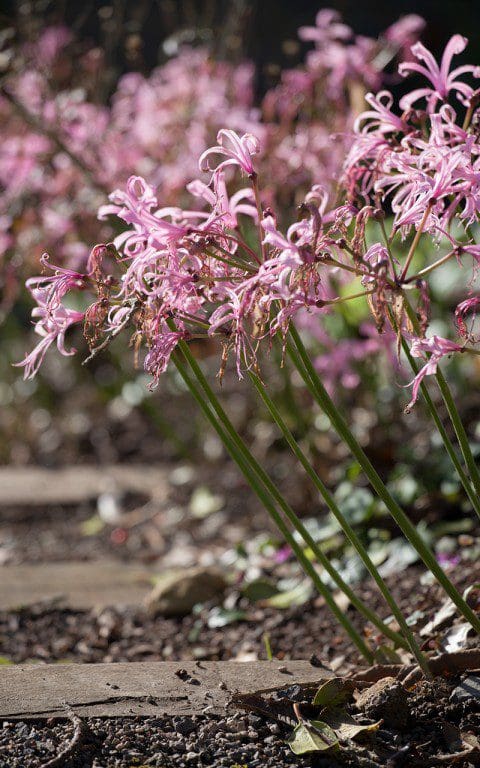 Nerine bowdenii
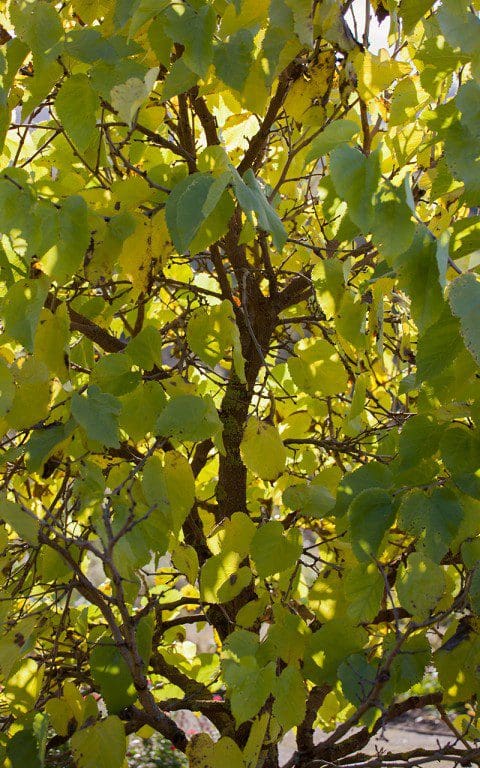 Mulberry – Morus nigra
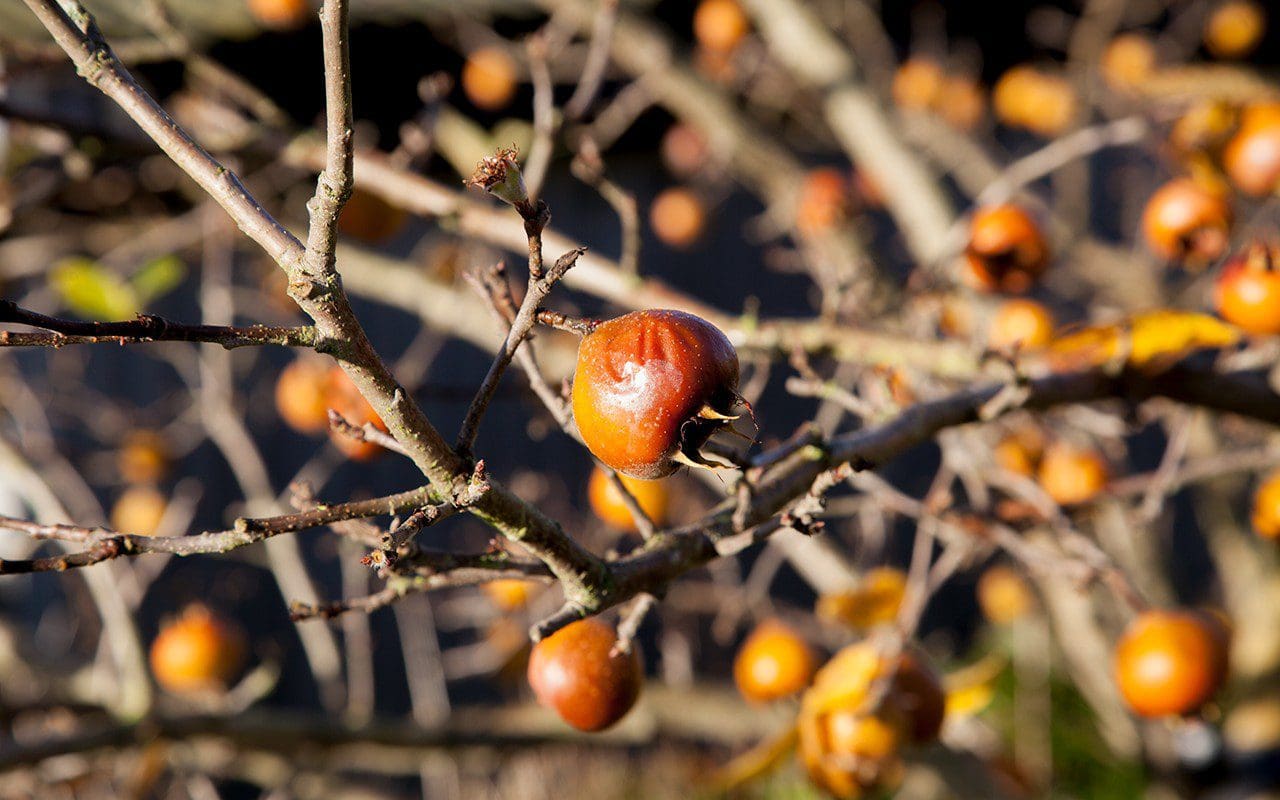 Medlar – Mespilus germanica
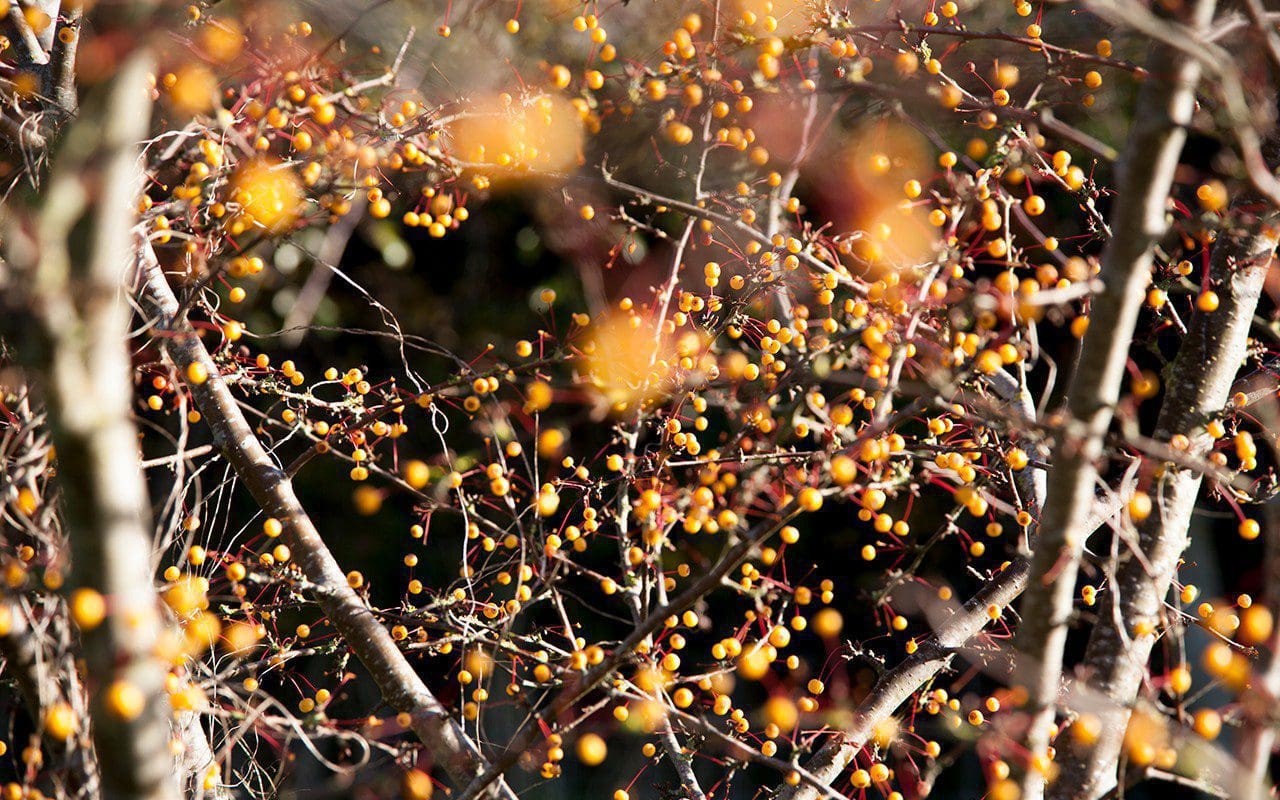 Malus transitoria
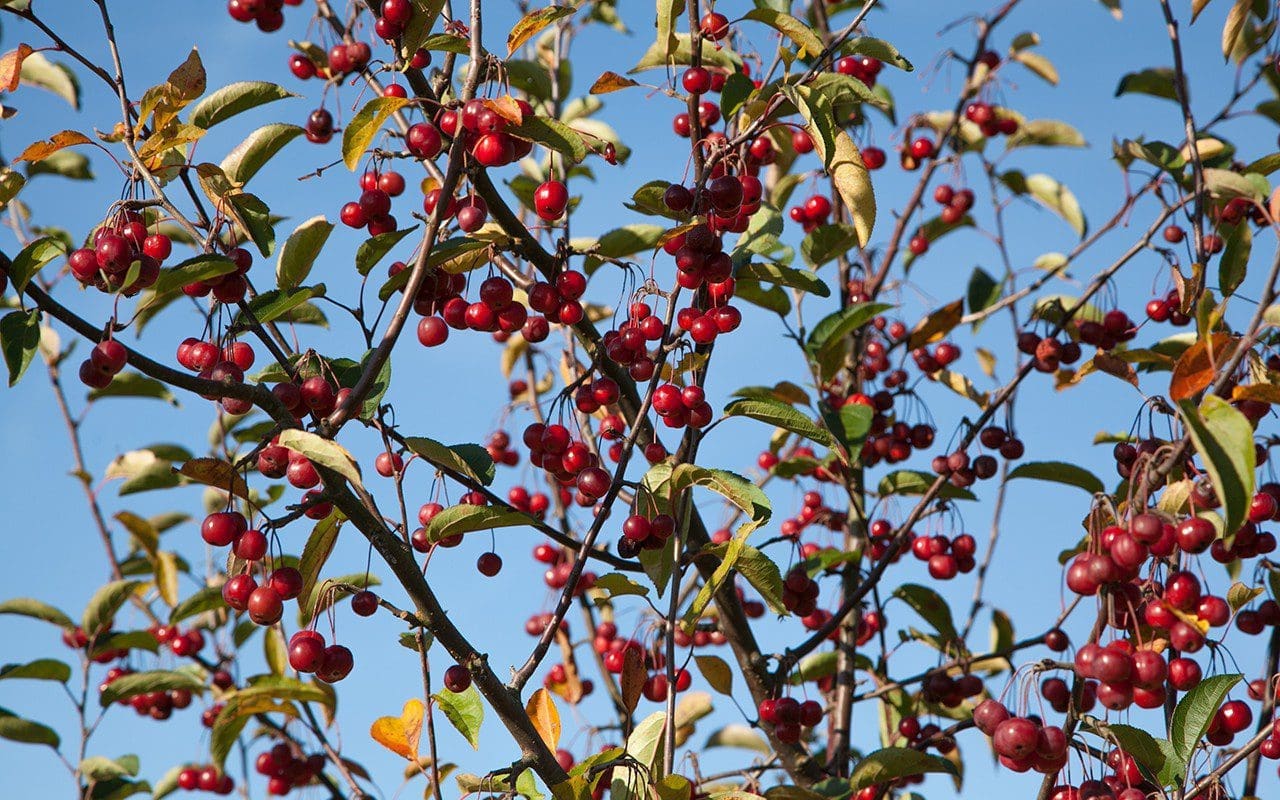 Malus hupehensis
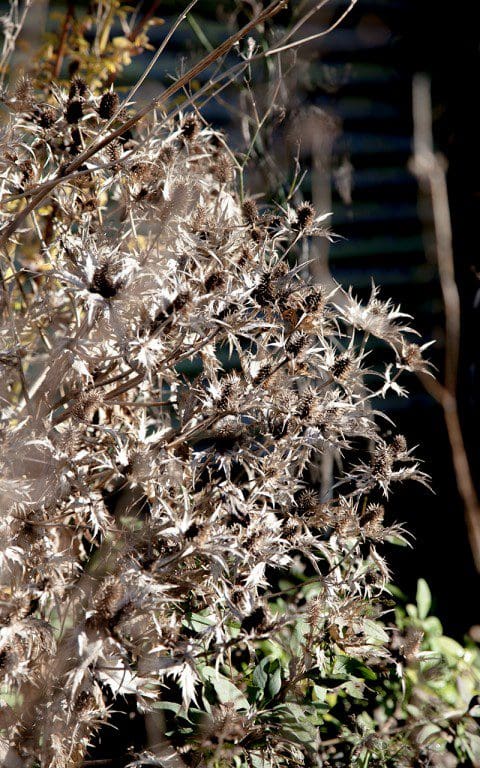 Eryngium giganteum
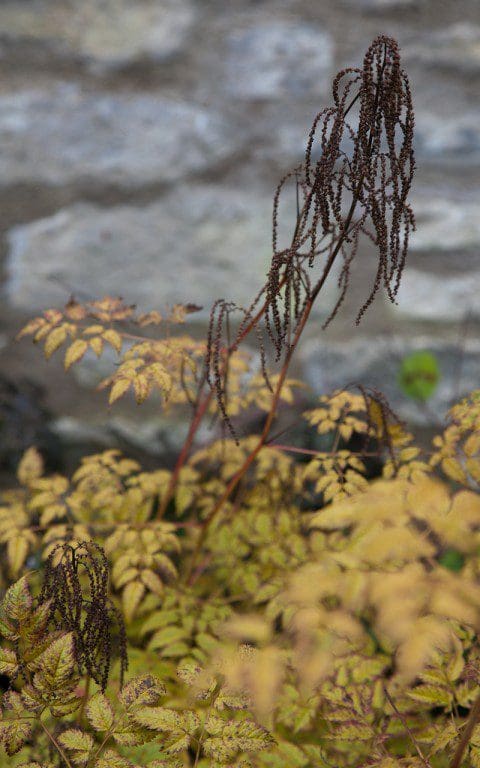 Aruncus dioicus ‘Horatio’
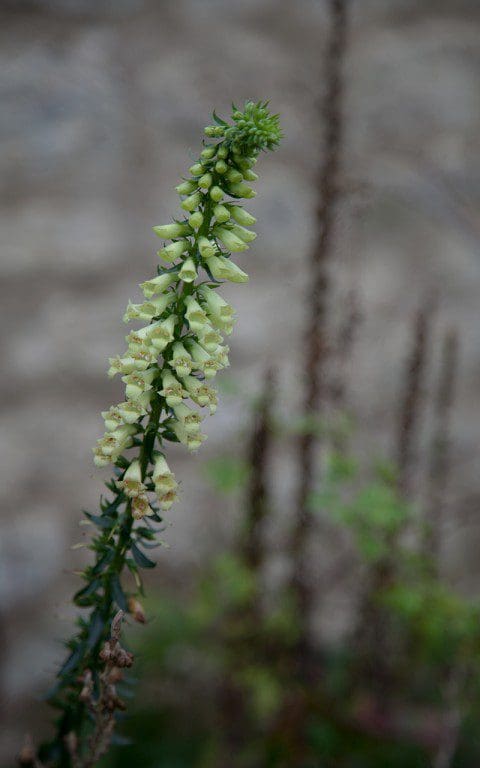 Digitalis lutea
 Dahlia australis
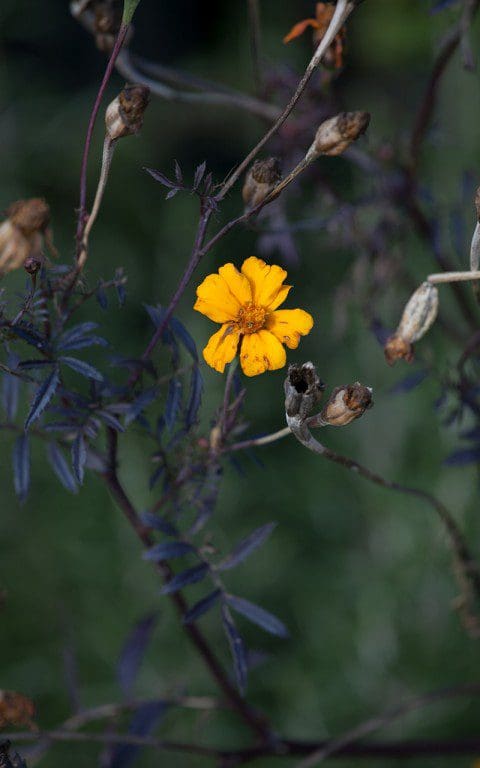 Tagetes patula
 Malus hupehensis seedlings
 Rosa ‘The Lark Ascending’
Words: Dan Pearson / Photos: Huw Morgan
Published 18 November 2017
We are sorry but the page you are looking for does not exist. You could return to the homepage